Introduction
This manual provides essential information for the safe and efficient operation of your Vonyx ST180 Portable Sound System. Please read these instructions carefully before use and retain them for future reference.
The Vonyx ST180 is a versatile, self-contained portable sound system featuring a 12-inch woofer, 450 Watts of power, Bluetooth connectivity, CD/MP3 player (USB/SD), and multiple microphone inputs. Its integrated battery, telescopic handle, and wheels make it suitable for various mobile applications.
Коопсуздук нускамалары
- Кубат булагы: кубат менен камсыз кылуу Voltage specified on the unit. Use only the provided power cable.
- Суу жана ным: Электр тогуна урунуп же өрт чыгып кетпеши үчүн, шайманды жамгырдын же нымдуулуктун таасирине дуушар кылбаңыз.
- Вентиляция: Адекваттуу вентиляцияны камсыз кылыңыз. Вентиляция тешиктерин жаап албаңыз.
- Жылуулук: Аппаратты радиаторлор, жылуулук регистрлери, мештер же жылуулук чыгарган башка аппараттар сыяктуу жылуулук булактарынан алыс кармаңыз.
- Тазалоо: Тазалоодон мурун электр кубатынан сууруп коюңуз. Кургак чүпүрөктү гана колдонуңуз.
- Тейлөө: Агрегатты өзүңүз тейлөөгө аракет кылбаңыз. Бардык тейлөөлөрдү квалификациялуу тейлөө кызматкерлерине тапшырыңыз.
- Батареяга кам көрүү: For optimal battery life, fully charge the unit before first use and recharge regularly. Avoid complete discharge.
Жайгашуу
1. Таңгактан чыгаруу жана алгачкы текшерүү
Carefully remove the sound system and all accessories from the packaging. Inspect the unit for any signs of damage during transit. Retain the packaging for future transport or storage.
2. Power Connection and Battery Charging
Connect the provided power cable to the AC inlet on the rear panel of the unit and then to a suitable wall outlet. The internal battery will begin charging automatically. The "CHARGE" indicator light will illuminate during charging.

Сүрөт 1: The Vonyx ST180 Portable Sound System with its telescopic handle extended, ready for transport. This image shows the overall design and portability features.

Сүрөт 2: Rear panel connections of the Vonyx ST180, including the AC power inlet, external battery terminals, and RCA Line Out ports.
A full charge is recommended before the first use to maximize battery life. The unit can operate while charging.
3. Микрофонду орнотуу
- Зымсыз микрофондор: Insert batteries into the two UHF wireless microphones. The system operates on 863.000 MHz and 865.000 MHz. Ensure the microphones are switched on. The "RF" indicator on the control panel will light up when a wireless microphone is connected.
- Зымдуу микрофон: Connect the wired microphone to the 6.35mm MIC input jack on the control panel.
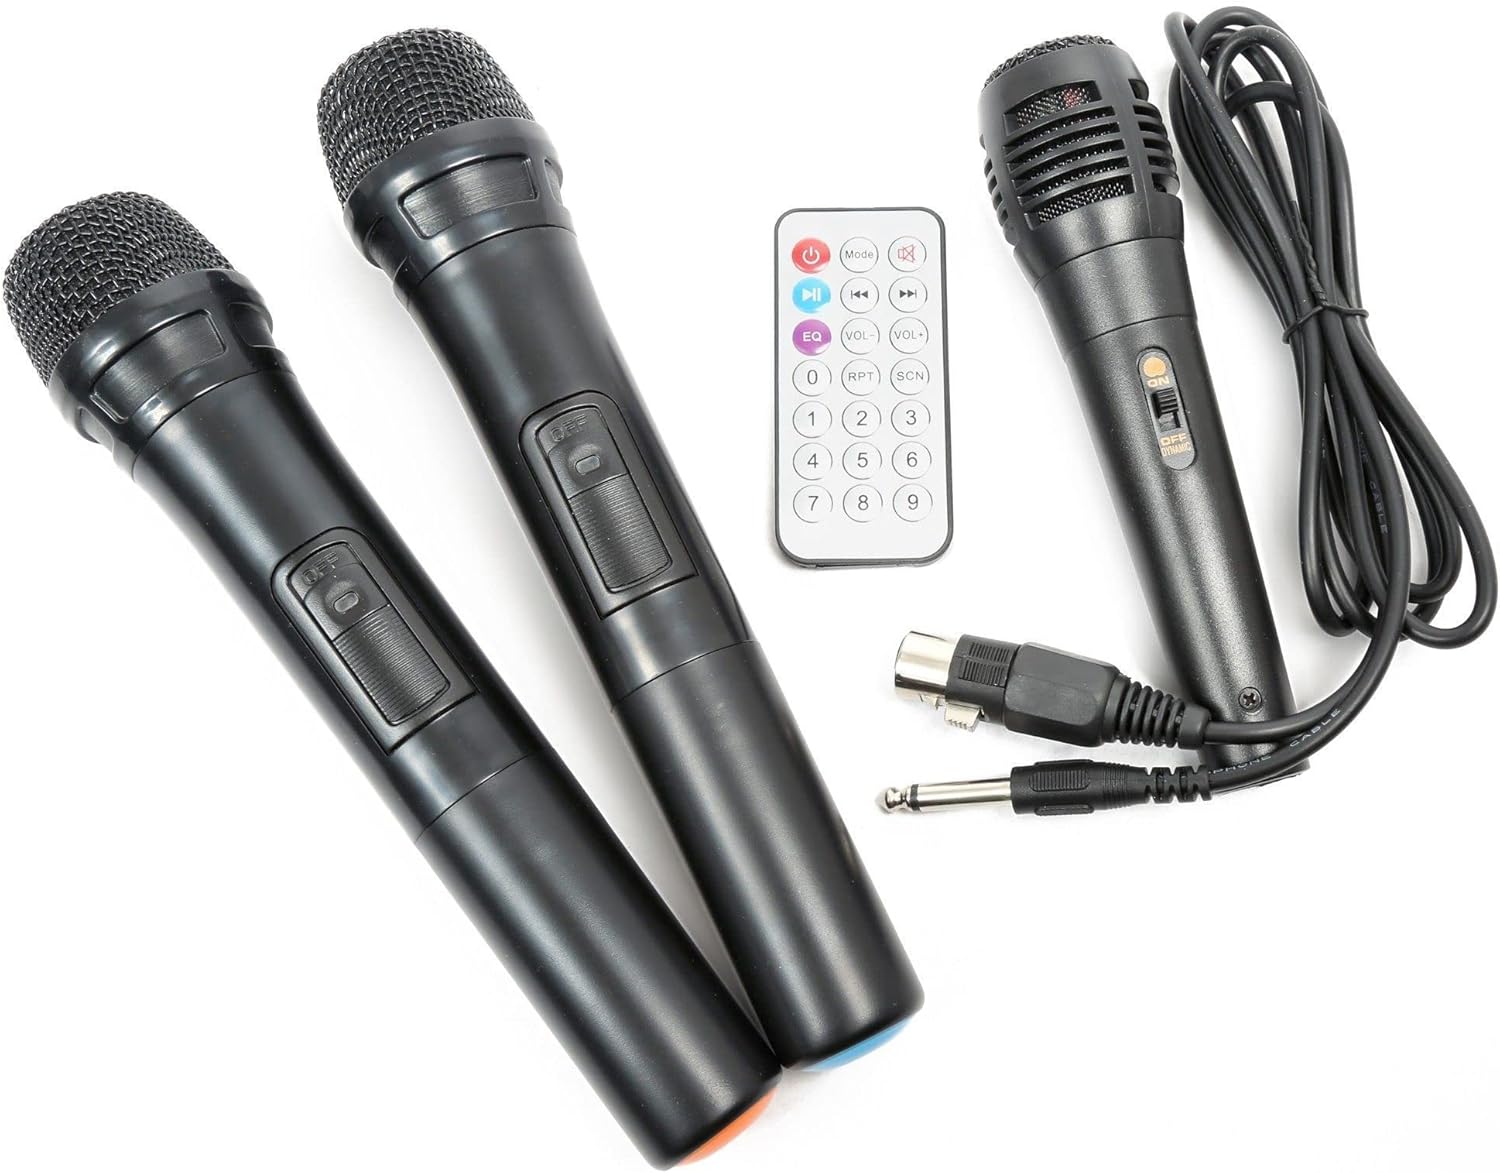
Сүрөт 3: Included accessories: two UHF wireless microphones, one wired microphone, and the infrared remote control.
Иштөө нускамалары
1. Күйгүзүү / Өчүрүү
Locate the "POWER" switch on the control panel. Flip it to the "ON" position to power on the unit. Flip it to "OFF" to power down.

Сүрөт 4: Бүттүview of the Vonyx ST180 control panel, featuring master volume, EQ controls, microphone inputs, and the integrated media player.
2. Аудио булагын тандоо
The ST180 supports multiple audio sources:
- Bluetooth:
- Press the "MODE" button on the media player or remote control until "BT" appears on the display.
- On your smartphone, tablet, or computer, enable Bluetooth and search for "VONYX".
- Select "VONYX" to pair. A confirmation tone will sound upon successful pairing.
- Эми түзмөгүңүздөн зымсыз аудио агымын өткөрө аласыз.
- CD/MP3 Player (USB/SD):
- Insert a CD into the CD slot, a USB drive into the USB port, or an SD card into the SD card slot.
- The unit will automatically detect the media and begin playback, or you may need to press the "MODE" button to select the correct source (USB or SD).
- Use the playback controls (Play/Pause, Next, Previous, Folder, Repeat, Shuffle) on the unit or remote control.
- Line Input (3.5mm Jack): Connect an external audio device (e.g., laptop, MP3 player) using a 3.5mm audio cable to the "LINE INPUT" jack. Select "LINE" mode if available, or ensure no other media is playing.
- External Audio Input (RCA): Connect devices with RCA outputs to the "LINE IN" RCA ports on the control panel.
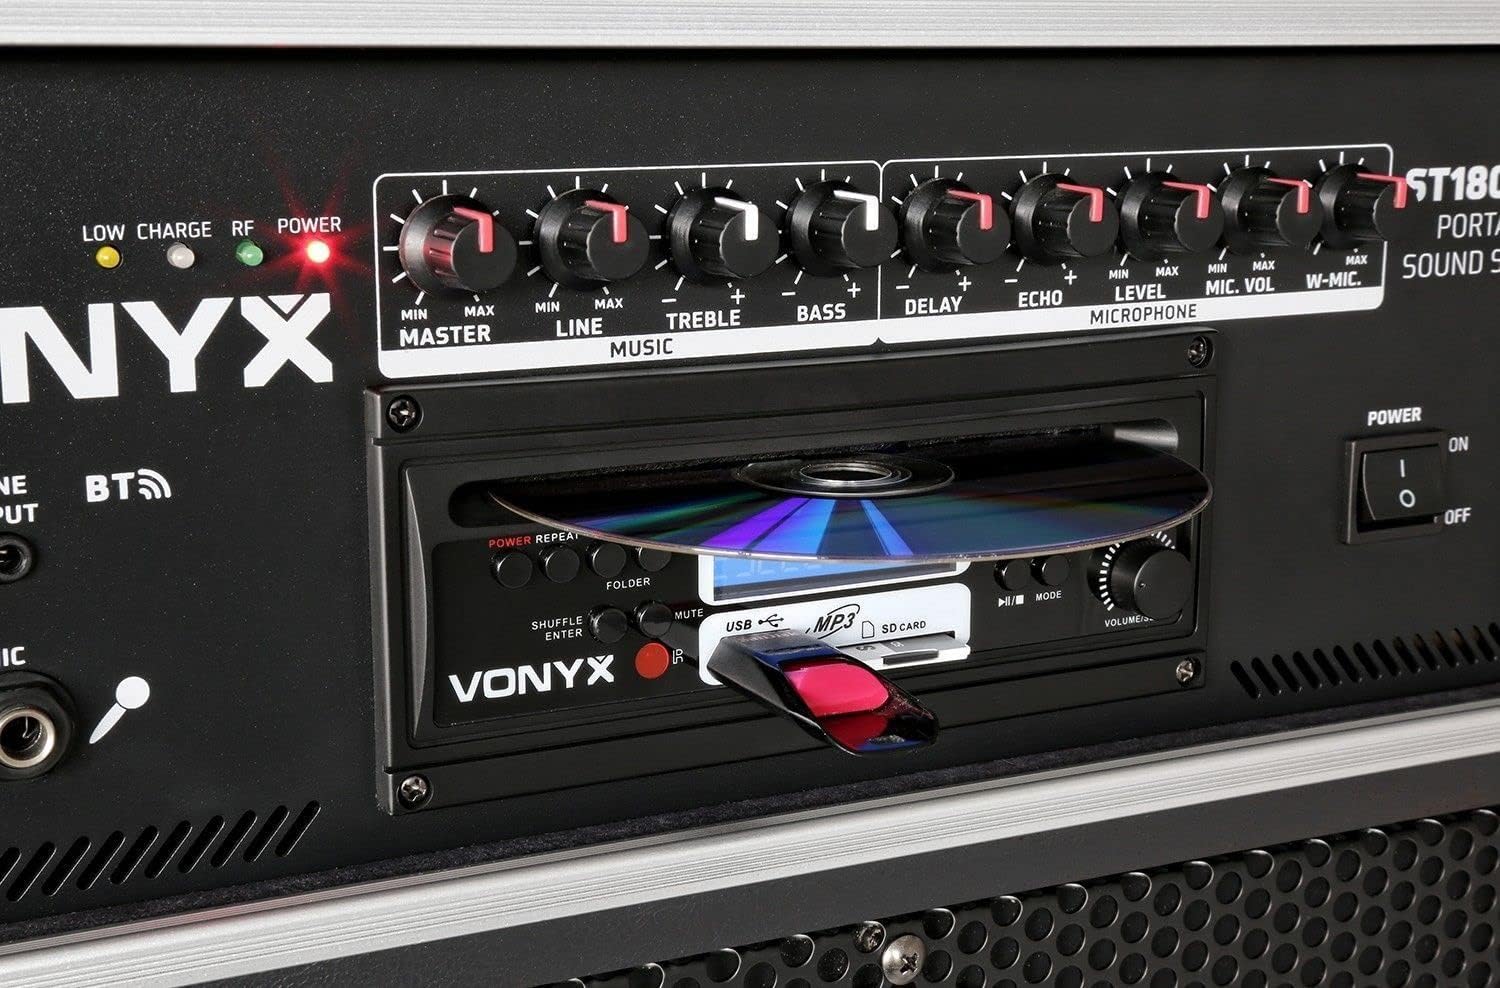
Сүрөт 5: Деталдаштырылган view of the integrated media player, showing the CD tray, USB port, and SD card slot. A USB drive is inserted.

Сүрөт 6: Close-up of the media player's control buttons and digital display, indicating playback status and selected source.
3. Микрофонду колдонуу
Adjust the microphone volume using the "MIC VOL" knob for wired microphones and "W-MIC" knob for wireless microphones. Use the "LEVEL" knob to fine-tune the microphone input sensitivity. Apply "DELAY" and "ECHO" effects as desired.
4. Аудио башкаруу
- МАСТЕР: Системанын жалпы чыгаруу көлөмүн башкарат.
- LINE: Adjusts the volume of the line input sources.
- ҮЧТҮҮ: Жогорку жыштыктагы жоопту тууралайт.
- Бас: Төмөн жыштыктагы жоопту тууралайт.
5. Алыстан башкаруу
The included infrared remote control allows for convenient operation of the media player functions (play, pause, track skip, mode selection) and volume adjustments from a distance.
Техникалык тейлөө
- Тазалоо: Түзмөктүн сыртын тазалоо үчүн жумшак, кургак чүпүрөктү колдонуңуз. Абразивдүү тазалоочу каражаттарды же эриткичтерди колдонбоңуз.
- Батареяны сактоо: If storing the unit for an extended period, ensure the battery is partially charged (around 50%) and recharge it every few months to prevent deep discharge.
- Транспорт: When moving the unit, utilize the telescopic handle and wheels. Exercise caution on uneven surfaces.
Проблемаларды чечүү
| Көйгөй | Мүмкүн себеп | Чечим |
|---|---|---|
| Күч жок | Power cable disconnected; unit switched off; battery depleted. | Check power cable connection; ensure power switch is ON; charge the battery. |
| Үн чыгышы жок | Master volume too low; incorrect input selected; audio source not playing. | Increase MASTER volume; select correct input mode; ensure audio source is playing and its volume is up. |
| Микрофон иштебей жатат | Microphone switched off; batteries depleted (wireless); MIC/W-MIC volume too low; incorrect frequency (wireless). | Switch microphone ON; replace batteries; increase MIC/W-MIC volume; ensure wireless microphones are on correct frequencies (863.000 MHz / 865.000 MHz). |
| Bluetooth жупташкан жок | Unit not in Bluetooth mode; device too far; previously paired with another device. | Select "BT" mode; ensure device is within range; disconnect from other Bluetooth devices and try pairing again. |
| CD/USB/SD ойнотулбай жатат | Incorrect media format; media not inserted correctly; media player mode not selected. | Ensure media is in supported format (MP3); re-insert media; select correct mode (CD, USB, or SD). |
Техникалык шарттар
| Бренд | VONYX |
| Модель номери | 170.013 |
| Power Output | 450 Ватт |
| Вуфердин өлчөмү | 12 дюйм |
| Каналдардын саны | 2 |
| Аудио киргизүү | USB, SD/MMC, Bluetooth, 6.3mm Jack (Microphone), 3.5mm Jack (External Audio), RCA Line In |
| Аудио чыгаруу | RCA Stereo Line Out |
| Wireless Microphone Frequencies | 863.000 МГц, 865.000 МГц |
| Frequency Response | 20,000 Гц чейин |
| Заряддалуучу батарея | 12V/4.5Ah (Integrated) |
| Байланыш технологиясы | Bluetooth, USB |
| Өзгөчөлүктөр | Bluetooth, USB Port, Portable, CD Player, SD Card Slot, Telescopic Handle, Wheels |
| Өлчөмдөрү (L x W x Y) | 32 x 43 x 76 см |
| Элемент Салмагы | 32.7 килограмм |
| Материал | Нейлон |
| Power Source | AC and Battery Combination |
| Монтаж түрү | Полюс тоо |
Кепилдик жана колдоо
For warranty information and technical support, please refer to the documentation provided with your purchase or visit the official Vonyx webсайт. Ар кандай кепилдик дооматтары үчүн сатып алганыңыздын далилин сактаңыз.
Өндүрүүчү: Vonyx
Байланыш маалыматы: Please refer to the Vonyx official website or your retailer for the most up-to-date support contact details.


