1. Киришүү
This manual provides essential information for the installation, configuration, operation, and maintenance of the MOXA AWK-1137C-US-T 802.11n Wireless AP Client. This device is designed for industrial wireless applications, offering reliable 802.11n connectivity in challenging environments with a wide operating temperature range.
2. Коопсуздук маалыматы
- Always disconnect power before cleaning or servicing the device.
- Электрдик коркунучтарды алдын алуу үчүн туура жерге туташтырууну камсыз кылыңыз.
- Аппаратты белгиленген температура жана нымдуулук диапазондорунда иштетиңиз.
- Аппаратты нымдуулукка же экстремалдык температурага дуушар кылбаңыз.
- Монтаждоо жана тейлөөнү квалификациялуу кызматкерлер гана аткарышы керек.
3. Пакеттин мазмуну
Пакетиңизде төмөнкү заттар бар экенин текшериңиз:
- MOXA AWK-1137C-US-T Wireless AP Client unit
- Ыкчам орнотуу колдонмосу
- Documentation CD (or link to online resources)
- Mounting kit (if applicable)
- Power adapter or terminal block (if applicable)
Эгерде кандайдыр бир буюмдар жок болсо же бузулуп калса, дароо сатуучуга кайрылыңыз.
4. Техникалык жабдыктар бүттүview
The AWK-1137C-US-T features robust industrial design. Key components typically include:
- Ethernet порттору: Зымдуу тармак байланыштары үчүн.
- Антенна туташтыргычтары: For external antennas to optimize wireless signal.
- Кубат киргизүү: Terminal block for DC power input.
- LED көрсөткүчтөрү: Provide status information for power, WLAN, and Ethernet activity.
- Калыбына келтирүү баскычы: For restoring factory default settings.
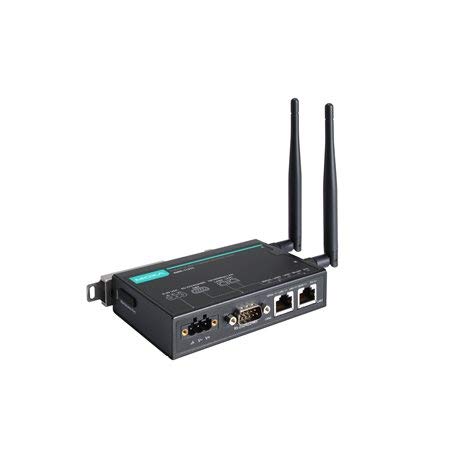
Figure 1: MOXA AWK-1137C-US-T Wireless AP Client. This image shows the compact industrial design of the device, typically featuring antenna ports, Ethernet connections, and power input.
5. Орнотуу
5.1 Монтаждоо
The AWK-1137C-US-T supports DIN-rail mounting. Attach the DIN-rail kit to the device and snap it onto a standard DIN-rail. Ensure the device is securely fastened to prevent vibration or accidental dislodgement.
5.2 Кубат туташтыруу
- Connect a suitable DC power source (e.g., 12-48 VDC) to the device's power input terminal block.
- Ensure correct polarity (+ and -) as indicated on the device.
- Tighten the screws on the terminal block to secure the power wires.
5.3 Тармактык туташуу
- Connect an Ethernet cable from your network switch or router to the Ethernet port on the AWK-1137C-US-T.
- Attach appropriate antennas to the antenna connectors. Ensure they are securely tightened.
5.4 Баштапкы конфигурация
To access the device's web- негизделген башкаруу интерфейси:
- Connect a computer directly to the device's Ethernet port or ensure it is on the same network segment.
- Configure your computer's IP address to be in the same subnet as the device's default IP address (refer to the Quick Installation Guide for the default IP).
- ачуу а web browser and enter the device's default IP address.
- Демейки колдонуучу аты жана сырсөз менен кириңиз (Тез орнотуу көрсөтмөсүн караңыз).
- Change the default password immediately for security.
6. Иштөө
6.1 Иштөө режимдери
The AWK-1137C-US-T can operate in various modes, including Access Point (AP) and Client mode. Select the appropriate mode based on your network requirements.
- Кирүү чекити (AP) режими: The device acts as a central hub for wireless clients to connect.
- Кардар режими: The device connects to an existing Access Point, extending wired network connectivity wirelessly.
6.2 Зымсыз орнотуулар
Configure the following wireless parameters via the web интерфейс:
- SSID: The name of your wireless network.
- Канал: Select an appropriate wireless channel to avoid interference.
- Топ: Configure for 2.4 GHz or 5 GHz operation, depending on the model and environment.
- Өтүү күчү: Adjust the output power for optimal coverage and compliance.
6.3 Коопсуздук орнотуулары
Implement strong wireless security to protect your network:
- Шифрлөө: Use WPA2/WPA3-PSK or Enterprise for robust security.
- Password/Passphrase: Choose a strong, unique password.
- MAC дарегин чыпкалоо: Optionally restrict access to specific devices.
7. Техникалык тейлөө
7.1 Микропрограмма жаңыртуулары
Regularly check the MOXA website for the latest firmware updates. Firmware updates can provide new features, performance improvements, and security patches. Follow the instructions provided with the firmware package for a safe update process.
7.2 Тазалоо
Clean the device periodically with a soft, dry cloth. Do not use liquid or aerosol cleaners. Ensure the device is powered off before cleaning.
7.3 Айлана-чөйрөнү коргоо
Ensure the operating environment remains within the specified temperature and humidity limits (-40 to 75°C). Avoid placing the device near heat sources or in direct sunlight.
8. Кыйынчылыктарды
8.1 Күч жок
- Check the power cable connection and ensure the power source is active.
- Кубат менен камсыздоону текшериңизtage is within the device's specified range.
- Inspect the power input terminal block for loose connections.
8.2 Тармакка туташуу жок
- Check Ethernet cable connections and ensure they are properly seated.
- Verify that the network switch or router is functioning correctly.
- For wireless connections, ensure the SSID, security settings, and channel match the connected AP/client.
- Check the LED indicators for network activity.
8.3 Жай зымсыз ылдамдык
- Ensure antennas are properly connected and positioned for optimal signal.
- Check for sources of interference (e.g., other wireless devices, microwave ovens).
- Adjust the wireless channel to a less congested one.
- Verify that the device is operating in 802.11n mode and not a slower standard.
8.4 Заводдук жөндөөлөргө кайтаруу
If configuration issues persist, you may need to reset the device to its factory default settings. Locate the reset button (often recessed) and press and hold it for approximately 5-10 seconds while the device is powered on. The device will reboot with default settings.
9. Техникалык шарттар
| Өзгөчөлүк | Спецификация |
|---|---|
| Модель номери | AWK-1137C-US-T |
| Зымсыз стандарт | 802.11n |
| Операция тобу | АКШ оркестри |
| Иштөө температурасы | -40…75°С |
| Пакеттин өлчөмдөрү | 7.87 x 6.57 x 1.97 дюйм |
| Элемент Салмагы | 1.15 фунт |
| Өндүрүүчү | MOXA |
| Дата биринчи жеткиликтүү | 30-апрель, 2018-жыл |
10. Кепилдик жана колдоо
10.1 Кепилдик маалыматы
MOXA products typically come with a standard warranty. For detailed warranty terms and conditions, please refer to the official MOXA webсайтка же продуктуңузга кошулган кепилдик картасы. Кепилдик дооматтар үчүн сатып алганыңыздын далилин сактаңыз.
10.2 Техникалык колдоо
For technical assistance, product documentation, or driver downloads, please visit the official MOXA support website. You can also contact MOXA's customer support team directly through the contact information provided on their webсайт.


