1. Киришүү
Thank you for choosing the Sygonix PYO-813 Wired Video Intercom System. This manual provides detailed instructions for the safe and efficient installation, operation, and maintenance of your new intercom system. Please read this manual thoroughly before use and retain it for future reference.
2. Коопсуздук нускамалары
- Ensure all electrical connections are made by a qualified electrician to prevent electric shock or fire hazards.
- Do not expose the outdoor unit to extreme temperatures, direct sunlight for prolonged periods, or heavy rain/snow beyond its water-resistant rating.
- Аппаратты ачпаңыз casings. Refer all servicing to qualified personnel.
- Keep the indoor monitor away from water and high humidity.
- Система менен кошо берилген кубат адаптерин гана колдонуңуз.
- Before cleaning, disconnect the power supply. Use a soft, dry cloth for cleaning.
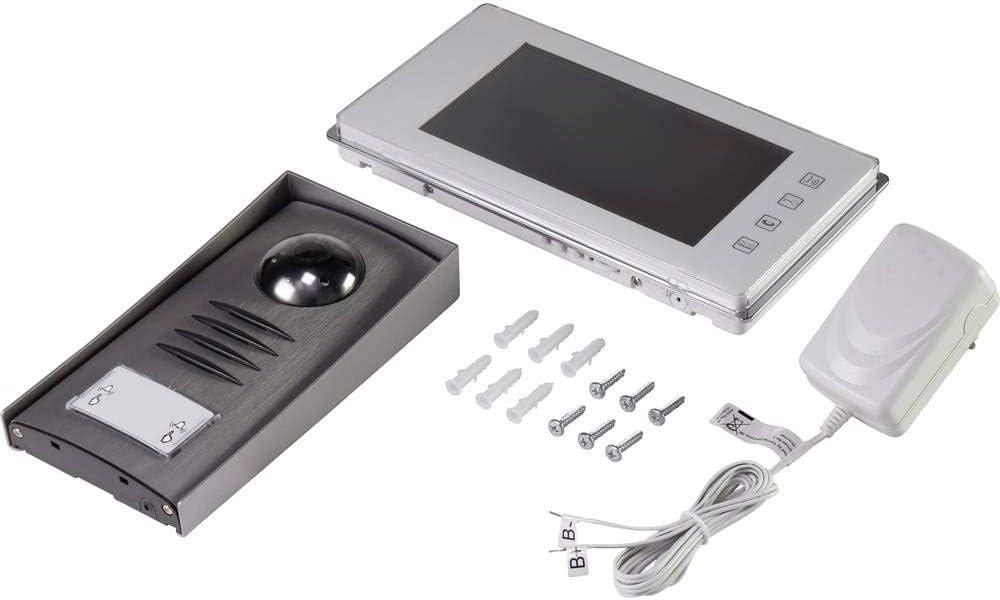
3. Пакеттин мазмуну
Сураныч, пакеттин мазмунун текшерип, бардык буюмдардын бар экенин жана бузулбаганын текшериңиз:
- 1x Outdoor Camera Unit
- 1x Indoor Monitor Unit (7" TFT LCD)
- 1x Power адаптер
- Монтаждоо бурамалар жана дубал сайгычтар
- Колдонуучунун Колдонмосу (бул документ)
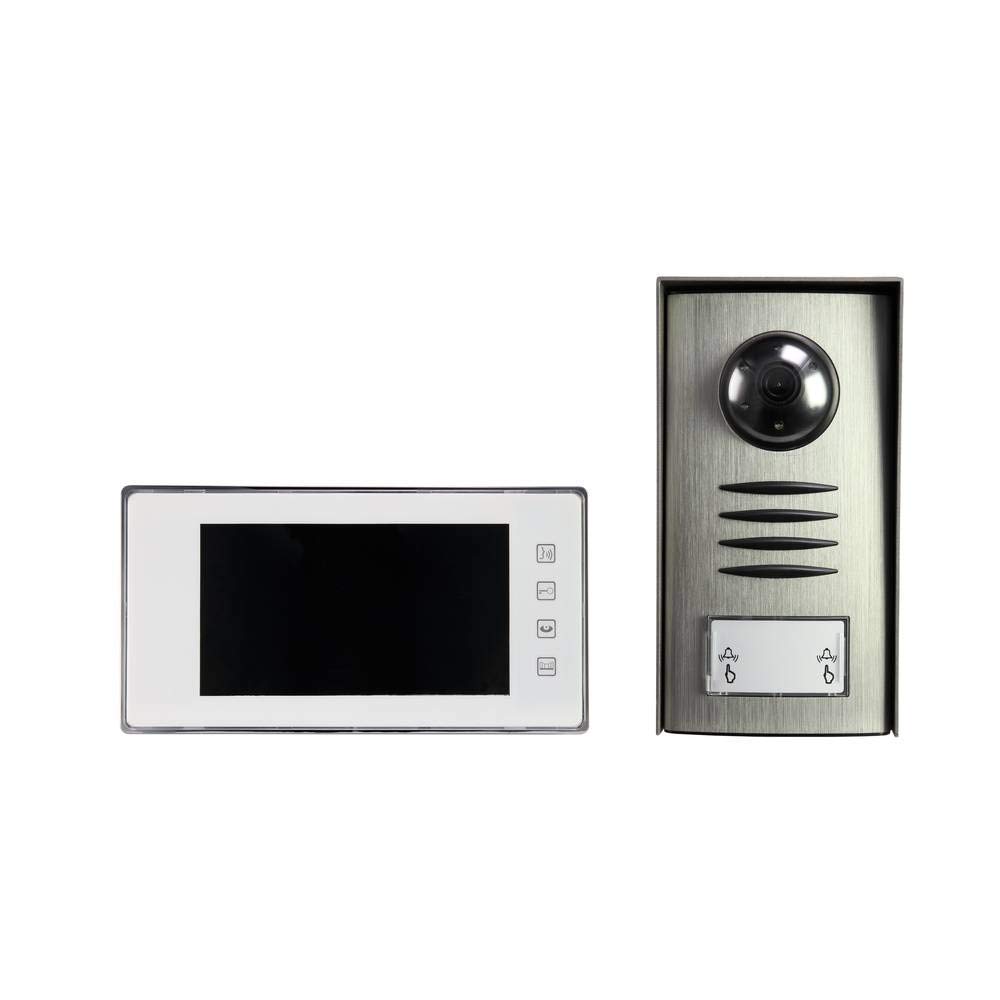
Image: Complete package contents of the Sygonix PYO-813 intercom system.
4. Продукт бүтүп калдыview
The Sygonix PYO-813 is a wired video intercom system designed for secure and convenient communication with visitors at your door. It features a hands-free system for clear two-way communication.
4.1 Outdoor Camera Unit
- Adjustable Angle Camera: Оптималдуу мүмкүндүк берет viewзыяратчыларды кабыл алуу.
- Интеграцияланган динамик жана микрофон: Эки тараптуу аудио байланышты камсыз кылат.
- Water-Resistant Casing: Protects components from splashes.
- Интегралдык светодиоддор: Automatically illuminate in low light conditions for night vision.
- Чалуу баскычы: For visitors to initiate a call to the indoor monitor.
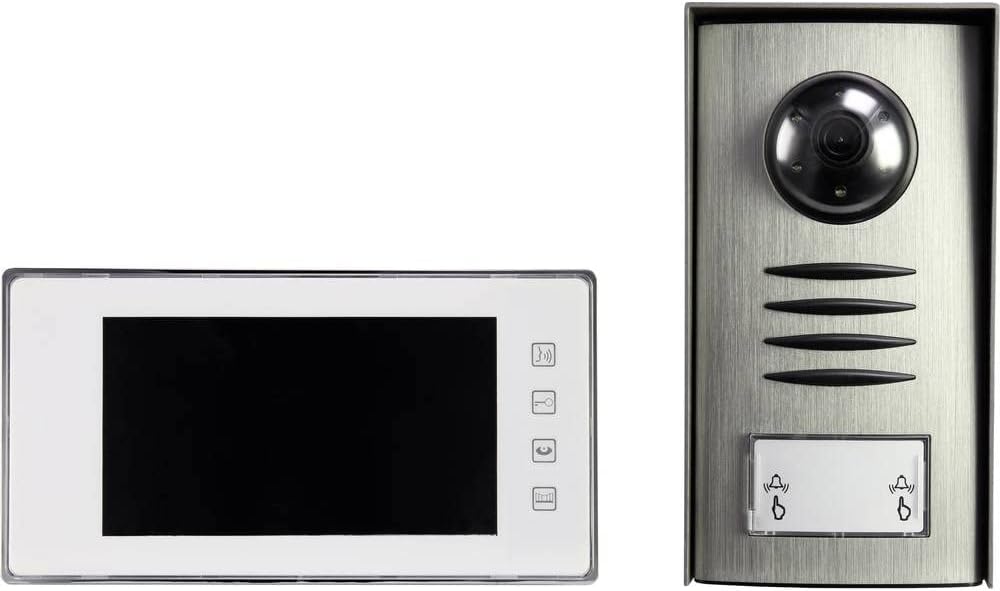
Image: The outdoor camera unit (right) and indoor monitor (left) of the Sygonix PYO-813.
4.2 Indoor Monitor Unit
- 7" TFT LCD Screen: Provides a clear display of the visitor.
- Тийүү баскычтары: For intuitive control of the system functions.
- Интеграцияланган динамик жана микрофон: For hands-free two-way communication.
Сүрөт: Жакын план view of the Sygonix PYO-813 indoor monitor and outdoor camera unit.
5. Орнотуу жана орнотуу
Оптималдуу иштөө үчүн туура орнотуу абдан маанилүү. Орнотууну квалификациялуу техник аткаруу сунушталат.
5.1 Mounting the Outdoor Camera Unit
- Choose a suitable location near your entrance, ensuring it is protected from direct heavy weather and at an appropriate height for visitors.
- Mark the drilling points using the unit as a template.
- Тешиктерди бургула жана дубал тыгындарын салгыла.
- Сырткы блокту берилген бурамалар менен дубалга бекитиңиз.
- Adjust the camera angle as needed for the best view of your entrance area.
5.2 Ички монитор блогун орнотуу
- Select a convenient indoor location, typically near the main entrance or in a central living area.
- Mark and drill holes, then insert wall plugs.
- Secure the mounting bracket (if separate) or the monitor directly to the wall.
5.3 Зымдарды туташтыруу
Connect the outdoor camera unit to the indoor monitor unit using appropriate wiring (not explicitly listed as included, but implied by "wired intercom"). Ensure all connections are secure and correctly polarized according to the wiring diagram in the full product manual (if available, otherwise general advice).
Connect the power adapter to the indoor monitor unit and then plug it into a suitable power outlet.
Маанилүү: Бардык зымдарды орнотуу процедуралары учурунда электр кубатынын өчүрүлгөнүн текшериңиз.6. Иштөө нускамалары
6.1 Чалууларды кабыл алуу
- Конок сырткы блоктогу чакыруу баскычын басканда, ички монитор шыңгырап, коноктун сүрөтүн көрсөтөт.
- басыңыз Жооп button (typically a phone icon) on the indoor monitor to establish two-way communication.
6.2 Эки тараптуу байланыш
Once the call is answered, you can speak with the visitor hands-free through the integrated speakers and microphones on both units.
- Сүйлөшүүнү аяктоо үчүн басыңыз Чакырууну аяктоо button (typically a hang-up icon) or wait for the call to automatically disconnect after a set period.
6.3 Кирүүнү көзөмөлдөө
Кол менен жасай аласыз view сырткы камера каалаган убакта конок чалуу баскычын баспастан көрсөтүлөт.
- басыңыз Монитор button (typically an eye or camera icon) on the indoor monitor to activate the outdoor camera view.
- The integrated LEDs on the outdoor unit will automatically activate in dark conditions to provide clear night vision.
6.4 Орнотууларды тууралоо
The indoor monitor may have touch buttons for adjusting settings such as ringtone volume, display brightness, and contrast. Refer to the icons on your monitor for specific functions.
7. Техникалык тейлөө
- Тазалоо: Use a soft, dry, lint-free cloth to clean the indoor monitor screen and the outdoor unit lens. Do not use abrasive cleaners or solvents.
- Текшерүү: Periodically check all wiring connections for wear or damage.
- Курчап турган чөйрөнү коргоо: Ensure the outdoor unit's water-resistant seals are intact.
8. Кыйынчылыктарды
| Көйгөй | Мүмкүн себеп | Чечим |
|---|---|---|
| Ички монитордо сүрөт жок. |
|
|
| Байланыш учурунда үн чыкпайт. |
|
|
| Түнкүсүн сүрөттүн сапаты начар. |
|
|
9. Техникалык шарттар
| Бренд: | Sygonix |
| Модель номери: | SY-3313340 (1656670) |
| Indoor Monitor Screen: | 7 дюймдук TFT LCD экран |
| Түсү: | Silver |
| Материал: | Алюминий |
| Кубат түрү: | Mains Powered (via included adapter) |
| Пакеттин өлчөмдөрү: | 32.5 x 32.5 x 7 см |
| Салмагы: | 9.07 грамм |
10. Кепилдик жана колдоо
For warranty information, please refer to the documentation provided with your purchase or contact your retailer. For technical support or service inquiries, please contact Sygonix customer service or your local distributor.
Өндүрүүчү: Sygonix


