1. Киришүү
The j5create JCD384 USB-C 10-in-1 Multi-Port Docking Station is designed to expand the connectivity of your USB-C enabled laptop, PC, or tablet. This docking station provides a comprehensive solution for connecting multiple displays, USB peripherals, Ethernet, and memory cards, enhancing your productivity and simplifying your workspace. It supports 4K HDMI and VGA outputs for versatile display options, along with USB 3.0 ports for high-speed data transfer and Power Delivery for charging your host device.
2. Негизги өзгөчөлүктөрү
- Multi-Display Connectivity: Connect your laptop to an additional monitor via HDMI (4K) or VGA (1080p).
- USB Expansion: Features two USB 3.1 Gen 1 Type-A ports for peripherals and one USB Type-A port with BC 1.2 for fast-charging mobile devices.
- Жогорку ылдамдыктагы маалыматтарды өткөрүп берүү: USB 3.1 Gen 1 ports offer up to 5 Gbps transfer speed, significantly faster than USB 2.0.
- Memory Card Reader: Direct access to SD and MicroSD memory cards for convenient data storage and transfer.
- Ethernet порту: Provides a stable and reliable wired network connection.
- Кубат жеткирүү: USB-C 3.1 port with Power Delivery allows charging of your host device while using the hub.
3. Орнотуу колдонмосу
Follow these steps to set up your j5create JCD384 docking station:
- Хост түзмөккө туташуу: Plug the integrated USB-C cable from the docking station into an available USB-C port on your laptop, PC, or tablet. Ensure your host device's USB-C port supports DisplayPort Alternate Mode and Power Delivery for full functionality.
- Кубат адаптерин туташтыруу (кошумча, бирок сунушталат): If your host device requires charging or if you are connecting power-intensive peripherals, connect your original USB-C power adapter to the USB-C Power Delivery port on the docking station. This will charge your host device and provide power to connected peripherals.
- Тышкы дисплейлерди туташтыруу:
- For HDMI display: Connect an HDMI cable from your monitor to the HDMI port on the docking station.
- For VGA display: Connect a VGA cable from your monitor to the VGA port on the docking station.
Note: The docking station supports either HDMI or VGA output at one time, not simultaneously for extended desktop. For mirrored display, both can be used.
- USB перифериялык түзүлүштөрдү туташтыруу: Plug your USB devices (e.g., keyboard, mouse, external hard drive) into the available USB 3.0 Type-A ports. The orange USB Type-A port supports BC 1.2 for faster charging of mobile devices.
- Ethernet кабелин туташтыруу: For a wired network connection, plug an Ethernet cable into the RJ-45 Gigabit Ethernet port on the docking station.
- Эстутум карталарын салыңыз: Insert your SD or MicroSD cards into the corresponding slots for data access.

Figure 1: ашыкview of the j5create JCD384 docking station with connected peripherals.
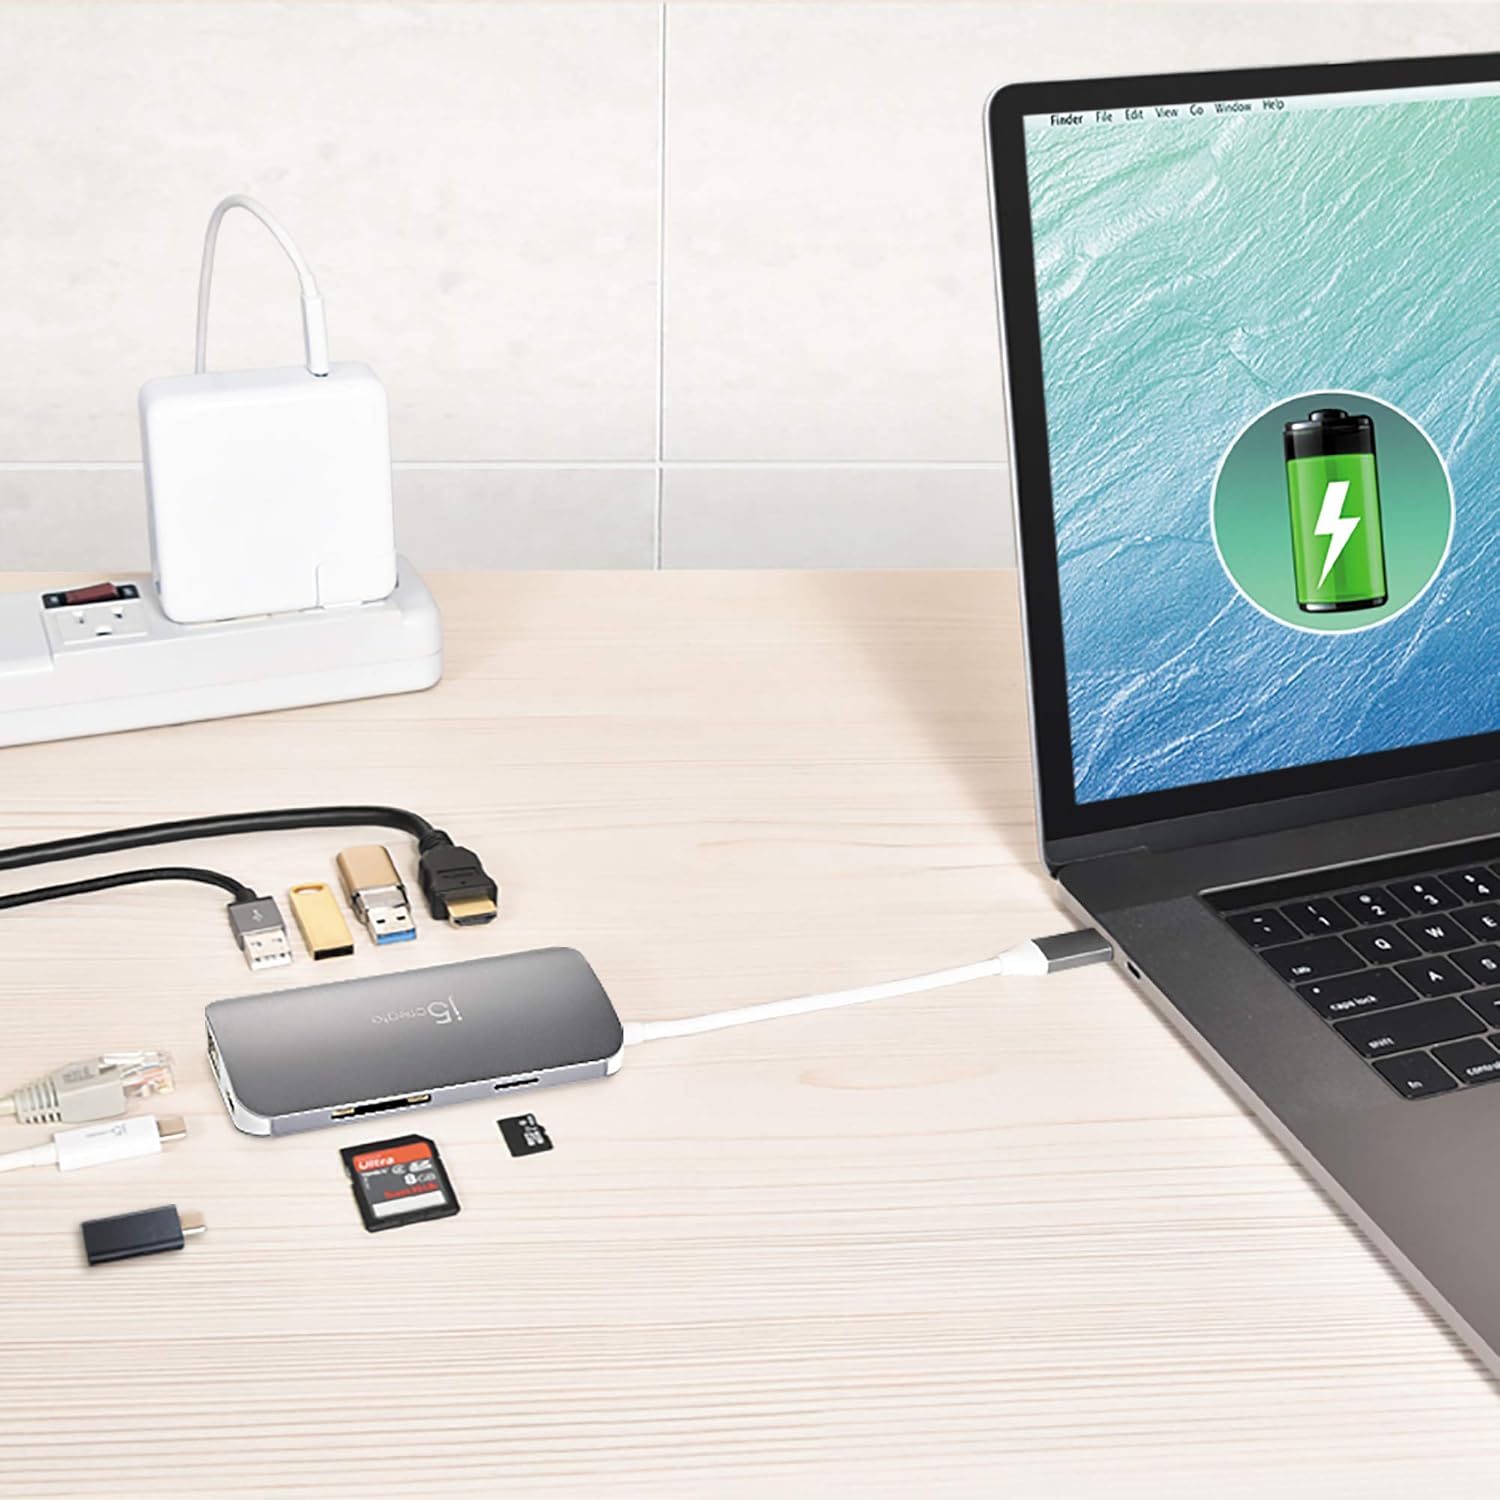
Figure 2: The docking station connected to a laptop, demonstrating power delivery and peripheral connections.
4. Иштөө нускамалары
Once the docking station is set up, it operates largely plug-and-play. Your operating system should automatically detect and configure most connected devices.
4.1 Дисплейдин конфигурациясы
After connecting your monitor(s), you may need to adjust display settings in your operating system:
- Windows: Right-click on the desktop, select "Display settings," and configure your displays (extend, duplicate, or second screen only).
- MacOS: Дисплейлериңизди иретке келтирүү же чагылдыруу үчүн "Система жөндөөлөрү" > "Дисплейлер" бөлүмүнө өтүңүз.

3-сүрөт: Тышкы мониторго туташкан ноутбук, көрсөтүүasing multi-display functionality.

Figure 4: A tablet and projector connected to a 4K UHD monitor, illustrating diverse display connections.
4.2 USB Device Usage
Simply plug your USB devices into the available USB 3.0 ports. For charging mobile devices, use the orange USB Type-A port which supports BC 1.2 for faster charging.
4.3 Memory Card Access
Insert your SD or MicroSD card into the appropriate slot. The card will appear as a removable drive in your file explorer, allowing you to transfer files.
4.4 Ethernet туташуусу
Once connected, your host device should automatically detect the wired network. If not, check your network settings.
5. Техникалык шарттар
| Өзгөчөлүк | Деталь |
|---|---|
| Модель номери | JCD384 |
| Бренд | j5create |
| Түс | Боз |
| Материал | Алюминий |
| Аппараттык интерфейс | MicroSD, Secure Digital Card, USB 3.0, HDMI, VGA, Ethernet, USB-C |
| Шайкеш түзмөктөр | PC, Laptops, Tablets, Smartphones (with USB-C DisplayPort Alt Mode) |
| Жалпы USB порттору | 3 (2x USB 3.0 Type-A, 1x USB Type-A with BC 1.2) |
| Маалыматтарды өткөрүү ылдамдыгы | 5 Gigabits Per Second (USB 3.0) |
| Порттардын саны | 9 (HDMI, VGA, Ethernet, 3x USB 3.0, SD, MicroSD, USB-C PD) |
| Операциялык системаны колдоо | Бир нече операциялык системалар |
| Элемент Салмагы | 88 грамм |
| UPC | 847626002458 |

5-сүрөт: үстү жана асты views of the docking station, showing various ports.

6-сүрөт: Каптал view highlighting the VGA port and integrated USB-C cable.

7-сүрөт: Каптал view displaying the Ethernet and USB-C Power Delivery ports.
6. Кыйынчылыктарды
Док станцияңызда көйгөйлөргө туш болсоңуз, төмөнкү жалпы чечимдерди караңыз:
- Дисплей чыгышы жок:
- Хост түзмөгүңүздүн USB-C порту DisplayPort альтернативдик режимин колдоорун текшериңиз.
- Check all cable connections (USB-C to host, HDMI/VGA to monitor).
- Монитордун киргизүү булагынын туура тандалганын текшериңиз.
- Try connecting only one display at a time to isolate the issue.
- Update your graphics drivers on your host device.
- USB түзмөктөрү таанылбайт:
- Ensure the docking station is securely connected to your host device.
- Try connecting the USB device directly to your host device to confirm it's working.
- If using a high-power USB device, ensure the docking station is connected to an external power source via its USB-C PD port.
- Some wireless peripherals (e.g., Logitech adapters) may have compatibility issues with certain hubs.
- Slow Ethernet Connection:
- Check your Ethernet cable for damage and ensure it's securely connected.
- Verify your network drivers are up to date.
- Test with a different Ethernet cable or port on your router/modem.
- Хост түзмөк кубатталбай жатат:
- Ensure your original USB-C power adapter is connected to the docking station's USB-C PD port.
- Verify your host device's USB-C port supports Power Delivery.
- Кубат адаптерин жана кабелин кандайдыр бир бузулууларды текшериңиз.
7. Техникалык тейлөө
To ensure the longevity and optimal performance of your j5create JCD384 docking station, follow these maintenance guidelines:
- Тазалоо: Use a soft, dry cloth to clean the exterior of the docking station. Avoid using liquid cleaners or aerosols, as they may damage the device.
- Сактагыч: Док-станцияны салкын, кургак жерде, күндүн түз тийген нурларынан жана өтө жогорку температурадан алыс сактаңыз.
- Колдонуу: Handle the device with care. Avoid dropping it or subjecting it to strong impacts. Do not pull on the integrated USB-C cable forcefully.
- Вентиляция: Ensure the docking station has adequate ventilation to prevent overheating, especially during prolonged use with multiple connected devices.
8. Кепилдик жана колдоо
The j5create JCD384 USB-C 10-in-1 Multi-Port Docking Station comes with a manufacturer's warranty. Please refer to the warranty card included in your product packaging for specific terms and conditions, including warranty duration and coverage details.
For technical support, product registration, or further assistance, please visit the official j5create website or contact their customer service department. Contact information can typically be found on the j5create webсайтында же продукт документациясында.