1. Киришүү
This manual provides detailed instructions for the proper installation, safe operation, and routine maintenance of your Puig 9462W New Generation Windshield. Designed specifically for Honda Rebel 500, Rebel 300, and Rebel SE models, this windshield enhances riding comfort by deflecting wind and debris. Please read this manual thoroughly before installation and use to ensure optimal performance and safety.

Image 1.1: Puig 9462W New Generation Windshield on a Honda Rebel.
2. Коопсуздук маалыматы
Always prioritize safety when working on your motorcycle and during operation. Failure to follow these safety guidelines may result in injury or damage to the product or motorcycle.
- Ensure the motorcycle is stable on a level surface before beginning installation.
- Кол кап жана көздү коргоо сыяктуу тиешелүү жеке коргоочу шаймандарды (ЖКБ) кийиңиз.
- Do not overtighten fasteners, as this can cause damage to the windshield or mounting hardware.
- Алдыңкы айнекти жана орнотуучу жабдыктарды эскирүүнүн, бузулуунун же бошоп калгандыгынын белгилерин үзгүлтүксүз текшерип туруңуз.
- Ensure the windshield does not obstruct your view or interfere with the motorcycle's controls.
- Consult a qualified mechanic if you are unsure about any part of the installation process.
3. Пакеттин мазмуну
Verify that all components are present and undamaged before proceeding with installation. If any parts are missing or damaged, please contact Puig customer support.
- 1x Puig 9462W Windshield
- Mounting Hardware Kit (bolts, washers, rubber grommets, brackets)
- Орнотуу боюнча нускамалар (бул колдонмо)

Image 3.1: Puig brand logo.
4. Орнотуу жана орнотуу
The Puig 9462W windshield is designed for straightforward installation. Follow these steps carefully. An 8mm Allen wrench may be required for certain bolts (not included).
4.1. Орнотууга чейинки кадамдар
- Park your motorcycle on a firm, level surface and ensure it is stable.
- Gather all necessary tools (e.g., Allen wrenches, pliers).
- Бардык компоненттерди таңгактан чыгарып, пакеттин мазмунун тизме менен текшериңиз.
4.2. Attaching Brackets to Windshield
Begin by attaching the mounting brackets to the windshield itself. This typically involves using the provided rubber grommets, washers, and screws.
Video 4.1: Detailed assembly of the windshield components and brackets. This video demonstrates the initial steps of attaching the mounting hardware to the windshield panel.
4.3. Mounting to Motorcycle Handlebars
The windshield mounts to the motorcycle's handlebars using the clamp-on system. Ensure all connections are secure but do not overtighten until final adjustments are made.
Video 4.2: Installation process of a similar windshield on a Honda Rebel CMX 300/500. This video shows how to attach the assembled windshield to the motorcycle's handlebars.
Video 4.3: Another perspective on installing a windshield on Honda Rebel CMX300/CMX500 models. This video highlights the handlebar mounting points and securing the windshield.
4.4. Акыркы түзөтүүлөр
Once the windshield is mounted, ensure all bolts are securely tightened. Check for any interference with steering or controls. The windshield should be firm with no excessive movement.
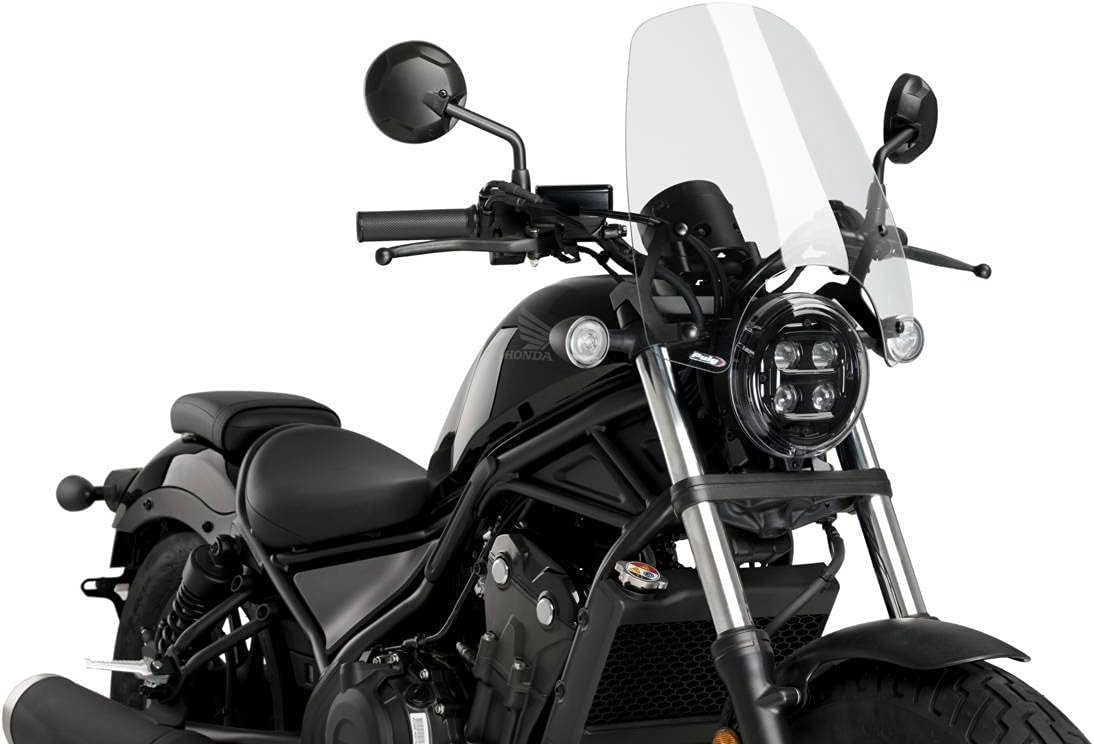
Image 4.1: Close-up of the windshield mounting points on the motorcycle.
5. Операциялык кароо
The Puig 9462W windshield is designed to provide improved aerodynamics and wind protection. While riding, be aware of the following:
- Көрүнүш: Ensure your line of sight is clear through or over the windshield.
- Wind Buffeting: Depending on rider height and helmet type, some wind buffeting may occur. This is a common characteristic of windshields and can sometimes be mitigated by minor adjustments to riding posture.
- Тазалоо: Keep the windshield clean for optimal visibility (refer to Section 6).
6. Техникалык тейлөө
Туура кам көрүү Puig алдыңкы айнегиңиздин иштөө мөөнөтүн узартат жана тунуктугун сактайт.
- Тазалоо: Use only mild soap and water with a soft cloth. Avoid abrasive cleaners, paper towels, or chemical solvents (e.g., ammonia-based cleaners) as these can scratch or damage the acrylic/polycarbonate material.
- Текшерүү: Periodically check all mounting bolts and hardware for tightness. Vibrations during riding can cause fasteners to loosen over time.
- Зыян: If the windshield becomes cracked or severely scratched, it should be replaced to maintain safety and visibility.
7. Кыйынчылыктарды
Бул жерде сиз кабылышы мүмкүн болгон жалпы маселелерди чечүү жолдору бар:
- Дирилдөө/Тартылдатуу: If the windshield rattles at high RPMs or speeds, ensure all mounting bolts are tightened securely. Consider adding thin weather stripping or rubber washers between the windshield and any contact points on the motorcycle's fairing to dampvibrations.
- Poor Wind Protection: Verify the windshield is installed at the correct angle and height. While the Puig 9462W is designed for optimal protection, individual rider height and motorcycle setup can influence effectiveness.
- Бош монтаждоо: Re-tighten all bolts. If the issue persists, inspect the mounting clamps for proper fit on the handlebars and ensure no components are stripped or damaged.
8. Техникалык шарттар
| Өзгөчөлүк | Деталь |
|---|---|
| Бренд | puig |
| Модель номери | 9462 Вт |
| Түсү (кайviewed) | CLEAR |
| Сырткы бүтүрүү | боёлгон |
| Стиль | Classic |
| Auto Part Position | Фронт |
| Даана саны | 1 |
| Орнотуу түрү | Clamp-Ошондо |
| Automotive Fit түрү | Унаанын өзгөчө ылайыктуулугу |
| Элемент Салмагы | 3.32 фунт |
| Продукциянын өлчөмдөрү | 16.14 x 4.92 x 18.5 дюйм |
9. Кепилдик жана колдоо
For warranty information, technical support, or to purchase replacement parts, please contact Puig directly through their official webсайтында же ыйгарым укуктуу дистрибьюторлордо сактаңыз. Сатып алуунун далили катары сатып алуу дүмүрчөгүңүздү сактап коюңуз.


