1. Киришүү
This manual provides detailed instructions for the installation, operation, and maintenance of your SEBSON Indoor Surface-Mounted Motion Detector, Model 2_X_IR_CEIL_A. Please read this manual thoroughly before installation and use to ensure safe and correct operation. Keep this manual for future reference.
2. Коопсуздук нускамалары
WARNING: Electrical installation should only be performed by a qualified electrician. Incorrect installation can lead to electric shock or fire.
- Always disconnect power at the main circuit breaker before performing any installation or maintenance.
- камсыз кылуу voltage matches the product's specifications (230V AC).
- дга аппаратты орнотпоңузamp environments or areas with high humidity.
- Do not exceed the maximum load capacity of the detector (2000W for incandescent lamps, 1000W for LED or energy-saving lampс).
- Avoid looking directly into the infrared sensor.
- Keep children away from the device during installation and operation.
3. Продукт бүтүп калдыview
3.1 Компоненттер
The SEBSON Motion Detector consists of a main unit with an infrared sensor, adjustment dials, and wiring terminals, along with a cover for surface mounting.
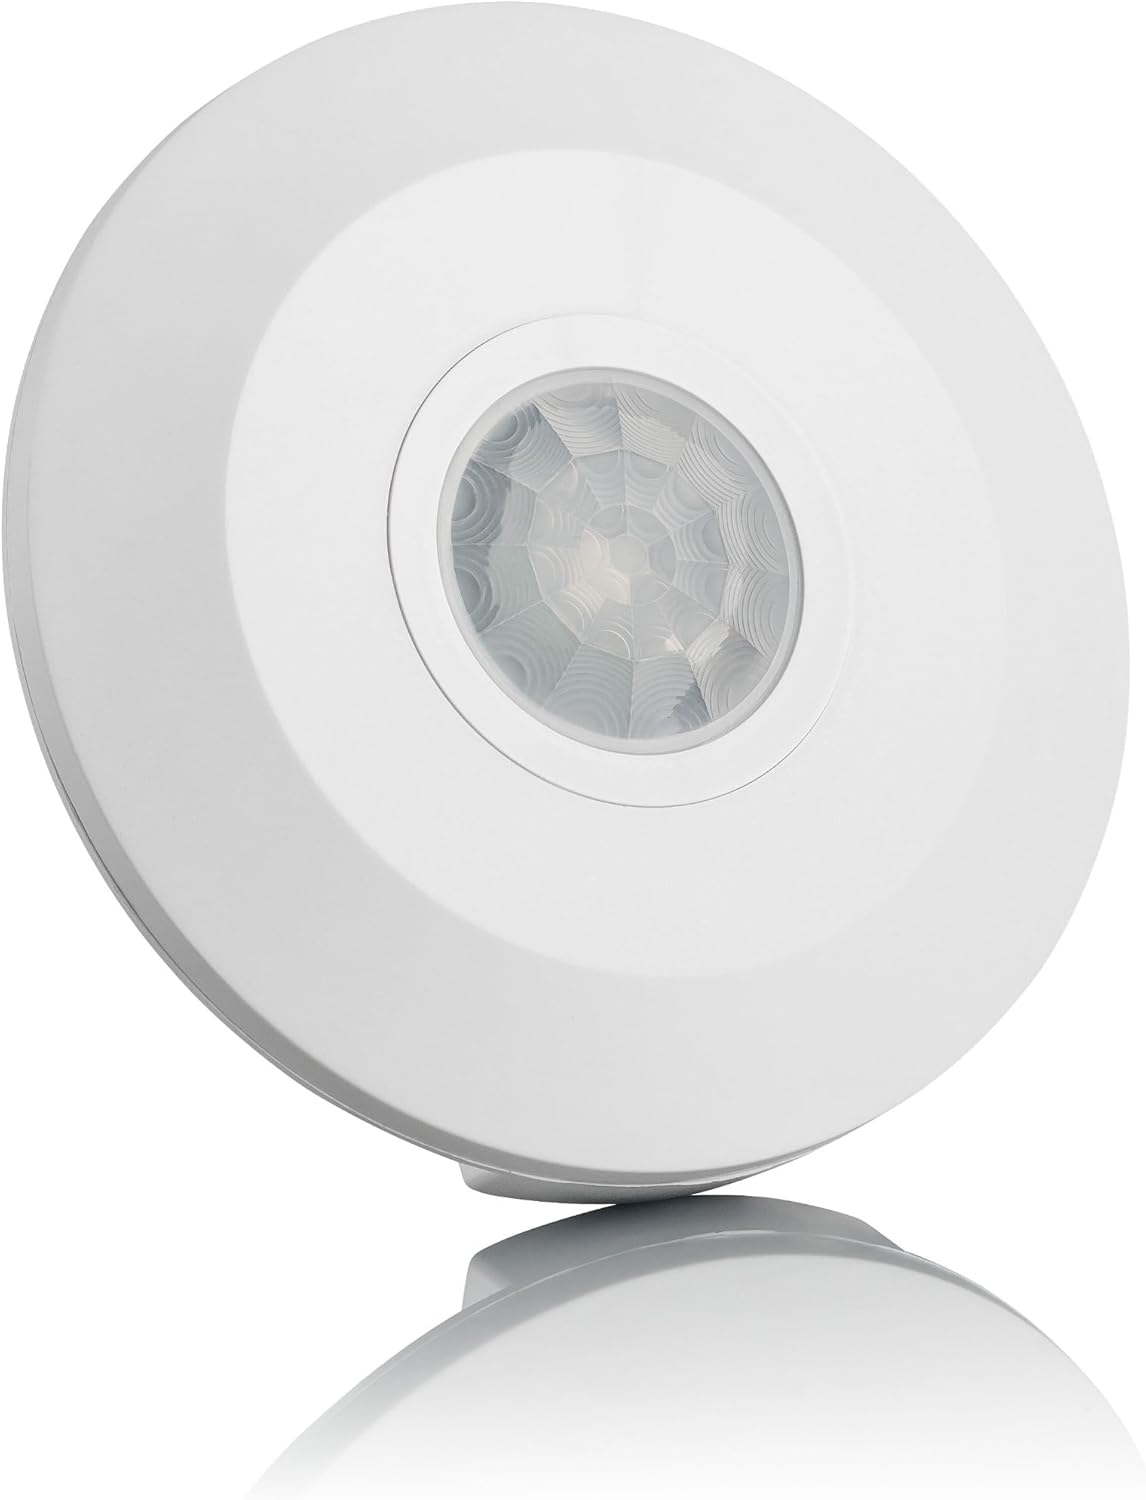
Сүрөт 1: Алдыңкы view of the SEBSON Motion Detector.

2-сүрөт: Ички view showing wiring terminals and adjustment dials (TIME and LUX).
3.2 Өзгөчөлүктөрү
- Ички колдонуу: Designed for interior applications.
- Беттик монтаждоо: Easy installation on ceilings or walls.
- Кеңири аныктоо диапазону: Approximately 6 meters at a 360° angle.
- Adjustable Operating Duration: Light-on time can be set continuously from 10 seconds to 15 minutes.
- Adjustable Light Sensitivity: Activation sensitivity can be adjusted based on ambient brightness, from 3 to 2000 LUX.
- Жогорку жүк кубаттуулугу: Supports up to 2000W for incandescent lamps and 1000W for LED or other energy-saving lamps.
4. Орнотуу жана орнотуу
Before installation, ensure the power supply is disconnected. The device is designed for ceiling mounting.
4.1 Монтаждалуучу жер
Choose a mounting location that allows for optimal detection. The recommended mounting height is between 2.2m and 4m. Avoid placing the detector near heat sources, air conditioning vents, or direct sunlight, as these can interfere with its operation.

Figure 3: Detection range and angle diagram. The detector covers a 360° area with a maximum diameter of 6 meters.
4.2 Электр зымдары боюнча нускамалар
- Негизги электр менен жабдууну ажыратыңыз.
- Remove the cover of the motion detector by twisting it counter-clockwise.
- Mount the base of the detector to the desired ceiling location using appropriate screws (see Figure 4 for mounting holes).
- Connect the electrical wires according to the wiring diagram (Figure 5):
- L: Live wire (Input)
- N: Neutral wire (Input)
- L': Switched Live wire (Output to load)
- Бардык байланыштар коопсуз жана туура изоляцияланганын текшериңиз.
- Replace the cover by aligning it and twisting clockwise until it clicks into place.

4-сүрөт: Арткы view showing mounting holes and cable entry points.
Figure 5: Wiring terminals (L, N, L') for power input and load output.
5. Иштөө нускамалары
After successful installation and power connection, the motion detector can be configured using the two adjustment dials:
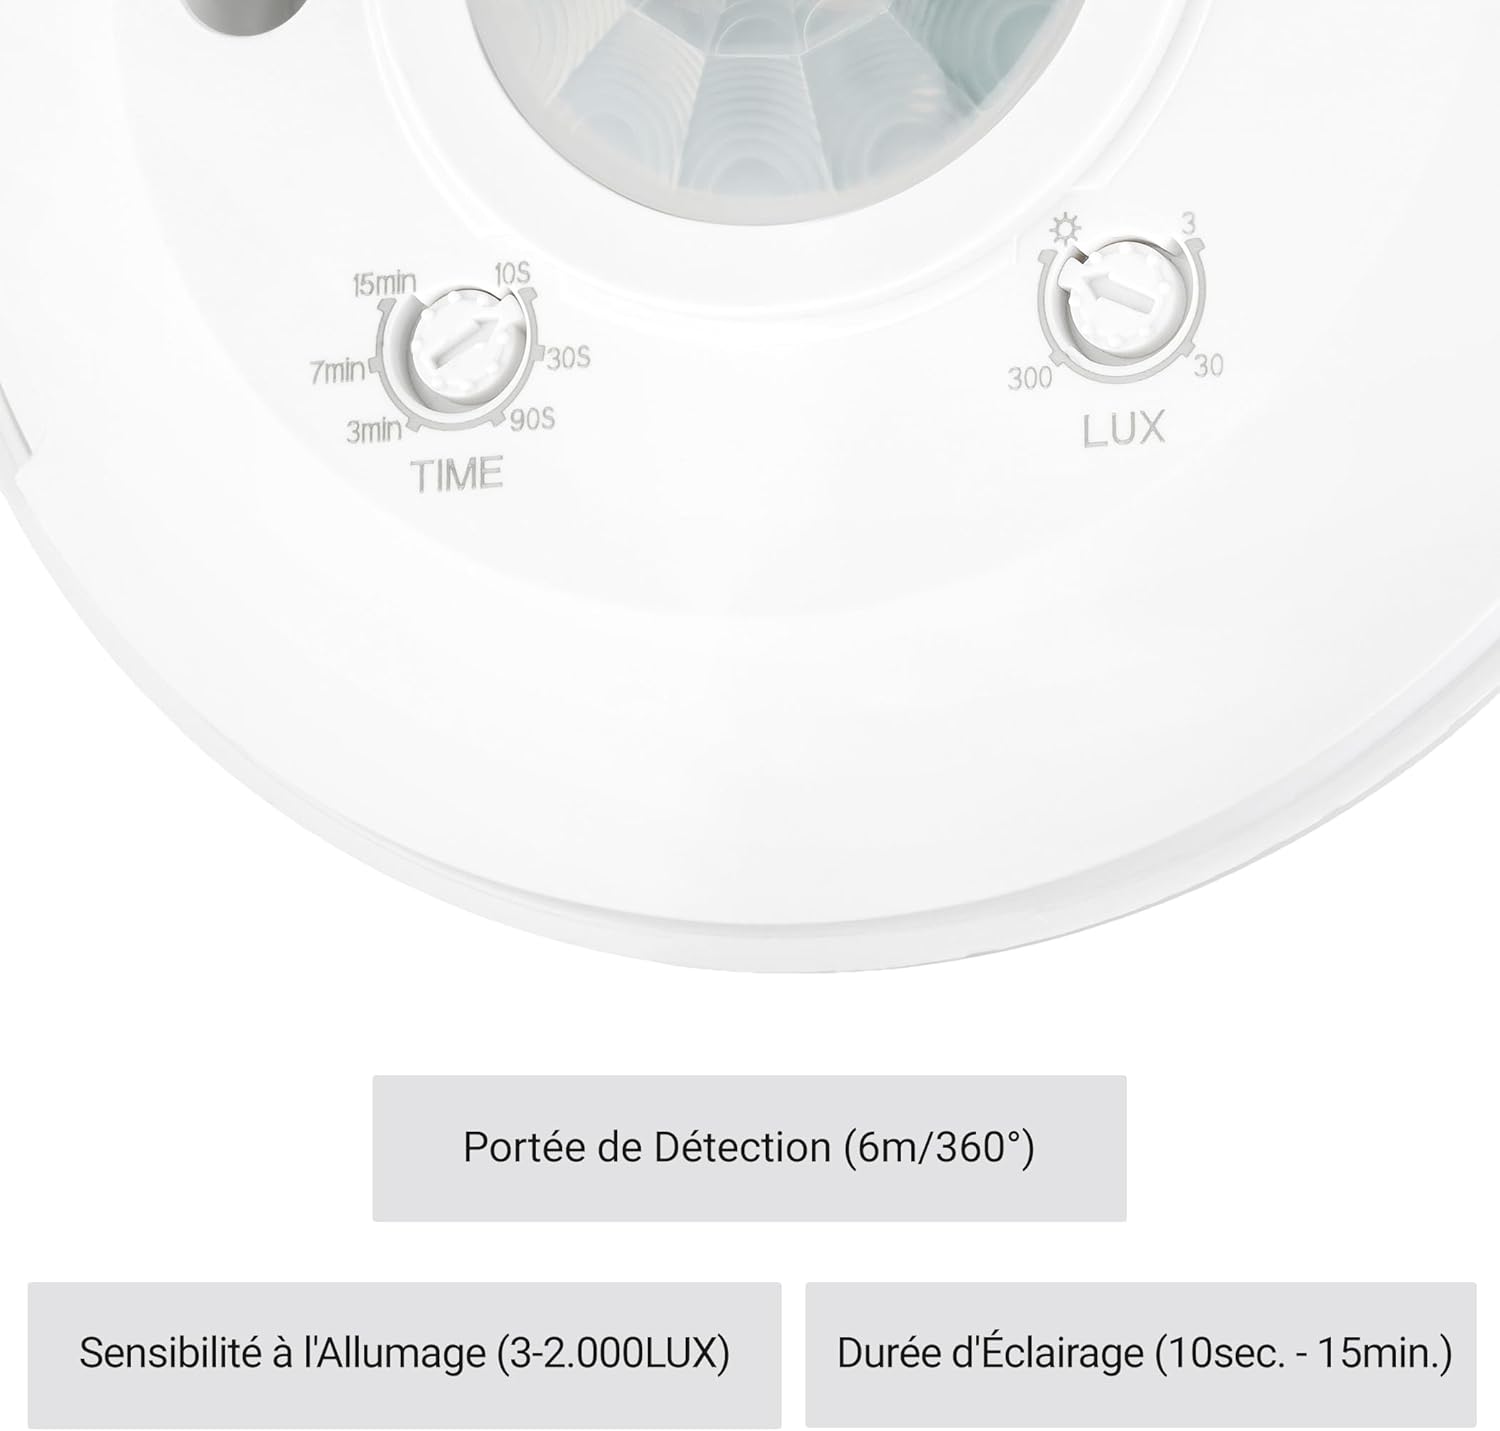
Figure 6: Close-up of TIME and LUX adjustment dials.
5.1 TIME Adjustment (Light Duration)
The 'TIME' dial controls how long the connected light remains on after motion is detected and no further motion is sensed. Rotate the dial to set the desired duration:
- 10с: Minimum duration (10 seconds)
- 15 мүнөт: Maximum duration (15 minutes)
5.2 LUX Adjustment (Light Sensitivity)
The 'LUX' dial determines the ambient light level at which the motion detector will activate the connected light. This allows the light to only turn on when it's dark enough.
- 3 LUX (Moon symbol): The detector will only activate in very dark conditions.
- 2000 LUX (Sun symbol): The detector will activate regardless of ambient light (daylight operation).
To test the detector, set the LUX dial to the 'Sun' symbol and the TIME dial to the minimum setting (10s). Once confirmed working, adjust the LUX dial to the desired ambient light level for automatic operation.
6. Техникалык тейлөө
The SEBSON Motion Detector requires minimal maintenance.
- Тазалоо: Gently wipe the surface of the detector with a soft, dry cloth. Do not use abrasive cleaners or solvents, as these can damage the plastic and sensor.
- Текшерүү: Periodically check for any loose connections or physical damage. If any damage is found, disconnect power and consult a qualified electrician.
7. Кыйынчылыктарды
| Көйгөй | Мүмкүн себеп | Чечим |
|---|---|---|
| Кыймыл аныкталганда жарык күйбөйт. |
|
|
| Жарык тынымсыз күйүп турат. |
|
|
| Light turns on and off too frequently. |
|
|
8. Техникалык шарттар
| Параметр | Нарк |
|---|---|
| Бренд | SEBSON |
| Модель номери | 2_X_IR_CEIL_A |
| Продукциянын өлчөмдөрү | 11.5 x 11.5 x 2.3 см |
| Салмагы | 280 грамм |
| Түс | Ак |
| Материал | Пластик |
| Power Source | AC |
| Тtage | 230 вольт |
| Max. Incandescent Load | 2000 Ватт |
| Max. LED/Energy-Saving Load | 1000 Ватт |
| Орнотуу ыкмасы | Шыпка орнотуу |
| Detection Coverage | Макс. 6 м / 360° |
| Иштөө температурасы | 40°Сге чейин |
| Сунушталган колдонуу | Indoor |
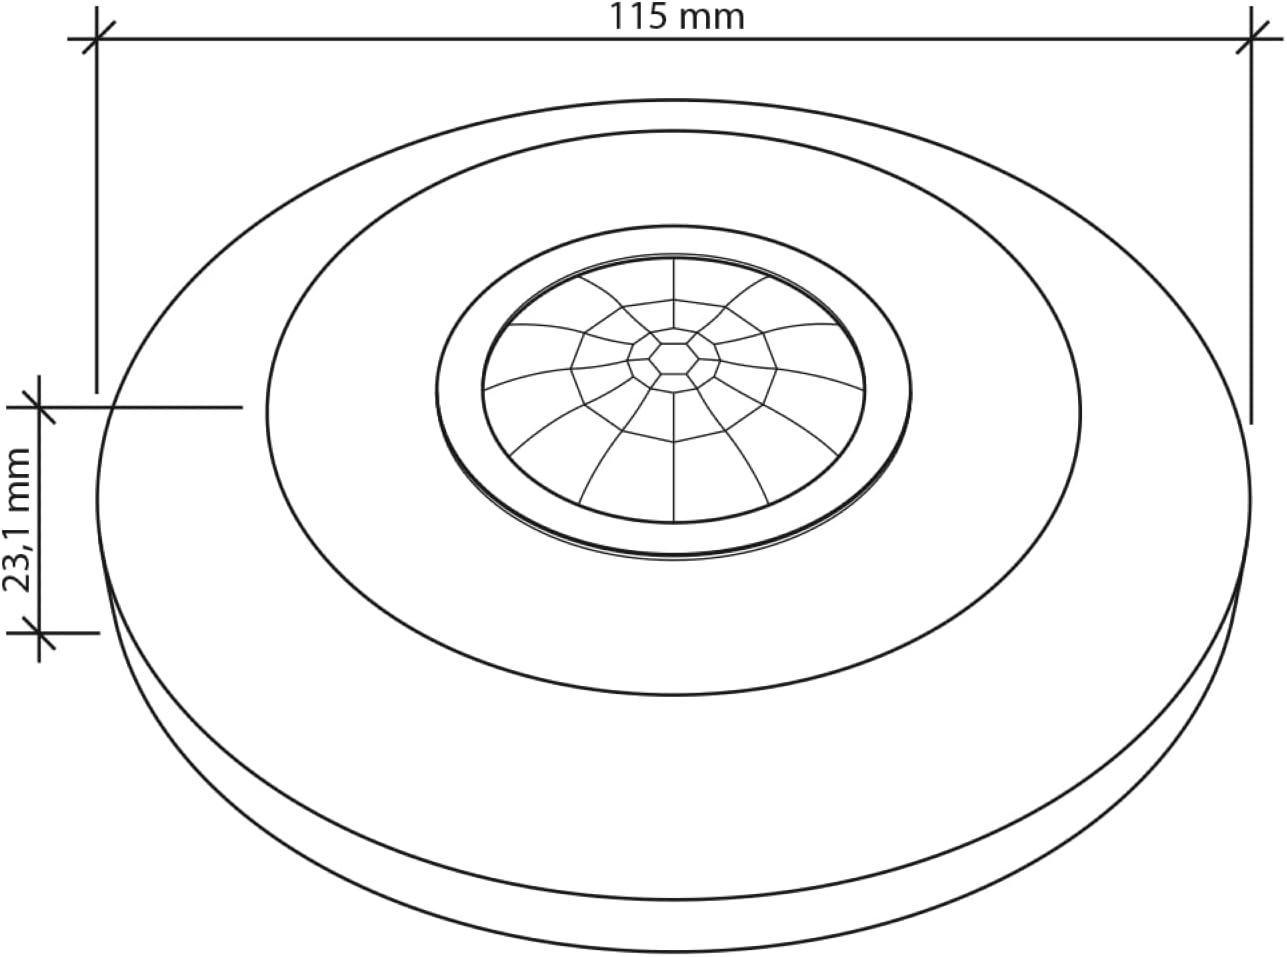
Figure 7: Dimensional drawing of the motion detector.
9. Кепилдик жана колдоо
For warranty information or technical support, please contact SEBSON directly through their official website or the retailer where the product was purchased. Please have your model number (2_X_IR_CEIL_A) and purchase details ready when contacting support.


