1. Киришүү
This manual provides detailed instructions for the installation, programming, and operation of your Orbit 2-Outlet Programmable Hose Faucet Timer, Model 24621. This device is designed to automate your watering schedule, ensuring efficient irrigation for your garden or lawn. Please read these instructions carefully before use to ensure proper function and longevity of the product.
2. Продукт бүтүп калдыview
The Orbit 2-Outlet Programmable Hose Faucet Timer features a large digital display and intuitive controls for easy programming. It allows for independent programming of two watering zones from a single faucet.

Сүрөт 2.1: Фронт view of the Orbit 2-Outlet Programmable Hose Faucet Timer, displaying the digital screen and control dial.
Негизги өзгөчөлүктөрү:
- Кош розеткалар: Control two separate watering zones independently.
- Жөнөкөй программалоо: Simple interface with a large, easy-to-read digital display.
- Ийкемдүү график: Program watering intervals from every hour up to every 7th day.
- Жөнгө салынуучу узактыгы: Set watering times from 1 to 360 minutes.
- Жаан кечигүү: Pause your watering schedule for 1 to 7 days.
- Кол менен иштөө: Instant faucet use without interrupting programmed schedules.
- Батарея менен иштейт: Operates on batteries for convenience.
3. Орнотуу
3.1. Батареяны орнотуу
- Таймердин артындагы батарея бөлүкчөсүн табыңыз.
- Батареянын капкагын алып салыңыз.
- Insert two fresh AA alkaline batteries, ensuring correct polarity (+/-).
- Батареянын капкагын бекем орнотуңуз.
3.2. Attaching the Timer to the Faucet
- Крандын жабылганын текшериңиз.
- Thread the timer's inlet collar onto your outdoor hose faucet. Hand-tighten only; do not use tools.
- Connect your garden hoses to the two outlets at the bottom of the timer. Hand-tighten only.
- Slowly turn on the faucet completely.

Сүрөт 3.1: The timer connected to a water faucet with two hoses attached, ready for use in a garden setting.
4. Программалоо боюнча көрсөтмөлөр
The timer features a large dial and buttons for easy navigation through programming steps. Use the СТАНЦИЯ button to select which outlet (1 or 2) you are programming.
4.1. Саатты коюу
- Тергичти буруңуз СААТТЫ КОЮ.
- колдонуу < жана > учурдагы убакытты тууралоо үчүн баскычтар.
- басыңыз OK ырастоо үчүн баскыч.
4.2. Баштоо убактысын коюңуз
- Тергичти буруңуз БАШТАЛГАН УБАКЫТ.
- колдонуу < жана > Сугаруу баштоонун каалаган убактысын коюу үчүн баскычтарды басыңыз.
- Басыңыз OK ырастоо үчүн.
4.3. Set Watering Duration (How Long)
- Тергичти буруңуз КАНЧА УБАКЫТ.
- колдонуу < жана > buttons to set the watering duration (from 1 to 360 minutes).
- Басыңыз OK ырастоо үчүн.
4.4. Set Watering Frequency (How Often)
- Тергичти буруңуз КАЧАН.
- колдонуу < жана > buttons to set the watering frequency (from every hour up to every 7th day).
- Басыңыз OK ырастоо үчүн.
4.5. Кол менен иштөө
Программаланган графигиңизге таасир этпестен кол менен сугаруу үчүн:
- Тергичти буруңуз АВТО/КОЛ.
- басыңыз КОЛ баскычы.
- колдонуу < жана > баскычтарын басып, каалаган кол менен сугаруу узактыгын орнотуңуз.
- Басыңыз OK кол менен сугарууну баштоо.
- Кол менен сугарууну токтотуу үчүн баскычын басыңыз КОЛ button again or turn the dial to ӨЧҮРҮҮ.
4.6. Жамгырдын кечиктирүү функциясы
To temporarily pause your watering schedule due to rain or other reasons:
- Тергичти буруңуз АВТО/КОЛ.
- басып, кармап туруңуз ЖАМГЫР КЕЧИК button (often integrated with AUTO/MANUAL or a dedicated button).
- колдонуу < жана > buttons to select the delay duration (1 to 7 days).
- Басыңыз OK to activate the rain delay. The timer will resume its programmed schedule after the delay period.
5. Техникалык тейлөө
5.1. Батареяны алмаштыруу
It is recommended to replace the batteries annually, or when the low battery indicator appears on the display, to ensure continuous operation. Refer to section 3.1 for battery installation steps.
5.2. Кышкы сактоо
Before the first frost, remove the timer from the faucet. Drain any water from the timer and store it indoors in a dry, protected location. Freezing temperatures can damage the internal components of the timer.
6. Кыйынчылыктарды
| Көйгөй | Мүмкүн себеп | Чечим |
|---|---|---|
| Таймер күйбөйт же дисплей бош турат. | Өлүк же туура эмес орнотулган батарейкалар. | Батареяларды жаңы AA щелочтуу батареялары менен алмаштырыңыз, полярдуулукту туура сактаңыз. |
| Water does not flow at scheduled time. | Faucet is off; rain delay is active; incorrect programming; low water pressure. | Ensure faucet is fully open. Check if rain delay is active. Verify programming settings (start time, duration, frequency). Check water pressure. |
| Таймер өчпөй жатат. | Internal valve malfunction; low battery. | Replace batteries. If problem persists, the unit may require replacement. |
| Water leaks from faucet connection. | Бошоң туташуу; шайба эскирген. | Ensure connection is hand-tight. Check and replace the rubber washer inside the timer's inlet if it is worn or missing. |
| Timer resets or loses program. | Low batteries; power interruption. | Replace batteries. Reprogram the timer. |
7. Техникалык шарттар
- Модел: 24621
- Бренд: Орбита
- Материал: Пластик
- Түсү: Боз
- Продукциянын өлчөмдөрү: 3"D x 2"W x 4"H
- Элемент Салмагы: 1.2 фунт
- Кубат булагы: 2 x AA щелочтуу батарейкалар (киргизилген эмес)
- Орнотуулардын саны: 3 (Start Time, How Long, How Often)
- Сугаруу узактыгы: 1-360 мүнөт
- Сугаруу жыштыгы: Every hour up to every 7th day
- Жаан-чачындын кечигүүсүнүн параметрлери: 1 күндөн 7 күнгө чейин
- UPC: 046878246218
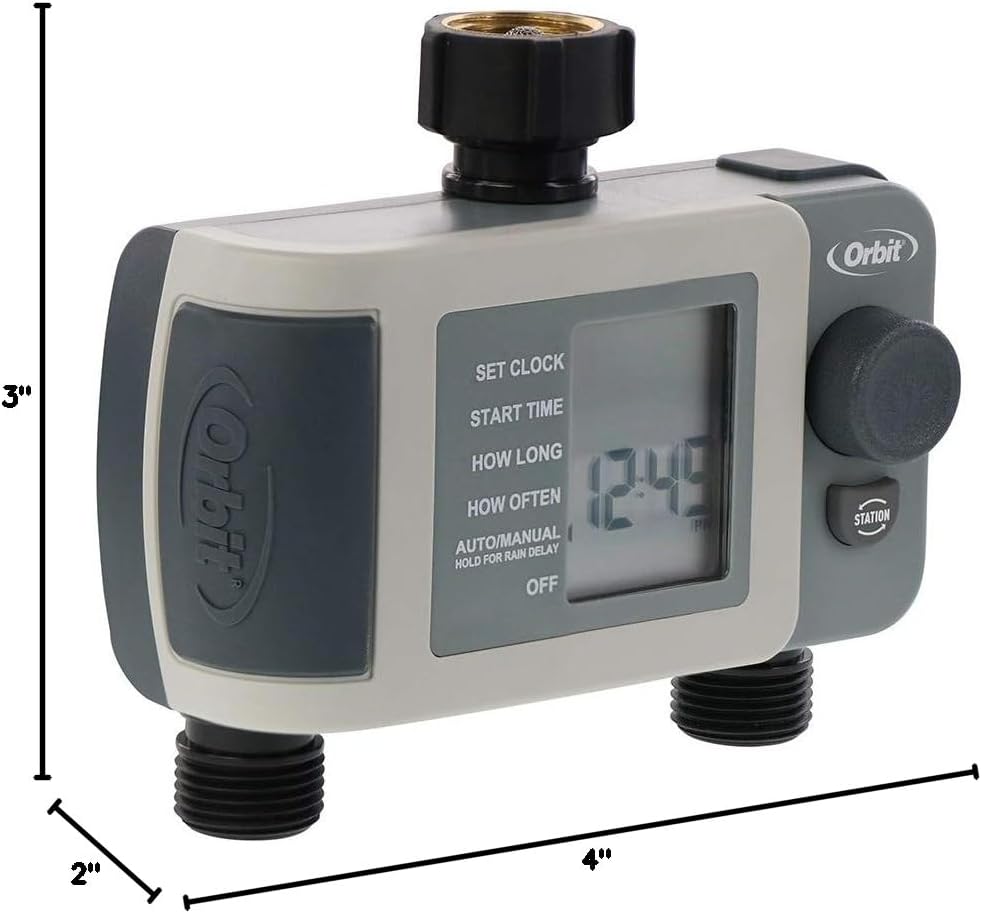
Сүрөт 7.1: Diagram showing the approximate dimensions of the timer: 3 inches deep, 2 inches wide, and 4 inches high.
8. Кепилдик жана колдоо
Orbit products are designed for durability and performance. For specific warranty information or technical support, please refer to the official Orbit webсайтка же түздөн-түз кардарларды тейлөөгө кайрылыңыз. Кепилдик дооматтар үчүн сатып алуу дүмүрчөгүңүздү сактаңыз.


