1. Киришүү
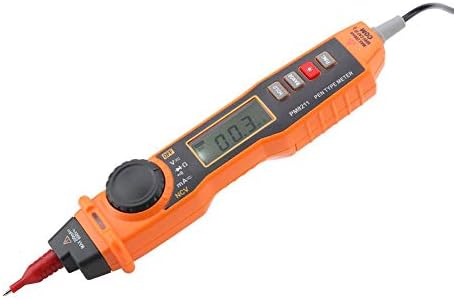
This manual provides essential information for the safe and effective operation of your Walfront PM8211 Digital Pen Type Multimeter. Please read this manual thoroughly before use and retain it for future reference. The PM8211 is a compact, handheld electrical tester designed for measuring DC voltage, AC томtage, DC current, AC current, resistance, diode, and continuity. It also features non-contact voltage (NCV) detection, sound and light alarms, and a built-in flashlight, making it suitable for various electrical testing and maintenance tasks in homes, factories, and automotive applications.
2. Коопсуздук маалыматы
Always adhere to basic safety precautions when using electrical testing equipment to reduce the risk of fire, electric shock, or personal injury. This device is designed for safe operation when used according to these instructions.
- Ар бир өлчөө диапазону үчүн көрсөтүлгөн максималдуу киргизүү маанилеринен ашпаңыз.
- Ток чынжырлары менен иштөөдө өтө этият болуңуз.
- Ensure the test leads are in good condition, without any damage to the insulation.
- Аппарат бузулуп калса же туура иштебей жатса, аны колдонбоңуз.
- Каршылыкты же үзгүлтүксүздүктү өлчөөдөн мурун чынжырдан электр кубатын ажыратыңыз.
- Өлчөө учурунда колду жана манжаларды зонд тосмолорунун артында кармаңыз.
- Батареянын аз көрсөткүчү так көрсөткүчтөрдү камсыз кылуу үчүн батарейкаларды дароо алмаштырыңыз.
3. Продукттын компоненттери жана өзгөчөлүктөрү
The Walfront PM8211 Digital Pen Type Multimeter is designed for ease of use and portability. Below are the key components and their functions.


- Pen-Type Design: Ergonomic and lightweight (251g) for easy one-hand operation.
- Санариптик дисплей: Clear LCD for precise readings.
- Айлануучу которгуч: Selects measurement functions.
- Функция баскычтары: Includes Data Hold, Range Selection, and Backlight/Flashlight activation.
- Байланышсыз томtage (NCV): Detects voltagд түз байланышсыз.
- Үн жана жарык сигнализациясы: Provides clear indications during voltage аныктоо.
- Automatic and Manual Ranging: Offers flexibility in measurements.
- Дайындарды кармоо: Көрсөтүлгөн окууну токтотот.
- Автоматтык өчүрүү функциясы: Батареянын иштөө мөөнөтүн үнөмдөйт.
- Over-Shell Rubber Sleeve: Туруктуулукту жана кармашты жакшыртат.
4. Орнотуу
Мультиметрди колдонуудан мурун, анын туура орнотулгандыгын текшериңиз.
4.1. Батареяны орнотуу
The multimeter requires 2x AAA 1.5V batteries (not included). To install or replace batteries:
- Аппараттын артындагы батарея бөлүкчөсүнүн капкагын табыңыз.
- Use a small screwdriver to open the cover.
- Туура полярдуулукту (+/-) сактоо менен эки AAA батарейкасын салыңыз.
- Батарея бөлүгүнүн капкагын бекем жабыңыз.
4.2. Сыноо линияларын туташтыруу
The multimeter comes with integrated test leads. Ensure they are securely connected to the device before use. The red probe is for positive (+) connections, and the black probe is for common (COM) or negative (-) connections.
5. Иштөө нускамалары
Familiarize yourself with the various measurement functions of the PM8211.
5.1. Күйгүзүү/өчүрүү
Press the power button to turn the multimeter on. The device will typically enter auto-ranging mode. To turn off, press and hold the power button.
5.2. DC Voltage Өлчөө
DC көлөмүн өлчөө үчүнtage:
- Set the rotary switch to the 'V=' position.
- Connect the red test probe to the positive (+) terminal of the DC source and the black test probe to the negative (-) terminal.
- Томду окуңузtage мааниси дисплейде.

5.3. AC Voltage Өлчөө
AC көлөмүн өлчөө үчүнtage:
- Set the rotary switch to the 'V~' position.
- Сыноо зонддорун AC том аркылуу туташтырыңызtage булагы.
- Томду окуңузtage мааниси дисплейде.
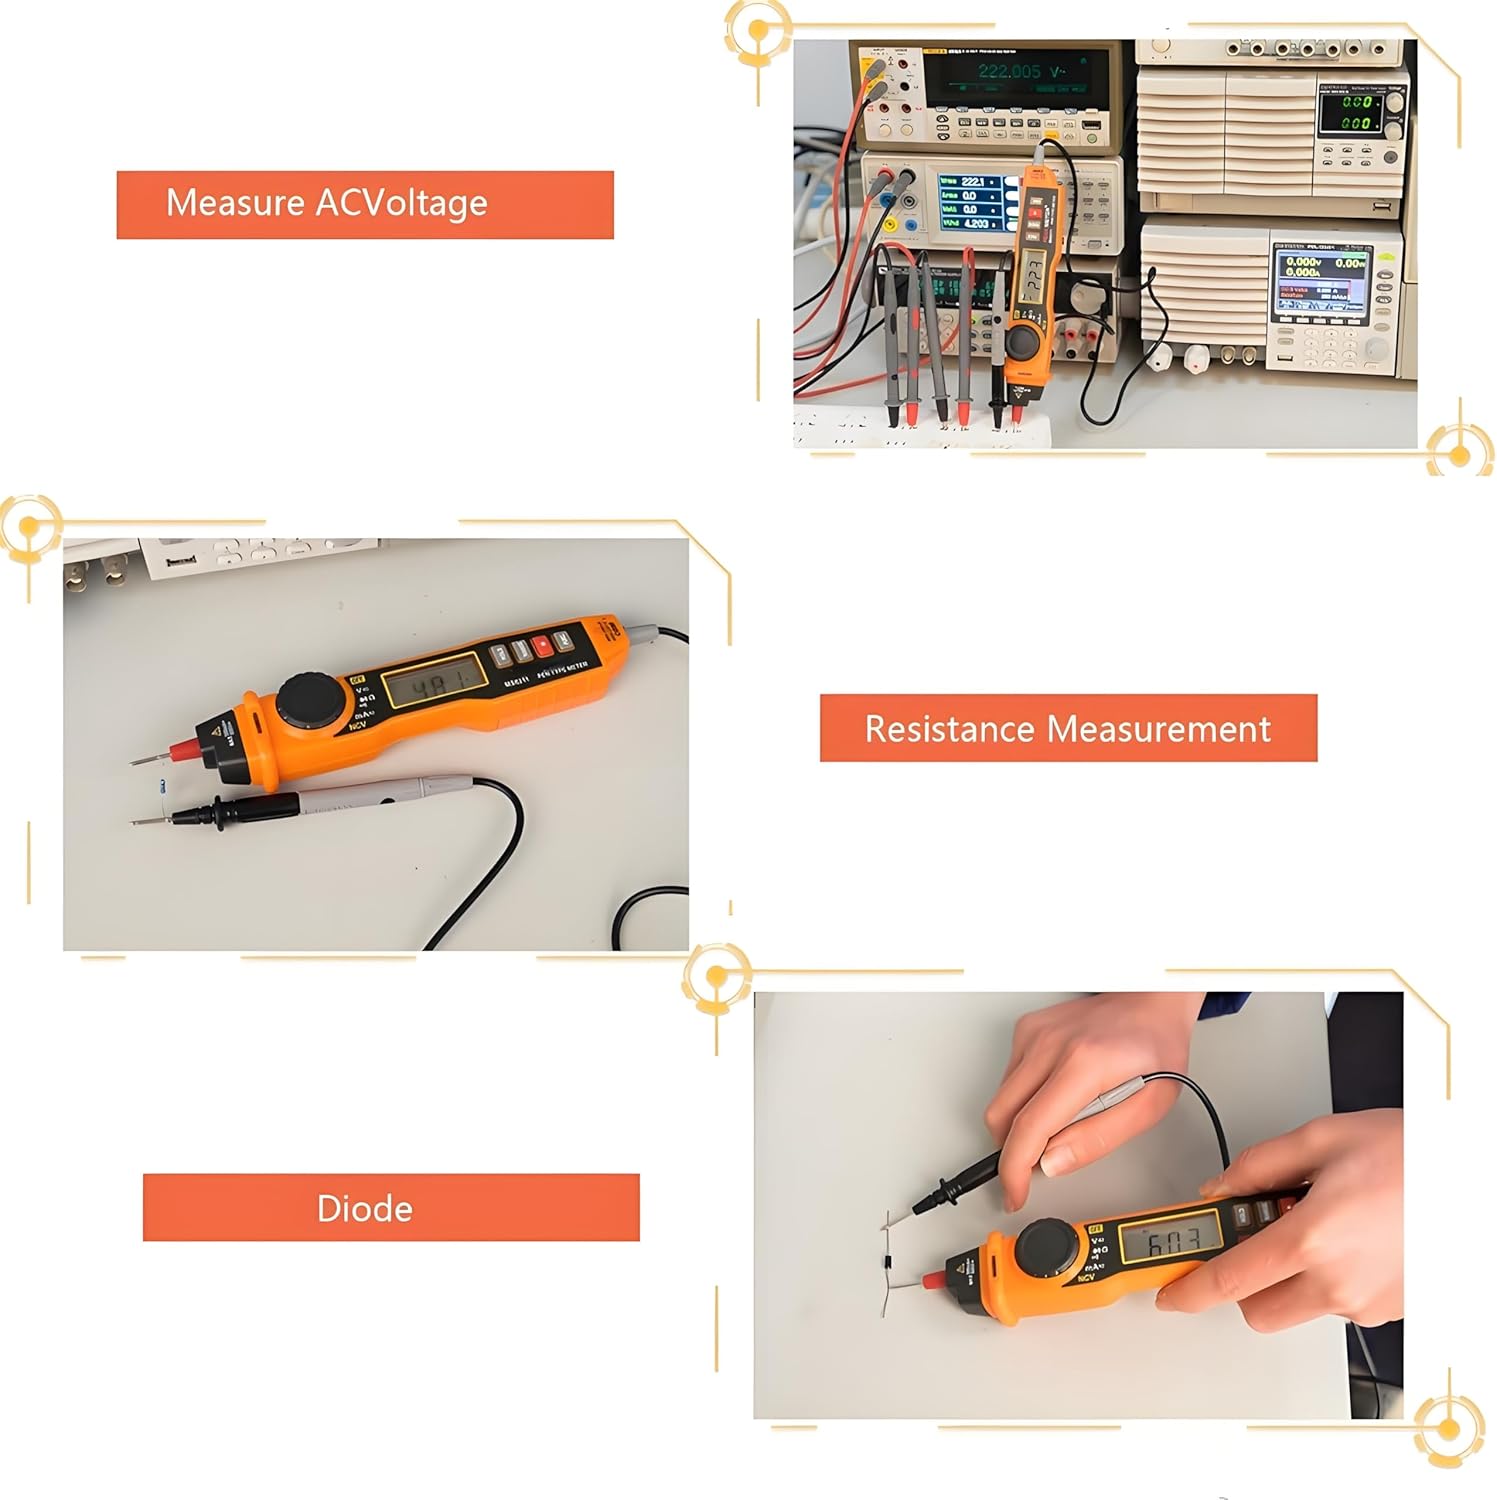
5.4. Каршылык Өлчөө
каршылык өлчөө үчүн:
- Ensure the circuit is de-energized before measurement.
- Айланма которгучту 'Ω' абалына коюңуз.
- Сыноо зонддорун өлчөй турган компонентке туташтырыңыз.
- Дисплейдеги каршылык маанисин окуп чыгыңыз.
5.5. Диод жана үзгүлтүксүздүк сыноо
To test diodes or continuity:
- Ensure the circuit is de-energized before measurement.
- Айланма которгучту "Диод/Үзгүлтүксүздүк" абалына коюңуз.
- For diode testing, connect the red probe to the anode and the black probe to the cathode. The forward voltagтөмөндөө көрсөтүлөт. Ачык чынжырды текшерүү үчүн зонддорду тескери буруңуз.
- For continuity testing, connect the probes across the circuit path. A low resistance (typically less than 50Ω) will indicate continuity with an audible beep.

5.6. Контактсыз томtage (NCV) аныктоо
NCV функциясы тtage detection without direct contact with live conductors.
- Айланма которгучту 'NCV' абалына коюңуз.
- Мультиметрдин учун өткөргүчкө жакын келтириңиз.
- The device will emit an audible beep and the NCV indicator light will flash when AC voltage is detected. The frequency of beeps and flashes increases with higher voltage or closer proximity.
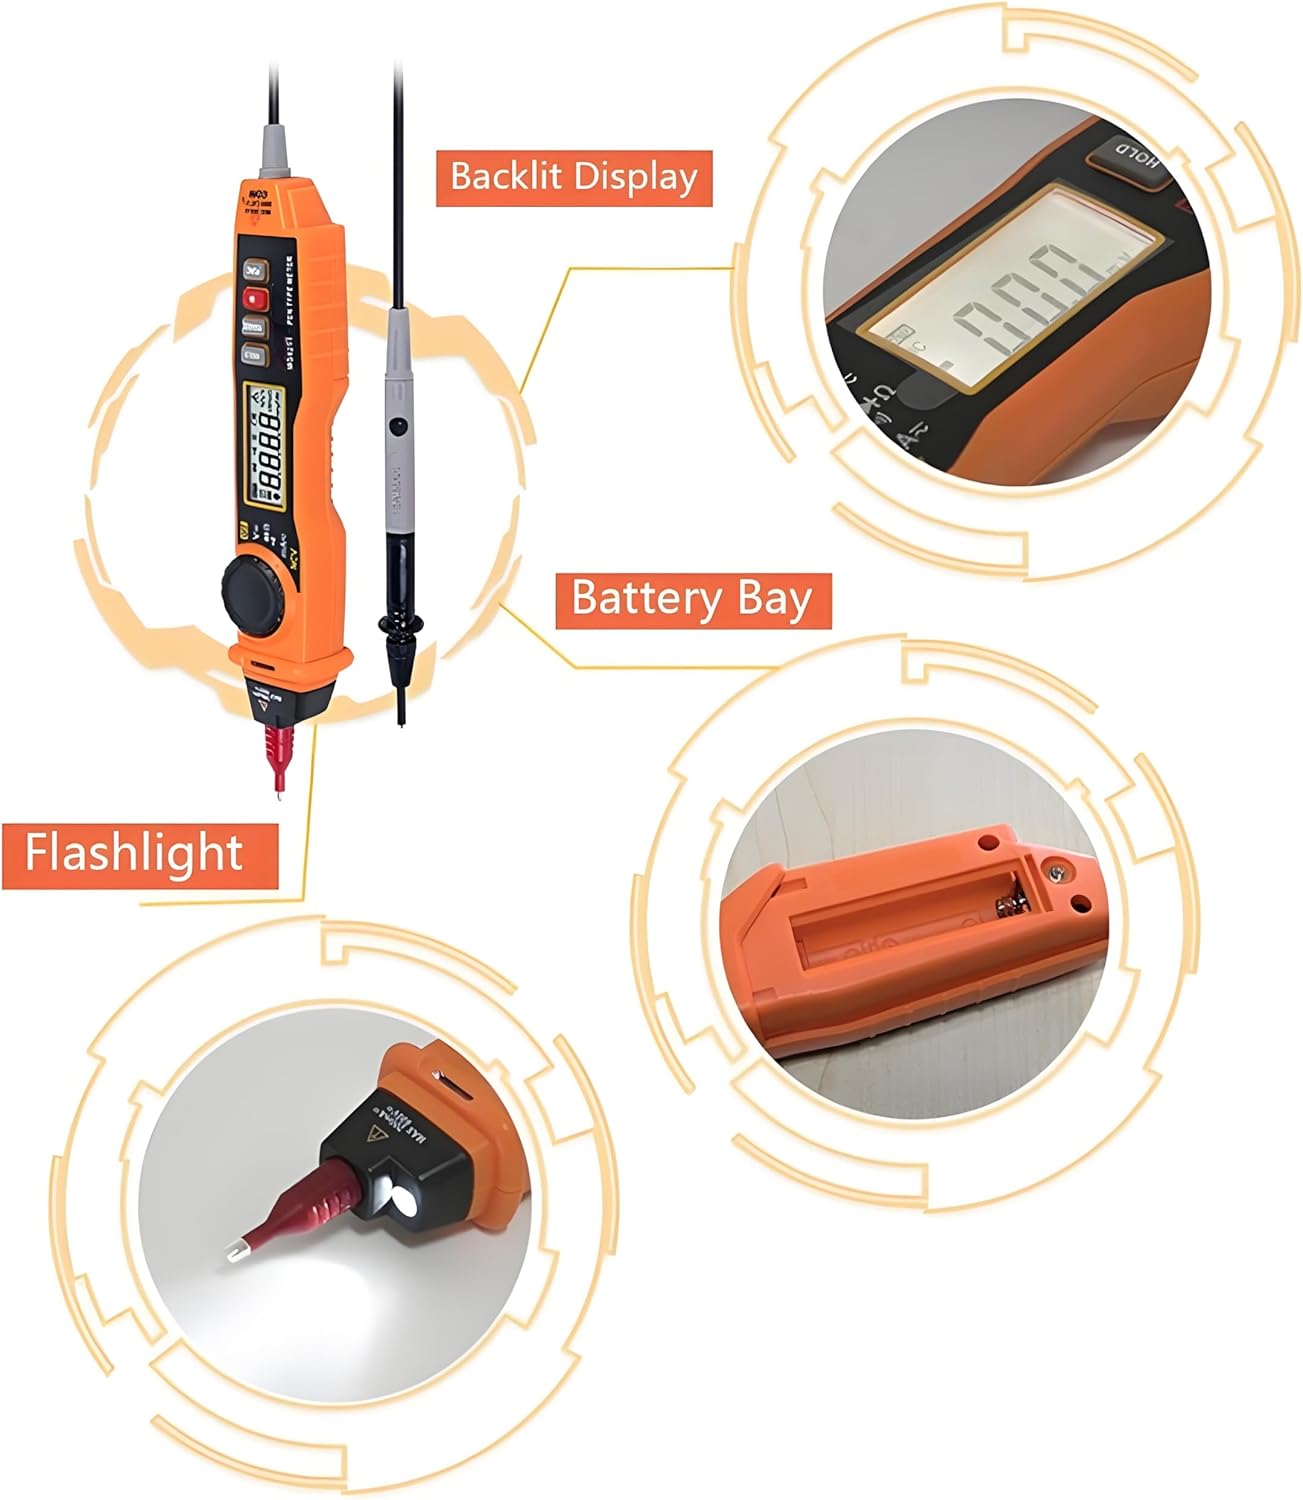
5.7. Фонар жана арткы жарык
Press the 'Backlight and Lighting Key' button to activate the display backlight for improved visibility in low-light conditions. Press and hold the same button to turn on the built-in flashlight located at the tip of the device.
5.8. Маалыматты кармоо функциясы
Press the 'HOLD' button to freeze the current reading on the display. Press it again to release the hold and resume live measurements.
5.9. Автоматтык өчүрүү функциясы
The multimeter is equipped with an auto-off function to conserve battery life. If no operation is performed for a certain period (typically 15 minutes), the device will automatically power off. Press any button or turn the rotary switch to reactivate it.
6. Техникалык тейлөө
Туура тейлөө мультиметриңиздин узак мөөнөттүү жана тактыгын камсыздайт.
- Тазалоо: Аппаратты кургак, жумшак чүпүрөк менен сүртүңүз. Абразивдүү тазалагычтарды же эриткичтерди колдонбоңуз.
- Сактагыч: Store the multimeter in a cool, dry place away from direct sunlight and extreme temperatures. If storing for extended periods, remove the batteries to prevent leakage.
- Батареяны алмаштыруу: Replace batteries as soon as the low battery indicator appears to maintain measurement accuracy.
- Сыноочулар: Regularly inspect test leads for any signs of damage, such as cracked insulation or exposed wiring. Replace damaged leads immediately.
7. Кыйынчылыктарды
If you encounter issues with your Walfront PM8211, refer to the following common problems and solutions:
| Көйгөй | Мүмкүн себеп | Чечим |
|---|---|---|
| Дисплей жок же алсыз дисплей | Батареялары аз же өлүк | Батареяларды жаңы AAA 1.5V батарейкалары менен алмаштырыңыз. |
| Так эмес окуулар | Low battery, incorrect function selection, damaged test leads | Replace batteries, ensure correct function is selected, check and replace test leads if damaged. |
| Үзгүлтүксүздүк сигналы жок | Open circuit, high resistance, or incorrect mode | Verify the circuit path, ensure resistance is below threshold for beep, confirm continuity mode is selected. |
| NCV аныкталбайт томtage | Тtage too low, incorrect mode, or device malfunction | Ensure NCV mode is active, test on a known live source, contact support if issue persists. |
8. Техникалык шарттар
Detailed technical specifications for the Walfront PM8211 Digital Pen Type Multimeter.
- Продукциянын өлчөмдөрү: 9.84 x 1.57 x 1.3 дюйм
- Элемент Салмагы: 3.52 унция
- Модель номери: PM8211
- Өндүрүүчү: Walfront
- Батареялар талап кылынат: No (requires 2x AAA 1.5V, not included)
- Функциялары: DC Voltage, AC Voltage, DC Current, AC Current, Resistance, Diode, Continuity, Non-Contact Voltage (NCV)
- Өзгөчөлүктөр: Automatic/Manual Range, Data Hold, Auto-Off, Backlight, Flashlight, Sound and Light Alarm.
9. Кепилдик жана колдоо
Кепилдик маалыматы же техникалык колдоо үчүн продуктунун таңгагын караңыз же сатуучуга кайрылыңыз. Сатып алганыңыздын далили катары сатып алуу дүмүрчөгүңүздү сактаңыз.
