1. Продукт бүтүп калдыview
The Electrolux EEG48200L is an integrated dishwasher designed for efficient and quiet dishwashing. This appliance features a capacity of 14 place settings and operates at a low noise level of 44 decibels. It includes multiple wash programs and convenient loading options such as a cutlery drawer and a cutlery basket.
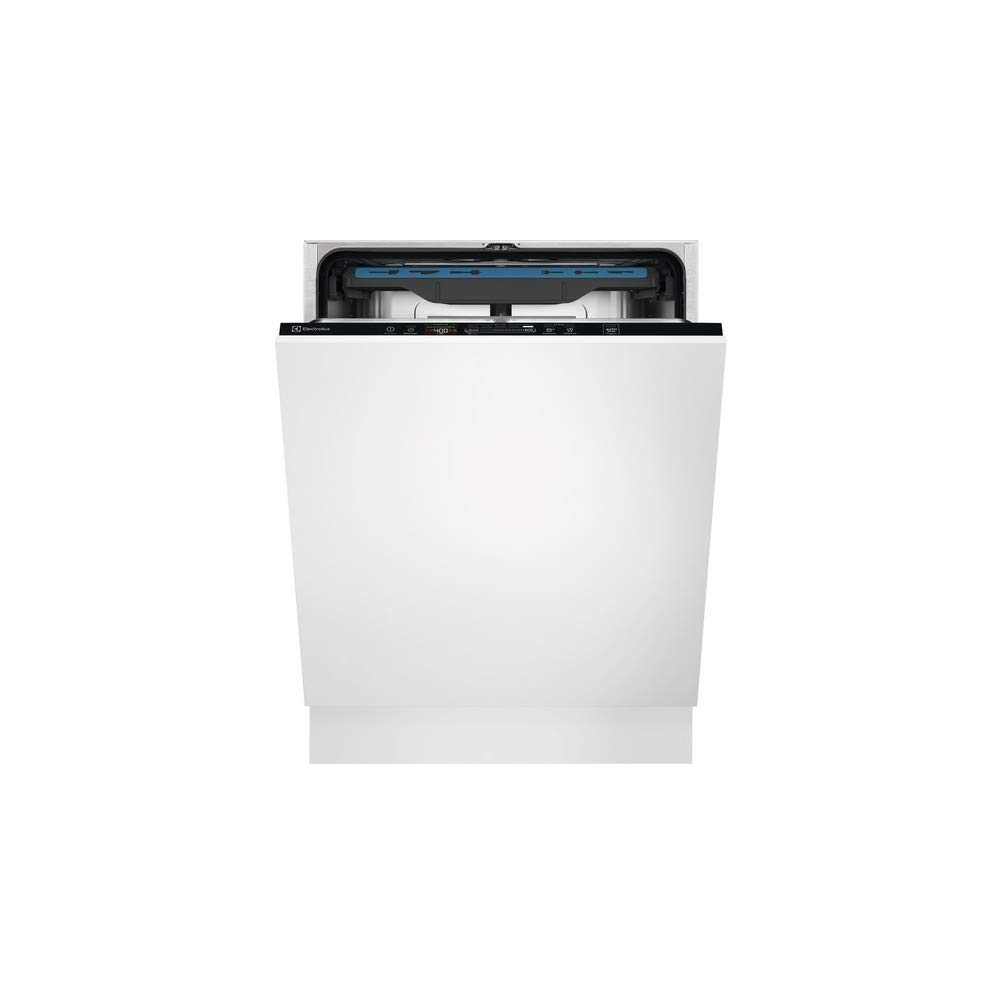
1-сүрөт: Electrolux EEG48200L Integrated Dishwasher. This image shows the front view of the dishwasher, typically installed within kitchen cabinetry.
Негизги өзгөчөлүктөрү:
- Сыйымдуулугу: 14 орун орнотуулары
- Ызы-чуу деңгээли: 44 децибел
- Башкаруу түрү: Fully integrated controls
- Орнотуу түрү: Интеграцияланган / Камтылган
- Камтылган компоненттер: Cutlery basket, cutlery drawer
- Цикл параметрлери: 8 жуу программасы
2. Орнотуу жана орнотуу
Proper installation is crucial for the safe and efficient operation of your Electrolux EEG48200L dishwasher. Ensure all connections are secure and meet local regulations.
2.1. Dimensions and Cabinetry Requirements
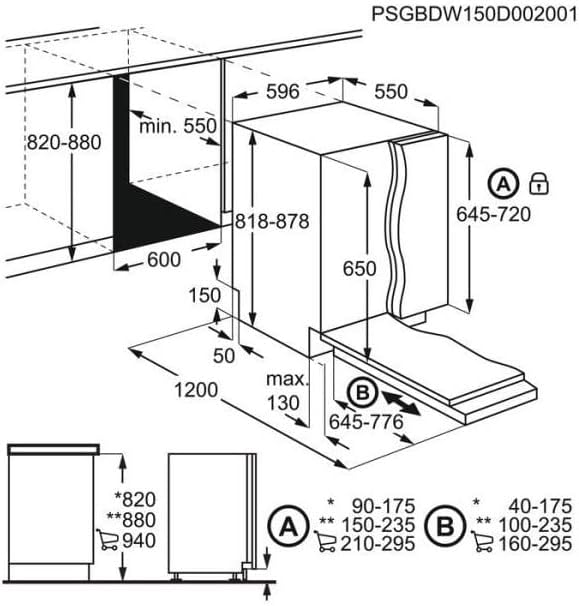
Refer to the diagram below for detailed dimensions and cabinetry requirements for integrating your dishwasher.
2-сүрөт: Installation dimensions for the Electrolux EEG48200L dishwasher. This diagram illustrates the required cabinet opening dimensions (width 600mm, height 820-880mm), dishwasher unit dimensions (width 596mm, height 818-878mm), and panel dimensions (height 645-720mm for panel A, 645-776mm for panel B). It also shows the adjustable feet and minimum clearances.
- Cabinet Opening Width: 600 мм
- Cabinet Opening Height: 820 - 880 мм
- Dishwasher Unit Dimensions (W x H): Approximately 596 mm x 818-878 mm
- Тереңдик: Minimum 550 mm for the cabinet.
- Front Panel Dimensions:
- Panel A (top): 645 - 720 mm height
- Panel B (bottom): 645 - 776 mm height
- Жөнгө салынуучу буттар: Бийиктигин жөнгө салууга мүмкүндүк берет.
2.2. Суу жана электр байланыштары
Connect the water inlet hose to a cold or hot water supply (max 60°C) and the drain hose to a suitable drain. Ensure the electrical connection is properly grounded and matches the appliance's power requirements. Consult a qualified technician for installation if you are unsure.
3. Иштөө нускамалары
Follow these steps for optimal performance and cleaning results.
3.1. Идиш жуугучка жүктөө
- Жүктөө алдында идиштерден чоң тамак-аш бөлүкчөлөрүн кырып салыңыз.
- Төмөнкү себетке чоңураак нерселерди, үстүнкү себетке кичирээк, назик нерселерди салыңыз.
- Utilize the dedicated cutlery drawer or basket for forks, knives, and spoons, ensuring they do not nest together.
- Ensure spray arms can rotate freely and are not blocked by dishes.
3.2. Жуучу каражатты жана чайкоочу каражатты кошуу
- Fill the detergent dispenser with the appropriate amount of dishwasher detergent according to the program selected and water hardness.
- Чайгычтын индикаторун текшериңиз жана сызыксыз кургатуу үчүн зарыл болгон учурда чайкоо жардамчы диспенсерди кайра толтуруңуз.
- If your water is hard, ensure the salt reservoir is filled with dishwasher salt to prevent limescale buildup.
3.3. Selecting and Starting a Wash Program
- Идиш жуугуч машинанын эшигин жабыңыз.
- Select the desired wash program using the control panel. The dishwasher offers 8 cycle options.
- Циклди баштоо үчүн Start баскычын басыңыз.
- A light indicator on the floor may signal that the dishwasher is in operation.
- The dishwasher may automatically open its door at the end of the cycle to assist with drying.
4. Техникалык тейлөө жана кам көрүү
Үзгүлтүксүз техникалык тейлөө идиш жуугуч машинаңыздын узак жана натыйжалуулугун камсыздайт.
4.1. Чыпкаларды тазалоо
- Periodically check and clean the coarse and fine filters located at the bottom of the dishwasher tub.
- Remove any food debris to prevent blockages and ensure proper drainage.
4.2. Ички жана тышкы тазалоо
- Жарнама менен интерьерди сүртүңүзamp ар кандай калдыктарды алып салуу үчүн кездеме.
- Clean the exterior control panel and door with a soft, damp кездеме. Абразивдүү тазалагычтардан алыс болуңуз.
4.3. Кышка даярдоо (эгер бар болсо)
If the dishwasher is in an unheated area and there is a risk of freezing, drain all water from the appliance and disconnect the water supply. Consult the full manual for detailed winterization procedures.
5. Кыйынчылыктарды
Before contacting customer service, refer to the following common issues and solutions.
5.1. Dishwasher Does Not Start
- Эшик толугу менен жабылып, бекитилип турганын текшериңиз.
- Электр шнурунун розеткага бекем сайылганын текшериңиз.
- Автоматтык өчүргүч өчүп калбаганын текшериңиз.
- Confirm that a wash program has been selected and the Start button pressed.
5.2. Poor Cleaning Results
- Check if the spray arms are blocked or clogged.
- Идиштердин туура салынганын, суунун бардык беттерге жетишин камсыз кылыңыз.
- Verify that the detergent dispenser was filled correctly and the detergent is fresh.
- Чыпкаларды тазалаңыз.
- Check rinse aid and salt levels.
5.3. Water Not Draining
- Inspect the drain hose for kinks or blockages.
- Clean the filters to ensure no debris is obstructing the drain pump.
For more complex issues or persistent problems, please contact Electrolux customer service.
6. Техникалык шарттар
Detailed technical specifications for the Electrolux EEG48200L dishwasher.
| Өзгөчөлүк | Спецификация |
|---|---|
| Модель аты | EEG48200L |
| Бренд | Electrolux |
| Орнотуу түрү | Интеграцияланган |
| Кубаттуулугу | 14 Орун орнотуулары |
| Ызы-чуу деңгээли | 44 децибел |
| Продукциянын өлчөмдөрү (L x W x Y) | 54.99 x 59.59 x 81.79 см (болжол менен 55 x 59.6 x 81.8 см) |
| Элемент Салмагы | 37.08 Kilograms (approx. 37.1 kg) |
| Number of Cycle Options | 8 |
| Дисплей түрү | LED |
| Башкаруу түрү | Толугу менен интеграцияланган |
| Түс | Ак |
| Камтылган компоненттер | Cutlery basket, cutlery drawer |
| Аяктоо түрү | Жылтырак |
7. Кепилдик жана колдоо
Кепилдик боюнча кенен маалымат алуу үчүн продуктуңузга кошулган кепилдик картасын караңыз же расмий Electrolux компаниясына баш багыңыз. webсайт. Кепилдиктин шарттары жана шарттары аймакка жараша өзгөрүшү мүмкүн.
For technical assistance, spare parts, or customer service inquiries, please contact your local Electrolux customer support. Have your model number (EEG48200L) and serial number ready when contacting support.


