1. Киришүү
The WiMiUS H7 Trail Game Camera is designed for outdoor wildlife observation, security monitoring, and hunting applications. It features 16MP still image capture, 1080P video recording, night vision capabilities, and motion activation. This manual provides detailed instructions for setting up, operating, and maintaining your camera to ensure optimal performance.
2. Продукт бүтүп калдыview
Familiarize yourself with the main components of your WiMiUS H7 Trail Game Camera.
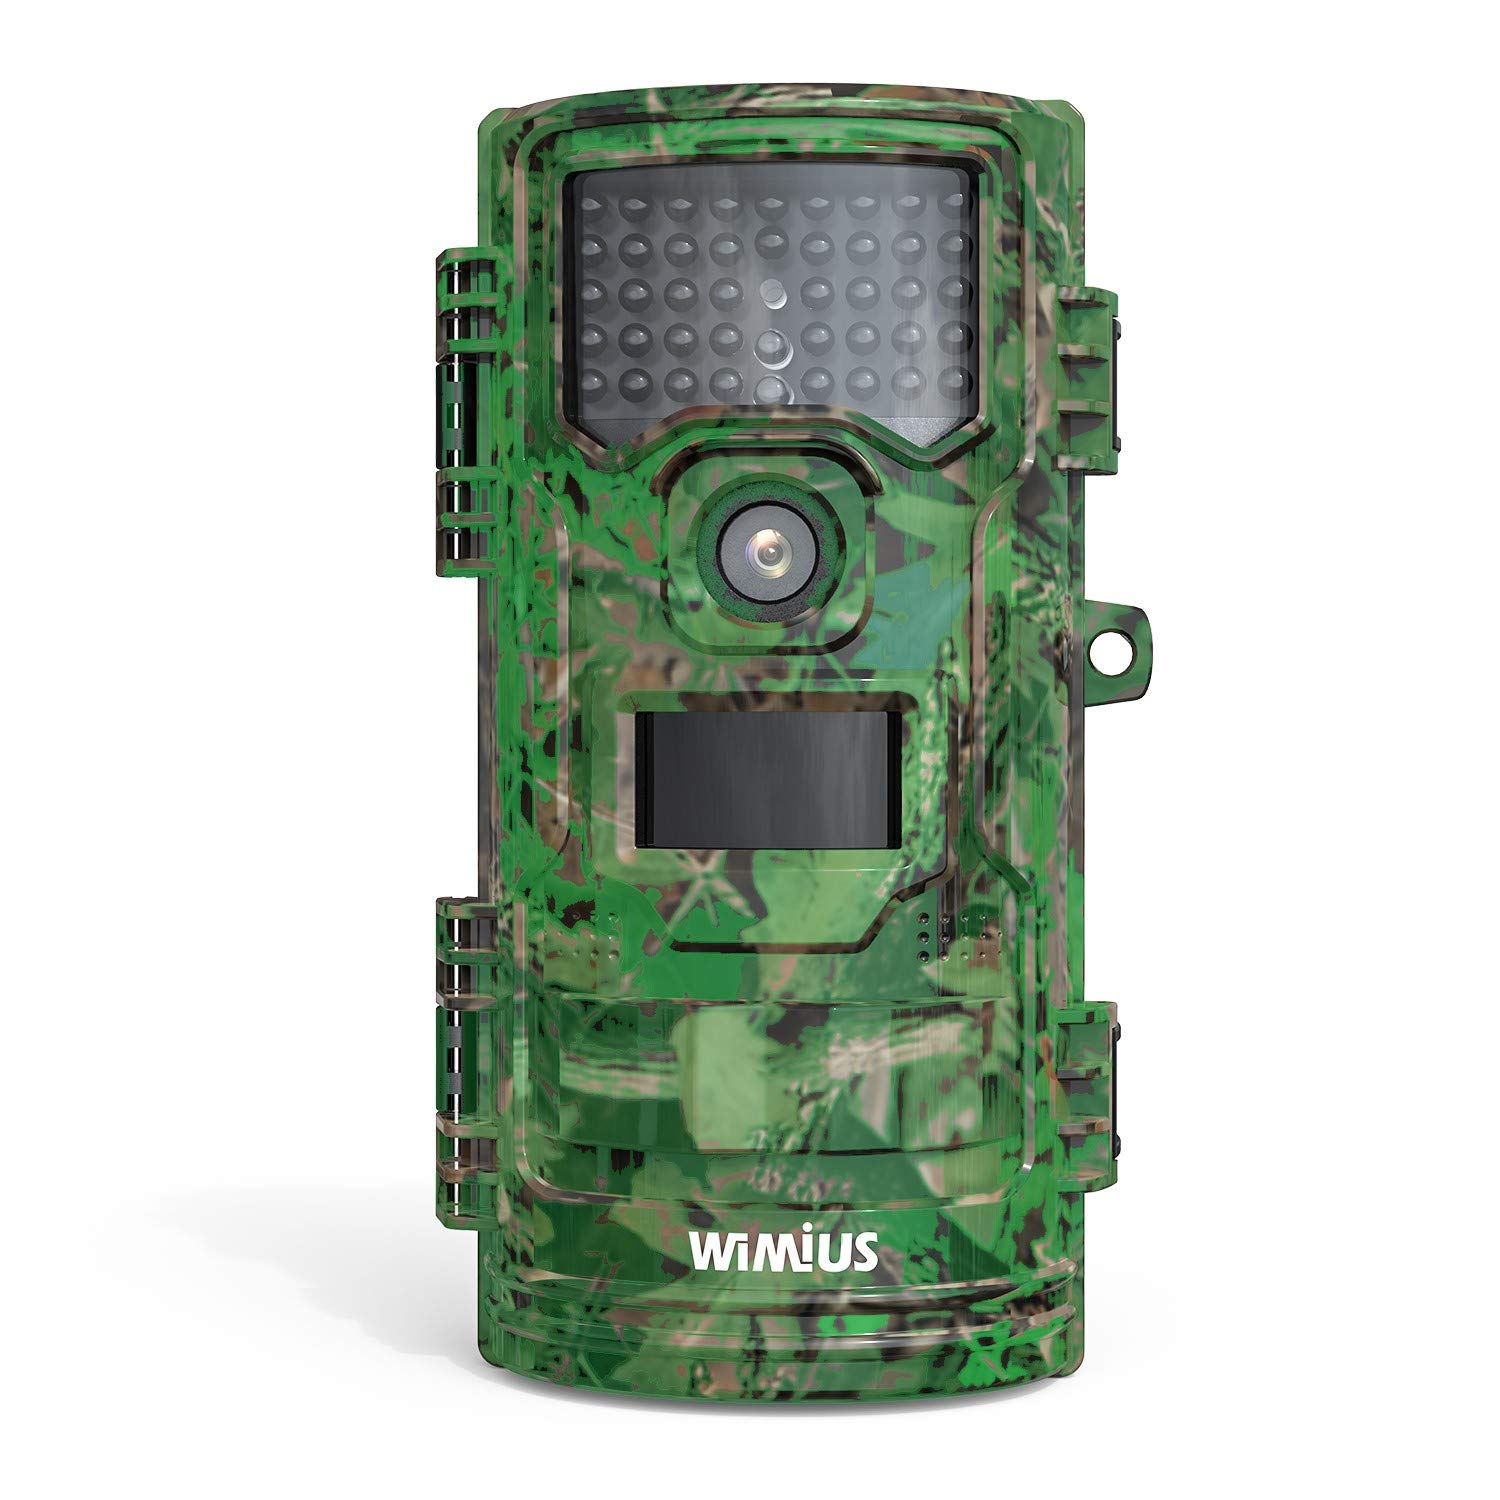
1-сүрөт: Фронт view of the WiMiUS H7 Trail Game Camera. This image displays the front of the WiMiUS H7 Trail Game Camera, featuring a camouflage design. Visible components include the main camera lens, the Passive Infrared (PIR) motion sensor, and the array of infrared LEDs for night vision. The camera's robust casing is designed for outdoor use.
Негизги компоненттер:
- Негизги линза: Captures photos and videos.
- PIR Кыймыл сенсору: Жаздырууну иштетүү үчүн кыймылды аныктайт.
- IR Диоддордон: Provide illumination for night vision without visible light.
- 2.4 дюймдук LCD экран: Меню навигациясы, жөндөөлөрдү тууралоо жана ойнотуу үчүн.
- Башкаруу баскычтары: Menu, Up, Down, OK for navigation.
- Батарея бөлүмү: 8 AA батарейкасын кармайт.
- Микро SD карта слоту: Тартылган медианы сактоо үчүн.
- Монтаждоо пункттары: For strap, tripod, or wall mount.
3. Орнотуу
3.1 Батареяны орнотуу
- Open the camera's front cover latches.
- Батарея бөлүмүн камеранын арткы бетинен табыңыз.
- Insert 8 new AA batteries (not included), ensuring correct polarity (+/-).
- Батарея бөлүгүнүн капкагын бекем жабыңыз.
3.2 Micro SD картаны орнотуу
- With the camera open, locate the Micro SD card slot.
- Insert a Micro SD card (up to 32GB, not included) into the slot until it clicks into place.
- It is recommended to format the Micro SD card before first use (see Section 3.4).
3.3 Камераны орнотуу
The camera offers several mounting options:
- Боо: Use the included strap to attach the camera to a tree or post.
- Трипод: The camera has a standard tripod screw mount on the bottom.
- Дубалга орнотуу: Utilize the provided mount for fixed installations.
3.4 Initial Settings (Test Mode)
Slide the power switch from "Off" to "Test" to access the camera's menu and settings on the LCD screen.
- Тил: Select your preferred language (e.g., English).
- Дата жана убакыт: Учурдагы күн менен убакытты коюңуз.
- Режим: Choose between Photo, Video, or Photo+Video.
- PIR аралыгы: Adjust the delay between motion detections (e.g., 5 sec, 10 sec, 30 sec, 1 min).
- PIR Level: Set motion sensor sensitivity (Low, Middle, High).
- Capture Num: Number of photos taken per trigger (1, 2, 3).
- Видеонун узундугу: Duration of video recording per trigger (e.g., 10 sec, 30 sec, 1 min).
- Видео өлчөмү: Select video resolution (e.g., 1080P 30fps, 720P 30fps).
- Сүрөттүн өлчөмү: Select photo resolution (e.g., 16M, 12M, 8M).
- Күтүү режиминде: Normal or Super.
- IR LED: Adjust infrared LED power (High, Middle, Low).
- Аудио жаздыруу: Enable or disable audio capture with videos.
- Убакыттын өтүшү: Set intervals for time-lapse photography.
- Таймерди орнотуу: Define specific operational hours for the camera.
- Коопсуздук коду: Set a password to protect camera access.
- Формат: Select "Yes" to format the Micro SD card. This will erase all data on the card.
- Демейки: Restore camera settings to factory defaults.
4. Камераны иштетүү
4.1 Activating Recording
- After configuring settings in "Test" mode, slide the power switch to the "On" position.
- A red LED will flash, indicating a 15-second countdown. This allows you to close the camera and position it without triggering immediate recording.
- Once the countdown finishes, the camera enters active monitoring mode. It will automatically capture photos or videos based on your settings when motion is detected.
4.2 Viewжазууларды кабыл алуу
Сенин колуңдан келет view captured media directly on the camera or on a computer.
- Камерада: Switch the camera to "Test" mode. Use the navigation buttons to browse and play back photos and videos on the LCD screen.
- Компьютерде: Remove the Micro SD card from the camera and insert it into a computer's card reader. The media files андан кийин кирүүгө болот жана viewред.
5. Техникалык тейлөө
- Тазалоо: Gently clean the camera lens, PIR sensor, and IR LEDs with a soft, dry cloth. Avoid abrasive materials or harsh chemicals.
- Батареяны текшерүү: Regularly check battery levels, especially before extended deployment. Replace all batteries simultaneously to ensure consistent power.
- SD Card башкаруу: Periodically format the Micro SD card to maintain optimal performance and prevent data corruption. Back up important files форматтоодон мурун.
- Суу өткөрбөйт: Ensure the rubber seals around the battery compartment and camera housing are clean and properly seated to maintain waterproof integrity.
- Сактагыч: When not in use, store the camera in a cool, dry place, away from direct sunlight and extreme temperatures. Remove batteries for long-term storage.
6. Кыйынчылыктарды
Жалпы маселелер жана чечимдер:
- Камера күйбөй жатат:
Чечим: Check if batteries are inserted correctly with proper polarity. Ensure batteries have sufficient charge. Try new batteries. - Сүрөт/видео тартылган жок:
Чечим: Verify the Micro SD card is inserted correctly and has available space. Format the SD card. Check PIR sensor sensitivity and interval settings. Ensure the camera is in "On" mode, not "Test" or "Off". - Сүрөттүн/видеонун сапаты начар:
Чечим: Clean the camera lens. Adjust photo/video resolution settings. Ensure the camera is stable and not subject to excessive movement. For night images, ensure IR LEDs are not obstructed. - Батареянын ашыкча кубаты:
Чечим: Use high-quality alkaline or rechargeable AA batteries. Reduce PIR sensitivity or increase PIR interval. Ensure the camera is not constantly triggered by environmental factors (e.g., swaying branches). - Incorrect Date/Time Stamp:
Чечим: Re-enter the correct date and time in the settings menu.
7. Техникалык шарттар
| Натыйжалуу дагы эле чечим | 16 MP (Maximum 20 MP) |
| Видео тартуунун резолюциясы | 1080p |
| Screen Size | 2.4 дюйм |
| Сууга туруктуулук деңгээли | Суу өткөрбөйт (IP54) |
| Power Source | 8 AA Batteries (4 AA minimum required) |
| Flash эс тутум түрү | Micro SD (32 ГБ чейин) |
| Өзгөчөлүктөр | Кыймыл сенсору, Түнкү көрүү |
| Иштөө температурасы | 60 градус Цельсийге чейин |
| Байланыш технологиясы | Зымсыз (Wi-Fi) |
| Элемент моделинин номери | CEX107 |
8. Кепилдик жана колдоо
8.1 Кепилдик маалыматы
Your WiMiUS H7 Trail Game Camera is covered by a limited warranty against defects in materials and workmanship. Please refer to the warranty card included with your purchase or visit the official WiMiUS webбелгилүү бир шарттар жана шарттар үчүн сайт.
8.2 Кардарларды колдоо
For technical assistance, troubleshooting, or warranty claims, please contact WiMiUS customer support through their official website or the contact information provided with your product packaging. When contacting support, please have your model number (H7 or CEX107) and purchase details ready.


