Introduction
This user manual provides detailed instructions for the proper use and maintenance of your AUTOPHIX OM123 OBD2 Scanner. The OM123 is a universal automotive diagnostic scan tool designed to read and clear engine fault codes, view live data, and retrieve vehicle information for OBDII/EOBD+CAN compliant vehicles. Please read this manual thoroughly before operating the device.
Продукт бүттүview
The AUTOPHIX OM123 OBD2 Scanner is a compact and user-friendly diagnostic tool. It features a large LCD display with backlight for clear readability and intuitive navigation buttons.
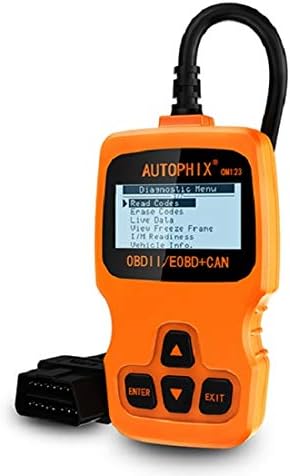
1-сүрөт: Фронт view of the AUTOPHIX OM123 OBD2 Scanner, showing the display and control buttons.
Негизги өзгөчөлүктөрү:
- Диагностикалык функциялар: Reads and clears Diagnostic Trouble Codes (DTCs), turns off the Malfunction Indicator Lamp (MIL), views live data streams, and displays freeze frame data.
- I/M даярдыгы: Checks the status of emission-related monitors to ensure vehicle readiness for emissions testing.
- Унаа тууралуу маалымат алуу: Accesses Vehicle Identification Number (VIN), Calibration ID (CIN), and Calibration Verification Number (CVN).
- Кеңири шайкештик: Supports all OBDII protocols, including CAN, J1850 PWM, J1850 VPW, ISO9141, and KWP2000. Compatible with most vehicles manufactured from 1996 onwards.
- Колдонуучуга ыңгайлуу интерфейс: Features a large 128 x 64 pixel LCD display with white backlight and contrast adjustment. Built-in OBD2 fault code definitions eliminate the need for external lookup.
- Батареялар талап кылынбайт: Powered directly via the detachable OBDII cable from the vehicle's OBDII port.
- Көп тилдүү колдоо: Available in English, French, German, Spanish, Dutch, Finnish, Portuguese, and Russian.

2-сүрөт: The OM123 scanner's display showing the main diagnostic menu options: Read Codes, Erase Codes, Live Data, View Freeze Frame, I/M Readiness, and Vehicle Info.
Түзмөктүн өлчөмдөрү:

3-сүрөт: Dimensions of the AUTOPHIX OM123 scanner: approximately 125mm (height), 70mm (width), and 22mm (thickness).
Жайгашуу
- OBDII портун табыңыз: The OBDII port is typically located under the dashboard on the driver's side of the vehicle. Refer to your vehicle's owner's manual for the exact location.
- Сканерди туташтыруу: With the vehicle's ignition off, firmly plug the OM123 scanner's OBDII connector into the vehicle's OBDII port.
- Күйгүзүү: Turn the vehicle's ignition to the "ON" position (do not start the engine). The scanner will automatically power on and display the main menu.
- Тилди тандоо (зарыл болсо): If the device is not in your preferred language, navigate to the "Settings" or "System Setup" menu (if available) to select the desired language.
Иштөө нускамалары
Once the scanner is connected and powered on, use the UP жана ылдый arrow buttons to navigate through the menu options, the ENTER Тандоону ырастоо үчүн баскычты басыңыз жана ЧЫГУУ мурунку экранга кайтуу үчүн баскычты басыңыз.
1. Коддорду окуу
Бул функция унаанын компьютеринен диагностикалык көйгөй коддорун (DTC) алат. Бул коддор унаанын борттогу диагностикалык системасы тарабынан аныкталган белгилүү бир көйгөйлөрдү көрсөтөт.
- Негизги менюдан тандаңыз "Коддорду окуу" жана басыңыз ENTER.
- Сканер унаа менен байланышып, сакталган бардык DTCлерди көрсөтөт.
- колдонуу UP жана ылдый buttons to scroll through multiple codes if present. The built-in DTC library provides definitions for common codes.
2. Коддорду өчүрүү
This function clears all Diagnostic Trouble Codes (DTCs) from the vehicle's computer and turns off the Malfunction Indicator Lamp (MIL), also known as the "Check Engine" light. Ensure any underlying issues are resolved before clearing codes, as they may reappear if the problem persists.
- Негизги менюдан тандаңыз "Коддорду өчүрүү" жана басыңыз ENTER.
- Тандооңузду ырастаңыз.
- The scanner will clear the codes and the MIL should turn off.
3. Live Data
This function displays real-time operational parameters from the vehicle's sensors and modules. This data can be useful for diagnosing intermittent problems or verifying repairs.
- Негизги менюдан тандаңыз "Түз эфирдеги маалыматтар" жана басыңыз ENTER.
- The scanner will display a list of available data parameters.
- колдонуу UP жана ылдый buttons to scroll through the data.
4. View Кадрларды тоңдуруп коюу
When an emission-related fault occurs, the vehicle's computer stores a "freeze frame" of data, capturing the engine conditions at the moment the fault was detected. This snapshot can help in diagnosing the cause of the problem.
- Негизги менюдан тандаңыз "View Freeze Frame" жана басыңыз ENTER.
- The scanner will display the stored freeze frame data.
5. I/M даярдыгы
I/M Readiness (Inspection/Maintenance Readiness) indicates whether the various emission-related systems on the vehicle are functioning correctly and have completed their self-tests. This is crucial for emissions testing.
- Негизги менюдан тандаңыз "И/А даярдык" жана басыңыз ENTER.
- The scanner will display the status of various monitors (e.g., Catalyst Monitor, O2 Sensor Monitor). "OK" or "Complete" indicates the test has passed; "INC" or "Not Complete" indicates the test has not yet run or failed.
6. Унаа маалыматы
Бул функция сизге унаанын идентификациялык маанилүү маалыматтарын алууга мүмкүндүк берет.
- Негизги менюдан тандаңыз "Vehicle Info." жана басыңыз ENTER.
- The scanner will display information such as VIN (Vehicle Identification Number), CIN (Calibration Identification Number), and CVN (Calibration Verification Number).
Техникалык тейлөө
- Тазалоо: Сканердин сканерин тазалоо үчүн жумшак, кургак чүпүрөктү колдонуңузasing and screen. Avoid using abrasive cleaners or solvents.
- Сактагыч: Store the device in a clean, dry environment, away from extreme temperatures and direct sunlight.
- Кабельге кам көрүү: Ensure the OBDII cable is not kinked or damaged. Always grasp the connector when plugging or unplugging, not the cable itself.
- Программалык камсыздоо жаңыртуулары: Өндүрүүчүнү текшериңиз webОптималдуу иштөөнү жана шайкештикти камсыз кылуу үчүн мезгил-мезгили менен сайттагы программалык камсыздоонун бардык жеткиликтүү жаңыртуулары үчүн маалымат алып туруңуз.
Проблемаларды чечүү
| Көйгөй | Мүмкүн себеп | Чечим |
|---|---|---|
| Scanner does not power on or screen is blank. |
|
|
| Унаа менен байланыш катасы. |
|
|
| Коддорду тазалоо мүмкүн эмес. |
|
|
Техникалык шарттар
| Өзгөчөлүк | Деталь |
|---|---|
| Модель номери | OM123 |
| Дисплей | 128 x 64 pixel LCD with white backlight and contrast adjustment |
| Operating Voltage | 9-16V (OBDII порту аркылуу) |
| Колдоого алынган протоколдор | CAN, J1850 PWM, J1850 VPW, ISO9141, KWP2000 |
| Иштөө температурасы | 0°Cден 60°Cге чейин (32°F—140°F) |
| Сактоо температурасы | -20°Cден 70°Cге чейин (-4°Fтен 158°Fге чейин) |
| Өлчөмдөр | Болжол менен 125мм x 70мм x 22мм |
| Салмагы | Болжол менен 10.4 унция (295 грамм) |
| Сертификаттар | FCC, CE, RoHS |
Кепилдик жана колдоо
The AUTOPHIX OM123 OBD2 Scanner comes with a one-year warranty from the date of purchase, covering manufacturing defects. For technical support, warranty claims, or further assistance, please contact AUTOPHIX customer service through their official webпродукт сатылып алынган сайт же сатуучу.
Көбүрөөк маалымат алуу үчүн расмий иш сапары менен AUTOPHIX Store.


