1. Киришүү
This manual provides essential instructions for the setup, operation, and maintenance of your SUNMI T2 Smart POS Terminal. The T2 is an integrated point-of-sale device featuring a 15.6-inch Full HD touch screen and a built-in thermal printer, designed for various commercial applications.
2. Продукт бүтүп калдыview
2.1 Аппараттын компоненттери
The SUNMI T2 terminal integrates a high-resolution display, a powerful processor, and a thermal printer into a single unit. Key components include:
- 15.6-inch Full HD Touch Screen (1920x1080)
- Integrated Thermal Printer (80mm paper width, 200mm/s print speed)
- Base Unit with connectivity ports
- Power Input
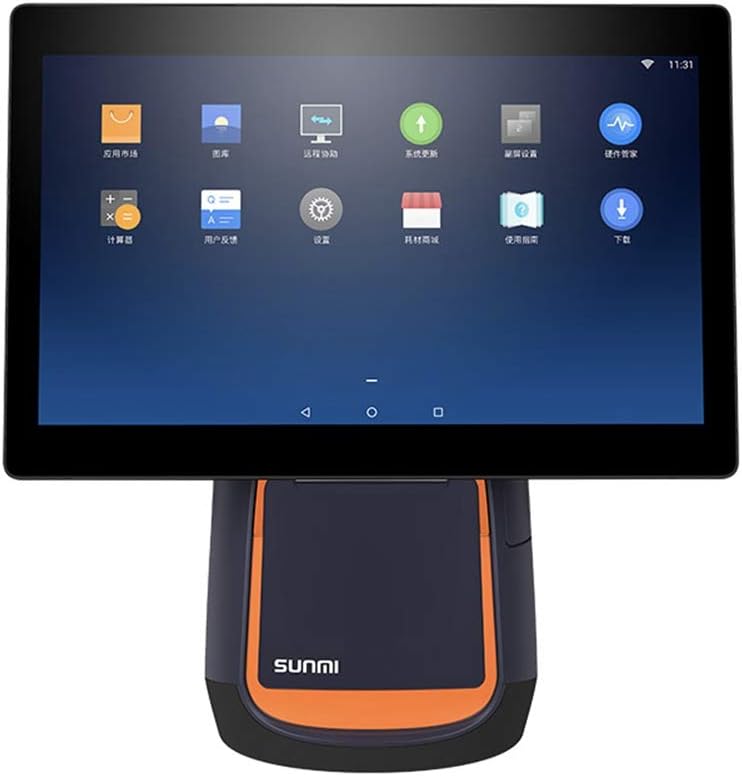
Сүрөт 2.1: Алдыңкы view of the SUNMI T2 Smart POS Terminal. The 15.6-inch touch screen is visible, displaying various application icons, indicating its Android operating system interface.

2.2-сүрөт: Каптал view of the SUNMI T2 terminal, illustrating the design of the stand and the adjustable angle of the main display unit.
2.2 Пакеттин мазмуну
Таңгактан чыгаргандан кийин, бардык буюмдар бар экенин текшериңиз:
- SUNMI T2 Printer (T2 model)
- Электр кабели
- Колдонуучунун Колдонмосу (бул документ)
3. Орнотуу нускамалары
3.1 Пакеттен чыгаруу жана жайгаштыруу
- Carefully remove the SUNMI T2 terminal from its packaging.
- Place the device on a stable, flat surface, ensuring adequate ventilation around the unit.
- Avoid placing the device near heat sources, direct sunlight, or in areas with high humidity or dust.
3.2 Кубат туташтыруу
- Connect the provided power cable to the power input port located at the rear of the device base.
- Электр кабелинин экинчи учун стандарттуу электр розеткасына сайыңыз.
- The device will typically power on automatically or can be powered on using the power button.
3.3 Баштапкы күйгүзүү жана конфигурация
- Press and hold the power button (refer to Section 5.1 for button location) until the screen illuminates.
- Follow the on-screen prompts to complete the initial setup, including language selection, Wi-Fi connection, and time zone settings.
- Connect to your local network via Wi-Fi or Ethernet (if available) to ensure proper functionality and updates.
4. Иштөө нускамалары
4.1 Сенсордук экрандын иштеши
The SUNMI T2 features a capacitive multi-touch screen. Operate the device using standard touch gestures:
- таптаңыз: Элементтерди тандаңыз же функцияларды иштетиңиз.
- Серпүү: Navigate through menus or scroll content.
- Чымчып чоңойтуу: Adjust the size of on-screen content.
4.2 Integrated Printer Operation
The T2 includes an 80mm thermal printer for receipts and order tickets.
4.2.1 Принтерге кагаз жүктөлүүдө
- Locate the printer cover on the front of the device base.
- Press the release button or latch to open the printer cover.
- Insert a new roll of 80mm thermal paper, ensuring the paper feeds from the bottom and the leading edge extends slightly out of the printer slot.
- Принтердин капкагын ордуна чыкылдаган үн чыкканча бекем жабыңыз.
- Tear off any excess paper.
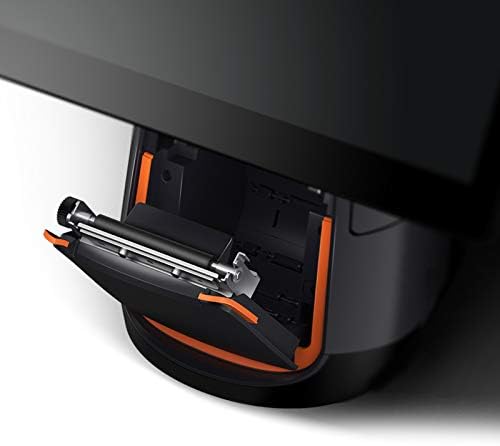
4.1-сүрөт: Детальдуу view of the integrated thermal printer compartment with the cover open, illustrating the correct method for inserting a new 80mm thermal paper roll.

4.2-сүрөт: Ички view of the SUNMI T2's thermal printer mechanism, highlighting its design for efficient paper handling and high-speed printing up to 200mm/s.
4.2.2 Квитанцияларды басып чыгаруу
Once paper is loaded, the printer will automatically activate when a print command is issued from your POS software application. Ensure your application is correctly configured to use the integrated printer.
4.3 Байланыш
The SUNMI T2 supports various connectivity options:
- Wi-Fi: 2.4G/5G (IEEE 802.11 a/b/g/n) for wireless network access.
- Bluetooth: Supports Bluetooth 2.1/3.0/4.0 (BLE) for connecting peripherals.
- USB порттору: USB Type A port x1, USB 3.1 Type C x1, USB 2.0 x2 (total 3 USB ports).
- RJ11: Cash drawer port x1.
- RJ45: LAN port x1 for wired network connection.
- Гарнитура уячасы: 3.5 мм аудио чыгаруу.
- Микро-USB: Debug port x1.
Connect external devices such as barcode scanners, external keyboards, or cash drawers to the appropriate ports as needed.
5. Техникалык тейлөө
5.1 Аппаратты тазалоо
- Power off the device and disconnect the power cable before cleaning.
- Бир аз жумшак, түксүз кездемени колдонуңуз dampened with water or a mild, non-abrasive cleaner to wipe the screen and exterior surfaces.
- Do not use harsh chemicals, abrasive pads, or excessive moisture.
- For the thermal printer head, use a specialized thermal printer cleaning pen or card to ensure optimal print quality.
5.2 Программалык камсыздоо жаңыртуулары
Regularly check for and install software updates for the SUNMI OS and your POS application to ensure optimal performance, security, and access to new features. Updates can typically be found in the device's settings menu or through your POS software provider.
6. Кыйынчылыктарды
6.1 Жалпы маселелер жана чечимдер
- Түзмөк күйбөйт:
- Ensure the power cable is securely connected to both the device and a working electrical outlet.
- Электр розеткасынын иштешин текшериңиз.
- Try pressing and holding the power button for 10-15 seconds.
- Экран жооп бербей жатат:
- Аппаратты кайра иштетиңиз.
- Экран таза жана таштандылардан таза экенин текшериңиз.
- Принтер басып чыгарбай жатат:
- Check if thermal paper is loaded correctly and not jammed.
- Принтердин капкагы бекем жабылганын текшериңиз.
- Verify that the POS application is sending print commands and is configured for the integrated printer.
- Аппаратты кайра иштетиңиз.
- No network connection (Wi-Fi/Ethernet):
- Check Wi-Fi settings and ensure you are connected to the correct network.
- For Ethernet, ensure the cable is securely connected to the RJ45 port and your router/switch.
- Restart your network equipment (router/modem).
If issues persist, refer to the support section or contact your vendor.
7. Техникалык шарттар
The following table details the technical specifications of the SUNMI T2 Smart POS Terminal:

Figure 7.1: ашыкview of SUNMI T2 Technical Specifications, detailing hardware and software components.
| Өзгөчөлүк | Деталь |
|---|---|
| Модел | T2 |
| Негизги дисплей | 15.6" FHD, 1920x1080 |
| Процессор | Qualcomm Snapdragon Octa-core processor |
| Операция системасы | Android 7.1, SUNMI OS |
| Эс | 2 ГБ ОЗУ, 16 ГБ ROM |
| Сенсордук экран | G+G capacitive multi-touch screen |
| Принтер | Built-in high speed 80mm thermal printer with automatic cutter, print speed 200mm/s |
| Wi-Fi | 2.4G/5G (IEEE 802.11 a/b/g/n) |
| Bluetooth | Supports Bluetooth 2.1/3.0/4.0 (BLE) |
| Тышкы порттор | USB Type A x1, RJ11 cash drawer x1, RJ45 LAN x1, Headphone jack x1, Power port x1, Micro-USB debug x1 |
| USB порттору | USB 3.1 Type C x1, USB 2.0 x2 |
| Тышкы эс | Supports MicroSD (TF) up to 64GB |
| Кубаттуу адаптер | Киргизүү: AC100-240V/1.7A, Чыгуу: DC24V/2.5A |
| Өлчөмдөр | 37.4cm x 33.8cm x 22.4cm |
| Элемент Салмагы | 17.6 фунт (болжол менен 7.98 кг) |
| Иштөө чөйрөсү | Temp: 0°C - 40°C |
| Сактоо чөйрөсү | Temp: -20°C - 60°C |
8. Кепилдик жана колдоо
For warranty information and technical support, please refer to the documentation provided with your purchase or contact the vendor/manufacturer directly. Keep your purchase receipt as proof of purchase.
Manufacturer: Kunxilin Electronic CO. (Brand: SUNMI)


