1. Киришүү
This manual provides detailed instructions for the installation, operation, and maintenance of your Antec NX210 Mid-Tower ATX Computer Cabinet. Please read this manual thoroughly before beginning assembly or use to ensure proper functionality and safety.
The Antec NX210 is designed to accommodate ATX, Micro-ATX, and ITX motherboards, offering ample space for components and efficient cooling with pre-installed ARGB fans.
2. Коопсуздук маалыматы
Орнотуу жана эксплуатациялоо учурунда төмөнкү коопсуздук чараларын сактаңыз:
- Always disconnect the power supply from the wall outlet before installing or removing any components to prevent electric shock.
- Handle components with care to avoid damage from static electricity. Consider using an anti-static wrist strap.
- Keep the cabinet away from direct sunlight, heat sources, and moisture.
- Ашыкча ысып кетүүнүн алдын алуу үчүн туура желдетүүнү камсыз кылыңыз. Аба желдеткичтерин жаап албаңыз.
- Майда тетиктерди жана шаймандарды балдар жетпеген жерде сактаңыз.
3. Пакеттин мазмуну
Пакетте бардык буюмдар бар экенин текшериңиз:
- Antec NX210 Mid-Tower ATX Computer Cabinet
- 4 x 120mm ARGB Fans (3 pre-installed in front, 1 pre-installed in rear)
- Accessory Box (screws, cable ties, etc.)
- Колдонуучунун Колдонмосу (бул документ)
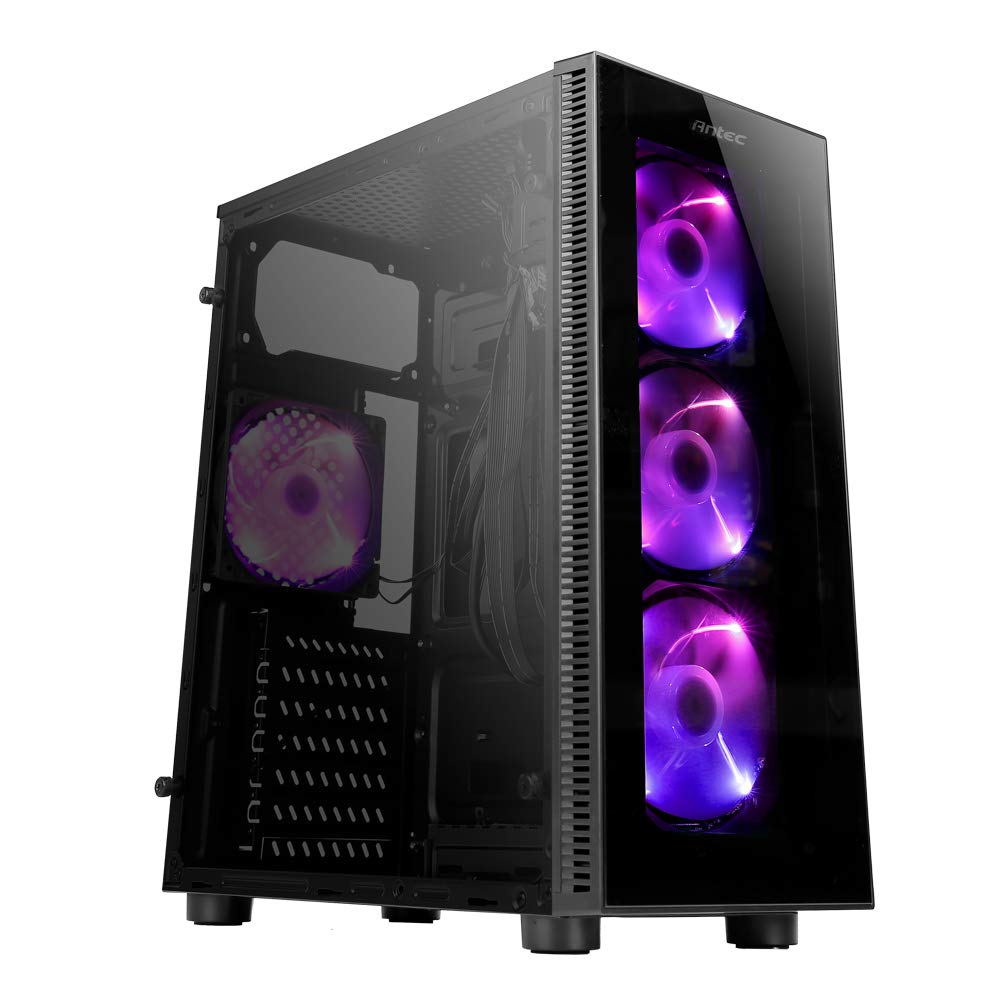
Image: Antec NX210 Mid-Tower ATX Computer Cabinet, showcasing its tempered glass side panel and front ARGB fans.
4. Product Features and Layout
4.1 Тышкы Views

Сүрөт: алдыңкы жана арткы views of the Antec NX210 cabinet, highlighting the tempered glass front panel with ARGB fans and the rear I/O panel layout.

Image: Left side (tempered glass) and right side (solid panel) views of the Antec NX210 cabinet.
4.2 Top I/O Panel
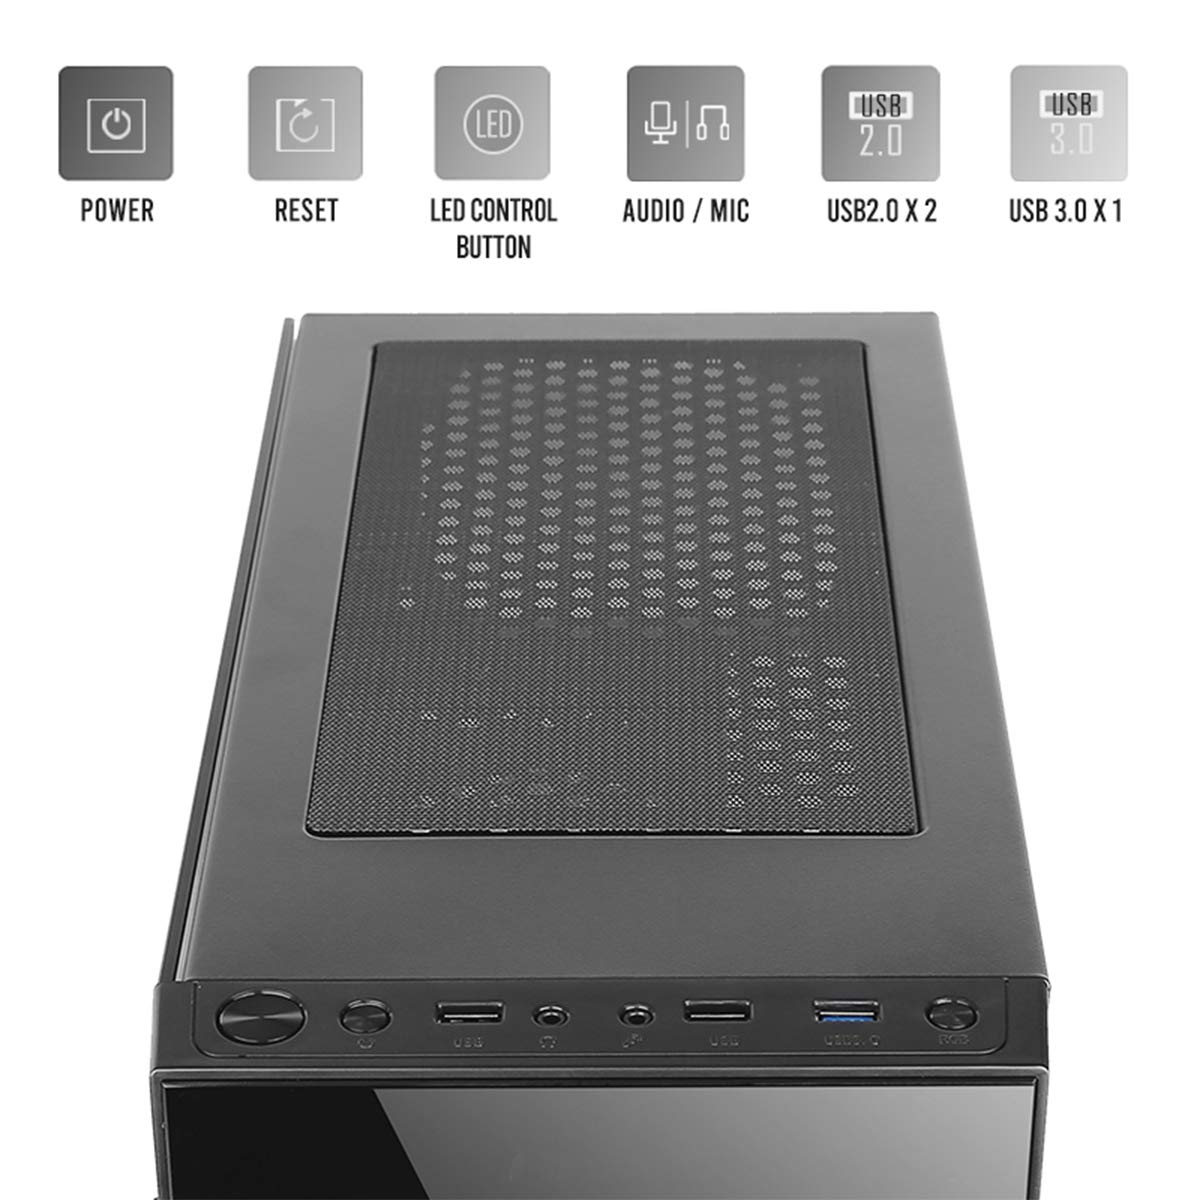
Image: Close-up of the top I/O panel, showing the Power button, Reset button, LED Control button, Audio/Mic jacks, 2x USB 2.0 ports, and 1x USB 3.0 port.
- Кубат баскычы: Системаны күйгүзүү же өчүрүү үчүн.
- Калыбына келтирүү баскычы: Системаны кайра иштетүү үчүн.
- LED башкаруу баскычы: To cycle through ARGB lighting effects for the pre-installed fans.
- Audio / Mic Jacks: Кулакчындарды жана микрофондорду туташтыруу үчүн.
- USB 2.0 порттору (x2): USB 2.0 түзмөктөрүн туташтыруу үчүн.
- USB 3.0 порту (x1): For connecting USB 3.0 devices, offering faster data transfer speeds.
4.3 Ички жайгашуу жана компоненттерди колдоо

Image: Diagram illustrating the internal layout of the Antec NX210, indicating locations for motherboard, SSDs, HDDs, GPU, CPU cooler, and PSU.
- Motherboard колдоо: Up to ATX (also supports Micro-ATX, ITX).
- 2.5" SSD Support: 3 drive bays.
- 3.5" HDD Support: 1 drive bay.
- Графикалык картаны колдоо: узундугу 310 мм чейин.
- CPU Cooler Support: 155 мм бийиктикке чейин.
- PSU колдоо: Up to 220mm in length (top-mounted).
4.4 Муздатуу системасы

Image: Diagram showing fan and radiator mounting options for the Antec NX210, including pre-installed fans.
- Алдын ала орнотулган күйөрмандар: 4 x 120mm ARGB fans (3 in front, 1 in rear).
- Front Fan Support: 3 x 120 мм.
- Rear Fan Support: 1 x 120 мм.
- Радиатор колдоо: Front up to 240mm, Rear up to 120mm.
5. Орнотуу жана орнотуу
Follow these general steps for installing components into your Antec NX210 cabinet. Specific component manuals should be consulted for detailed installation instructions.
5.1 Министрлер кабинетин даярдоо
- Place the cabinet on a stable, flat surface.
- Remove the tempered glass side panel by unscrewing the thumbscrews at the rear and carefully pulling the panel away.
- Remove the right-side metal panel by unscrewing the thumbscrews at the rear.
5.2 Motherboard орнотуу
- Install the I/O shield into the rear opening of the cabinet.
- Align your motherboard with the standoffs inside the cabinet. Ensure the standoffs match your motherboard's form factor (ATX, Micro-ATX, ITX).
- Берилген бурамалар менен энелик тактаны бекитиңиз.
5.3 Электр менен камсыздоо блогун (PSU) орнотуу
- The Antec NX210 supports a top-mounted ATX PS2 power supply.
- Slide the PSU into the designated top compartment from the rear of the cabinet.
- Secure the PSU with screws from the rear of the cabinet.
5.4 Сактоочу дискти орнотуу (HDD/SSD)
- 3.5 дюймдук катуу диск: Locate the 3.5" drive bay. Slide the HDD into the bay and secure it with screws.
- 2.5 дюймдук SSD: Locate the 2.5" SSD mounting points behind the motherboard tray. Secure the SSDs with screws.
5.5 Графикалык картаны (GPU) орнотуу
- Remove the necessary PCIe slot covers from the rear of the cabinet.
- Insert the graphics card into the appropriate PCIe slot on the motherboard.
- Графикалык картаны бурамалар менен бекитиңиз.
5.6 Кабелди башкаруу
Кабелдерди башкаруу үчүн энелик плата лотогунун артындагы кабелдерди өткөрүү кесиктерин жана байлоочу чекиттерди колдонуңуз. Бул аба агымын жана эстетиканы жакшыртат.
5.7 Connecting Front Panel Cables
Connect the front panel cables (Power SW, Reset SW, HDD LED, Power LED, USB 2.0, USB 3.0, HD Audio) to the corresponding headers on your motherboard. Refer to your motherboard manual for exact pin layouts.
6. Иштөө нускамалары
6.1 Күйгүзүү
After all components are installed and cables connected, close both side panels. Connect the power cable to the PSU and a wall outlet. Press the Power button on the top I/O panel to turn on your system.
6.2 ARGB Fan Control
The pre-installed ARGB fans are connected to an internal controller. Use the LED башкаруу баскычы on the top I/O panel to cycle through various lighting modes and effects. The fans will display a default lighting effect upon initial power-up.
7. Техникалык тейлөө
Regular maintenance helps ensure optimal performance and longevity of your computer cabinet.
- Чаң чыпкалары: The Antec NX210 features a dust filter on the top panel. Regularly remove and clean this filter to prevent dust buildup and maintain good airflow.
- Ички тазалоо: Periodically open the side panels and use compressed air to remove dust from internal components and fan blades. Ensure the system is powered off and unplugged before cleaning.
- Тышкы тазалоо: Сырткы беттерин жумшак менен сүртүңүз, гamp кездеме. Абразивдүү тазалагычтардан же эриткичтерден качыңыз.
8. Кыйынчылыктарды
Эгер көйгөйлөргө туш болсоңуз, көйгөйлөрдү чечүүнүн төмөнкү негизги кадамдарын карап көрүңүз:
- Кубат жок:
- PSU розеткага туура туташтырылганын жана PSUдогу кубат которгучу "ON" абалында экенин текшериңиз.
- Verify that the front panel Power button cable is correctly connected to the motherboard header.
- Бардык ички электр байланыштарын текшериңиз (24-пин ATX, 8-пин CPU, GPU үчүн PCIe кубаттуулугу).
- Fans Not Spinning / ARGB Not Working:
- Бардык желдеткичтин кубат кабелдеринин энелик платага же желдеткич контроллерине бекем туташтырылганын текшериңиз.
- Verify ARGB cables are correctly connected to the internal controller and the controller is powered.
- Try pressing the LED Control Button on the top I/O panel to cycle effects.
- USB порттору иштебейт:
- Check that the USB 2.0 and USB 3.0 front panel cables are correctly connected to the corresponding headers on your motherboard.
For more complex issues, consult the manuals for your individual components or seek professional assistance.
9. Техникалык шарттар

Image: Diagram showing the physical dimensions of the Antec NX210 cabinet.
| Өзгөчөлүк | Деталь |
|---|---|
| Модел | NX210 |
| Иштин түрү | Ара Tower |
| Өлчөмдөрү (L x W x Y) | 43.99 x 38.99 x 21.01 см (болжол менен 395 x 210 x 445 мм) |
| Материал | SPCC, чыңалган айнек |
| Motherboard Support | ATX, Micro-ATX, ITX |
| Кеңейтүү уячалары | 7 |
| Drive Bays | 1 x 3.5" катуу диск, 3 x 2.5" SSD |
| Алдыңкы I / O порттору | Power, Reset, LED Control Button, MIC/Audio, 2 x USB 2.0, 1 x USB 3.0 |
| Алдын ала орнотулган күйөрмандар | 4 x 120mm ARGB fans (3 front, 1 rear) |
| Күйөрмандарды колдоо (алдыңкы) | 3 x 120 мм |
| Желдетүүчү колдоо (арткы) | 1 x 120 мм |
| Радиатордук колдоо (алдыңкы) | 240 мм чейин |
| Радиатор колдоо (арткы) | 120 мм чейин |
| Максималдуу GPU узундугу | 310мм |
| CPU муздаткычтын максималдуу бийиктиги | 155мм |
| PSU колдоо | ATX PS2 (Top Mounted), Max length 220mm |
| Чаң чыпкасы | Жогорку |
| Элемент Салмагы | 4.8 кг |
10. Кепилдик жана колдоо
The Antec NX210 Computer Cabinet comes with a 1 жылдык кепилдик сатып алынган күндөн тартып. Кепилдик дооматтары үчүн сатып алганыңыздын далилин сактап коюңуз.
For technical support or warranty inquiries, please contact Antec customer service or your local distributor.
Өндүрүүчү: Antec Inc. 8F, No 107, Jhouzih St, Neihu District, Taipei City 114, Taiwan
Импорттоочу (Индия): Acro Engineering Company, Khasra No 522/1, Village Jonapur, Delhi - 110 030
Көбүрөөк маалыматты жана колдоо булактарын расмий сайттан таба аласыз Amazon'догу Antec дүкөнү.


