1. Киришүү
This manual provides essential information for the safe and efficient operation of your Prixton Goya P20 Mini Portable Projector. Please read it thoroughly before using the device and retain it for future reference.
2. Коопсуздук маалыматы
- l болгондо проектордун объективине тике карабаamp күйүк. Күчтүү жарык көзгө зыян келтириши мүмкүн.
- Проектордун айланасында жакшы желдетүүнү камсыз кылыңыз. Желдетүүчү тешиктерди жаппаңыз.
- Проекторду суудан, нымдуулуктан жана өтө жогорку температурадан алыс кармаңыз.
- Проектор менен келген кубат адаптерин гана колдонуңуз.
- Проекторду өз алдынча бөлүктөргө бөлүүгө же оңдоого аракет кылбаңыз. Квалификациялуу тейлөө кызматкерлерине кайрылыңыз.
- Проектор кулап калбашы үчүн аны туруктуу, түз жерге коюңуз.
3. Пакеттин мазмуну
Пакетте бардык буюмдар бар экенин текшериңиз:
- Prixton Goya P20 Mini Portable Projector
- Алыстан башкаруу
- Кубаттуу адаптер
- Колдонуучунун Колдонмосу (бул документ)

Image: The Prixton Goya P20 projector shown alongside its included remote control.
4. Продукт бүтүп калдыview
4.1. Фронт View

Сүрөт: алдыңкы view of the projector, highlighting the projection lens.
4.2. Арткы жана каптал Views (Порттор)

Image: Rear panel of the projector, showing the VGA input and IR receiver.
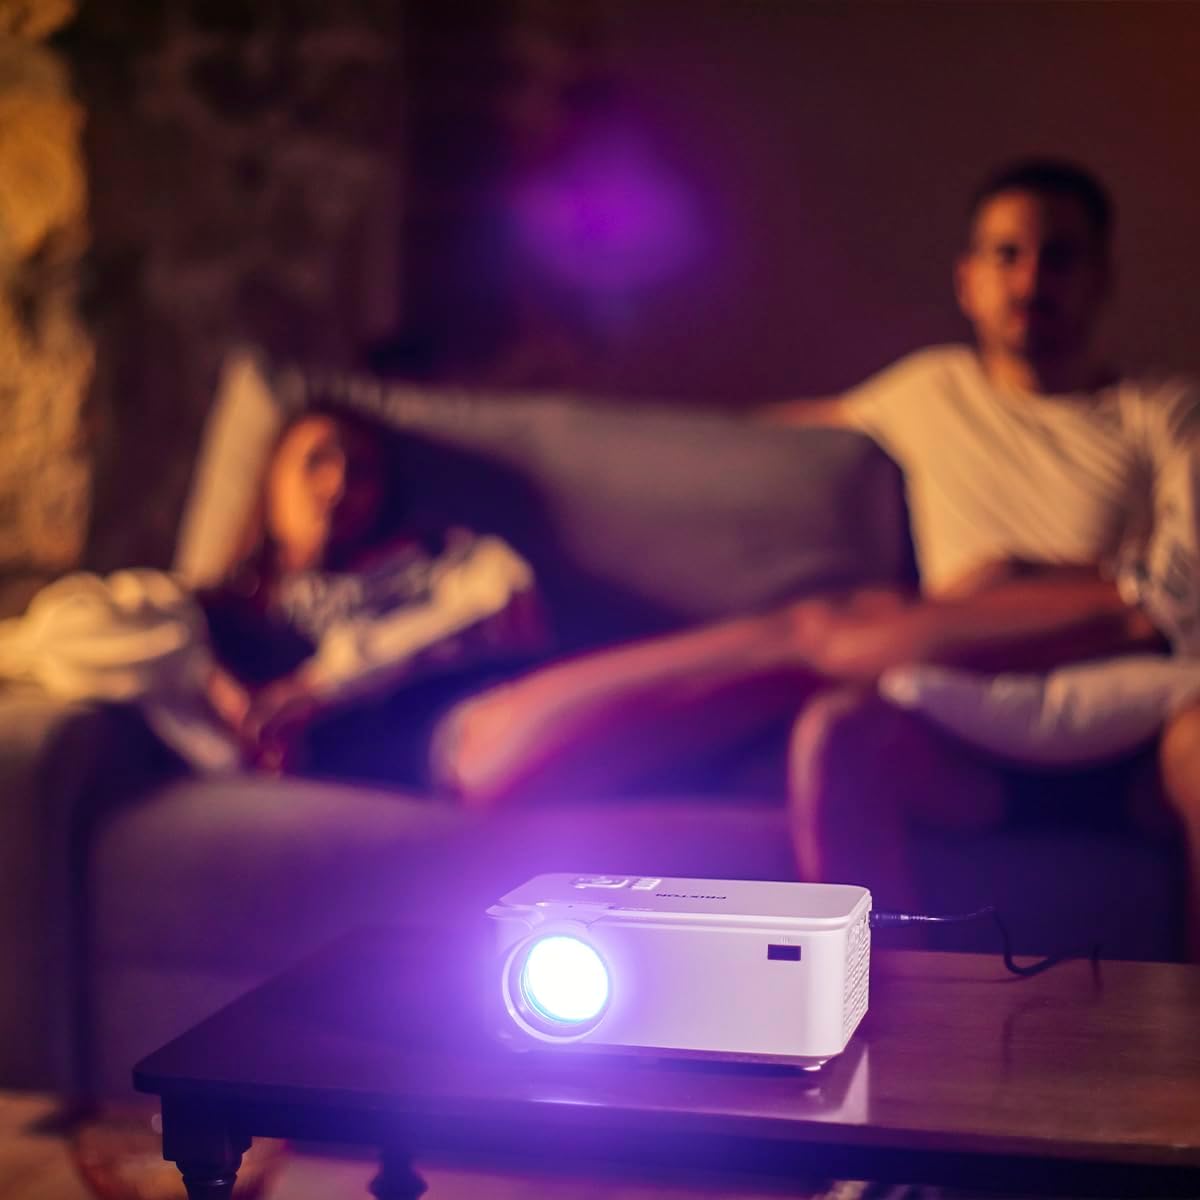
Image: Side panel of the projector, displaying the AV, MicroSD, HDMI (x2), and USB (x2) ports.
4.3. Үстүнкү панелдин башкаруу элементтери

Image: Top panel of the projector, illustrating the control buttons for navigation and power.
The projector features various input ports for connectivity and intuitive controls on the top panel, in addition to the remote control.
5. Орнотуу
5.1. Жайгаштыруу
Place the projector on a flat, stable surface. For optimal viewing, position the projector between 1 to 5 meters from the projection surface. This distance allows for a screen size ranging from 30 to 150 inches.

Image: A visual representation of recommended projection distances (1 to 5 meters) and corresponding screen sizes (30 to 150 inches).
5.2. Power Connection
- Кубат адаптерин проектордун кубат киргизүү портуна туташтырыңыз.
- Кубат адаптерин ылайыктуу электр розеткасына сайыңыз.
5.3. Түзмөктөрдү туташтыруу
Проектор бир нече киргизүү булактарын колдойт:
- HDMI: Connect Blu-ray players, laptops, game consoles, or media players using an HDMI cable.
- USB: Түз медиа ойнотуу үчүн USB флеш-дискти салыңыз.
- VGA: Эски компьютерлерди же ноутбуктарды VGA кабели аркылуу туташтырыңыз.
- MicroSD: Insert a MicroSD card for direct media playback.
- OF: Use the AV port for connecting devices with composite video and stereo audio outputs.

Image: A hand connecting a USB drive to the projector's USB port.
5.4. Фокус жана негизги ташты тууралоо
Use the focus ring near the lens to sharpen the image. If the image appears trapezoidal, adjust the keystone correction to achieve a rectangular projection.
6. Иштөө нускамалары
6.1. Күйгүзүү / Өчүрүү
Аппаратты күйгүзүү же өчүрүү үчүн проектордун же пульттун кубат баскычын басыңыз.
6.2. Булак тандоо
After powering on, use the 'Source' button on the remote or projector to select the desired input source (HDMI1, HDMI2, USB, VGA, AV, MicroSD).
6.3. Медиа ойнотуу
When a USB drive or MicroSD card is inserted, the projector's interface will allow you to browse and play video, audio, photo, and text fileтүздөн-түз с.
6.4. Bluetooth байланышы
The projector supports Bluetooth for audio output. Navigate to the Bluetooth settings in the projector's menu to pair with compatible Bluetooth speakers or headphones.

Image: The projector in operation, casting an image onto a wall in a dimly lit room, demonstrating its home cinema capability.
7. Техникалык тейлөө
7.1. Тазалоо
- Проектордун сыртын тазалоо үчүн жумшак, кургак чүпүрөктү колдонуңуз.
- Линза үчүн, чийилип калбашы үчүн, линзаны тазалоочу атайын чүпүрөктү жана эритмени колдонуңуз.
- Regularly clear dust from the ventilation openings using a soft brush or compressed air.
7.2. Лamp Жашоо
The LED light source in your projector has an estimated lifespan of up to 50,000 hours, providing long-term use without frequent lamp алмаштыруу.
8. Кыйынчылыктарды
| Көйгөй | Мүмкүн себеп | Чечим |
|---|---|---|
| Сүрөт көрсөтүлгөн жок | Power not connected, incorrect input source, device not connected properly. | Check power cable, select correct input source, ensure source device is on and connected securely. |
| Сүрөт бүдөмүк | Focus not adjusted, projection distance too far/close. | Adjust the focus ring. Ensure projector is within the recommended 1-5 meter projection distance. |
| Үн жок | Volume too low, external audio device not connected, incorrect audio settings. | Increase projector volume. Check if external speakers are connected and functioning. Verify audio output settings. |
| Пульт иштебей жатат | Batteries depleted, obstruction between remote and projector. | Replace batteries. Ensure no objects are blocking the IR sensor on the projector. |
| Желдетүүчү ызы-чуу катуу | Normal operation, restricted airflow. | Some fan noise is normal for projectors. Ensure ventilation ports are clear and not obstructed. |
9. Техникалык шарттар
| Өзгөчөлүк | Деталь |
|---|---|
| Бренд | Прикстон |
| Модель номери | Goya P20 |
| Дисплей технологиясы | LED |
| Native Resolution | 800 x 480 |
| Max Display Resolution | 1920 x 1080 (Full HD compatible) |
| Жарыктык | Up to 2800 lumens (40 LED lumens) |
| Контраст катышы | 500:1 |
| Жарык булагы Life | 50,000 саат |
| Байланыш технологиясы | Bluetooth, HDMI (x2), USB (x2), VGA, MicroSD, AV |
| Өзгөчөлүктөр | Integrated speaker, Portable, Remote control included |
| Сунушталган колдонуу | Үй кинотеатры |
| Шайкеш түзмөктөр | Game console, Blu-ray player, Media player, Laptop, Smartphone |
| Форма фактору | Portable |
| Монтаж түрү | Стол орнотуу |
10. Кепилдик жана колдоо
For warranty information and technical support, please refer to the documentation provided at the time of purchase or contact Prixton customer service. Information regarding spare parts availability and software updates is not available in this manual.


