1. Киришүү
This manual provides detailed instructions for the installation, operation, and maintenance of your Nilight ZH409 20-Inch 420W Triple Row LED Light Bar. Please read this manual thoroughly before installation and use to ensure proper function and safety.
2. Коопсуздук маалыматы
- Кандайдыр бир электрдик жумуштарды аткаруудан мурун дайыма унаанын аккумуляторун ажыратыңыз.
- Кыска туташуулардын алдын алуу үчүн бардык зымдарды туташтыруу бекем жана тийиштүү түрдө изоляциялангандыгын текшериңиз.
- Mount the light bar securely to prevent it from dislodging during vehicle operation.
- Жарык тилкеси күйүп турганда ага түз карабаңыз, анткени ал көздүн чарчоосуна же зыян келтириши мүмкүн.
- Verify local regulations regarding auxiliary lighting before use on public roads.
3. Пакеттин мазмуну
Сураныч, бардык буюмдардын бар экенин жана бузулбаганын текшерүү үчүн пакетти текшериңиз:
- 1 x Nilight ZH409 20-Inch LED Light Bar
- 1 x Heavy Duty Off-Road Wiring Harness
- Монтаждоо кронштейндери жана аппараттык

Image: Contents of the Nilight ZH409 package, including the LED light bar, wiring harness, and mounting accessories.
4. Техникалык шарттар
| Өзгөчөлүк | Спецификация |
|---|---|
| Модел | ZH409 |
| Өлчөмдөрү (L x W x Y) | 20"L x 3"W x 3"H |
| Ватtage | 420 Ватт |
| Жарыктык | 42000 Lumens |
| Тtage | 30 вольт |
| Суу өткөрбөйт | IP67 |
| Материал | Aluminum Alloy Housing, PC Lens |
| Beam Pattern | Triple Row Flood Spot Combo |
| Өмүр | 30,000 XNUMX сааттан ашык |
Өлчөмдөр

Image: Detailed dimensions of the 20-inch LED light bar and its mounting components.
5. Орнотуу жана орнотуу
The Nilight ZH409 LED Light Bar comes with an adjustable mounting bracket and a heavy-duty wiring harness for straightforward installation.
5.1 Жарык тилкесин орнотуу
- Identify a suitable mounting location on your vehicle that provides clear light projection and secure attachment points.
- Attach the adjustable mounting brackets to the light bar using the provided screws, washers, and nuts.
- Жарык тилкесин каалаган жерге коюп, кронштейндер үчүн бургулоочу жерлерди белгилеңиз.
- Drill pilot holes and securely fasten the light bar to the vehicle using appropriate hardware. The brackets allow for flexible adjustment of the light bar's angle.
Image: Illustration of the adjustable mounting bracket for flexible positioning.
5.2 Wiring the Light Bar
The included wiring harness simplifies the electrical connection. It typically includes a relay, an in-line fuse, and a toggle switch.
- Connect the light bar's power connector to the corresponding connector on the wiring harness.
- Connect the positive (+) wire from the harness to the positive terminal of your vehicle's battery.
- Connect the negative (-) wire from the harness to the negative terminal of your vehicle's battery or a suitable ground point on the chassis.
- Route the toggle switch to a convenient location within the vehicle's cabin. Ensure the wiring is secured and protected from heat, sharp edges, and moving parts.
- The in-line blade fuse provides overcurrent protection. Ensure it is correctly installed in its water-resistant holder.
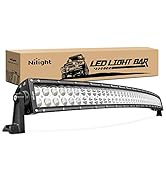
Image: General wiring diagram for the light bar and harness.

Image: The included toggle switch for controlling the light bar.
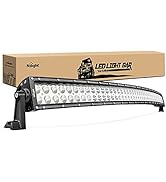
Image: The in-line blade fuse for circuit protection.
5.3 Орнотуу боюнча видео колдонмо
Video: An official Nilight video demonstrating the installation process for the 20-inch LED light bar with wiring harness.
6. Иштөө нускамалары
Once properly installed, operate the Nilight ZH409 LED Light Bar using the installed toggle switch. Press the switch to turn the light bar ON or OFF.
6.1 Beam Pattern
The light bar features a triple row flood spot combo beam pattern, providing both wide area illumination (flood) and focused long-distance light (spot) for comprehensive visibility.
Image: Representation of the light bar's wide and focused beam pattern.
6.2 Brightness Demonstration
Video: An official Nilight video demonstrating the brightness and beam pattern of the LED light bar in various scenarios.
7. Техникалык тейлөө
- Тазалоо: Regularly clean the lens with a soft cloth and mild soap to maintain optimal light output. Avoid abrasive cleaners that could scratch the lens.
- Текшерүүлөр: Periodically check all mounting hardware and electrical connections for tightness and corrosion. Tighten any loose fasteners.
- Зымдар: Inspect the wiring harness for any signs of wear, fraying, or damage. Replace damaged components immediately.
- Гидроизоляция: The light bar has an IP67 waterproof rating. While designed for harsh conditions, avoid directing high-pressure water jets directly at the seals for extended periods.
8. Кыйынчылыктарды
| Көйгөй | Мүмкүн себеп | Чечим |
|---|---|---|
| Жарык тилкеси күйбөйт | Электр энергиясы жок, сактагыч күйүп кеткен, туташуу бошоп калган, өчүргүч бузук. | Check battery connections, inspect the in-line fuse and replace if blown, ensure all wiring connections are secure, test the switch for functionality. |
| Жарык начар чыгат же жымыңдайт | Төмөн үнtage, poor ground connection, damaged wiring. | Унааны текшерүү томtage, ensure a clean and secure ground connection, inspect wiring for damage. |
| Линзанын ичиндеги нымдуулук | Мөөр компромисс. | Жардам алуу үчүн кардарларды колдоо бөлүмүнө кайрылыңыз. |
9. Кепилдик жана колдоо
Nilight ZH409 LED Light Bar бир менен келет 2 жылдык кепилдик, as indicated in the product description. For warranty claims, technical support, or any inquiries, please contact Nilight customer service through their official channels or visit the Nilight Store on Amazon.


