Introduction
Thank you for choosing the Walfront TM919A-3 Digital Programmable 7-Day Timer. This device is designed for precise control of electrical equipment, allowing you to set up to 16 ON/OFF programs daily across a 7-day cycle. Its clear LCD display and easy-to-use interface make it suitable for various applications, from home automation to industrial control. Please read this manual thoroughly before installation and operation to ensure safe and correct usage.
Коопсуздук маалыматы
Эскертүү: Electrical installation should only be performed by qualified personnel. Always disconnect power before installing or servicing the timer to prevent electric shock or equipment damage. Ensure all wiring complies with local electrical codes and regulations. Do not exceed the specified current rating of 16A.
- Ensure the power supply matches the timer's voltage (24V DC).
- Аппаратты сууга салбаңыз же ашыкча нымдуулукка дуушар кылбаңыз.
- Балдар жетпеген жерде сактаңыз.
- Агрегатты өз алдынча бөлүүгө же оңдоого аракет кылбаңыз. Квалификациялуу тейлөө кызматкерлерине кайрылыңыз.
Продукт өзгөчөлүктөрү
- LCD дисплей: Digital LCD display with LED indicator for clear and intuitive readings.
- Оңой орнотуу: Designed for 35mm DIN rail mounting, suitable for various electrical panels.
- Программалануучу Орнотуулар: Up to 16 ON/OFF programs per day, with 15 weekly combinations. Manual ON/OFF control also available.
- Артка саноо функциясы: Features a countdown timer up to 24 hours before switching OFF.
- Эстутумдун камдык көчүрмөсү: Equipped with a replaceable CR2032 battery to save programmed settings during power outages.
- Убакыт диапазону: 1 мүнөттөн 168 саатка чейин.
- Саат дисплей: Supports 12-hour and 24-hour formats.
Пакеттин мазмуну
- 1 x Walfront TM919A-3 Digital Programmable Timer
- 1 x Instruction Manual
Жайгашуу
1. Батареяны орнотуу/алмаштыруу
The timer includes a replaceable CR2032 battery for memory backup. If the display is blank or programs are not retained after a power cut, the battery may need replacement.
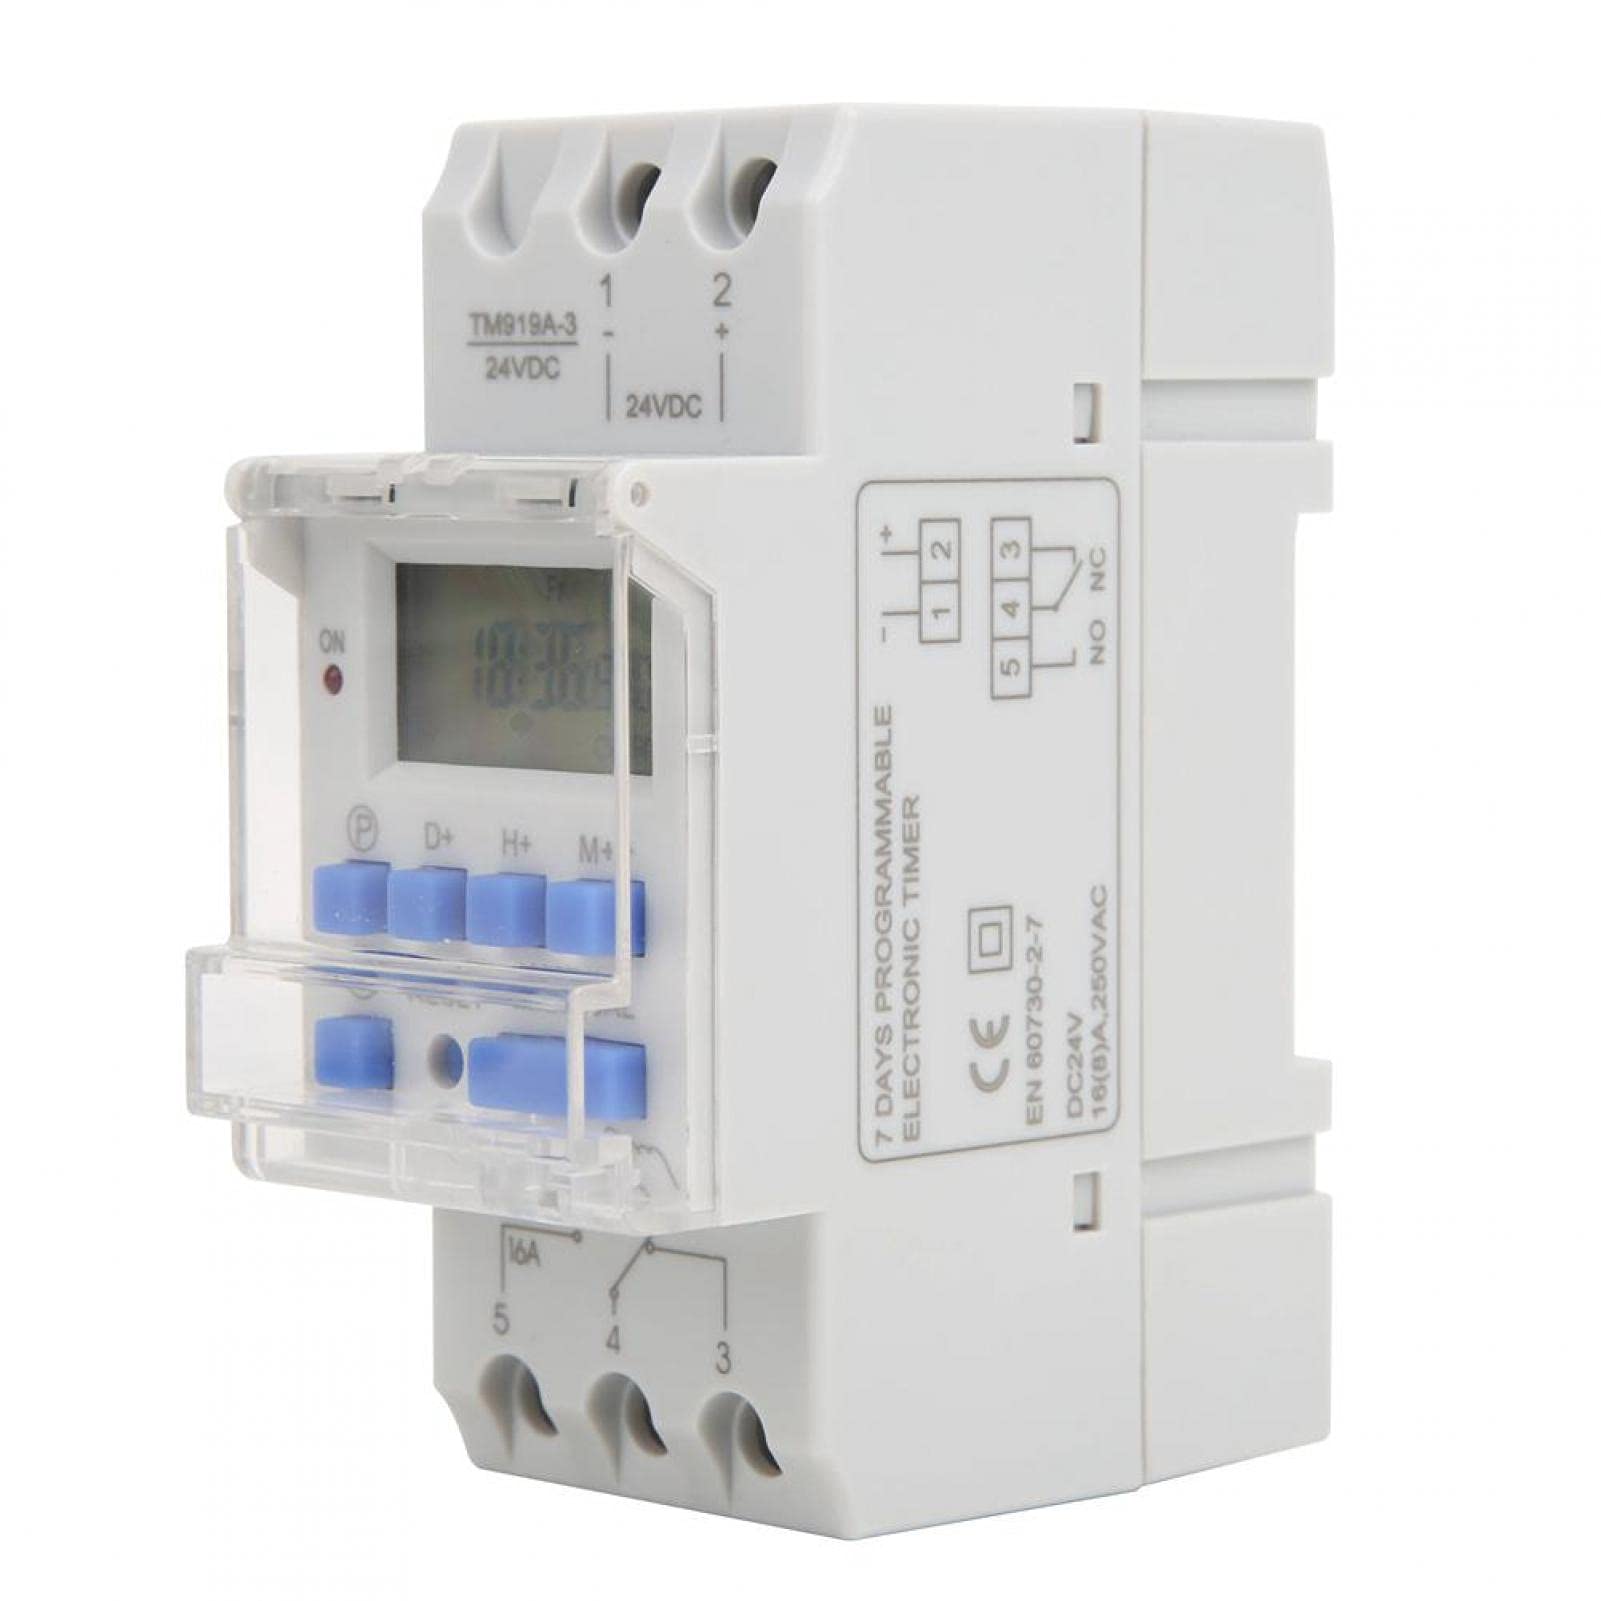
Image: Walfront TM919A-3 timer with an arrow pointing to the replaceable CR2032 battery compartment on the side.
- Таймердин капталындагы батарея бөлүмүн табыңыз.
- Бөлүмдү этияттык менен ачыңыз.
- Remove the old CR2032 battery and insert a new one, ensuring correct polarity.
- Отсекти коопсуз жабыңыз.
2. DIN темир жол орнотуу
The timer is designed for standard 35mm DIN rail mounting. Simply clip the timer onto the DIN rail in your electrical panel.
3. Электр зымдары боюнча нускамалар
Маанилүү: Ensure power is disconnected before wiring. Refer to the diagrams below for correct wiring. The TM919A-3 model operates on 24V DC.

Image: Simple wiring diagram for connecting the timer directly to a load (e.g., a light bulb). Terminals 1 and 2 are for 24V DC input, and terminals 3, 4, 5 are for the switch output.

Image: Advanced wiring diagram showing the timer connected to an external contactor (ABB AX-09-30-10) for controlling higher power loads. The timer's output controls the contactor coil, which then switches the main load.
- Connect the 24V DC power supply to terminals 1 (+) and 2 (-).
- Terminals 3, 4, and 5 are the switch output. Terminal 4 is the common (COM), Terminal 3 is normally closed (NC), and Terminal 5 is normally open (NO).
- Connect your load (e.g., light, pump) to the appropriate output terminals based on whether you need it to be ON or OFF when the timer is active. For most applications, connect the load between terminal 5 (NO) and the power supply.
- For high-power loads, use an external contactor as shown in the advanced wiring diagram.
Иштөө нускамалары
1. Initial Power On and Reset
Upon initial power-up or after battery replacement, the display may be blank. Press the RESET button (usually a small recessed button requiring a pointed object) to clear all settings and initialize the timer.

Сүрөт: алдыңкы view of the Walfront TM919A-3 timer, highlighting the LCD and control buttons (P, D+, H+, M+, RESET, MANUAL).
2. Учурдагы убакытты жана күндү коюу
- басыңыз P button (Program) once. The display will show the current time setting.
- басыңыз D+ аптанын учурдагы күнүн коюу үчүн баскыч.
- басыңыз H+ учурдагы саатты коюу үчүн баскыч.
- басыңыз M+ учурдагы мүнөттү коюу үчүн баскыч.
- басыңыз P button again to exit time setting mode and return to the normal clock display.
3. КҮЙГҮЗҮҮ/ӨЧҮРҮҮ ЦИКЛДЕРИН ПРОГРАММАЛОО
Таймер 16га чейин КҮЙГҮЗҮҮ/ӨЧҮРҮҮ программаларын колдойт. Ар бир программа КҮЙГҮЗҮҮ убактысынан жана ӨЧҮРҮҮ убактысынан турат.
- басыңыз P баскычын дисплейде "1 ON" пайда болгонго чейин кайра-кайра басыңыз. Бул биринчи ON программасы.
- Басыңыз D+ to select the day(s) for this program. You can choose individual days, weekdays, weekends, or all 7 days.
- Басыңыз H+ "КҮЙҮК" окуясы үчүн каалаган саатты коюу үчүн.
- Басыңыз M+ "КҮЙҮК" окуясы үчүн каалаган мүнөттү коюу үчүн.
- Басыңыз P кайрадан. "1 OFF" пайда болот. Бул биринчи OFF программасы.
- "ӨЧҮРҮҮ" окуясынын күнүн (күндөрүн), саатын жана мүнөтүн коюу үчүн 2-4-кадамдарды кайталаңыз.
- Басууну улантыңыз P to cycle through "2 ON", "2 OFF", up to "16 ON", "16 OFF". Set all desired programs.
- Программалоо режиминен чыгуу үчүн баскычты басыңыз P button until the current time is displayed, or wait for approximately 30 seconds for it to automatically exit.
4. Кол менен башкаруу
басыңыз КОЛ button to cycle through different operating modes:
- КҮЙҮК: The timer output is continuously ON, overriding all programs.
- АВТО: The timer operates according to the programmed ON/OFF cycles.
- ӨЧҮК: The timer output is continuously OFF, overriding all programs.
Таймердин коюлганын текшериңиз АВТО mode for programmed operations to function.
5. Артка саноо функциясы
The countdown function allows you to set a specific duration after which the timer will switch OFF. This function is typically accessed by holding a specific button or through a dedicated menu. Refer to the specific button layout on your device for activation, usually by pressing a combination of buttons or a dedicated countdown button if available. The maximum countdown is 24 hours.
Техникалык тейлөө
The Walfront TM919A-3 timer requires minimal maintenance. The primary maintenance task is the replacement of the CR2032 memory backup battery when needed. Regularly check connections for tightness and ensure the unit is free from dust and moisture.
- Тазалоо: Сыртын жумшак, кургак чүпүрөк менен сүртүңүз. Абразивдүү тазалагычтарды же эриткичтерди колдонбоңуз.
- Батарея: Replace the CR2032 battery as described in the Setup section if programs are not retained during power outages.
Проблемаларды чечүү
- Таймер программалангандай күйбөй/өчпөй жатат:
- Check if the timer is in АВТО режими.
- Verify that the ON/OFF programs are set correctly for the desired days and times.
- Ensure the current time and day are set accurately.
- Коопсуздук жана туура полярдуулук үчүн бардык зым байланыштарын текшериңиз.
- Дисплей бош:
- Check if the 24V DC power supply is connected and active.
- басыңыз RESET баскычы.
- If the power is on but the display is still blank, the unit may be faulty.
- Электр энергиясы өчүрүлгөндөн кийин программалар жоголотtage:
- The internal CR2032 battery may be depleted. Replace the battery as described in the Setup section.
- Timer is ON/OFF continuously, ignoring programs:
- басыңыз КОЛ button to cycle back to АВТО режими.
Техникалык шарттар

Image: Dimensions of the Walfront TM919A-3 timer, indicating measurements such as 8.7cm height, 3.5cm width, and 6.5cm depth.
| Өзгөчөлүк | Спецификация |
|---|---|
| Бренд | Walfront |
| Модель номери | TM919A-3 |
| Материал | Пластик |
| Электр камсыздоо | 24V DC |
| Учурдагы рейтинг | 16A |
| Убакыт диапазону | 1 мүнөт ~ 168 саат |
| Программалар | Күнүнө 16 КҮЙГҮЗҮҮ/ӨЧҮРҮҮ |
| Энергияны керектөө | <5VA |
| Орточо ката | <2 секунд/күн |
| Иштөө температурасы | -10 ~ 50 ℃ |
| Нымдуулук | <95% |
| Эстутумдун камдык көчүрмөсү | CR2032 replaceable battery |
| Монтаждоо | 35 мм DIN темир жол |
| Өндүрүүчүнүн маалымдамасы | Walfrontigu1qrv9xk |
| UPC | 738589915582 |
Кепилдик маалымат
This product comes with a standard manufacturer's warranty. Please refer to your purchase documentation or contact the retailer for specific warranty terms and conditions. Keep your proof of purchase for any warranty claims.
Колдоо
For technical assistance, troubleshooting not covered in this manual, or inquiries about your Walfront TM919A-3 timer, please contact Walfront customer support or your authorized dealer. You can typically find contact information on the product packaging or the retailer's webсайт.


