1. Киришүү
Thank you for choosing the CREATE WIPEBOT Automatic Window Cleaning Robot. This manual provides essential information for the safe and efficient operation, maintenance, and troubleshooting of your device. Please read this manual thoroughly before first use and retain it for future reference.
The WIPEBOT is designed to clean glass surfaces such as windows, mirrors, and glass doors. It features powerful suction, intelligent navigation, and a remote control for convenient operation.
2. Коопсуздук нускамалары
Коопсуз эксплуатацияны камсыз кылуу жана зыян келтирбөө үчүн төмөнкү коопсуздук чараларын сактаңыз:
- Шайманды колдонуудан мурун бардык нускамаларды кылдат окуп чыгыңыз.
- This appliance is for indoor use only. Do not use it outdoors or on broken glass.
- Always attach the safety rope before operating the robot, especially on high windows. Ensure the rope is securely fastened to a stable anchor point.
- Keep the robot and its accessories away from children and pets.
- Түзмөк менен кошо берилген оригиналдуу кубат адаптерин гана колдонуңуз.
- Do not use the robot in rainy or humid conditions.
- Ensure the cleaning pads are properly attached before operation.
- Эгерде робот бузулган же иштебей калган болсо, аны иштетпеңиз. Кардарларды колдоо кызматына кайрылыңыз.
- Avoid using abrasive cleaning solutions or materials that could scratch glass surfaces.
- The robot has a backup battery for power outages. Do not rely solely on the backup battery for extended operation.
3. Пакеттин мазмуну
Carefully unpack the box and ensure all items are present and in good condition. If any items are missing or damaged, please contact your retailer.
- CREATE WIPEBOT Window Cleaning Robot
- Алыстан башкаруу
- Кубат адаптери жана кубат кабели
- Safety Rope with Carabiner
- Cleaning Solution Spray Bottle
- Microfiber Cleaning Pads (12 included)

Description: This image displays the complete package contents of the CREATE WIPEBOT. It shows the main robot unit, a remote control, the power adapter with its cable, a safety rope with a carabiner clip, a spray bottle labeled 'CLEANING CAN', and two stacks of circular microfiber cleaning pads.
4. Продукт бүтүп калдыview
4.1. Robot Unit

Description: This image shows the CREATE WIPEBOT from a side angle, highlighting its sleek black design and the two circular microfiber pads attached to its underside. A power cable extends from the robot.
- Кубат баскычы/Индикатор жарыгы: To turn the robot on/off and indicates status.
- Suction Ports: Generate vacuum to adhere to the glass.
- Rotating Pads: Two circular pads for cleaning and movement.
- Кубат киргизүү: Кубат адаптерине туташат.
- Коопсуздук арканын бекитүү жери: Коопсуздук арканын бекитүү үчүн.
4.2. Алыстан башкаруу

Description: This image displays the black remote control unit. It features several buttons for controlling the robot's movement and cleaning modes, including directional arrows, start/pause, and mode selection buttons.
- Күйгүзүү/өчүрүү: Роботту күйгүзөт же өчүрөт.
- Баштоо / Тындыруу: Initiates or pauses cleaning cycles.
- Багыт баскычтары: Manually controls the robot's movement.
- Cleaning Modes (M1, M2, M3): Selects different automatic cleaning patterns (e.g., zigzag).
5. Орнотуу
Follow these steps to prepare your WIPEBOT for cleaning:
- Тазалоочу жайларды тиркөө: Securely attach two clean microfiber pads to the rotating bases on the underside of the robot. Ensure they are centered and flat.
- Туташуу кубаты: Plug the power adapter into the robot's power input port, then plug the power cable into a suitable electrical outlet.
- Коопсуздук арканын бекитүү: Fasten the safety rope to the designated attachment point on the robot. Secure the other end of the safety rope to a sturdy, immovable object (e.g., a heavy piece of furniture, a window frame anchor) to prevent the robot from falling.
- Тазалоочу чечимди колдонуу: Lightly spray a small amount of glass cleaning solution onto the microfiber pads. Do not oversaturate the pads, as this can reduce suction.

Description: This image shows a close-up of the safety rope being securely attached to the designated loop on the CREATE WIPEBOT, emphasizing the importance of this safety measure.

Description: This image illustrates a hand spraying cleaning solution onto one of the circular microfiber pads attached to the robot, demonstrating the correct way to prepare the pads for cleaning.
6. Иштөө нускамалары
- Күйгүзүү: Роботтогу же пульттагы күйгүзүү баскычын басыңыз. Индикатор жарыгы күйөт.
- Роботту жайгаштыруу: Carefully place the robot onto the glass surface. Ensure it is flat against the glass. The robot will automatically activate its suction to adhere to the surface. Wait for the suction to stabilize before releasinробот.
- Тазалоону баштоо: Press the 'Start' button on the remote control or select a cleaning mode (M1, M2, M3) to begin an automatic cleaning cycle. The robot will start moving in a zigzag pattern to cover the surface.
- Кол менен башкаруу: Use the directional buttons on the remote control to guide the robot manually if needed.
- Stopping the Robot: Press the 'Pause' button on the remote control or the power button on the robot to stop the cleaning cycle. The robot will remain adhered to the glass.
- Remove Robot: Once cleaning is complete or paused, carefully grasp the robot and press the power button to release the suction. Remove the robot from the glass.

Description: This image shows the CREATE WIPEBOT actively cleaning a large window, demonstrating its ability to adhere to and move across vertical glass surfaces. The robot is positioned on the upper part of the window.

Description: This image captures the CREATE WIPEBOT cleaning a large glass panel, with a person visible in the background. The robot is moving across the glass, demonstrating its operational capability on expansive surfaces.

Description: This image shows a hand holding the remote control for the CREATE WIPEBOT, with the robot visible on a window in the background. It illustrates the user interaction with the device via its remote.
7. Техникалык тейлөө
Regular maintenance ensures optimal performance and extends the lifespan of your WIPEBOT.
7.1. Cleaning Pads
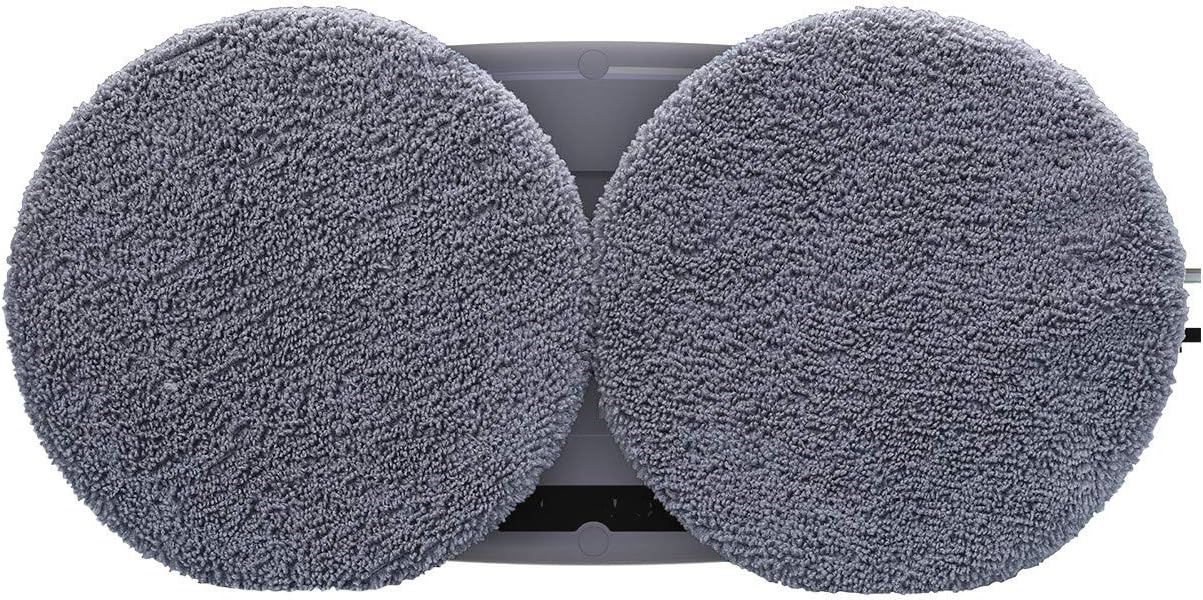
Сүрөттөмө: Бул сүрөт жакындан тартылган view of the two circular microfiber cleaning pads attached to the underside of the CREATE WIPEBOT, showing their texture and placement.
- Remove the microfiber pads after each use.
- Wash the pads by hand or machine wash with mild detergent. Do not use bleach or fabric softener.
- Allow pads to air dry completely before reattaching them to the robot or storing.
7.2. Robot Unit
- Роботтун сыртын жумшак, d менен сүртүңүзamp кездеме.
- Do not immerse the robot in water or spray water directly onto it.
- Clean the suction ports regularly to ensure strong adhesion. Use a dry cloth or a soft brush to remove any dust or debris.
7.3. Сактоо
- Store the robot and its accessories in a cool, dry place, away from direct sunlight.
- Ensure the robot is clean and dry before storage.
8. Кыйынчылыктарды
If you encounter issues with your WIPEBOT, refer to the following common problems and solutions:
| Көйгөй | Мүмкүн себеп | Чечим |
|---|---|---|
| Робот күйбөйт. | No power, low battery, or power button not pressed correctly. | Ensure power cable is securely connected. Check power outlet. Charge the robot if the battery is low. Press the power button firmly. |
| Робот айнекке жабышпайт. | Insufficient suction, dirty suction ports, or wet pads. | Ensure the glass surface is clean and dry. Clean the suction ports. Do not oversaturate cleaning pads. Check for air leaks around the robot's edges. |
| Робот сызыктарды калтырат. | Dirty pads, too much cleaning solution, or dirty glass. | Replace or wash cleaning pads. Use less cleaning solution. Pre-clean heavily soiled windows if necessary. |
| Робот күтүүсүздөн токтоп калды. | Power interruption, obstacle detected, or edge detection. | Check power connection. Remove any obstacles. The robot may stop at edges; reposition if needed. |
If the problem persists after attempting these solutions, please contact CREATE customer support for further assistance.
9. Техникалык шарттар
| Өзгөчөлүк | Деталь |
|---|---|
| Бренд | ТҮЗҮҮ |
| Модель аты | WIPEBOT |
| Модель номери | KLiHD |
| Түс | Кара |
| Өлчөмдөрү (L x W x Y) | 29.1 x 14.4 x 8.2 см |
| Салмагы | 1.1 килограмм |
| Күч | 90 Ватт |
| Тtage | 240 вольт (AC) |
| Батарея түрү | Литий-ион (14.4V) |
| Батареянын иштөө мөөнөтү (камдык көчүрмө) | 30 мүнөт |
| Өзгөчө өзгөчөлүк | Жыгууга каршы система |
| Controller Type | Алыстан башкаруу |
| Тазалоо режими | Zig Zag |
| Сунушталган бет | Айнек |
10. Кепилдик жана колдоо
The CREATE WIPEBOT comes with a standard manufacturer's warranty. Please refer to the warranty card included in your package for specific terms and conditions. For technical support, troubleshooting assistance, or to inquire about replacement parts, please contact CREATE customer service through their official webсайт же сатып алуу менен камсыз болгон байланыш маалыматы.
Please have your model number (KLiHD) and purchase date ready when contacting support.


