1. Киришүү
This manual provides comprehensive instructions for the setup, operation, and maintenance of your hygger Aquarium Programmable LED Light, Model HG-957. Please read this manual thoroughly before use to ensure proper function and longevity of your product.
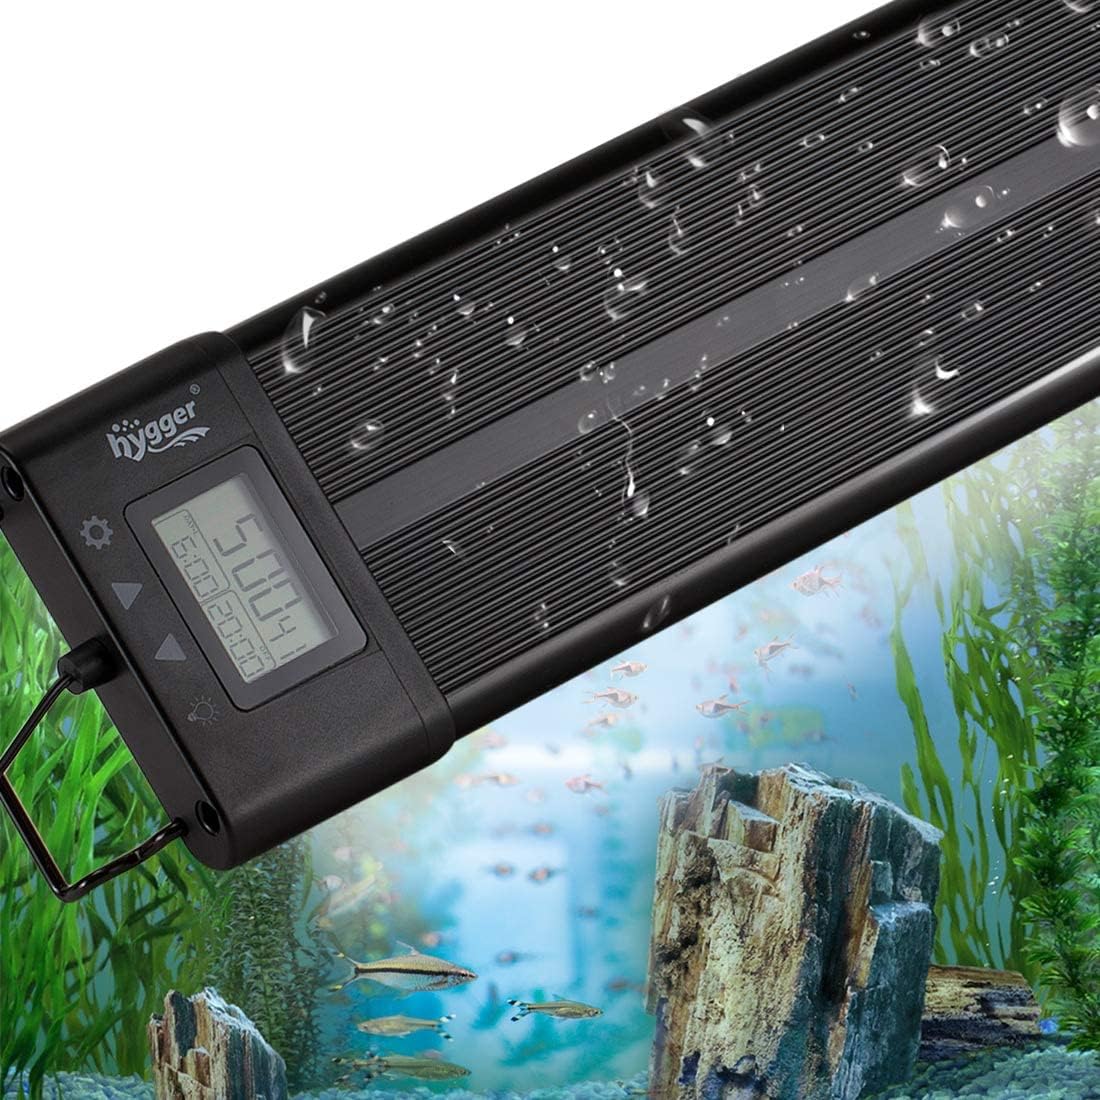
Figure 1: hygger Aquarium Programmable LED Light (Model HG-957)
2. Коопсуздук нускамалары
- электр менен жабдууну камсыз кылуу voltage matches the product's requirements (AC100-240V).
- Do not operate the light if the power cord or adapter is damaged.
- Keep the power adapter away from water to prevent electric shock.
- лamp beads are IP68 waterproof, but the control unit and adapter are not. Avoid submerging the control unit.
- Always unplug the light before performing any maintenance or cleaning.
- This product is designed for indoor aquarium use only.
3. Пакеттин мазмуну
- hygger Aquarium Programmable LED Light (Model HG-957)
- Кубаттуу адаптер
- Extendable Brackets (2 pcs)
- User Manual
4. Орнотуу
4.1. Орнотуу
- Attach the extendable brackets to both ends of the LED light fixture.
- Adjust the brackets to fit the length of your aquarium (suitable for 24-30 inch tanks).
- Place the light securely on top of your aquarium.

Figure 2: Light sizes and features
4.2. Power Connection
- Connect the separable adapter cable to the light fixture.
- Plug the power adapter into a standard AC100-240V electrical outlet.

Figure 3: Separable adapter connection
Видео 1: Продукт бүттүview, installation, and basic operation of the hygger Aquarium Programmable LED Light HG-957.
5. Иштөө нускамалары
5.1. LCD Display and Control Buttons
The control unit features an LCD display and four function keys: Mode Setting (gear icon), Up (triangle up), Down (triangle down), and Light Setting/Return (bulb icon).

4-сүрөт: LCD дисплей жана башкаруу баскычтары
5.2. Setting Local Time
- Press the Mode Setting button (gear icon) once. The hour display will flash.
- Use the Up/Down buttons to adjust the hour.
- Press the Mode Setting button again to move to minutes. Use Up/Down to adjust.
- Press the Mode Setting button a third time to select 12-hour or 24-hour format. Use Up/Down to select.
- Press the Mode Setting button again to save and exit time setting.
5.3. Жарыктандыруу режимдери
The light offers four distinct operating modes. Press the Light Setting button (bulb icon) to cycle through these modes.
- Демейки режим: Simulates natural light cycles. The light transitions from dim to bright (sunrise), maintains full brightness (daylight), gradually dims (sunset), and switches to blue light (moonlight). The brightness and time for each stage are preset but can be adjusted.
- DIY режими: Allows for custom programming of up to 8 time stages. For each stage (L1-L8), you can set the start/end time and choose from 10 brightness levels. L1-L6 are all-optical, while L7-L8 are blue light.
- Градиент режими: The light cycles through 7 colors (dark blue, green, purple, light blue, yellow, red) continuously. Brightness and time cannot be set in this mode.
- All-day All-optical Mode: Provides full spectrum light throughout the day. You can fine-tune the color temperature of the RGB light, but brightness and time settings are not available.

Figure 5: Default Mode Cycle

Figure 6: DIY Mode Features

Figure 7: Gradient Mode Colors
5.4. Жарыктык менен түстү жөндөө
- In Default Mode, use the Up/Down buttons to adjust the overall brightness.
- In DIY Mode, use the Up/Down buttons to adjust brightness for each programmed stage.
- In All-day All-optical Mode, press the Light Setting button twice to fine-tune the color temperature of the RGB LEDs.
5.5. Заводдук демейки орнотууларды калыбына келтирүү
To restore the light to its factory default settings:
- Press and hold both the Up and Down buttons simultaneously until 'SOP' appears on the LCD display.
- While 'SOP' is displayed, unplug the adapter jack from the light fixture.
- Plug the adapter jack back in. The light will reset to default settings.
6. Техникалык тейлөө
6.1. Тазалоо
лamp beads are IP68 waterproof, allowing for easy cleaning. Gently wipe the light fixture with a soft, damp cloth. Ensure the control unit and adapter remain dry.

8-сүрөт: IP68 суу өткөрбөйт
6.2. Adapter Replacement
The separable adapter design allows for easy replacement if damaged, preventing the need to replace the entire light fixture.
7. Кыйынчылыктарды
- Жарык күйбөйт: Check all power connections. Ensure the adapter is securely plugged into both the light and the wall outlet.
- Moisture inside the light: Ал эми лamp beads are waterproof, prolonged exposure to high humidity or direct water spray on the control unit can cause issues. Ensure the light is properly positioned to minimize condensation or splashes reaching the control unit. If moisture is observed, immediately unplug the unit and allow it to dry completely in a well-ventilated area before reconnecting.
- Settings not saving: Ensure you press the Mode Setting button to confirm and save changes after adjusting time or mode settings. The power-off memory function retains settings, but local time may default to 12 noon after a power outage.
- Inconsistent light output: Verify that the light is not in Gradient Mode if you expect static colors. Check DIY Mode settings for any unintended brightness changes.
8. Техникалык шарттар
| Өзгөчөлүк | Спецификация |
|---|---|
| Модел | HG-957 |
| Light Size | 60 x 10 x 2.2 см |
| Колдонмо | 24-30 inch Aquariums |
| Киргизүү көлөмүtage | AC100-240V |
| Output Voltage | DC15V |
| LED саны | 112 PCS (64 White, 10 Blue, 6 Red, 4 Green, 28 RGB) |
| Rendering Index (CRI) | 89 |
| Lumens | 1984 |
| Түс температурасы | 6500-10000K |
| Электр шнурунун узундугу | 4.9 фут |
| Материал | Aluminum alloy plastic case |
| Суу өткөрбөйт рейтинги | IP68 (Lamp beads only) |
9. Кепилдик жана колдоо
For warranty information and customer support, please refer to the product packaging or contact hygger customer service directly. Keep your purchase receipt for warranty claims.


