Introduction
The Stanley FatMax SFMCH900B SDS-Plus Cordless Combination Hammer is a versatile and powerful tool designed for various drilling and chiseling applications. Its brushless motor technology ensures high performance, extended runtime, and maximum service life. This manual provides essential information for the safe and effective operation, setup, and maintenance of your tool.

Figure 1: Stanley FatMax SFMCH900B SDS-Plus Cordless Combination Hammer, showing its main body, auxiliary handle, and chuck.
Коопсуздук маалыматы
Электр шаймандарын колдонууда өрт чыгуу, электр тогуна урунуу жана жеке жаракат алуу коркунучун азайтуу үчүн ар дайым негизги коопсуздук чараларын сактаңыз. Бул колдонмону келечекте колдонуу үчүн сактап коюңуз.
- Жумуш аймагынын коопсуздугу: Жумушчу жерди таза жана жакшы жарыктандырыңыз. Жарылуучу чөйрөдө, мисалы, күйүүчү суюктуктар, газдар же чаң бар жерде электр шаймандарын иштетпеңиз.
- Электр коопсуздугу: Жерге туташтырылган же жерге төшөлгөн беттерге денеге тийбеңиз. Электр шаймандарын жамгырга же нымдуу шарттарга тийгизбеңиз.
- Жеке коопсуздук: Always wear eye protection, hearing protection, and suitable work gloves. Dress properly; avoid loose clothing or jewelry.
- Куралды колдонуу жана кам көрүү: Электр аспапты күчтөп албаңыз. Колдонмоңуз үчүн туура электр шайманын колдонуңуз. Оңдоолорду жасоодон, аксессуарларды алмаштыруудан же электр шаймандарын сактоодон мурда батарейканы электр шайманынан ажыратыңыз.
- Батарея куралын колдонуу жана сактоо: Өндүрүүчү көрсөткөн заряддагыч менен гана заряддаңыз. Электр шаймандарын атайын дайындалган батарейкалар менен гана колдонуңуз.
Продукт бүттүview жана компоненттер
Familiarize yourself with the key components of your Stanley FatMax SFMCH900B combination hammer.
- SDS-Plus Chuck
- Mode Selector Switch (Drill, Hammer Drill, Chisel)
- Көмөкчү тутка
- Тереңдикти токтотуу
- Trigger Тизмеге
- Батареяны чыгаруу баскычы
- Батарея порту
- LED Батарея көрсөткүчү

2-сүрөт: Каптал view of the combination hammer, highlighting the ergonomic design and main operational areas.
Жайгашуу
1. Батареяны орнотуу жана алып салуу
The tool operates on an 18V Stanley FatMax V20 Lithium-Ion battery (not included with the basic version).
- Орнотуу: Батарея блогун шаймандын батарея порту менен тегиздеңиз. Батарея блогун шаймандын ичине бекем орнотулганга чейин жылдырыңыз.
- Алып салуу: Батареяны чыгаруу баскычын (6) басып, батарея пакетин шаймандан сууруп алыңыз.

Figure 3: Proper method for inserting the battery pack into the tool's base.

Figure 4: The 3-level LED indicator on the battery shows the remaining charge level.
2. Auxiliary Handle Attachment
The auxiliary handle provides additional control and stability during operation.
- Кошумча тутканы саат жебесине каршы бурап бошотуңуз.
- Slide the handle onto the front of the tool body.
- Rotate the handle to the desired position for comfortable and secure grip.
- Сааттын жебеси боюнча бурап, тутканы бекем бекемделгенче бекемдеңиз.

Figure 5: Adjusting the auxiliary handle for optimal grip and control.
3. SDS-Plus Bit/Chisel Installation
This tool uses SDS-Plus bits for quick and secure accessory changes.
- Clean the shank of the drill bit or chisel.
- Pull back the chuck collar (1) and insert the SDS-Plus bit into the chuck.
- Release the chuck collar. The bit should click into place. Pull on the bit to ensure it is securely locked. A slight axial play is normal for SDS-Plus systems.
- Алуу үчүн, патрондун жакасын кайра тартыңыз жана битти тартыңыз.

Figure 6: Inserting an SDS-Plus drill bit into the tool's chuck.
4. Depth Stop Adjustment
The depth stop allows for precise control over drilling depth.
- Insert the depth stop rod into the hole on the auxiliary handle.
- Adjust the rod to the desired drilling depth by sliding it in or out.
- Secure the depth stop by tightening the knob on the auxiliary handle.

Figure 7: Adjusting the depth stop for controlled drilling depth.
Иштөө режимдери
The SFMCH900B features a mode selector switch (2) to choose between different operating functions:

Figure 8: The mode selector switch allows selection of drilling, hammer drilling, or chiseling functions.
1. Hammer Drilling Mode (Hammer and Drill Bit Icon)
This mode is for drilling in concrete, masonry, and brick. It combines rotary action with powerful hammer blows for fast drilling progress.

Figure 9: Demonstrating hammer drilling into a wall.
2. Drilling Mode (Drill Bit Icon)
This mode provides rotary action only, suitable for drilling in wood, metal, plastics, and ceramics. The impact mechanism is disengaged.
3. Chiseling Mode (Chisel Icon)
This mode provides hammer action only with a rotary stop, ideal for light chiseling work in plaster, tiles, or for removing small amounts of material. Ensure a chisel bit is installed.
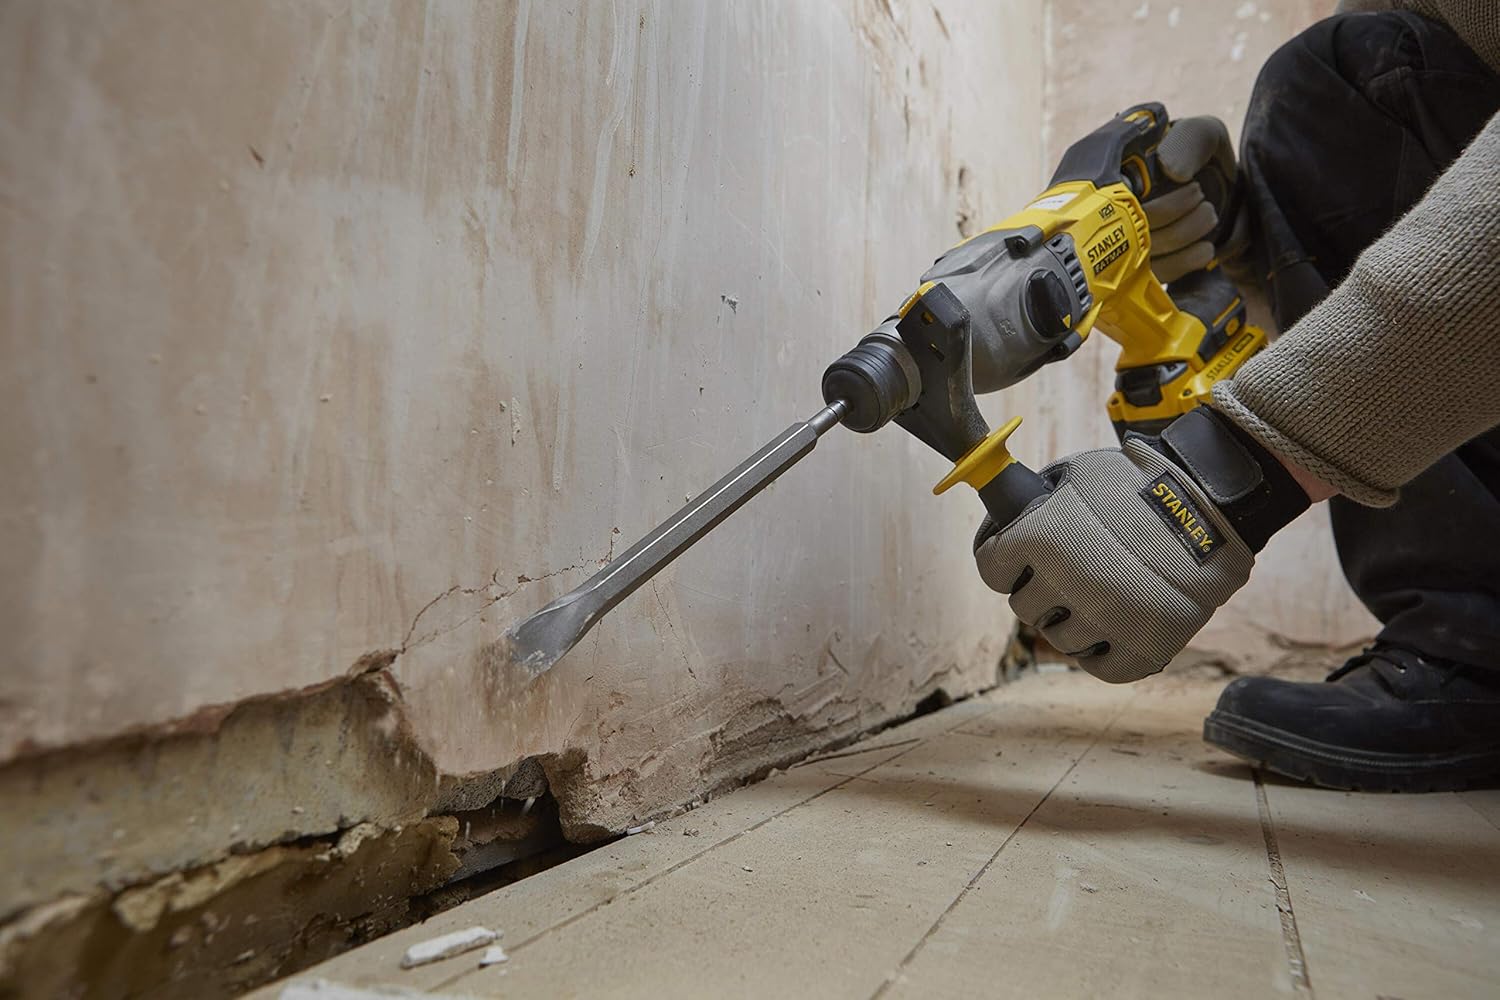
Figure 10: Performing light chiseling work with the tool.
To change modes, rotate the mode selector switch to the desired icon. Ensure the tool is off before changing modes.
Операция
Before starting any operation, ensure the work area is clear and you are wearing appropriate personal protective equipment.
- Куралды баштоо: Squeeze the trigger switch (5) to start the tool. The speed is variable depending on the pressure applied to the trigger.
- Куралды токтотуу: Куралды токтотуу үчүн триггер баскычын коё бериңиз.
- Колдонуу басымы: Apply steady, firm pressure to the tool. Do not lean into the tool excessively; let the hammer mechanism do the work.
- Ашыкча ысып кетүү: If the tool becomes excessively hot, run it without load for a few minutes to cool the motor.
Техникалык тейлөө
Үзгүлтүксүз техникалык тейлөө куралыңыздын узак мөөнөттүү жана оптималдуу иштешин камсыз кылат.
- Тазалоо: Keep the ventilation slots clean and free from dust. Use a soft brush or dry cloth to clean the tool. Do not use water or chemical cleaners.
- Brushless Motor: The brushless motor design significantly reduces maintenance requirements compared to traditional brushed motors, as there are no carbon brushes to replace.
- Сактагыч: Store the tool and battery in a cool, dry place, away from direct sunlight and moisture. Ensure the battery is removed from the tool before storage.
- Аксессуарларга кам көрүү: Keep drill bits and chisels clean and sharp for best performance.

Figure 11: Storing the tool and accessories in a compatible TSTAK case for protection and organization.
Проблемаларды чечүү
| Көйгөй | Мүмкүн себеп | Чечим |
|---|---|---|
| Курал башталбайт. | Батарея заряддалган эмес же туура салынган эмес. | Батарея толук заряддалганын жана коопсуз салынганын текшериңиз. |
| Төмөндөтүлгөн бургулоо көрсөткүчтөрү. | Көңүлсүз же туура эмес бургулоочу бит; туура эмес режим тандалган. | Replace with a sharp, appropriate bit. Verify mode selector is in the correct position. |
| Курал өтө ысып кетет. | үзгүлтүксүз оор колдонуу; бөгөттөлгөн желдетүү. | Allow tool to cool down. Clear ventilation slots. Reduce load. |
| Бит патронго бекитилбейт. | Chuck collar not pulled back sufficiently; debris in chuck. | Pull chuck collar fully back. Clean chuck and bit shank. |
Техникалык шарттар
| Өзгөчөлүк | Спецификация |
|---|---|
| Бренд | Стэнли ФАТМАКС |
| Модель номери | SFMCH900B-XJ |
| Power Source | Батарея менен иштейт |
| Тtage | 18 вольт |
| Impact Energy | 2.0 Джоуль |
| Мотор түрү | Brushless Motor |
| Максималдуу бургулоо кубаттуулугу (металл) | 22 миллиметр |
| Ылдамдык | 2200 RPM |
| Элемент Салмагы | 2.84 килограмм (6.25 фунт) |
| Продукциянын өлчөмдөрү | 15.75"L x 6.3"W x 10.04"H |
| Материал | Rubber (Handle and Grip), Metal (Body, Chuck, Key Components) |
| Камтылган компоненттер | Cordless combination hammer (Battery and Charger Not Included in basic version) |
Кепилдик жана колдоо
For warranty information, technical support, or service inquiries, please refer to the official STANLEY FATMAX webсайтка же кардарларды тейлөө бөлүмүнө кайрылыңыз. Кепилдик дооматтар үчүн сатып алганыңыздын далилин сактаңыз.
Өндүрүүчү: Stanley


