1. Киришүү
Сатып алганыңыз үчүн рахматasing the BYINTEK R19 Portable 3D Smart LED DLP Projector. This manual provides essential information for the safe and efficient operation of your device. Please read it thoroughly before use and retain it for future reference.

Image 1.1: The BYINTEK R19 Portable 3D Smart LED DLP Projector.
2. Коопсуздук маалыматы
Проекторго зыян келтирбөө жана колдонуучунун коопсуздугун камсыз кылуу үчүн төмөнкү коопсуздук чараларын сактаңыз:
- l болгондо проектордун объективине тике карабаamp күйүк.
- Ашыкча ысып кетүүнүн алдын алуу үчүн проектордун айланасында туура желдетүүнү камсыз кылыңыз.
- Проекторду жамгырдын, нымдуулуктун же экстремалдык температуранын таасиринде калтырбаңыз.
- Проектор менен келген кубат адаптерин гана колдонуңуз.
- Проекторду туруксуз беттерге коюудан алыс болуңуз.
- Проекторду өз алдынча бөлүктөргө бөлүүгө же оңдоого аракет кылбаңыз. Квалификациялуу тейлөө кызматкерлерине кайрылыңыз.
3. Пакеттин мазмуну
Пакетте бардык буюмдар бар экенин текшериңиз:
- BYINTEK R19 Projector
- Алыстан башкаруу
- Кубаттуу адаптер
- Колдонуучунун Колдонмосу (бул документ)
- HDMI Cable (may vary by region/package)

Image 3.1: The BYINTEK R19 projector shown with its remote control.
4. Продукт бүтүп калдыview
4.1. Проектор компоненттери

Image 4.1: Diagram illustrating the projector's components and ports.
- Объектив: Сүрөттү экранга проекциялайт.
- IR алуучу: Алыстан башкаруу пультунан сигналдарды алат.
- Speaker (4Ω 5W x2): Аудио чыгарууну камсыз кылат.
- Universal Bracket Hole (d=1/4 inch, 6mm): For mounting on tripods or ceiling mounts.
4.2. Киргизүү/чыгыш порттору
- DC-in (19V): Кубат киргизүү порту.
- USB1 / USB2: USB ports for connecting external storage or peripherals.
- HD-in: HDMI input for connecting video sources.
- Тармак: зымдуу интернет байланышы үчүн Ethernet порту.
- TF картасы: Slot for TransFlash (MicroSD) cards.
- Аудио чыгаруу: 3.5mm audio jack for external speakers or headphones.
- OF: Audio/Video input port.
5. Орнотуу
5.1. Жайгаштыруу
Position the projector on a stable, flat surface or mount it using the universal bracket hole. Ensure the projector is perpendicular to the projection surface for optimal image geometry. The throw distance determines the screen size:
- Throw Range: 30-300 дюйм
- Ыргытуу аралык: 1-6 метр
- Approximately 2.15m for 84 inches, 2.5m for 100 inches, 3.1m for 120 inches, 3.86m for 150 inches.

Image 5.1: Illustration of throw distances for various screen sizes and different mounting methods (tabletop, tripod, ceiling).
5.2. Power Connection
Connect the supplied power adapter to the DC-in port (19V) on the projector and then plug it into a power outlet.
5.3. Баштапкы күйгүзүү
Press the Power ON/OFF button on the projector or the remote control to turn on the device. The projector will boot into the Android OS interface.
5.4. Фокусту тууралоо
Use the "Focus+" and "Focus-" buttons on the projector or the remote control to adjust the image clarity until it is sharp and clear on the screen.
6. Иштөө нускамалары
6.1. Алыстан башкаруу функциялары
The remote control allows for convenient navigation and control of the projector's features.

Image 6.1: The remote control for the BYINTEK R19, highlighting the one-button 3D switching function.
- Кубат баскычы: Проекторду күйгүзөт/өчүрөт.
- Навигация панели (OK баскычы): Менюда навигация жана тандоо үчүн.
- Артка баскычы: Мурунку экранга кайтат.
- Үй баскычы: Негизги Android OS интерфейсине кайтып келет.
- Үн баскычтары: Аудионун үнүн тууралайт.
- Focus Buttons: Adjusts image focus.
- 3D баскычы: One-touch switching for 3D mode (DLP-LINK shutter 3D, TNB, SBSH).
6.2. Android OS Navigation
The projector runs on an Android operating system, providing access to various applications and settings. Use the remote control's navigation pad to browse the interface.
6.3. Түзмөктөрдү туташтыруу
- HDMI (HD-in): Connect laptops, Blu-ray players, gaming consoles, or other HDMI-enabled devices.
- USB: Медиа ойнотуу үчүн USB дисктерин салыңыз.
- TF картасы: Медиа ойнотуу үчүн MicroSD картасын салыңыз.
- Wi-Fi: Connect to a wireless network via the Android OS settings for internet access and online streaming.
- Зымсыз экранды бөлүшүү: Utilize the built-in screen sharing feature to mirror content from compatible smartphones or PCs.
- OF: Эски түзмөктөрдү AV кабели аркылуу туташтырыңыз.
6.4. 3D Mode Activation
The BYINTEK R19 supports 3D content. To activate 3D mode, ensure you are playing compatible 3D content and press the dedicated 3D button on the remote control. The projector supports DLP-LINK shutter 3D, TNB (Top and Bottom), and SBSH (Side-by-Side Half) formats. Active shutter 3D glasses (not included) are required for view3D мазмуну.
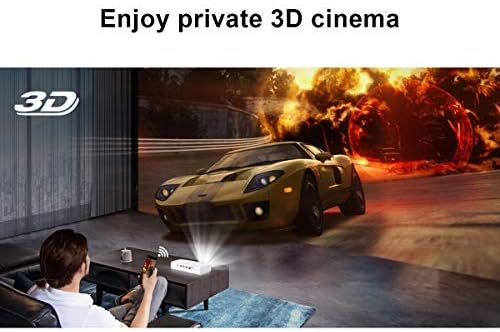
Image 6.2: A user experiencing a private 3D cinema with the BYINTEK R19 projector.
6.5. Screen Size and Usage
The projector can produce a large screen size up to 300 inches, offering an immersive viewing experience. It is suitable for various applications, including home theater, gaming, and presentations, particularly in dim light environments.

Image 6.3: Visual comparison demonstrating the large 300-inch projection size achievable with the BYINTEK R19, compared to a typical 50-inch television.

Сүрөт 6.4: Мисamples of the BYINTEK R19 projector in various settings, including business presentations, outdoor movie nights, home gaming, and home cinema.
7. Техникалык тейлөө
7.1. Объективди тазалоо
Проектордун линзасын оптикалык беттер үчүн атайын жасалган жумшак, мамыксыз чүпүрөк менен акырын сүртүңүз. Абразивдүү тазалоочу каражаттарды же эриткичтерди колдонбоңуз.
7.2. Тазалоо Casing
Проекторду сүртүңүз casing with a soft, dry cloth. For stubborn marks, slightly dampчүпүрөккө суу куюп, анан дароо кургатып сүртүңүз.
7.3. Сактоо
When not in use for extended periods, store the projector in a cool, dry place, away from direct sunlight and excessive dust. Use the original packaging or a protective case if available.
8. Кыйынчылыктарды
| Көйгөй | Мүмкүн себеп | Чечим |
|---|---|---|
| Сүрөт чагылдырылган жок | Power cable disconnected; Projector not powered on; Input source not selected. | Check power connection; Press power button; Select correct input source (HDMI, USB, etc.). |
| Сүрөт бүдөмүк | Фокус туураланган эмес; проектор экранга өтө жакын/алыс. | Adjust focus using "Focus+" / "Focus-" buttons; Adjust projector distance. |
| Үн жок | Volume too low; Muted; External speakers not connected properly. | Increase volume; Unmute; Check external speaker connection or use internal speakers. |
| Пульт иштебей жатат | Batteries depleted; Obstruction between remote and IR receiver. | Батареяларды алмаштырыңыз; Инфракызыл кабыл алгычтын көрүнбөй турганын текшериңиз. |
| Wi-Fi туташуу маселелери | Incorrect password; Router too far; Network interference. | Verify password; Move projector closer to router; Check for network interference. |
9. Техникалык шарттар
| Өзгөчөлүк | Деталь |
|---|---|
| Бренд | BYINTEK |
| Модел | R19 |
| Дисплей технологиясы | LED, DLP |
| Native Resolution | 1920 x 1080 (Full HD) |
| Колдоого алынган максималдуу чечим | 3840 x 2160 (4K) |
| Форма фактору | Portable |
| Өзгөчөлүктөр | Portable, 3D-Ready, Wi-Fi Ready, Android OS |
| Ыргытуу аралыгы | 30-300 дюйм |
| Ыргытуу Дистанция | 1-6 метр |
| Монтаж түрү | Tabletop Mount (also tripod/ceiling compatible) |
| Түс | Ак |
| Controller Type | Алыстан башкаруу |
| Шайкеш түзмөктөр | Laptop, Smartphone, Gaming Console, Blu-ray Player |
| Элемент Салмагы | 7.94 г (Note: This weight appears unusually low and may be a data entry error in the source specifications.) |
| Пакеттин өлчөмдөрү | 16.93 x 12.1 x 7.09 см |
10. Кепилдик жана колдоо
For information regarding warranty coverage, technical support, or service inquiries, please refer to the warranty card included with your product or visit the official BYINTEK webсайт. Сатып алганыңыздын далили катары сатып алуу дүмүрчөгүңүздү сактаңыз.


