Introduction
Thank you for choosing the Kalorik Home Indoor Handheld Vacuum with Floor Extension. This manual provides essential information for the safe and efficient operation, maintenance, and care of your new vacuum cleaner. Please read these instructions thoroughly before first use and retain them for future reference.
This versatile vacuum is designed for both handheld use to clean hard-to-reach areas and can be converted into a stick vacuum for floor cleaning. Its bagless design and included accessories make it suitable for various cleaning tasks around your home and vehicle.
Маанилүү коопсуздук нускамалары
Электр шаймандарын колдонууда өрт, электр тогуна урунуп калуу жана жаракат алуу коркунучун азайтуу үчүн негизги коопсуздук чараларын дайыма сактоо керек.
- Шайманды колдонуудан мурун бардык нускамаларды окуп чыгыңыз.
- Сыртта же нымдуу беттерде колдонбоңуз.
- оюнчук катары колдонууга жол бербеңиз. Балдар тарабынан же алардын жанында колдонулганда кылдат көңүл буруу зарыл.
- Бул колдонмодо сүрөттөлгөндөй гана колдонуңуз. Өндүрүүчү сунуштаган тиркемелерди гана колдонуңуз.
- Бузулган шнур же сайгыч менен колдонбоңуз. Эгерде шайман керектелип иштебесе, кулап, бузулуп, сыртта калып же сууга түшүп кетсе, аны тейлөө борборуна кайтарыңыз.
- Тартпаңыз же шнур менен көтөрүп жүрбөңүз, шнурду тутка катары колдонбоңуз, шнурга эшикти жаппаңыз же шнурду курч четтеринен же бурчтарынан тартпаңыз. Шайманды шнурдун үстүнөн иштетпеңиз. Шнурды ысытылган беттерден алыс кармаңыз.
- шнурду тартып сууруп албаңыз. Электр розеткасынан сууруп алуу үчүн шнурдан эмес, сайгычтан кармаңыз.
- Штепсель же шайманды нымдуу кол менен кармабаңыз.
- Тешиктерге эч кандай нерсени салбаңыз. Бөгөттөлгөн ачуу менен колдонбоңуз; чаңдан, түктөн, чачтан жана аба агымын азайта турган нерселерден алыс болуңуз.
- Чачты, кенен кийимдерди, манжаларды жана дененин бардык бөлүктөрүн тешиктерден жана кыймылдуу бөлүктөрдөн алыс кармаңыз.
- Тамеки, ширеңке, ысык күл сыяктуу күйүп жаткан же чылым чеккен нерселерди албаңыз.
- Бензин сыяктуу күйүүчү же күйүүчү суюктуктарды алуу үчүн колдонбоңуз же алар болушу мүмкүн болгон жерлерде колдонбоңуз.
- Хлор агартуучу, аммиак же дренажды тазалагыч сыяктуу уулуу заттарды албаңыз.
- Чаң чөйчөктөрү жана/же чыпкалары жок колдонбоңуз.
- Электр розеткасынан ажыратуудан мурун бардык башкаруу элементтерин өчүрүңүз.
- Тепкичтерде тазалоодо өзгөчө этият болуңуз.
- Аппаратты сыртта заряддабаңыз.
- Өндүрүүчү көрсөткөн заряддагыч менен гана заряддаңыз. Батарея топтомунун бир түрүнө ылайыктуу заряддагыч башка батарея таңгагы менен колдонулганда өрт чыгуу коркунучун жаратышы мүмкүн.
- Кокусунан баштоону алдын алуу. Батарея пакетине туташтыруудан, шайманды көтөрүүдөн же алып жүрүүдөн мурун өчүргүч өчүк абалда экенин текшериңиз.
Продукт компоненттери
Familiarize yourself with the parts of your Kalorik Handheld Vacuum:
- Handheld Vacuum Unit (Main Body)
- Чаң кубогу
- Циклондук чыпка
- Floor Extension Tube
- Floor Brush Attachment
- 2-in-1 Crevice Tool with Swivel-on Brush Head
- Эмерек щеткасы
- Заряддоо базасы

The main handheld vacuum unit in gray, featuring the power button and dust cup.
Жайгашуу
1. таңгактан чыгаруу
Carefully remove all components from the packaging. Inspect for any damage. Keep packaging materials for future storage or disposal.
2. Баштапкы заряддоо
Before first use, fully charge the vacuum. Place the handheld vacuum unit onto the charging base. Ensure the charging base is connected to a power outlet. The indicator light on the vacuum will show charging status. A full charge may take several hours.
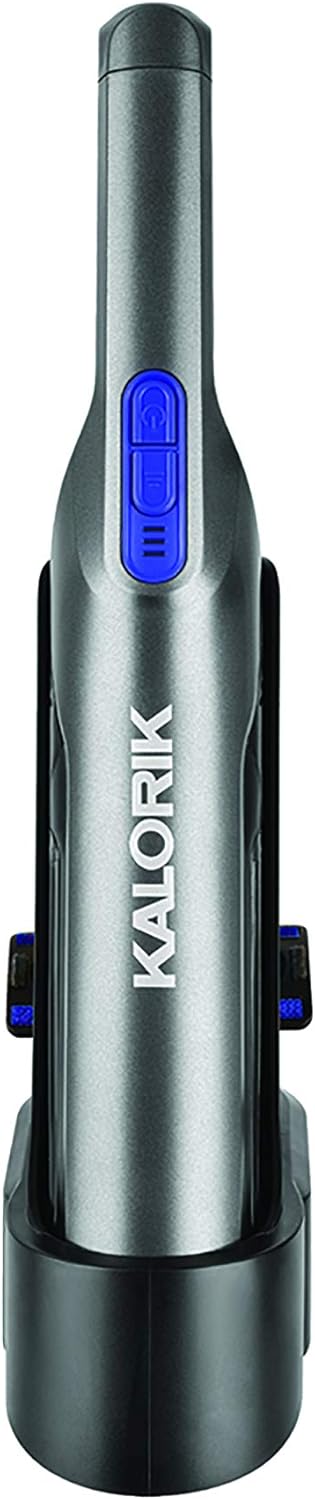
The handheld vacuum unit securely placed on its charging base.
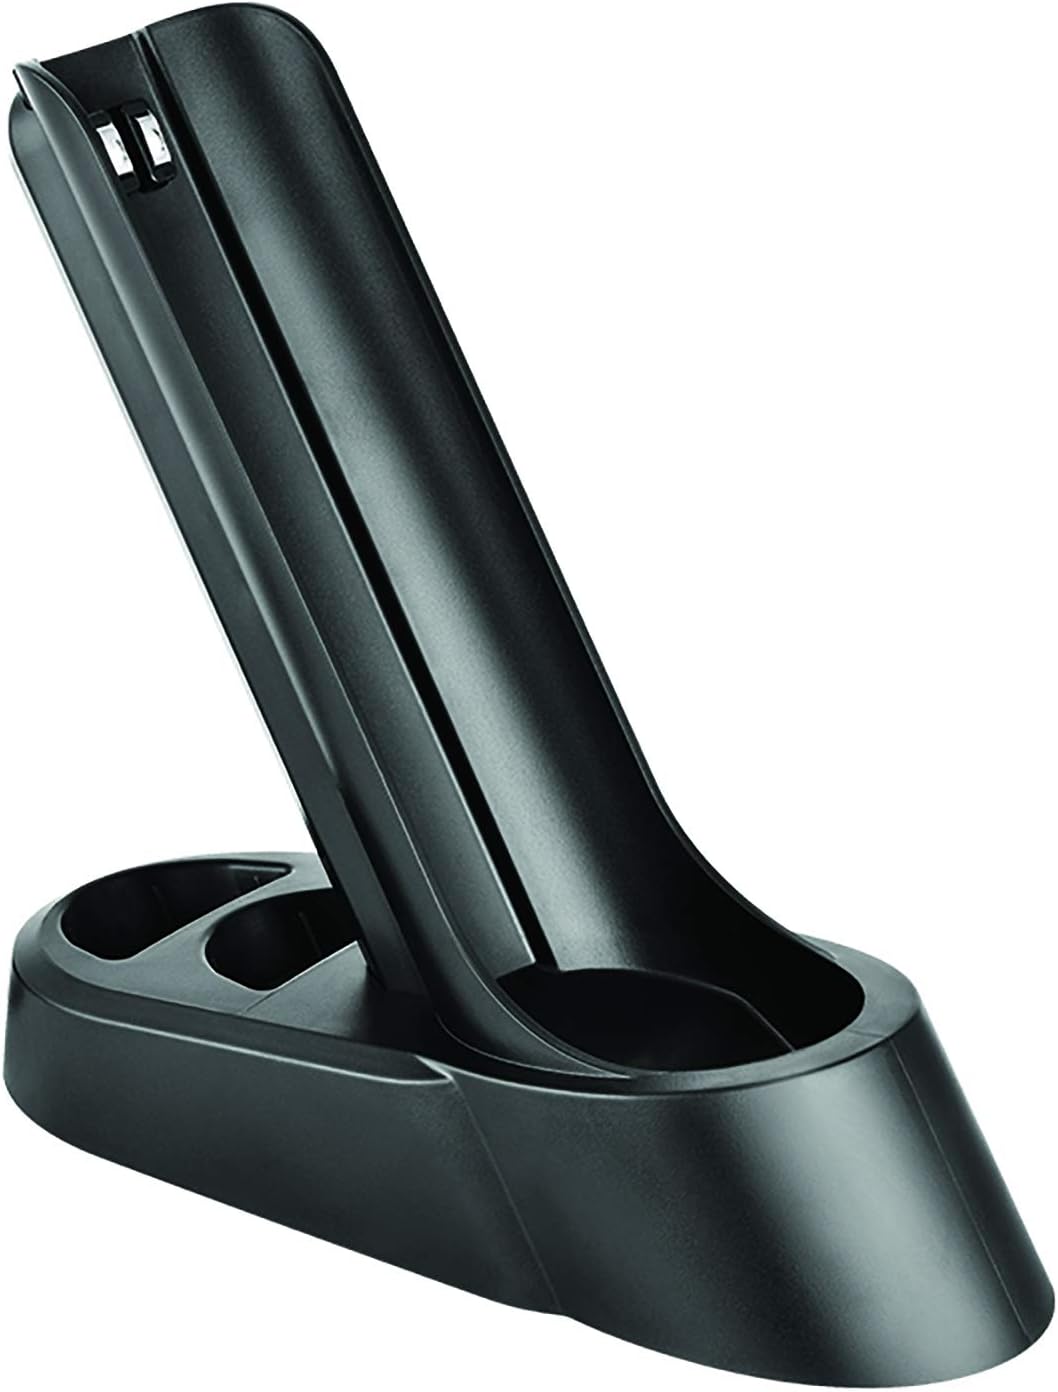
The standalone charging base for the Kalorik handheld vacuum.
3. Assembling for Handheld Use
For handheld cleaning, you can attach the 2-in-1 crevice tool or the furniture brush directly to the nozzle of the handheld vacuum unit. Simply align the attachment with the nozzle and push until it clicks into place.
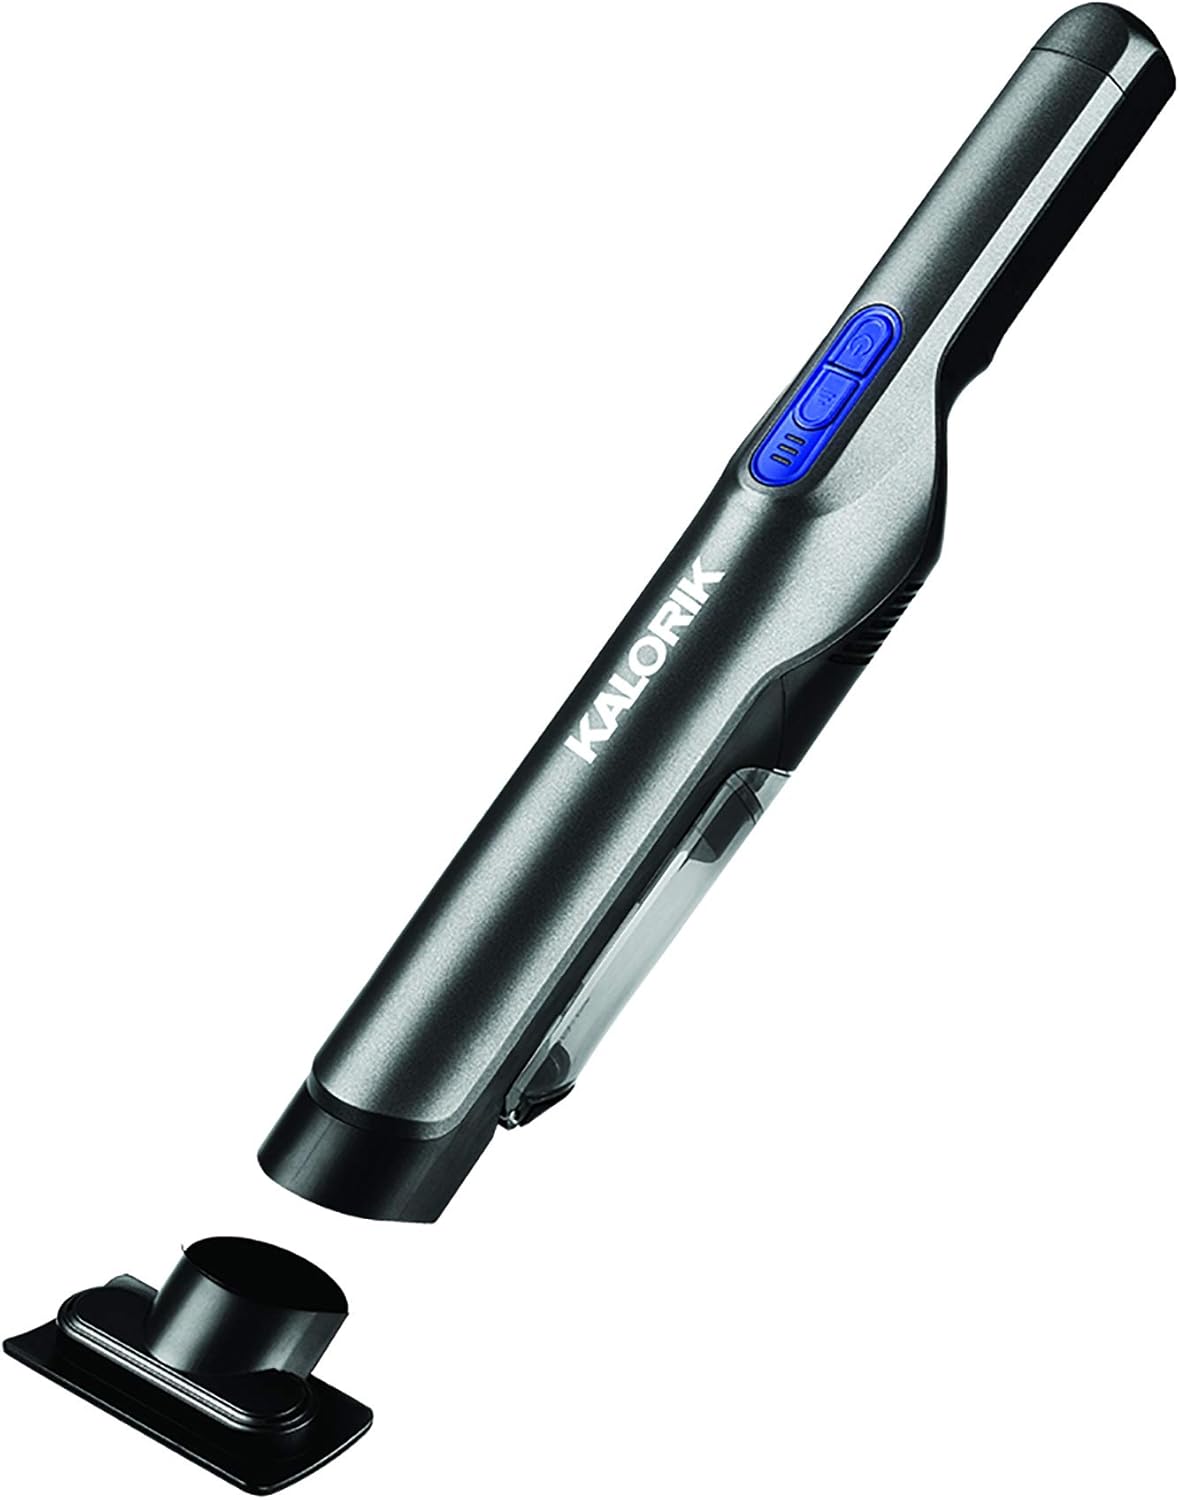
The handheld vacuum unit with the narrow crevice tool attached, ideal for tight spaces.

The handheld vacuum unit with the 2-in-1 brush tool, showing both the brush and crevice functions.
4. Assembling for Stick Vacuum Use
To convert to a stick vacuum, first attach the floor extension tube to the handheld vacuum unit. Then, attach the floor brush attachment to the other end of the extension tube. Ensure all connections are secure.

The complete vacuum assembly in stick mode, showing the handheld unit, extension tube, and floor brush.
Иштөө нускамалары
1. Күйгүзүү / Өчүрүү
Press the power button located on the top of the handheld unit to turn the vacuum on. Press it again to turn the vacuum off.
2. Using in Handheld Mode
With the desired attachment (crevice tool or furniture brush) secured, hold the vacuum by the handle and direct the nozzle towards the area to be cleaned. This mode is ideal for:
- Upholstery and furniture
- Car interiors
- Blinds and drapes
- Tight corners and crevices

A person using the handheld vacuum to clean debris from a gray upholstered chair.

The handheld vacuum being used to clean crumbs and dust from a car's center console.
3. Using in Stick Vacuum Mode
With the floor extension tube and floor brush attached, use the vacuum to clean floors and rugs. The high-speed, brushless motor is designed to effectively remove dirt and debris from various floor surfaces.

A person operating the vacuum in stick mode with the floor brush attachment, cleaning a patterned rug.
Техникалык тейлөө
1. Чаң чөйчөгүн бошотуу
The vacuum features a bagless design with an easy-to-empty dust cup. To empty, locate the release button on the dust cup, press it, and detach the cup from the main unit. Empty the contents into a waste bin. Reattach the dust cup securely until it clicks.
2. Фильтрди тазалоо
Regularly clean the cyclonic filter to maintain optimal suction performance. After emptying the dust cup, remove the filter. Tap it gently over a waste bin to dislodge dust. If necessary, rinse the filter with cold water. Ensure the filter is completely dry before reinserting it into the dust cup and reattaching to the vacuum.
3. Тазалоочу аксессуарлар
Wipe down all attachments with a damp cloth. Ensure they are dry before storing or reattaching to the vacuum.
4. Сактоо
Store the vacuum and its accessories in a cool, dry place. The charging base can be used for convenient storage and charging.
Проблемаларды чечүү
| Көйгөй | Мүмкүн себеп | Чечим |
|---|---|---|
| Вакуум күйбөйт | Батарея түгөндү Кубат баскычы туура басылган жок | Charge the vacuum fully Кубат баскычы бекем басылганын текшериңиз |
| Азайтылган соруу күчү | Чаң чөйчөгү толтура Фильтр бүтүп калган Nozzle or attachment is blocked | Чаң чөйчөгүн бошотуңуз Чыпканы тазалаңыз же алмаштырыңыз Remove any obstructions from the nozzle or attachment |
| Vacuum not charging | Charging base not connected to power Vacuum not properly seated on base | Check power outlet and charging base connection Ensure vacuum is correctly placed on the charging base |
Техникалык шарттар
- Бренд: Калорик
- Модель номери: HVC 46818 GR
- Түсү: Боз
- Форма фактору: Колдук, таякча
- Өзгөчө өзгөчөлүгү: Баштыксыз
- Чыпка түрү: Циклондук чыпка
- Мотордун күчү: 1.2069 аттын күчү
- Башкаруу ыкмасы: Push Button
- Кубаттын деңгээли: 1
- Ички/тышкы колдонуу: Indoor
- Элемент Салмагы: 4.59 фунт
- Продукциянын өлчөмдөрү: 42 x 9.33 x 3.7 inches (assembled stick mode)
- UPC: 848052008069
Кепилдик жана колдоо
For warranty information and customer support, please refer to the warranty card included with your product or visit the official Kalorik website. Do not attempt to repair the appliance yourself, as this may void the warranty and cause further damage.


