1. Киришүү
Thank you for choosing the Rebel RB-0005 Weather Station. This device provides accurate indoor and outdoor temperature readings, indoor humidity, and features a clock, calendar, and alarm function. This manual will guide you through the setup, operation, and maintenance of your new weather station to ensure optimal performance.
2. Коопсуздук маалыматы
- Аппаратты экстремалдык температурага, түз күндүн нуруна же жогорку нымдуулукка дуушар кылбаңыз.
- Аппаратты түшүрүүдөн же катуу таасирлерден сактаныңыз.
- Аппаратты суудан жана башка суюктуктардан алыс кармаңыз.
- Колдонулган батарейкаларды жергиликтүү эрежелерге ылайык таштаңыз.
- Аппаратты өз алдынча бөлүүгө же оңдоого аракет кылбаңыз. Тейлөө үчүн квалификациялуу кызматкерлерге кайрылыңыз.
- The outdoor sensor cable should be handled with care to prevent damage.
3. Пакеттин мазмуну
Пакеттин мазмунун таңгактан чыгаргандан кийин текшериңиз:
- 1x Rebel RB-0005 Weather Station Main Unit
- 1x Wired Outdoor Temperature Sensor
- 1x Колдонуучунун колдонмосу (бул документ)
Note: 1x AAA battery is required for operation and is not included in the package.
4. Продукциянын өзгөчөлүктөрү
- Indoor and Outdoor Temperature Measurement
- Indoor Humidity Measurement
- Календар функциясы
- Ойготкуч функциясы
- 12/24 саат дисплей
- Memory Function for Highest and Lowest Temperature Readings
- Clear and Easy-to-Read LCD Display
- Батарейка портативдик үчүн иштейт
5. Продукт бүтүп калдыview
Familiarize yourself with the main components of your Rebel RB-0005 Weather Station.
5.1 Алдыңкы дисплей
The large LCD screen displays various information simultaneously:
- IN Temperature: Учурдагы үй ичиндеги температура.
- OUT Temperature: Current outdoor temperature from the wired sensor.
- Убакыт: Current time in 12-hour (AM/PM) or 24-hour format.
- RH%: Current indoor relative humidity.
- Календар: Date display (day, month).
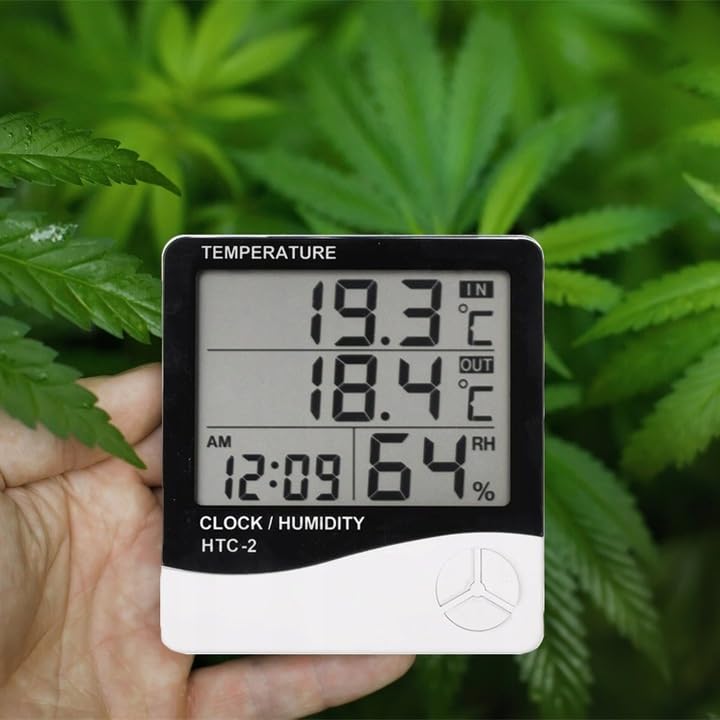
Figure 1: Front display of the weather station showing temperature, time, and humidity readings.

2-сүрөт: Детальдуу view of the display and control buttons.
5.2 Башкаруу баскычтары
The device features three control buttons located on the front, below the display:
- РЕЖИМ: Used to switch between display modes (e.g., time, alarm, calendar) and to enter/exit setting modes.
- ADJ (Adjust): Used to adjust values (e.g., hours, minutes, date) when in setting mode.
- Эстутум: Болгон view the highest and lowest recorded temperature and humidity values.
5.3 Арткы View жана сенсор
The back of the unit houses the battery compartment, a foldable stand, and the input for the wired outdoor temperature sensor.

3-сүрөт: Арткы view of the weather station with battery compartment and wired sensor.
6. Орнотуу
6.1 Батареяны орнотуу
- Негизги блоктун артындагы батарея бөлүкчөсүнүн капкагын ачыңыз.
- Insert one (1) AAA battery, ensuring the correct polarity (+/-).
- Close the battery compartment cover securely. The device should power on automatically.
6.2 Сырткы сенсорду жайгаштыруу
- Connect the wired outdoor temperature sensor to the designated port on the back of the main unit.
- Carefully route the sensor cable to the desired outdoor location. Ensure the cable is not pinched or damaged.
- Place the sensor in a shaded area, protected from direct sunlight and precipitation, to ensure accurate readings. Avoid placing it near heat sources or vents.

4-сүрөт: Мисample placement of the weather station for indoor temperature monitoring.
7. Иштөө нускамалары
7.1 Убакытты жана датаны орнотуу
- басып, кармап туруңуз РЕЖИМ убакыт дисплейи күйүп-өчө баштаганга чейин баскычын болжол менен 3 секунд басып туруңуз.
- колдонуу ADJ button to adjust the flashing value (e.g., hours, minutes).
- басыңыз РЕЖИМ button again to confirm the setting and move to the next value (e.g., minutes, 12/24 hour format, year, month, day).
- Repeat step 2 and 3 until all time and date settings are configured.
- Басыңыз РЕЖИМ орнотуу режиминен чыгуу үчүн акыркы жолу.
7.2 Сигналды коюу
- Кадимки убакыт дисплейинен баскычын басыңыз РЕЖИМ button once to enter alarm display mode (usually indicated by an alarm icon).
- басып, кармап туруңуз РЕЖИМ button for approximately 3 seconds until the alarm time starts flashing.
- колдонуу ADJ каалаган ойготкуч саатын коюу үчүн баскыч.
- басыңыз РЕЖИМ button to confirm the hour and move to set the minutes.
- колдонуу ADJ каалаган ойготкуч мүнөттү орнотуу үчүн.
- басыңыз РЕЖИМ ойготкучту орнотуу режимин ырастоо жана чыгуу үчүн баскычты басыңыз.
- Ойготкучту жандыруу/өчүрүү үчүн басыңыз ADJ button once while in alarm display mode. An alarm icon will appear/disappear on the display.
7.3 Viewing Min/Max Temperature and Humidity
- Кадимки дисплейден баскычын басыңыз ЭСКЕРТҮҮ button once to show the maximum recorded indoor/outdoor temperature and indoor humidity.
- басыңыз ЭСКЕРТҮҮ button again to show the minimum recorded indoor/outdoor temperature and indoor humidity.
- басыңыз ЭСКЕРТҮҮ Учурдагы көрсөткүчтөргө кайтуу үчүн баскычты үчүнчү жолу басыңыз.
- To clear the min/max memory, press and hold the ЭСКЕРТҮҮ баскычын болжол менен 3 секунд басып туруңуз viewing the min/max values.
7.4 Которуу температурасынын бирдиктери (°C/°F)
While in normal display mode, press the ADJ button once to toggle between Celsius (°C) and Fahrenheit (°F) temperature units.
8. Техникалык тейлөө
- Тазалоо: Аппаратты жумшак, кургак чүпүрөк менен сүртүңүз. Абразивдүү тазалагычтарды же эриткичтерди колдонбоңуз.
- Батареяны алмаштыруу: Replace the AAA battery when the display becomes dim or the device stops functioning. Follow the battery installation steps in Section 6.1.
- Сенсорго кам көрүү: Ensure the outdoor sensor cable is not damaged. Periodically check the sensor's placement to ensure it remains protected from elements for accurate readings.
9. Кыйынчылыктарды
| Көйгөй | Мүмкүн себеп | Чечим |
|---|---|---|
| Дисплей жок же дисплейдин күңүрттүгү жок. | Low or depleted battery. Incorrect battery polarity. | Replace the AAA battery with a new one, ensuring correct polarity. |
| Outdoor temperature reading is incorrect or "---". | Outdoor sensor cable is disconnected or damaged. Sensor is exposed to direct sunlight or heat source. | Check if the sensor cable is securely connected. Ensure the sensor is placed in a shaded, protected area. Inspect the cable for damage. |
| Убакыт/дата туура эмес. | Time/Date not set correctly after battery installation. | Refer to Section 7.1 "Setting Time and Date" to adjust. |
| Ойготкуч угулбайт. | Alarm is not activated. Alarm volume is too low (if adjustable, though this model likely isn't). | Ensure the alarm icon is displayed, indicating it is active (refer to Section 7.2). |
10. Техникалык шарттар
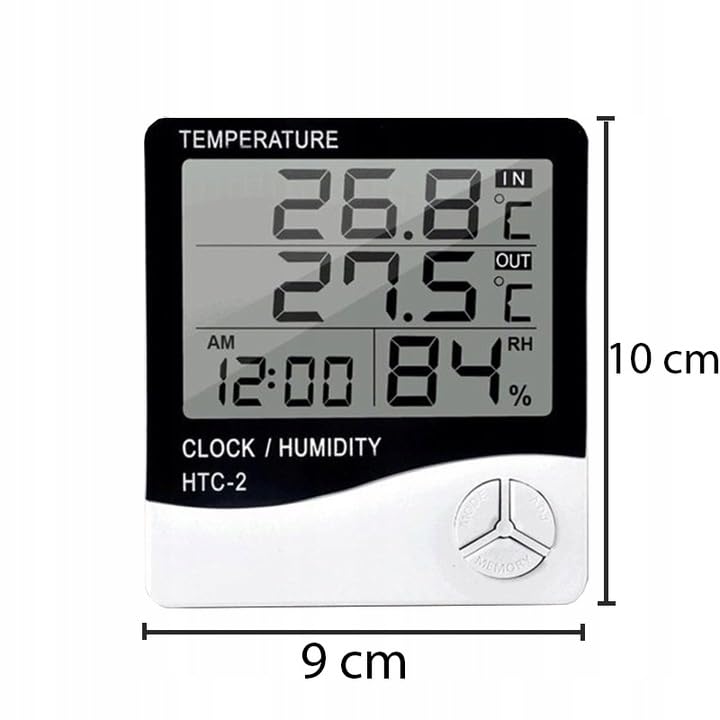
Figure 5: Approximate dimensions of the weather station.
- Модел: RB-0005
- Бренд: Rebel
- Кубат булагы: 1x AAA Батарея (киргизилген эмес)
- Материал: Пластик
- Өзгөчөлүктөр: Alarm, Calendar, Min/Max Memory
- Пакеттин өлчөмдөрү: 18 x 12 x 10 см
- Продукциянын өлчөмдөрү (болжол менен): 9 см (туурасы) x 10 см (бийиктиги)
- Биринчи жеткиликтүү датасы: 23-ноябрь, 2020-жыл
11. Кепилдик жана колдоо
Бул продукт стандарттуу өндүрүүчүнүн кепилдиги менен камтылган. Кепилдиктин конкреттүү шарттары жана эрежелери үчүн, сатып алуу учурунда берилген документтерди караңыз же сатуучуга кайрылыңыз.
For technical support or inquiries, please contact the Rebel customer service department through their official webсайт же сатуучуңуз берген байланыш маалыматы.