1. Киришүү
This manual provides comprehensive instructions for the setup, operation, and maintenance of your Lorex LWU3620 720p HD Weatherproof Wireless Security Camera. The LWU3620 series offers simple, clutter-free installation with secure real-time video protected by Signal Guard technology. Designed for both indoor and outdoor use, it features night vision and is weatherproof and vandal resistant.
Please read this manual thoroughly before installation and operation to ensure proper use and to maximize the camera's performance and longevity.
2. Эмнелер камтылган
The Lorex LWU3620 package typically includes the following components:
- Lorex LWU3620 Wireless Security Camera
- Кубаттуу адаптер
- Орнотуу жабдуулары (бурамалар жана якорьлор)
- Quick Start Guide
Please verify all items are present before proceeding with installation.

Image: The Lorex LWU3620 720p HD Weatherproof Wireless Security Camera, a white bullet-style camera with an antenna, shown from a front-side angle.
3. Орнотуу
3.1. Шайкештик
This 720p HD wireless security camera is exclusively compatible with the Lorex ECO LH041 and LH050 Series DVRs. Ensure you have one of these compatible DVR systems for proper operation.
3.2. Power Connection
- Connect the provided power adapter to the camera's power input.
- Plug the power adapter into a standard electrical outlet. The camera will power on automatically.
3.3. System Pairing
For detailed instructions on pairing the wireless camera with your Lorex ECO LH041 or LH050 Series DVR, please refer to the specific instruction manual provided with your DVR system. This process typically involves accessing the DVR's wireless setup menu and following the on-screen prompts to detect and add the camera.
3.4. Камераны орнотуу
Choose a suitable location for your camera, considering both indoor and outdoor environments. Ensure the chosen location is within the effective wireless range of your DVR and provides a clear line of sight to the area you wish to monitor.
- Use the included mounting template (if provided with your DVR or camera) to mark the drill holes on the desired surface.
- Drill pilot holes and insert the provided wall anchors if mounting into drywall or masonry.
- Secure the camera's mounting bracket to the surface using the provided screws.
- Attach the camera to the mounting bracket and adjust its angle to cover the desired surveillance area.
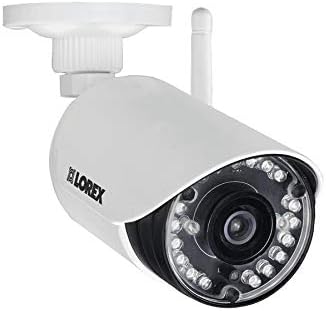
Image: The Lorex LWU3620 camera's mounting bracket, showing the base and adjustable arm for positioning the camera.
4. Иштөө нускамалары
Once your Lorex LWU3620 camera is successfully set up and paired with your DVR, you can begin utilizing its features for effective surveillance.
4.1. Viewing Footage
Access live and recorded video footage directly through your compatible Lorex ECO LH041 or LH050 Series DVR. Consult your DVR's manual for specific navigation and playback instructions.
4.2. Түнкү көрүнүш
The camera is equipped with long-range night vision capabilities, allowing it to capture clear video in low-light conditions up to 120 feet (37 meters) or 80 feet (28 meters), depending on environmental factors. This ensures continuous monitoring, day or night.
4.3. Зымсыз байланыш
High-gain antennas provide an extended wireless range of up to 160 feet (50 meters) indoors and up to 500 feet (152 meters) outdoors. This allows for flexible placement options without the need for extensive cabling.
4.4. SignalGuard Technology
Integrated SignalGuard technology continuously monitors the wireless signal strength between the camera and the DVR. In the event of a weak signal, it automatically attempts to reconnect, maintaining a steady and reliable connection for uninterrupted surveillance.
4.5. Аба ырайынын таасирине туруктуу дизайн
With an IP66 weatherproof rating, the camera and its power connectors are designed to withstand various outdoor conditions, including dust and water exposure. This ensures reliable performance whether installed indoors or outdoors.
5. Техникалык тейлөө
Regular maintenance helps ensure the optimal performance and longevity of your Lorex LWU3620 security camera.
- Линзаны тазалоо: Periodically clean the camera lens with a soft, lint-free cloth to remove dust, dirt, or smudges that may affect image clarity. Avoid using harsh chemicals or abrasive materials.
- Программалык камсыздоонун жаңыртуулары: Лорексти текшериңиз website (lorex.com) or your DVR system's interface for any available firmware updates. Keeping your camera's firmware up-to-date can provide performance enhancements, new features, and security improvements.
- Кабелдик текшерүү: Regularly inspect the power cable and antenna for any signs of wear, cuts, or damage. Ensure all connections are secure.
- Экологиялык текшерүүлөр: For outdoor installations, ensure that the camera's mounting remains secure and that no vegetation or other obstructions are blocking its field of view.
6. Кыйынчылыктарды
If you encounter issues with your Lorex LWU3620 camera, refer to the following common troubleshooting steps:
6.1. Видео сигнал жок
- Күчтү текшерүү: Ensure the camera is properly connected to its power adapter and the adapter is plugged into a working electrical outlet.
- Verify DVR Connection: Confirm that your Lorex DVR is powered on and functioning correctly.
- Зымсыз диапазон: Ensure the camera is within the effective wireless range of your DVR. Obstacles like thick walls or other wireless devices can reduce range. Try temporarily moving the camera closer to the DVR.
- Re-pair Camera: If the connection is lost, you may need to re-pair the camera with your DVR. Refer to your DVR's manual for the pairing procedure.
6.2. Сүрөттүн сапаты начар
- Таза линза: Gently clean the camera lens with a soft, damp кирди же тактарды кетирүү үчүн кездеме.
- Жарыктандыруу шарттары: Ensure there is adequate lighting in the monitored area. For night vision, confirm that the area is not excessively dark or that infrared lights are not obstructed.
- Тоскоолдуктар: Check for any physical obstructions (e.g., spiderwebs, leaves, glare) blocking the camera's view.
6.3. Үзгүлтүксүз туташуу
- Сигнал күчү: Relocate the camera or DVR to improve wireless signal strength. Avoid placing the camera near large metal objects or other sources of wireless interference.
- Router Interference: If possible, adjust the channels of your Wi-Fi router or other wireless devices to minimize interference with the camera's signal.
- SignalGuard: The camera's SignalGuard technology should help maintain connection, but extreme interference may still cause issues.
7. Техникалык шарттар
| Өзгөчөлүк | Description |
|---|---|
| Модел | LWU3620 |
| Видео тартуунун резолюциясы | 720p HD |
| Түнкү көрүү диапазону | Up to 120 ft (37m) / 80 ft (28m) |
| Зымсыз диапазон | Up to 160 ft (50m) indoor / 500 ft (152m) outdoor |
| Эл аралык коргоо рейтинги | IP66 (Аба ырайына чыдамдуу) |
| Байланыш технологиясы | Зымсыз (Wi-Fi) |
| Power Source | AC/DC |
| Шайкештик | Lorex ECO LH041 & LH050 Series DVRs only |
| Бренд | lorex |
| Элемент моделинин номери | LWU3620 |
| UPC | 695529023762 |
8. Кепилдик жана колдоо
For detailed warranty information regarding your Lorex LWU3620 720p HD Weatherproof Wireless Security Camera, please refer to the warranty documentation included with your product at the time of purchase. You can also find the most up-to-date warranty policies on the official Lorex webсайт.
For technical support, product registration, frequently asked questions (FAQs), and access to additional resources such as software downloads and updated manuals, please visit the official Lorex support webсайтында lorex.com.
When contacting support, please have your product model number (LWU3620) and serial number readily available.


