1. Киришүү
The Pro-Ject Debut RecordMaster II is a high-fidelity turntable designed for an enhanced vinyl listening experience and digital conversion. This model features a pre-mounted OM5e cartridge, a built-in switchable phono preamplifier, and a USB output for direct connection to a PC or Mac. It incorporates a belt drive system with a low-noise AC motor, TPE decoupling, and a DC-driven AC generator for stable speed. Electronic speed change allows for playback at 33, 45, and 78 RPM, with a simple stylus exchange (OM78, not included) and drive belt adjustment required for 78 RPM.
This manual provides essential information for the proper setup, operation, and maintenance of your turntable to ensure optimal performance and longevity.
2. Коопсуздук нускамалары
- Колдонуудан мурун бардык нускамаларды кунт коюп окуп чыгыңыз.
- Keep the turntable away from water, moisture, and direct sunlight.
- Do not place the turntable near heat sources such as radiators, heat registers, stoves, or other apparatus that produce heat.
- Өндүрүүчү белгилеген тиркемелерди/аксессуарларды гана колдонуңуз.
- Unplug the turntable during lightning storms or when unused for long periods.
- Бардык тейлөөлөрдү квалификациялуу тейлөө кызматкерлерине тапшырыңыз.
- Агрегаттын айланасын туура желдетүүнү камсыз кылыңыз.
3. Пакеттин мазмуну
Төмөндө тизмеленген нерселердин баары пакетиңизге камтылганын текшериңиз:
- Pro-Ject Debut RecordMaster II Turntable with pre-mounted OM5e cartridge
- Connect it RCA Cable
- Чаң каптоочу
- Adapter for 7-inch singles
- Электр камсыздоо
4. Орнотуу колдонмосу
Follow these steps to set up your Pro-Ject Debut RecordMaster II turntable:
4.1 Пакеттен чыгаруу жана жайгаштыруу
Carefully remove all components from the packaging. Place the turntable on a stable, level surface away from vibrations and direct heat sources. Ensure adequate space for the dustcover to open fully.
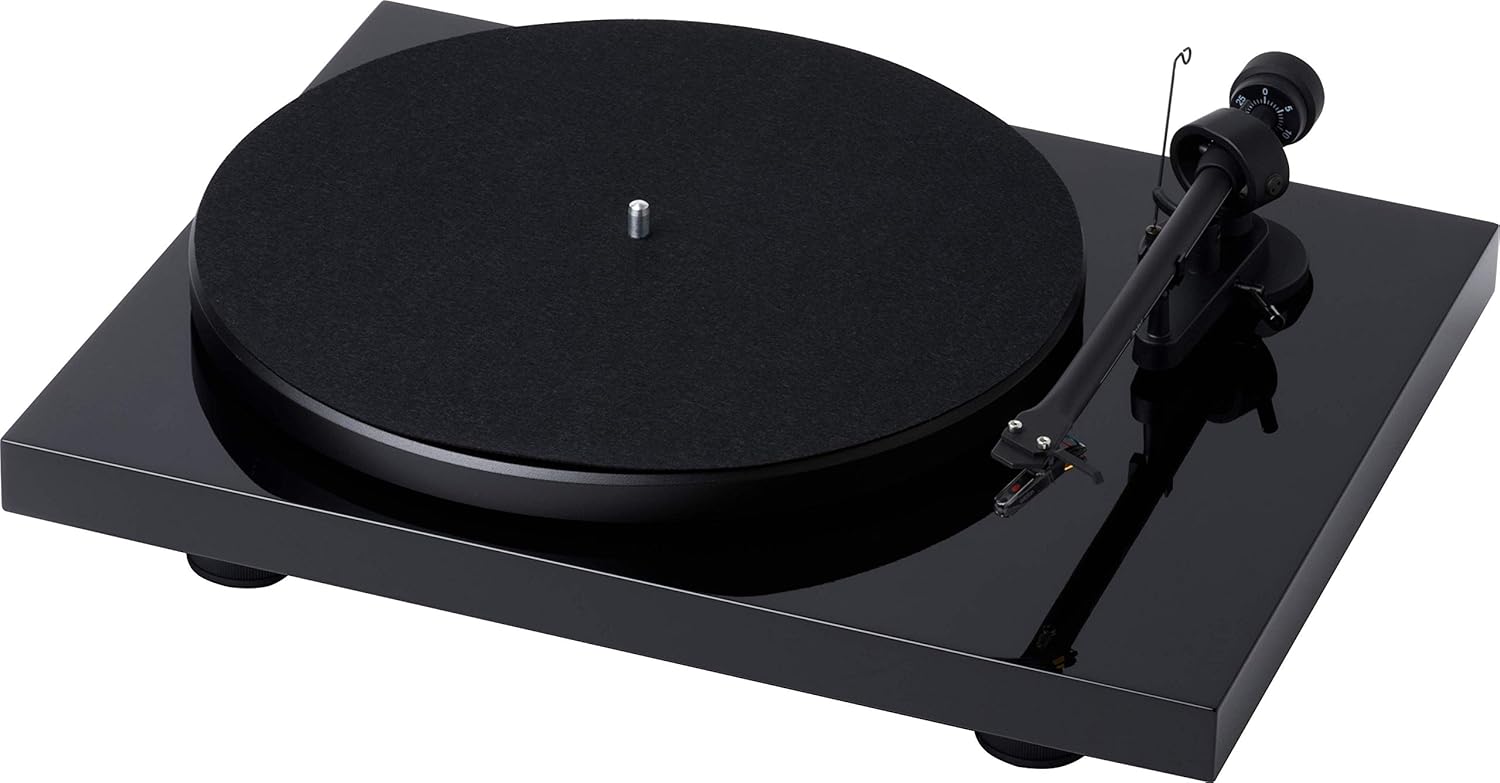
1-сүрөт: жогорудан ылдыйга view of the Pro-Ject Debut RecordMaster II Turntable.
4.2 Пластинаны жана курду орнотуу
- Place the platter onto the spindle.
- Carefully loop the drive belt around the motor pulley and the inner rim of the platter.
4.3 Тонеармдын балансы жана көзөмөлдөө күчү
The turntable comes with a pre-mounted OM5e cartridge. Refer to the cartridge manufacturer's instructions for precise tracking force and anti-skating settings. Generally, balance the tonearm until it floats freely, then set the tracking force using the counterweight.

Figure 2: Close-up of the tonearm, showing the Pro-Ject branding.
4.4 Аудио системага туташуу
The Debut RecordMaster II features a built-in switchable phono preamplifier and USB output. You can connect it to a line-level input on your hi-fi system or directly to a PC/Mac via USB.
- RCA туташуу: Use the supplied RCA cable to connect the turntable's output to an available line-level input (e.g., AUX, CD) on your amplifier or receiver. Ensure the phono preamplifier switch on the turntable is set to 'Line Out' if connecting to a line-level input, or 'Phono Out' if connecting to an amplifier with a dedicated phono input.
- USB туташуу: Connect the turntable to your computer using a USB cable (not included). This allows for digital recording of your vinyl.
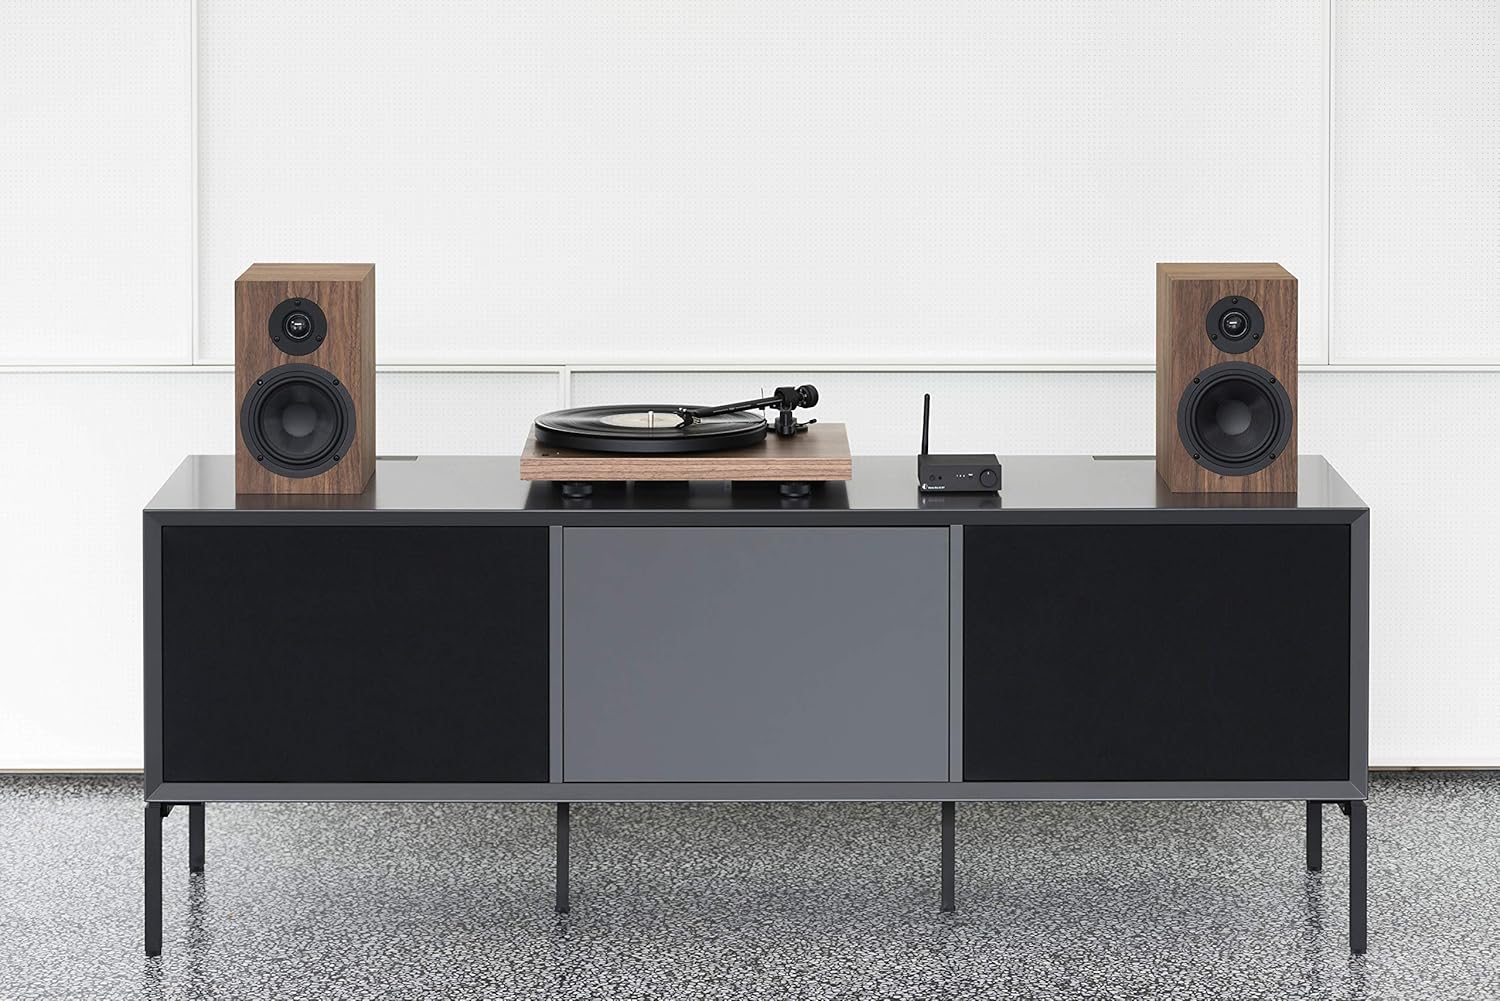
Figure 3: Turntable integrated into a home audio setup with speakers.

Figure 4: Turntable connected to a laptop, demonstrating USB recording capability.
4.5 Dustcover Installation
Attach the dustcover hinges to the designated slots on the rear of the turntable. The dustcover protects the turntable from dust and debris when not in use.
5. Иштөө нускамалары
5.1 Күйгүзүү/өчүрүү
Locate the power switch, typically on the underside or rear of the plinth. Turn the switch to the 'On' position to power the turntable. Turn it 'Off' when not in use.

Figure 5: Detail of the power switch for the turntable.
5.2 Ылдамдыкты тандоо
The turntable supports 33, 45, and 78 RPM playback. Use the electronic speed change function to select the appropriate speed for your record. For 78 RPM records, a specific OM78 stylus (not included) and a drive belt turnover to a larger diameter of the pulley are required.
5.3 Пластинканы ойнотуу
- Табакка рекорд кой.
- Ensure the correct playback speed is selected.
- Колду көтөрүү рычагын колдонуп, колду көтөрүңүз.
- Тонер рычагын пластинканын каалаган баштапкы оюгунун үстүнө акырын жылдырыңыз.
- Slowly lower the tonearm using the lift lever. The stylus will descend onto the record and playback will begin.
5.4 Ойнотууну токтотуу
- Колду көтөрүү рычагын колдонуп, колду көтөрүңүз.
- Тонер рычагын кайра баштапкы абалына жылдырыңыз.
- Lower the tonearm onto its rest using the lift lever.
- Turn off the turntable.
5.5 USB жаздыруу
To record vinyl to your PC/Mac, connect the turntable via USB. Use appropriate audio recording software (not included) on your computer to capture the audio signal. Ensure the turntable's phono preamplifier is set to 'Line Out' for USB recording.
6. Техникалык тейлөө
6.1 Стилусту тазалоо
Regularly clean the stylus using a soft brush or a dedicated stylus cleaning fluid. Brush gently from back to front to remove dust and debris.
6.2 Cleaning Records
Use a carbon fiber brush or a record cleaning solution to keep your vinyl records free of dust and static. Clean records before each play to minimize wear on the stylus and improve sound quality.
6.3 Dustcover Care
Clean the dustcover with a soft, damp кездеме. Бетти чийип салуучу абразивдүү тазалагычтардан алыс болуңуз.
7. Кыйынчылыктарды
If you encounter issues with your turntable, consult the following common problems and solutions:
| Көйгөй | Мүмкүн себеп | Чечим |
|---|---|---|
| Үн жок же өтө төмөн | Туура эмес киргизүү тандоосу күйүк amplifier; Phono preamp switch incorrect; Loose cables. | Select correct input; Adjust phono preamp switch; Check all cable connections. |
| Бурмаланган үн | Dirty stylus; Incorrect tracking force or anti-skating; Damaged stylus. | Clean stylus; Re-adjust tracking force/anti-skating; Replace stylus if damaged. |
| Ойнотуу ылдамдыгы туура эмес | Wrong speed selected; Drive belt issue. | Select correct speed (33/45/78 RPM); Check drive belt for proper placement or wear. |
| Укмуш ызы-чуу | Ground wire not connected; Interference from other electronics. | Ensure ground wire is securely connected; Move turntable away from other electronic devices. |
8. Техникалык шарттар
| Өзгөчөлүк | Деталь |
|---|---|
| Бренд | Pro-Ject |
| Модель аты | Recordmaster II |
| Элемент моделинин номери | RM II Om5e |
| Мотор түрү | AC мотор |
| Максималдуу айлануу ылдамдыгы | 78 RPM |
| Өзгөчөлүктөр | USB Output, Built-in Phono Preamplifier, Electronic Speed Change |
| Шайкеш түзмөктөр | Персоналдык компьютер |
| Туташтыргыч түрү | USB |
| Материал | Пластик |
| Продукциянын өлчөмдөрү | 32 x 41.5 x 11.8 см; 7.7 кг |
| Кубат булагынын түрү | Электр зымдары |
| Батареялар камтылган | Жок |
| Батареялар талап кылынат | Жок |
9. Кепилдик жана колдоо
For detailed warranty information, please refer to the documentation included with your product or visit the official Pro-Ject Audio Systems website. For technical support or service inquiries, please contact Pro-Ject customer service through their official channels.


