1. Киришүү
Thank you for choosing the ETA Delicca 2 Bread Maker. This appliance is designed to simplify your baking process, allowing you to effortlessly prepare a variety of breads, doughs, jams, and even yogurts. With its 12 pre-defined programs and user-friendly interface, you can enjoy fresh, homemade goods with minimal effort. Please read this manual carefully before first use to ensure safe and optimal operation of your new bread maker.
2. Коопсуздук нускамалары
- Always ensure the appliance is placed on a stable, flat, heat-resistant surface, away from water and heat sources.
- Do not immerse the bread maker's main unit, cord, or plug in water or any other liquid.
- Keep children and pets away from the appliance during operation, as surfaces can become very hot.
- Unplug the bread maker from the power outlet when not in use, before cleaning, or before adding/removing parts.
- Do not operate the appliance with a damaged cord or plug, or if it has malfunctioned or been damaged in any way.
- Өндүрүүчүлөр сунуштаган аксессуарларды гана колдонуңуз.
- Never insert hands or utensils into the bread maker during operation.
- Колдонуу учурунда шаймандын тегереги туура желдетилишин камсыз кылыңыз.
3. Продукт бүтүп калдыview
Familiarize yourself with the components of your ETA Delicca 2 Bread Maker:

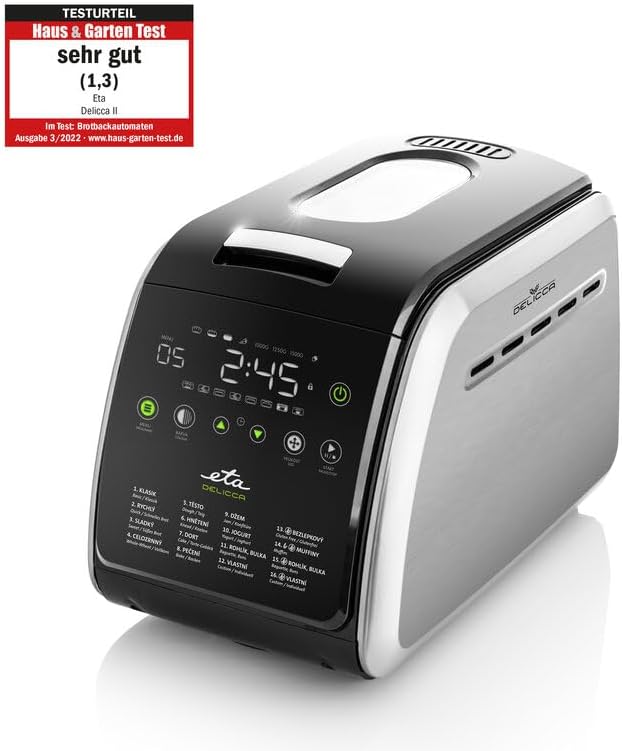
3.1-сүрөт: The ETA Delicca 2 Bread Maker with its removable bread pan. The control panel is visible on the left, and the main unit features a sleek stainless steel finish.
3.2-сүрөт: The bread maker shown with its essential accessories: two kneading paddles, a measuring cup, and a measuring spoon. These tools are crucial for accurate ingredient measurement and proper dough preparation.

3.3-сүрөт: Үстүбүздөгү чыгым view of the bread maker with its lid open, revealing the interior cavity where the bread pan is placed. The heating elements and the mechanism for the kneading paddles are visible at the bottom.
Компоненттери:
- Негизги блок: Анын ичинде жылытуучу элемент, кыймылдаткыч жана башкаруу панели жайгашкан.
- Нан табасы: Removable non-stick pan for baking.
- Kneading Paddles: Two paddles for mixing and kneading ingredients.
- Өлчөө чөйчөгү: For liquid ingredients.
- Өлчөө кашык: For smaller quantities of ingredients (e.g., yeast, salt).
- Капкак: менен а viewing window to monitor the baking process.
4. Орнотуу
Биринчи колдонуу:
- Unpack the bread maker and all its accessories. Remove any packaging materials.
- Wash the bread pan and kneading paddles with warm, soapy water. Rinse thoroughly and dry completely.
- Негизги блоктун сыртын жарнама менен сүртүңүзamp кездеме. Абразивдүү тазалагычтарды колдонбоңуз.
- Before first use, it is recommended to run the 'Bake' program (Program 12) for about 10 minutes without any ingredients to burn off any manufacturing residues. Ensure good ventilation during this process. Allow the unit to cool down completely afterwards.
Жайгашкан жери:
Place the bread maker on a stable, level, and heat-resistant surface. Ensure there is adequate space around the appliance for ventilation, especially at the back and sides. Do not place it near curtains or flammable materials.
5. Иштөө нускамалары
Нан жасоонун негизги кадамдары:
- Insert Kneading Paddles: Place the kneading paddles onto the shafts at the bottom of the bread pan.
- Ингредиенттерди кошуу: Add ingredients to the bread pan in the order specified by your recipe (typically liquids first, then dry ingredients, with yeast last and separate from liquids/salt). Ensure accurate measurements using the provided cup and spoon.
- Нан табасын кой: Нан табасын негизги блоктун ичине салыңыз, ал ордунан чыккыча катуу басыңыз. Капкакты жабыңыз.
- Плагин: Connect the power cord to a suitable electrical outlet. The display will light up.
- Программаны тандоо: Use the 'Menu' button to cycle through the 12 pre-defined programs until you reach your desired program.
- Select Loaf Size & Crust Color: Use the 'Loaf Size' and 'Crust Color' buttons to adjust settings according to your recipe and preference.
- Баштоо: Press the 'Start/Stop' button to begin the program. The bread maker will automatically mix, knead, rise, and bake.
- Нанды алып салуу: Once the program is complete, the bread maker will beep. Unplug the appliance. Using oven mitts, carefully remove the bread pan from the unit. Invert the pan to release the bread onto a wire rack to cool. Remove the kneading paddles from the bread if they remain embedded.
Атайын функциялар:
- Кечигүү таймери: Allows you to delay the start of the baking process for up to 13 hours. Add ingredients, set program, then use the '+' and '-' buttons to set the delay time, and press 'Start/Stop'.
- Жылытуу: After baking, the bread maker automatically enters a 60-minute 'Keep Warm' cycle to maintain bread temperature.
- Add Ingredients Signal: For some programs, the bread maker will beep during the kneading cycle to indicate when to add additional ingredients like fruits, nuts, or seeds.

5.1-сүрөт: The ETA Delicca 2 Bread Maker positioned in a modern kitchen, surrounded by a variety of freshly baked goods, including loaves of bread, cake, and jam, demonstrating its versatility.
6. Program Guide
The ETA Delicca 2 offers 12 pre-set programs to cater to various baking needs:
| Программа № | Программанын аты | Description |
|---|---|---|
| 1 | Негизги | Негизинен негизги нан унунан турган ак жана аралаш нандар үчүн. |
| 2 | Франсузча | For light breads made from fine flour. Typically results in a crispier crust. |
| 3 | Бүтүн буудай | For breads containing whole wheat flour, which requires a longer kneading and rising time. |
| 4 | таттуу | Кант, май жана белок көп болгон нандар үчүн. |
| 5 | Глютенсиз | For gluten-free recipes. These breads often require different kneading and rising conditions. |
| 6 | Rapid Bake | For quick baking of basic bread. Note: May result in a denser texture. |
| 7 | Камыр | For preparing doughs for pizza, rolls, or pastries without baking. |
| 8 | жууруп | For kneading dough only, without rising or baking. |
| 9 | Торт | For mixing and baking cakes and quick breads. |
| 10 | Jam | Үй кыямдарын жана мармеладдарын жасоо үчүн. |
| 11 | Йогурт | Үй шартында йогурт даярдоо үчүн. |
| 12 | Бышыруу | For baking only, without kneading or rising. Useful for additional baking time or pre-made dough. |
7. Техникалык тейлөө жана тазалоо
Үзгүлтүксүз тазалоо нан жасоочуңуздун узак иштөөсүн жана оптималдуу иштешин камсыз кылат.
Тазалоо кадамдары:
- Ажыратып, муздатуу: Always unplug the bread maker and allow it to cool completely before cleaning.
- Bread Pan and Paddles: Remove the bread pan and kneading paddles. Fill the pan with warm, soapy water and let it soak for 10-15 minutes to loosen any stuck-on dough. Use a soft sponge or cloth to clean. Do not use metal scouring pads or abrasive cleaners, as they can damage the non-stick coating. Rinse thoroughly and dry completely.
- Ички иштер: Бышыруучу камеранын ичин жарнама менен сүртүңүзamp cloth to remove any crumbs or residue. Do not use excessive water.
- Сырткы: Clean the exterior of the bread maker with a soft, damp cloth. For stubborn stains, a mild detergent can be used. Dry thoroughly.
- Сактагыч: Store the bread maker in a clean, dry place once completely dry.
Эскертүү: The bread pan and kneading paddles are not dishwasher safe, as this can damage the non-stick coating.
8. Кыйынчылыктарды
Нан жасоочу менен көйгөйлөргө туш болсоңуз, төмөнкү жалпы көйгөйлөрдү жана чечимдерди караңыз:
| Көйгөй | Мүмкүн себеп | Чечим |
|---|---|---|
| Нан көтөрүлбөйт | Expired or inactive yeast; incorrect water temperature; too much salt/sugar. | Check yeast expiry; use lukewarm water (38-43°C); ensure correct ingredient measurements. |
| Нан өтө тыгыз/оор | Too much flour; not enough liquid; insufficient kneading. | Measure ingredients precisely; ensure proper program selection for dough type. |
| Бышыруу учурунда нан кулап калат | Өтө көп суюктук; өтө көп ачыткы; жогорку нымдуулук. | Reduce liquid slightly; ensure correct yeast amount; adjust recipe for humidity. |
| Kneading paddles stuck in bread | Кадимки көрүнүш. | Нан муздагандан кийин металл эмес аспап менен этияттык менен алып салыңыз. |
| Дисплей ката кодун көрсөтөт | Overheating; motor overload; sensor issue. | Unplug and let cool for 20-30 minutes. If problem persists, contact customer support. |
9. Техникалык шарттар
| Өзгөчөлүк | Деталь |
|---|---|
| Бренд | ETA |
| Модель номери | ETA714990030 |
| Түс | Дат баспаган болот |
| Өлчөмдөрү (L x W x Y) | 30 x 12.5 x 20 см |
| Кубаттуулугу | Up to 3 pounds (approx. 1.5 kg) |
| Күч | 850 Ватт |
| Тtage | 230 вольт |
| Материал | Дат баспаган болот |
| Салмагы | 7 килограмм |
| Программалардын саны | 12 |
10. Кепилдик жана колдоо
For warranty information, please refer to the documentation provided at the time of purchase. Keep your proof of purchase for any warranty claims.
If you require technical assistance, have questions about your product, or need to order spare parts, please contact ETA customer support. Contact details can typically be found on the manufacturer's webсайтында же сатып алуу документтеринде.
Эскертүү: Бул моделдин запастык бөлүктөрү жөнүндө маалымат учурда жок.


