1. Киришүү
Thank you for choosing the Inkbird BBQGO BG-CT2D Digital Food Thermometer. This device is designed to help you achieve perfectly cooked meals by accurately monitoring food temperatures. Featuring dual probes, a touch screen, and preset temperature options, it is ideal for use with ovens, grills, smokers, and various cooking methods. Please read this manual thoroughly before use to ensure proper operation and longevity of your thermometer.
2. Продукт бүтүп калдыview
2.1 Негизги өзгөчөлүктөрү
- Кош зонддор: Monitor two different foods or two parts of the same food simultaneously. Probes are 40 inches (100cm) long and heat-resistant.
- Кең температура диапазону: Measures from -20℃ to 250℃ (-4°F to 482°F) with an accuracy of ±2℃/±2°F.
- Алдын ала коюлган менюлар: Includes factory-preset temperatures and doneness levels for 8 types of meat (Beef, Lamb, Veal, Hamburger, Pork, Turkey, Chick, Fish).
- Ыңгайлуу дизайн: Features two magnets for attachment to metal surfaces and a back stand for tabletop use. Silicone cover provides protection.
- Touch Screen & LCD Backlight: Easy-to-read large LCD with sensitive touch controls and backlight for clear visibility in any lighting condition.
- Built-in Timer & Alarm: Set cooking times from 59 seconds to 99 minutes. An alarm sounds when the set temperature is reached or time expires, preventing overcooking.
2.2 Компоненттер
The Inkbird BBQGO BG-CT2D thermometer consists of the main unit and two temperature probes.

Image: The main thermometer unit with its two temperature probes, showing approximate dimensions.

Image: A detailed diagram illustrating the various parts and buttons of the thermometer, including probe channels, display areas, and control buttons.
- 1. Magnet: Металл беттерге бекитүү үчүн.
- 2. Кубат өчүргүч: Аппаратты күйгүзөт/өчүрөт.
- 3. Support Frame: Үстөл үстүнө жайгаштыруу үчүн.
- 4. Probe Jack: Connects the temperature probes.
- 5. Батарея бөлүмү: 2 AAA батарейканы кармайт (киргизилген эмес).
- 6. Preset Meat Type: Displays the selected meat type.
- 7. Probe Channel: Indicates which probe (1 or 2) is active.
- 8. Doneness Level: Shows the selected doneness (e.g., RARE, MEDIUM).
- 9. Alarm Temperature: Displays the target temperature for the alarm.
- 10. Учурдагы температура: Shows the real-time temperature from the probe.
- M баскычы: Changes preset mode or turns on the alarm.
- T баскычы: Selects doneness level or switches between °C/°F.
- CH баскычы: Selects probe channel or sets an alarm.
3. Орнотуу
3.1 Батареяны орнотуу
- Термометрдин арткы бетиндеги батарея бөлүмүн табыңыз.
- Батареянын капкагын ачыңыз.
- Туура полярдуулукту (+/-) камсыз кылып, 2 AAA батарейкасын (кошулмага кирбейт) салыңыз.
- Батареянын капкагын бекем жабыңыз.

Image: The rear of the thermometer unit with the battery compartment open, indicating where to insert 2 AAA batteries.
3.2 Зонддорду туташтыруу
- Ensure the thermometer unit is powered off.
- Insert the stainless steel probes into the probe jacks located on the sides of the main unit. Ensure they are fully inserted for a secure connection.
Image: The thermometer unit with both probes correctly connected to the side jacks.
3.3 Күйгүзүү/өчүрүү
- To power on, slide the power switch on the back of the unit to the "ON" position.
- Өчүрүү үчүн, кубат которгучун "OFF" абалына жылдырыңыз.

Сүрөт: жакын план view of the power switch located on the side of the thermometer unit.
4. Иштөө нускамалары
4.1 Температура бирдигин тандоо (°C/°F)
Цельсий (°C) жана Фаренгейт (°F) ортосунда которулуу үчүн, баскычын басыңыз T button on the touch screen. The display will update accordingly.

Image: The thermometer display indicating the option to select between Celsius and Fahrenheit temperature units.
4.2 Selecting Probe Channel
басыңыз CH button to switch between Probe 1 and Probe 2. The selected channel will be highlighted on the display.
4.3 Using Preset Temperatures
- басыңыз M button to cycle through the 8 preset meat types (BEEF, LAMB, VEAL, HAMBURGER, PORK, TURKEY, CHICK, FISH).
- Once a meat type is selected, press the T button to choose the desired doneness level (e.g., RARE, MED RARE, MEDIUM, WELL). The target temperature will adjust automatically.
- Зондду тамактын эң калың жерине, сөөктөрдөн же түкчөлөрдөн алыс кылып салыңыз.
- The thermometer will display the current temperature and the set alarm temperature. An alarm will sound when the food reaches the target temperature.
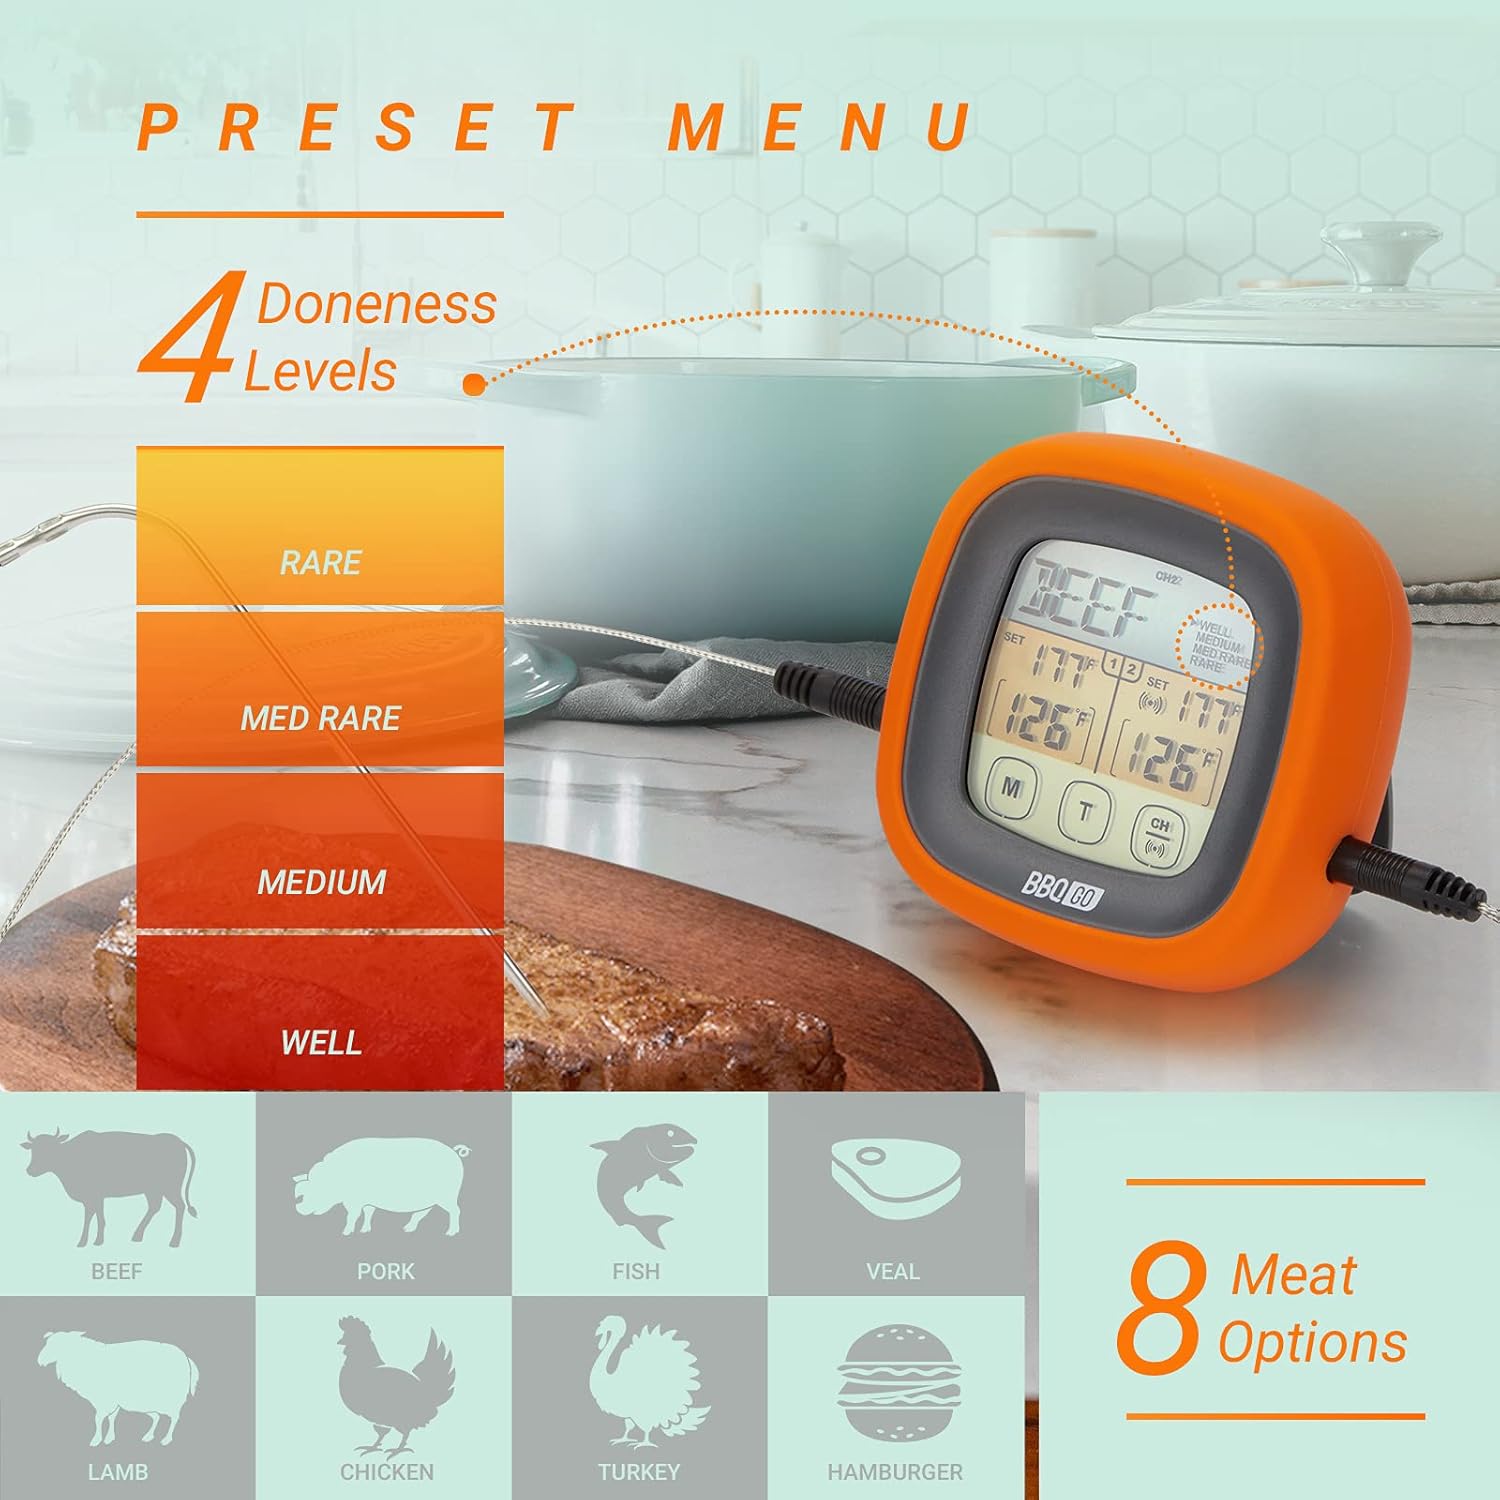
Image: The thermometer display illustrating the selection of various meat types and their corresponding doneness levels.
4.4 Setting Custom Temperatures
If you prefer a specific temperature not covered by the presets:
- Select the desired probe channel using the CH баскычы.
- басып, кармап туруңуз CH button until the alarm temperature starts flashing.
- колдонуу M жана T buttons to adjust the target temperature up or down.
- Басыңыз CH орнотууну ырастоо үчүн дагы.
4.5 Таймер функциясы
The thermometer includes a built-in timer:
- To activate the timer, press and hold the M button until the timer digits appear.
- колдонуу M жана T buttons to set the desired time (up to 99 minutes, 59 seconds).
- Басыңыз CH таймерди баштоо же тындыруу үчүн.
- Таймер нөлгө жеткенде сигнал иштейт.
4.6 Жарыкты башкаруу
The LCD backlight can be activated for better visibility:
- Press any button to momentarily activate the backlight.
- The backlight will automatically turn off after a short period of inactivity to conserve battery.

Image: The thermometer display illuminated by its backlight, demonstrating clear readability in low-light conditions.
5. Техникалык тейлөө
5.1 Тазалоо
- Термометр бирдиги: Негизги блокту жарнама менен сүртүңүзamp cloth. Do not immerse the unit in water or place it under running water.
- Зонддор: Wash the stainless steel probes with warm soapy water after each use. Rinse thoroughly and dry completely before storage. The probe wires are heat-resistant but should not be submerged in water.
5.2 Сактоо
- Store the thermometer and probes in a clean, dry place when not in use.
- Ашыкча температурада же жогорку нымдуулукта сактоодон алыс болуңуз.
5.3 Батареяны алмаштыруу
Replace batteries when the display becomes dim or the unit fails to power on. Follow the battery installation steps in Section 3.1.
6. Кыйынчылыктарды
| Көйгөй | Мүмкүн себеп | Чечим |
|---|---|---|
| Дисплей бош же күңүрт. | Төмөн же өлүп калган батарейкалар; туура эмес батарея орнотуу. | Туура полярдуулукту камсыз кылуу менен батарейкаларды жаңы AAA батарейкалары менен алмаштырыңыз. |
| Температураны туура эмес көрсөткүчтөр. | Probe not fully inserted; probe tip touching bone/gristle; probe damaged. | Ensure probe is fully inserted into the food's thickest part, away from bone. If problem persists, the probe may need replacement. |
| Ойготкуч угулбайт. | Alarm function not activated; volume too low (if applicable); unit malfunction. | Ensure alarm temperature is set. Check if the unit has a volume setting (this model does not, so this is a general troubleshooting tip). Contact support if issue persists. |
| Сенсордук экран жооп бербейт. | Unit frozen; temporary software glitch. | Remove and reinsert batteries to reset the unit. |
7. Техникалык шарттар
| Өзгөчөлүк | Деталь |
|---|---|
| Модель аты | BG-CT2D |
| Бренд | Inkbird |
| Температура диапазону | -20℃ден 250℃ге чейин (-4°F менен 482°F) |
| Тактык | ±2℃/±2°F |
| Зонд узундугу | 40 дюйм (100 см) |
| Дисплей түрү | Арткы жарык менен LCD |
| Power Source | 2 x AAA Батареялар (киргизилген эмес) |
| Өзгөчөлүктөр | Fast Reading System, Dual Probes, Touch Screen, Preset Menus, Timer, Magnetic Back, Stand, Silicone Cover |
| Сырткы материал | Acrylonitrile Butadiene Styrene, Silicon |
| Продукт кам көрүү | Oven Safe (probes only), Wipe Clean (main unit) |
8. Кепилдик жана колдоо
Inkbird products are designed for reliability and performance. For specific warranty information regarding your Inkbird BBQGO BG-CT2D Digital Food Thermometer, please refer to the warranty card included in your product packaging or visit the official Inkbird webсайт.
If you encounter any issues or have questions about your product, please contact Inkbird customer support through their official website or the retailer where you purchased the product. Please have your model number (BG-CT2D) and purchase details ready when contacting support.
You can visit the Inkbird store for more information: Inkbird расмий дүкөнү


