1. Киришүү
This manual provides essential instructions for the safe and efficient operation of your AKIYO Z9 Mini DLP Projector. Please read this manual thoroughly before using the product and retain it for future reference.

The compact design of the AKIYO Z9 allows for easy portability.
2. Коопсуздук маалыматы
Проекторго зыян келтирбөө же өзүңүзгө жаракат келтирбөө үчүн төмөнкү коопсуздук чараларын сактаңыз.
- Проекторду жамгырга же нымдуулукка дуушар кылбаңыз.
- Проекторду ачпаңыз casinг. Бардык тейлөөлөрдү квалификациялуу кызматкерлерге тапшырыңыз.
- Туура желдетүүнү камсыз кылыңыз. Вентиляция тешиктерин жаап албаңыз.
- Use only the provided power adapter (5V/3A) for charging.
- Avoid direct eye exposure to the projector lens when the device is operating.
- This projector is designed for front projection only.
- For optimal performance and to prevent battery issues, charge the projector when the power level is below 30%.
3. Пакеттин мазмуну
Пакетте бардык буюмдар бар экенин текшериңиз:
- AKIYO Z9 Mini DLP Projector
- HDMI кабели
- C түрүндөгү кубаттоочу кабель
- 5V/3A кубат адаптери
- Мини штатив
- Колдонуучунун Колдонмосу (бул документ)
4. Продукт бүтүп калдыview
Проектордун компоненттери жана интерфейстери менен таанышыңыз.
Алдыңкы жана каптал view of the AKIYO Z9 Projector with labeled ports and controls.
Негизги компоненттер:
- Проекциялык линза: Сүрөттү чыгарат.
- Сенсордук такта: Навигация жана башкаруу үчүн.
- USB-C заряддоо порту: For charging the projector.
- HDMI порту: Тышкы видео булактарын туташтыруу үчүн.
- USB чыгуу порту: For charging external devices (e.g., smartphones). Note: This port does not support reading or writing data from USB drives.
- Аудио чыгуу порту: Тышкы динамиктерди же наушниктерди туташтыруу үчүн.
- Негизги ташты оңдоо: Сүрөттүн бурмаланышын тууралайт.
- Көлөмдү көзөмөлдөө: Аудио чыгаруу деңгээлин тууралайт.
- Фокусту тууралоо: Проекцияланган сүрөттү курчутат.
- Жарыктыкты жөндөө: Үчtage adjustment for image luminosity.
- Кубат баскычы: Проекторду күйгүзөт/өчүрөт.
5. Орнотуу
5.1 Charging the Projector
- Connect the provided Type-C charging cable to the projector's USB-C port.
- Connect the other end of the cable to the 5V/3A power adapter.
- Кубат адаптерин розеткага сайыңыз.
- The projector can also be charged using a compatible power bank (5V/3A) for outdoor use.

Charging the projector with a power bank for extended outdoor use.
5.2 Күйгүзүү/өчүрүү
- Күйгүзүү үчүн, кубат баскычын индикатор жарыгы күйгүчө басып туруңуз.
- To power off, press and hold the Power button until the projector shuts down.
5.3 Фокусту жана негизги багытты тууралоо
- Фокус: Use the focus adjustment control on the projector to achieve a clear image.
- Негизги ташты оңдоо: The projector features ±40° vertical keystone correction. Adjust this setting via the touchpad to correct trapezoidal image distortion, ensuring a rectangular projection.

Adjusting vertical keystone correction via the touchpad.
5.4 Проекторду жайгаштыруу
The AKIYO Z9 has a short throw ratio of 0.98:1, allowing for a large image from a short distance. For example, a 60-inch projection can be achieved from approximately 7 feet (2.1 meters) away. Place the projector on a stable, flat surface or use the included mini tripod.

Example of outdoor projection with the AKIYO Z9, demonstrating its short throw capability.
6. Иштөө нускамалары
6.1 Түзмөктөргө туташуу
Проектор ар кандай киргизүү булактарын колдойт:
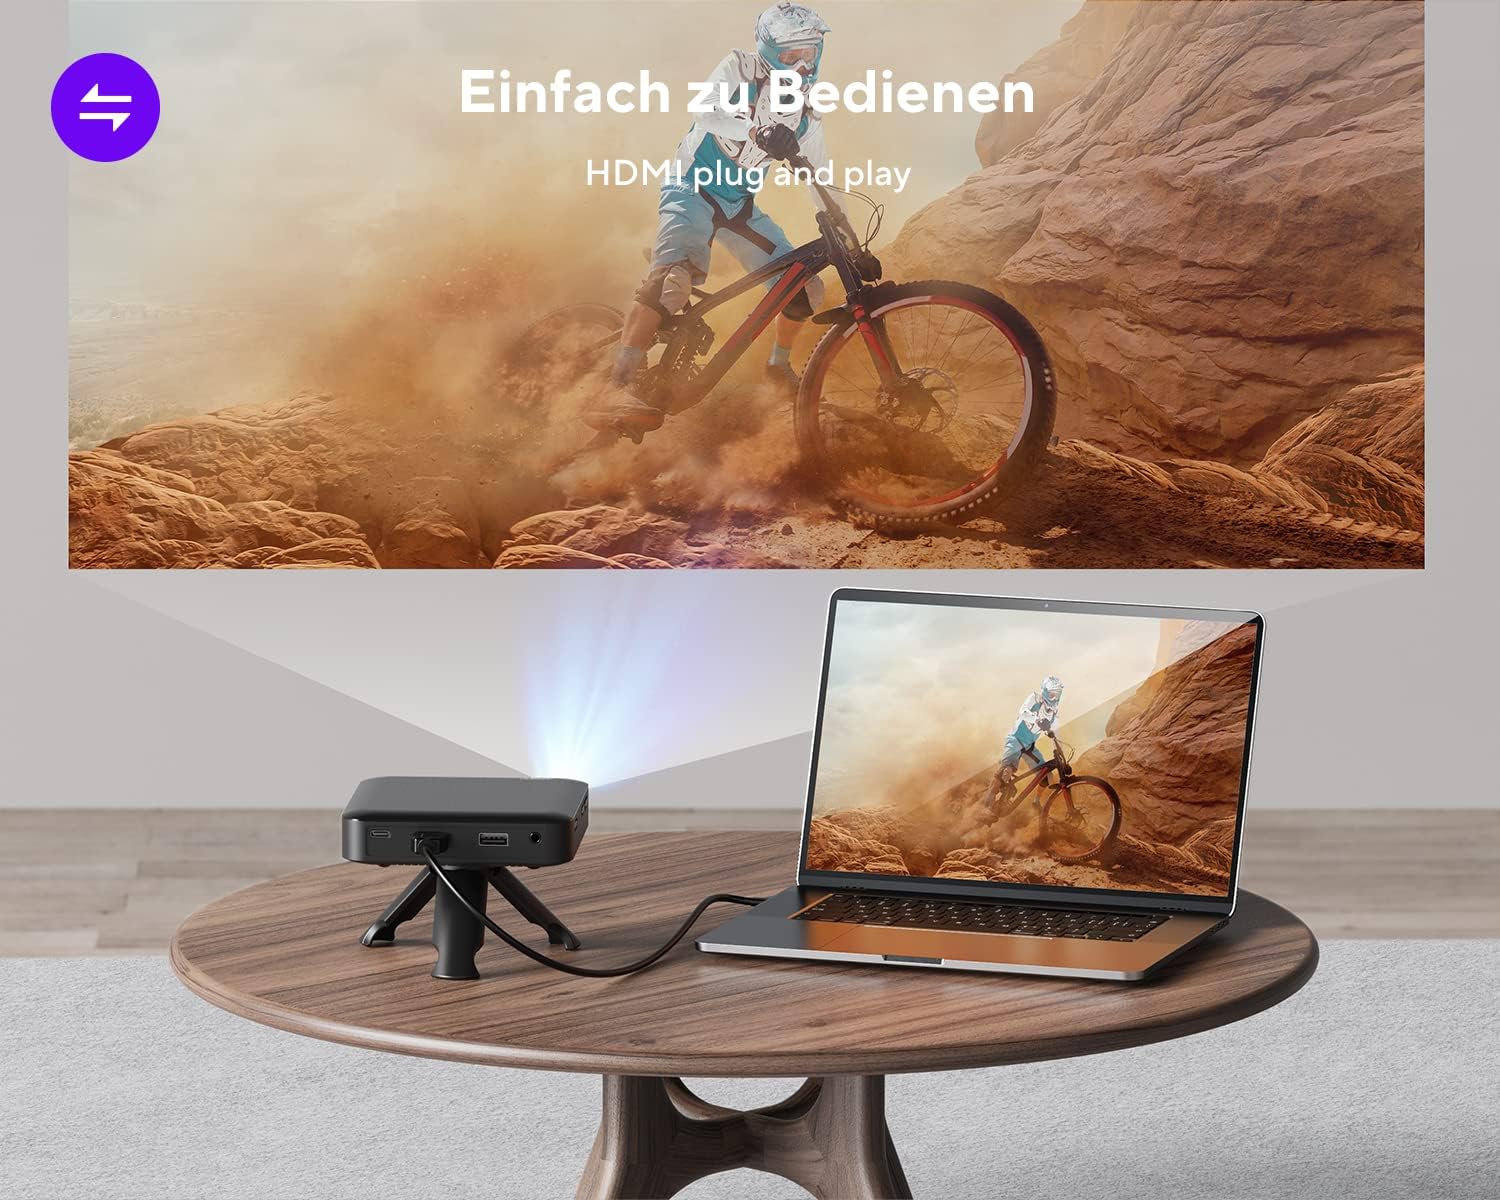
- HDMI туташуу: Use the included HDMI cable to connect to laptops, game consoles (e.g., PS4), TV boxes, or streaming sticks (e.g., Fire TV Stick, ROKU). This is a plug-and-play connection.

Connecting the projector to a laptop via HDMI for video playback.
- Smartphones (Android): Requires an additional MHL cable adapter, HDMI to USB-C cable, or Miracast device (not included).
- Smartphones (iPhone): Requires an additional Apple Lightning Digital AV Adapter (not included).
- Тышкы баяндамачылар: Connect external speakers or headphones to the Audio Out port for enhanced sound.
6.2 Жарыктыкты жөндөө
The projector offers three levels of brightness adjustment. Use the dedicated brightness control or menu options to select the desired level. For best image clarity, especially with 120 ANSI lumens, it is recommended to use the projector in a dark environment.
6.3 Power Bank катары колдонуу
The projector's built-in battery can be used to charge other devices, such as smartphones, via the USB Out port. Connect your device's charging cable to the projector's USB Out port.
The projector can function as a power bank to charge your smartphone.
7. Техникалык тейлөө
7.1 Тазалоо
- Use a soft, dry cloth to clean the exterior of the projector.
- For the lens, use a lens cleaning cloth and specialized lens cleaning solution. Do not use abrasive materials.
- Вентиляция тешиктерин чаңдан жана таштандылардан тазалаңыз.
7.2 Батареяга кам көрүү
- To prolong battery life, avoid fully discharging the projector frequently.
- Charge the projector when the battery level is low (below 30%).
- If storing the projector for an extended period, charge it to approximately 50-70% and recharge every few months.
8. Кыйынчылыктарды
- Кубат жок: Ensure the projector is charged. If the battery is very low, the projector may not turn on or may enter sleep mode. Connect to the power adapter.
- Сүрөт/сигнал жок: Check all cable connections (HDMI, adapters). Ensure the correct input source is selected on the projector.
- бүдөмүк сүрөт: Adjust the focus wheel. Ensure the projection surface is flat and the projector is stable. Use keystone correction if the image is trapezoidal.
- Image Too Dim: Ensure the projector is in a dark environment. Adjust the brightness setting.
- Үн жок: Check the projector's volume settings and the volume of the connected source device. If using external speakers, ensure they are properly connected and powered on.
- Netflix/Streaming Issues: Some streaming services (e.g., Netflix) may have digital rights management (DRM) that prevents playback on external displays like projectors. This is a content protection feature and not a projector malfunction.
- USB Port Not Reading Data: The USB port on the AKIYO Z9 is for charging external devices only and does not support reading or writing data from USB drives.
9. Техникалык шарттар
| Өзгөчөлүк | Спецификация |
|---|---|
| Модель номери | Z9 |
| Дисплей технологиясы | DLP (Санариптик Жарык иштетүү) |
| Native Resolution | 854 x 480 пиксель |
| Колдоого алынган резолюция | 1080P Full HD чейин |
| Жарыктык | 120 ANSI Lumens (3-stagд жөнгө салынуучу) |
| Проекциянын өлчөмү | 30-120 дюйм |
| Ыргытуу катышы | 0.98:1 |
| Keystone Correction | Вертикалдык ±40° |
| Байланыш | HDMI, Audio Out, USB (charging only) |
| Камтылган динамик | 1.5W HiFi dual speakers |
| Батареянын иштөө мөөнөтү | 90 мүнөткө чейин (толук кубаттоо менен) |
| Заряддоо киргизүү | 5V/3A (USB-C) |
| Өлчөмдөр | 4.13 x 4.13 x 0.98 дюйм (10.5 x 10.5 x 2.5 см) |
| Салмагы | 9.9 унция (280 г) |
| Түс | Боз |
10. Кепилдик жана колдоо
10.1 Кепилдик маалыматы
The AKIYO Z9 Mini DLP Projector comes with a 2-year manufacturer's warranty. Please refer to your purchase documentation for specific terms and conditions. Extended protection plans may be available for purchase separately.
10.2 Кардарларды колдоо
For technical assistance, warranty claims, or any product-related inquiries, please contact AKIYO customer support:
- Электрондук почта: support.dp@akiyo.co
- AKIYO offers lifetime technical and customer support.
- Expect a quick reply within 24 hours.


