Introduction
This manual provides detailed instructions for the setup, operation, and maintenance of your Pantum M6550NW/M6552NW Monochrome Multifunction Laser Printer. Please read this manual thoroughly before using the printer to ensure proper and safe operation.

Сүрөт: алдыңкы view of the Pantum M6550NW/M6552NW Monochrome Multifunction Laser Printer.
Продукт бүттүview
The Pantum M6550NW/M6552NW is a versatile monochrome laser printer designed for efficient printing, copying, and scanning. It features wireless and Ethernet networking capabilities, a compact design, and an intuitive LCD control panel.
Негизги өзгөчөлүктөрү
- Print, Copy, Scan functionality
- USB, Network, and Wireless connectivity
- 20,000-page monthly duty cycle
- 150 sheets input tray capacity
- Up to 23 letter pages per minute print speed
- Автоматтык документ берүүчү (ADF)
- LCD Control Panel for easy operation
- One-step driver installation
- Мобилдик басып чыгарууну колдоо

Image: Diagram showing key components of the printer, including the All-in-One Toner Cartridge slot, Paper Input Tray, Auto Document Feeder, LCD Control Panel, and highlighting its small footprint and networking capabilities.
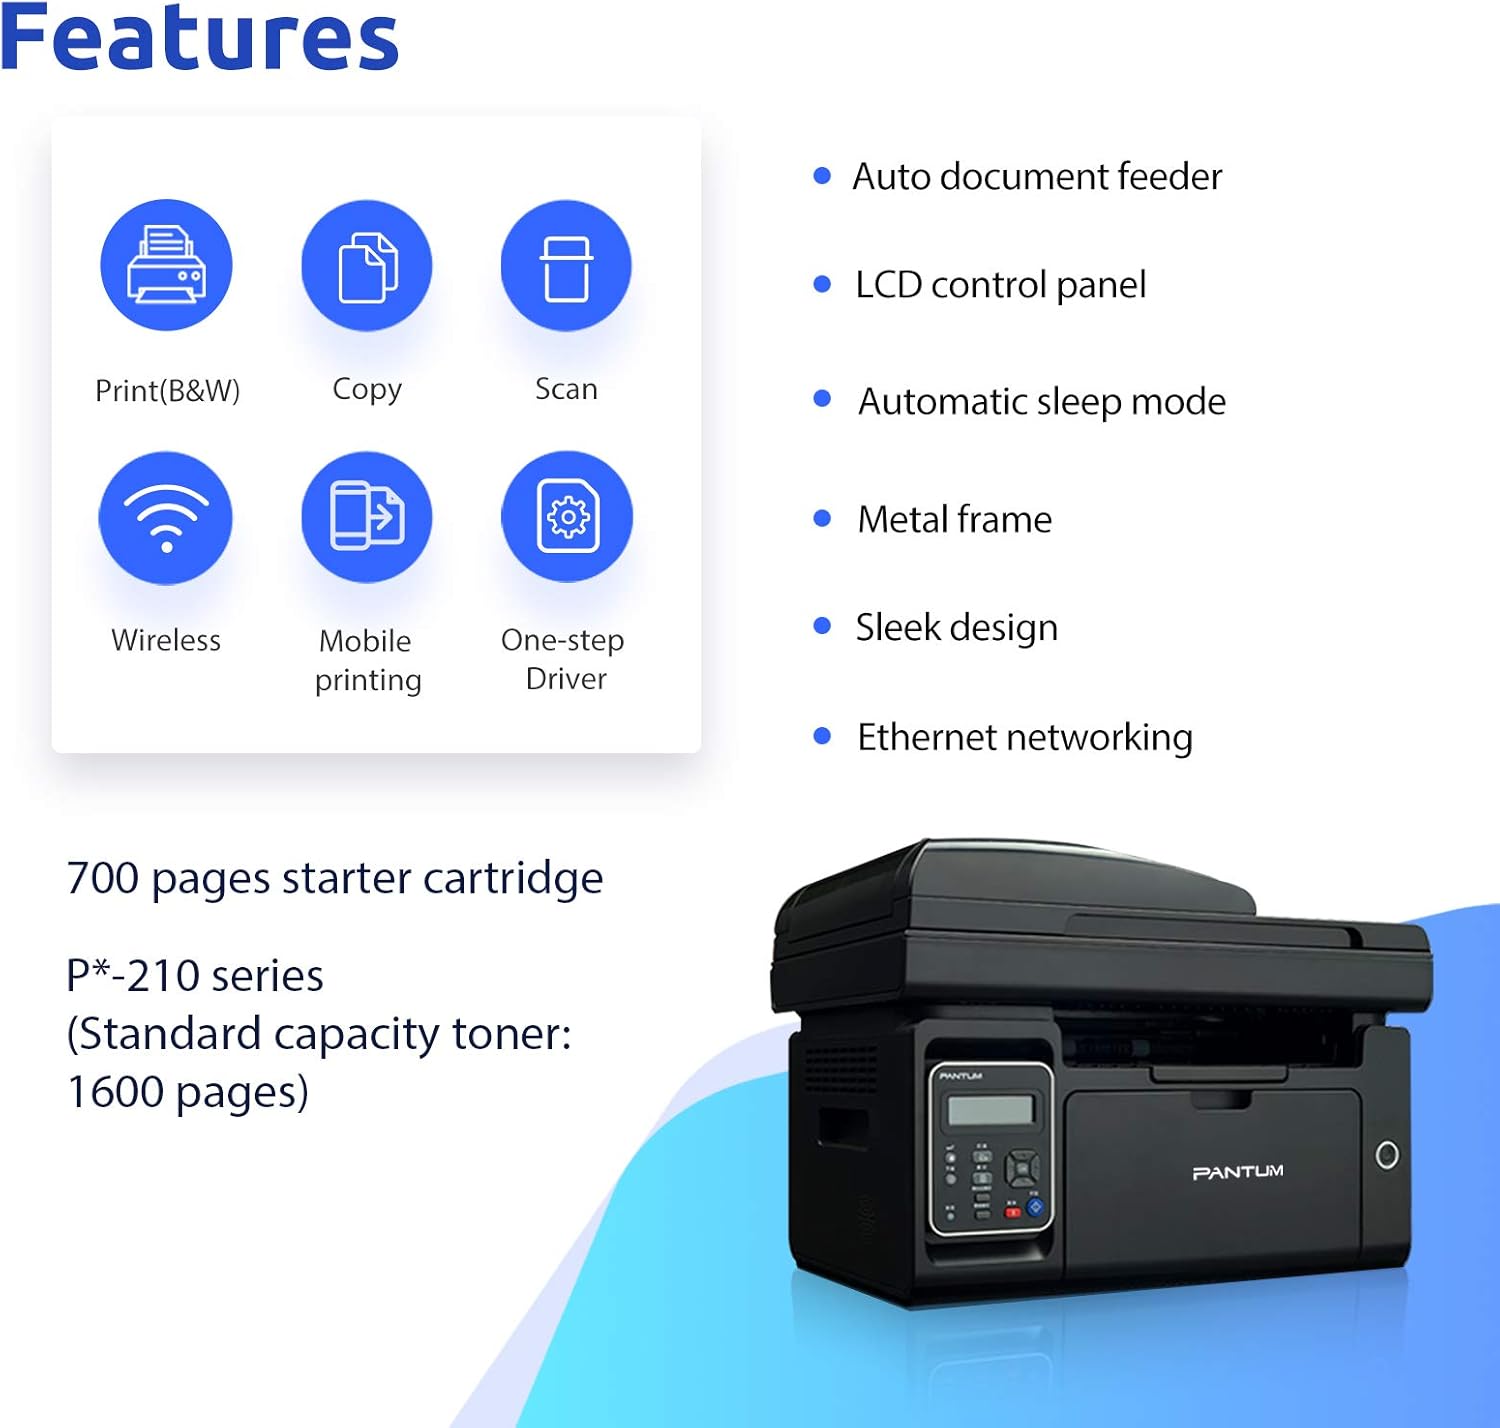
Image: Visual representation of the printer's core features: Print (B&W), Copy, Scan, Wireless, Mobile printing, and One-step Driver installation. Also notes the 700-page starter cartridge and P*-210 series standard capacity toner (1600 pages).
Жайгашуу
Follow these steps for the initial setup of your printer.
1. Пакеттен чыгаруу жана компоненттерди текшерүү
Принтерди таңгагынан кылдаттык менен чыгарыңыз. Бардык камтылган компоненттер бар экендигин текшериңиз:
- Pantum M6550NW/M6552NW Printer
- Электр зымы
- USB интерфейс кабели
- Starter toner cartridge
- Ыкчам орнотуу көрсөтмөсү
- CD-ROM (for drivers and software)

Image: Contents typically found in the printer box, including the printer, power cord, USB cable, starter cartridge, quick setup guide, and CD-ROM.
2. Toner Cartridge Installation
Before first use, install the toner cartridge. Refer to the quick setup guide for specific instructions, but generally, this involves:
- Принтердин алдыңкы капкагын ачыңыз.
- Carefully unpackage the toner cartridge.
- Remove any protective seals or tapes from the cartridge.
- Картриджди белгиленген уячага чыкылдагыча кыстарыңыз.
- алдыңкы капкакты жабыңыз.

Image: Step-by-step visual guide for installing the toner cartridge: 1) Take out the cartridge, 2) Remove the seal, 3) Install the cartridge.
3. Power Connection
Электр шнурду принтерге, анан жерге туташтырылган электр розеткасына туташтырыңыз.
4. Driver Installation and Connectivity
Install the printer drivers from the included CD-ROM or download the latest drivers from the official Pantum website. You can connect the printer via USB, Wi-Fi, or wired network.
- USB туташуу: Берилген USB кабелин колдонуп принтерди компьютериңизге туташтырыңыз.
- Wi-Fi туташуусу: Follow the on-screen instructions on the printer's LCD panel or use the setup wizard on your computer to connect to your wireless network. The printer supports Wi-Fi Hotspot direct connection.
- Зымдуу тармак туташуусу: Принтерден Ethernet кабелин тармак роутериңизге же коммутаторуңузга туташтырыңыз.

Image: Illustrations demonstrating the three easy driver installation and connection methods: USB, Wi-Fi, and wired network.
Иштөө нускамалары
Using the LCD Control Panel
The LCD control panel allows you to navigate printer functions, view status, and configure settings. Use the arrow keys and OK button to make selections.

Сүрөт: Жакын план view of the printer's LCD control panel, showing buttons for navigation, status, copy functions, and start/cancel.
Басып чыгаруу
Документти басып чыгаруу үчүн:
- Принтер күйгүзүлгөнүн жана түзмөгүңүзгө туташканын текшериңиз.
- Кагазды киргизүү лотогуна жүктөңүз.
- Компьютериңизден же мобилдик түзмөгүңүздөн басып чыгаргыңыз келген документти ачыңыз.
- Басып чыгаруу опциясын тандаңыз (адатта File > Басып чыгаруу).
- Choose the Pantum M6550NW/M6552NW from the list of available printers.
- Керектүү түрдө басып чыгаруу орнотууларын (мисалы, көчүрмөлөрдүн саны, кагаз өлчөмү, сапаты) тууралаңыз.
- "Басып чыгаруу" баскычын чыкылдатыңыз.
For mobile printing, download the Pantum app. It supports direct printing from your smartphone or tablet via Wi-Fi.

Image: Screenshot of the Pantum mobile application interface, demonstrating its capabilities for printing documents (Word, PDF, PPT, Excel, TXT) and scanning, highlighting easy wireless and mobile printing.
Көчүрүү
Көчүрмөсүн жасоо үчүн:
- Документти сканердин айнегине жүзүн ылдый каратып же Документти автоматтык бергичке (ADF) өйдө каратып коюңуз.
- Башкаруу панелинен "Көчүрүү" функциясын тандаңыз.
- Adjust settings such as number of copies, copy quality, or enlargement/reduction if available.
- Көчүрүүнү баштоо үчүн "Баштоо" баскычын басыңыз.
Скандоо
Документти сканерлөө үчүн:
- Документти сканердин айнегине жүзүн ылдый каратып же ADFке өйдө каратып коюңуз.
- From your computer, open the scanning software (usually installed with the printer drivers) or use the Pantum app on your mobile device.
- Select the "Scan" function.
- Choose scan settings such as resolution, color mode, and destination folder.
- Click "Scan" to start the process.
Техникалык тейлөө
Үзгүлтүксүз тейлөө оптималдуу иштешин камсыз кылат жана принтериңиздин иштөө мөөнөтүн узартат.
Принтерди тазалоо
- Принтердин сыртын жумшак менен сүртүңүз, damp, түксүз кездеме.
- Periodically clean the scanner glass with a glass cleaner applied to a cloth (not directly to the glass).
- Абразивдүү тазалагычтарды же эриткичтерди колдонбоңуз.
Тонер картриджди алмаштыруу
When the toner is low or empty, the printer's LCD panel will display a message. Replace the cartridge as follows:
- Принтер күйгүзүлгөнүн текшериңиз.
- Алдыңкы капкакты ачыңыз.
- Эски тонер картриджди кылдаттык менен чыгарып алыңыз.
- Unpack the new Pantum P*-210 series toner cartridge and remove all protective materials.
- Insert the new cartridge firmly until it locks into place.
- алдыңкы капкакты жабыңыз.
Dispose of used toner cartridges according to local regulations.
Проблемаларды чечүү
Бул бөлүм сиз кабылышы мүмкүн болгон жалпы көйгөйлөрдү карайт.
Принтер жооп бербей жатат
- Принтер күйгүзүлгөнүн жана кубат шнурунун бекем туташтырылганын текшериңиз.
- Verify the USB cable is properly connected to both the printer and the computer, or that the Wi-Fi/Ethernet connection is active.
- Принтериңизди жана компьютериңизди/түзмөктү өчүрүп күйгүзүңүз.
- Ensure the correct printer driver is installed and selected as the default printer.
Начар басып чыгаруу сапаты
- Check the toner level and replace the cartridge if it's low.
- Лазердик басып чыгаруу үчүн ылайыктуу кагазды колдонуп жатканыңызды текшериңиз.
- Clean the printer's internal components as per the maintenance section if streaks or smudges appear.
Connectivity Issues (Wi-Fi/Network)
- Принтер зымсыз роутериңиздин диапазонунда экенин текшериңиз.
- Verify that the Wi-Fi password entered is correct.
- Роутериңизди жана принтериңизди өчүрүп-күйгүзүңүз.
- Check your network settings on both the printer and your computer.
- If using a wired connection, ensure the Ethernet cable is securely plugged in.
Техникалык шарттар
| Өзгөчөлүк | Деталь |
|---|---|
| Модел | M6550NW/M6552NW |
| Функциялар | Басып чыгаруу, көчүрүү, сканерлөө |
| Басма технологиясы | Лазер (монохромдуу) |
| Макс басып чыгаруу ылдамдыгы (монохромдуу) | 23 ppm (Letter) |
| Max Print Resolution | 1200 x 1200 DPI |
| Сканер түрү | Жабылган |
| Сканер резолюциясы | 1200 x 1200 DPI |
| Байланыш | USB 2.0, Wi-Fi, Ethernet |
| Киргизүү лоток сыйымдуулугу | 150 барак |
| Шайкеш түзмөктөр | Смартфондор (Android, iOS) |
| Продукциянын өлчөмдөрү | 16.42 x 12.01 x 11.85 см |
| Элемент Салмагы | 9.02 кг |
| Камтылган компоненттер | USB cable, Starter Toner Cartridge |
Кепилдик жана колдоо
For warranty information and technical support, please refer to the documentation included with your printer or visit the official PANTUM webсайт. Сатып алуу квитанциясын кепилдик дооматтары үчүн сатып алуунун далили катары сактаңыз.


