1. Киришүү
This manual provides essential information for the safe and efficient operation, installation, and maintenance of your Teka HBB 724 G RX Gas Oven. Please read these instructions carefully before using the appliance and retain them for future reference. This oven features a 72-liter capacity, an electric grill, and a stainless steel finish with anti-fingerprint coating.

Сүрөт 1.1: Алдыңкы view of the Teka HBB 724 G RX Gas Oven, showcasing its stainless steel finish and control knobs.
2. Коопсуздук маалыматы
ЭСКЕРТҮҮ: Туура эмес орнотуу, тууралоо, өзгөртүү, тейлөө же тейлөө мүлккө зыян келтириши, жаракат алуу же өлүмгө алып келиши мүмкүн. Бул жабдууну орнотуудан же тейлөөдөн мурун орнотуу, иштетүү жана тейлөө нускамаларын кылдат окуп чыгыңыз.
- Бул шайман тиричиликте колдонуу үчүн гана иштелип чыккан.
- Ensure the oven is installed by a qualified technician in accordance with local regulations and gas supply requirements (LP gas).
- Мештин ичинде же жанында күйүүчү материалдарды сактабаңыз.
- Духовка иштеп жатканда балдарды шаймандан алыс кармаңыз. Духовканын беттери ысып кетет.
- Ысык идиштерди же мештин тетиктерин кармаганда ар дайым меш колдорун колдонуңуз.
- Never use water to extinguish a grease fire. Smother the fire or use a dry chemical or foam-type extinguisher.
- Ensure adequate ventilation in the kitchen during oven operation.
3. Продукциянын өзгөчөлүктөрү
The Teka HBB 724 G RX Gas Oven is equipped with features designed for efficient and convenient cooking:
- Stainless Steel with Anti-Fingerprint: Reduces visible smudges and makes cleaning easier.
- 72 Liter Net Capacity: Spacious interior for various cooking needs.
- Электр гриль: Provides versatile cooking options for browning and crisping.
- Кош айнек эшик: Enhances insulation and safety by keeping the outer surface cooler.
- Crystal Clean Enamel Interior: Facilitates easy cleaning of the oven cavity.
- Two Cooking Functions: Offers essential cooking modes for gas oven and electric grill.
- Mechanical Timer: Up to 120 minutes for precise cooking duration control.
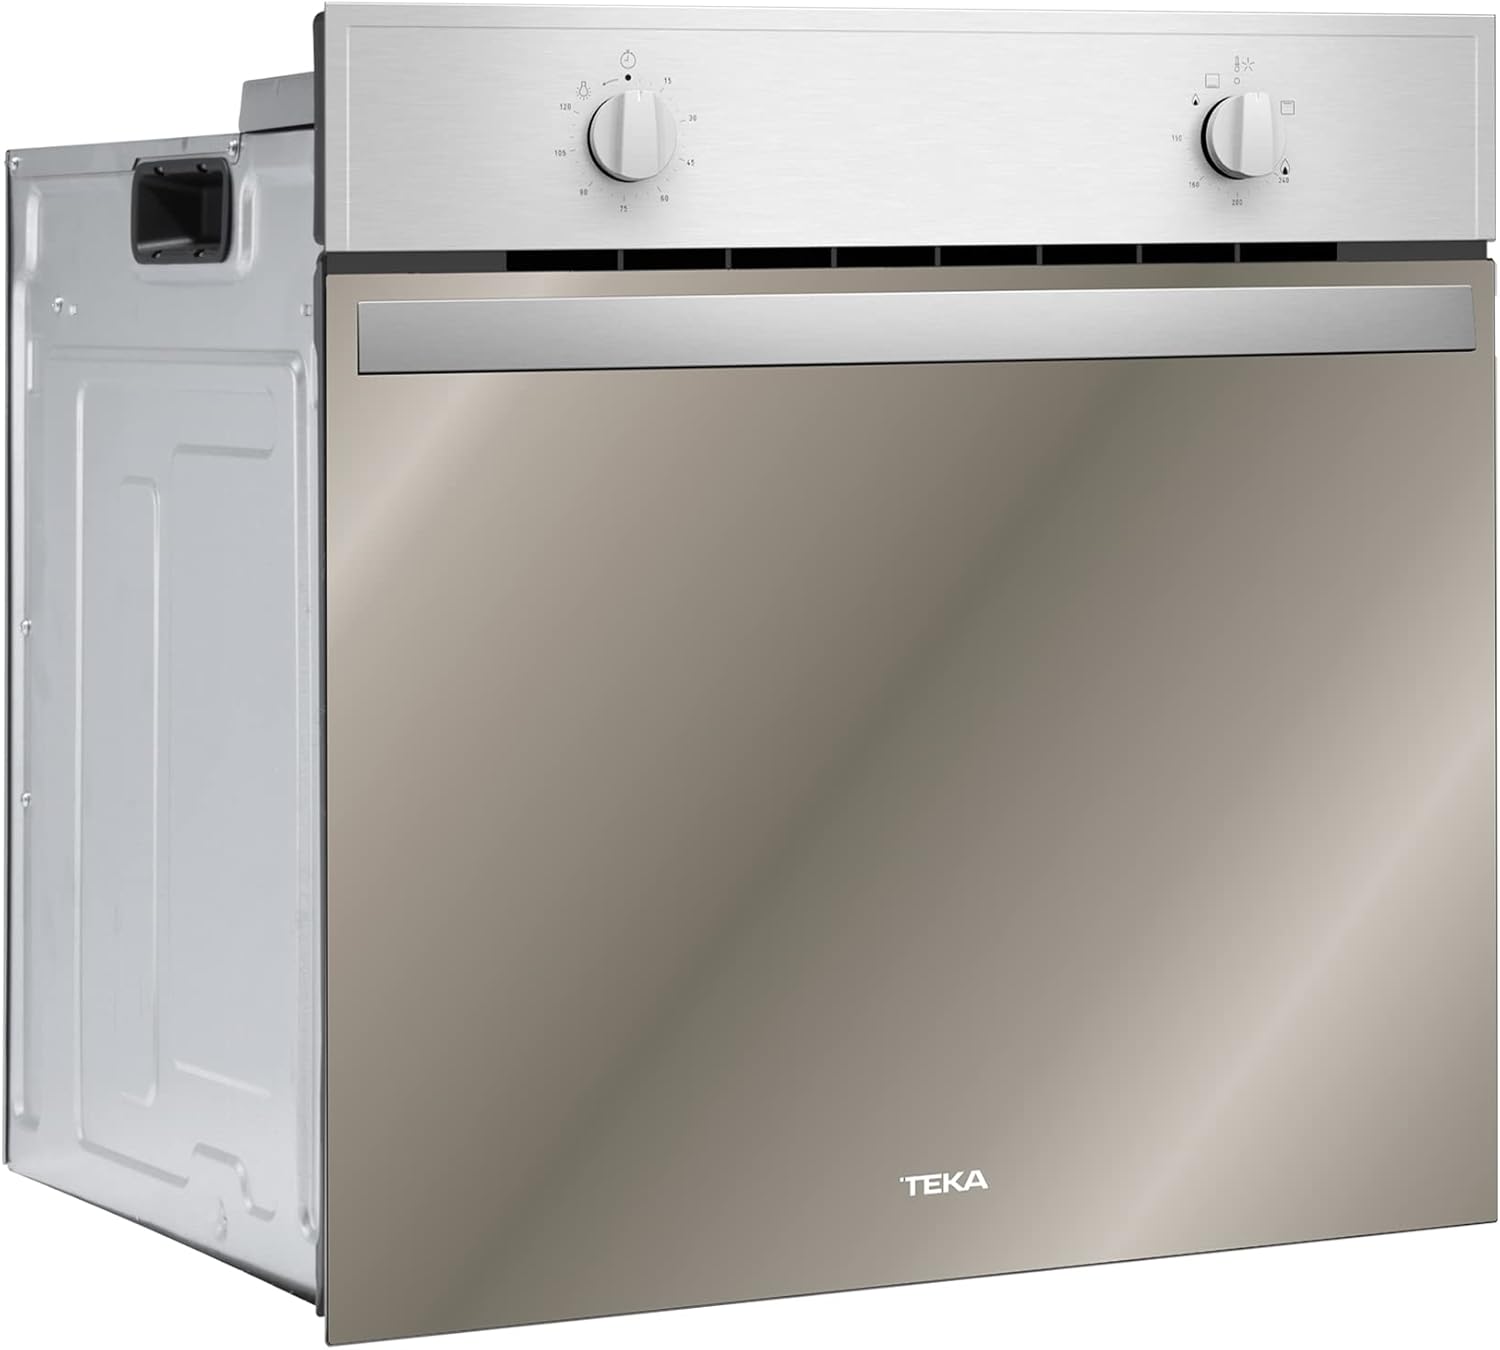
Image 3.1: Visual representation of the oven's main features, including anti-fingerprint stainless steel, double glass door, 120-minute mechanical timer, 72L capacity, and electric grill.
4. Орнотуу жана орнотуу
Installation of this gas oven must be performed by a qualified and certified technician. Incorrect installation can lead to gas leaks, electric shock, or fire.
4.1. таңгактан чыгаруу
Carefully remove all packaging materials. Inspect the oven for any damage. Do not install a damaged appliance. Contact your retailer immediately if damage is found.
4.2. Жайгашкан жери жана желдетүү
The oven must be installed in a well-ventilated area. Ensure proper clearances around the appliance as specified in the installation guide provided with the product.
4.3. Электр байланышы
The oven requires a 127-volt electrical supply for the electric grill and internal light. Ensure the electrical connection is properly grounded and meets local electrical codes.
4.4. Газ кошулуусу
This oven is designed for LP gas. The gas connection must be performed by a qualified technician using appropriate fittings and ensuring no leaks. A gas shut-off valve should be installed in an accessible location near the oven.
4.5. Dimensions and Cabinet Integration
The oven is designed for built-in installation. Refer to the dimension diagram for precise cutout requirements for your cabinet.

Image 4.1: Detailed dimensional drawing of the oven, indicating height, width, and depth for proper cabinet integration.
5. Иштөө нускамалары
Мешти иштетүүдөн мурун башкаруу баскычтары менен таанышыңыз.
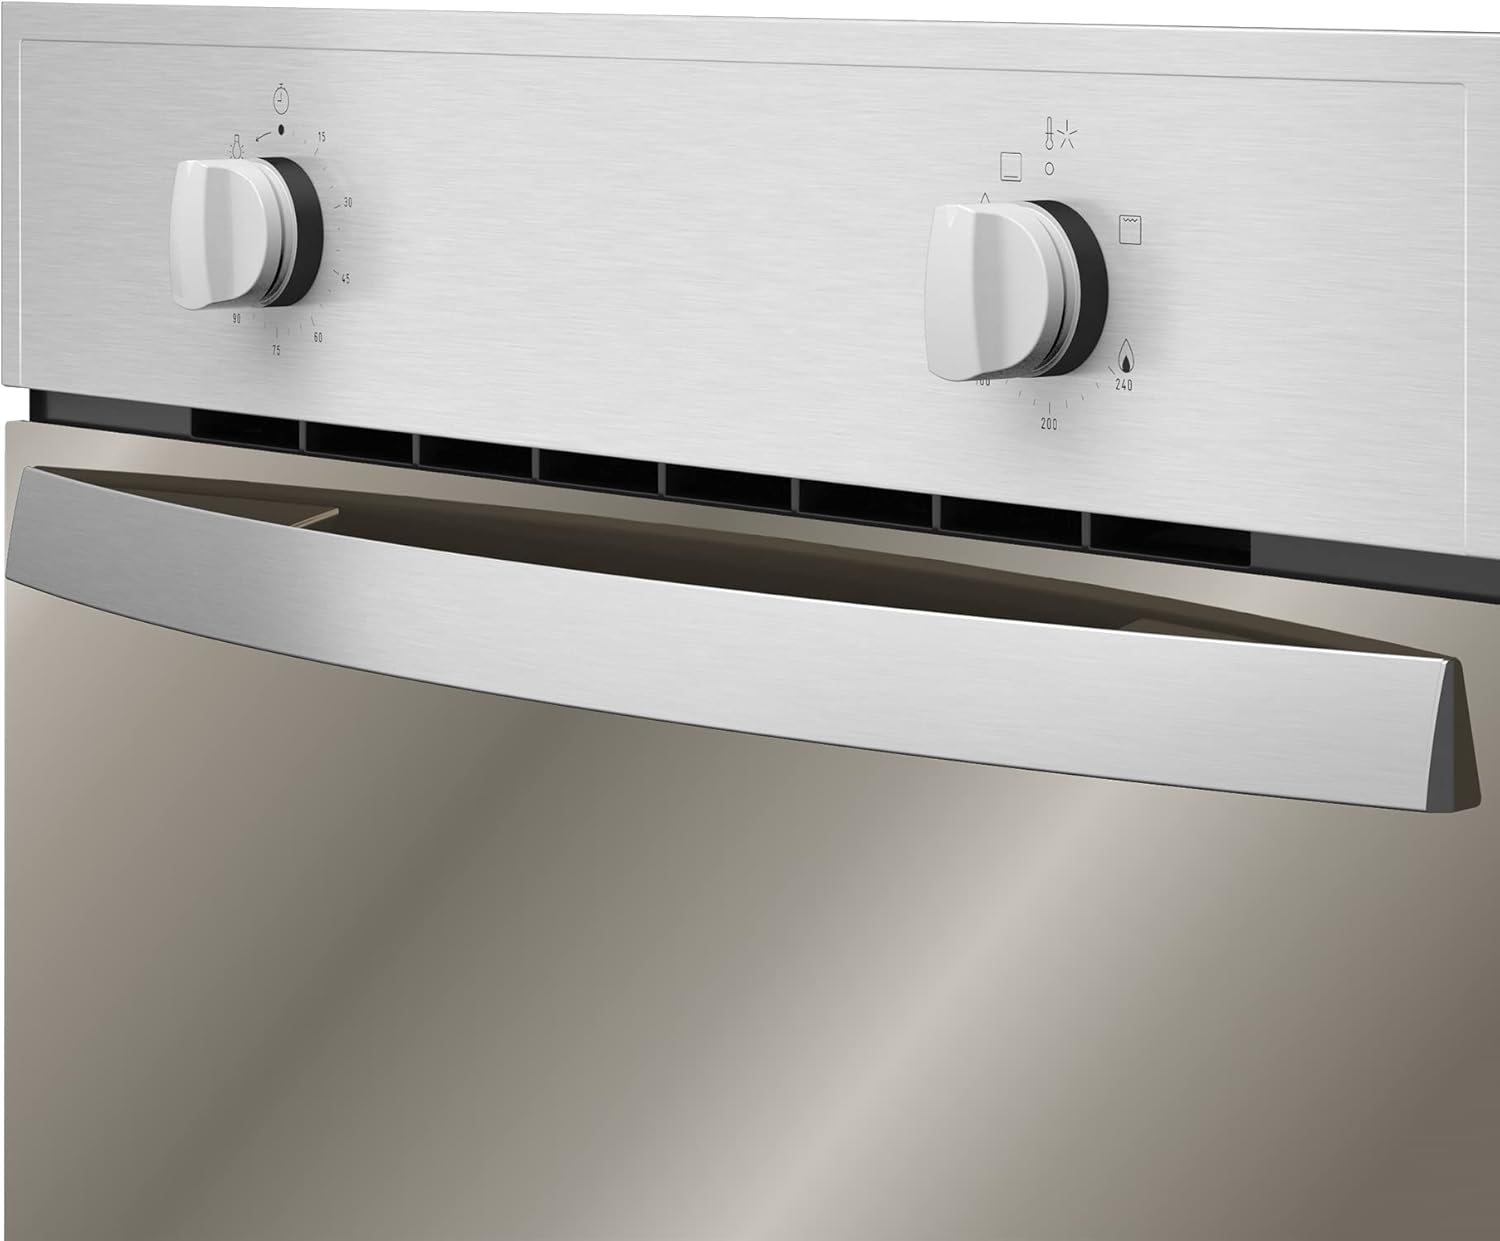
Image 5.1: Close-up of the oven's control panel, showing the temperature/function knob and the timer knob.
5.1. Gas Oven Operation
- Температураны орнотуу: Turn the left knob (temperature/function selector) to the desired temperature setting.
- Igniting the Gas: Push the left knob inwards and turn it to the desired temperature. Hold the knob in the pressed position for approximately 10-15 seconds after the flame ignites. This allows the thermocouple to heat up and activate the safety valve, ensuring the flame remains lit. Releasing the knob too soon will cause the flame to extinguish.
- Алдын ала ысытуу: Allow the oven to preheat for 10-15 minutes to reach the set temperature.
- Бышыруу: Тамакты мештин ичине салыңыз.
- Өчүрүү: Turn the left knob to the '0' (off) position.
5.2. Electric Grill Operation
- Setting the Grill: Turn the left knob to the grill symbol.
- Температураны орнотуу: The grill operates at a fixed high temperature.
- Алдын ала ысытуу: Allow the grill to preheat for 5 minutes.
- Гриль жасоо: Place food on the top rack, ensuring it is not too close to the heating element. Monitor food closely to prevent burning.
- Өчүрүү: Turn the left knob to the '0' (off) position.
5.3. Using the Mechanical Timer
The right knob controls the mechanical timer. Turn the knob clockwise to set the desired cooking duration, up to 120 minutes. The oven will turn off automatically when the timer reaches zero, or an audible signal will sound depending on the model's specific timer function.

Сүрөт 5.2: Интерьер view of the oven, illustrating the removable racks and baking tray for various cooking applications.
6. Техникалык тейлөө жана тазалоо
Үзгүлтүксүз тазалоо жана тейлөө мешиңиздин узак иштөөсүн жана оптималдуу иштешин камсыздайт.
- Тышкы тазалоо: Clean the stainless steel exterior with a soft cloth and a mild, non-abrasive cleaner. The anti-fingerprint coating helps resist smudges. Avoid harsh chemicals or abrasive pads.
- Ички тазалоо: The oven features a Crystal Clean enamel interior, which is designed for easy cleaning. After the oven has cooled, wipe down the interior with a damp cloth and mild detergent. For stubborn stains, use an oven cleaner suitable for enamel surfaces, following the product instructions carefully.
- Эшик тазалоо: The double glass door can be cleaned with glass cleaner. Ensure no liquid seeps into the door seals.
- Replacing the Oven Light: Ensure the oven is disconnected from the power supply before attempting to replace the oven light bulb. Refer to the full instruction manual for specific bulb type and replacement procedure.
- Gas Burner Maintenance: Periodically check the gas burner for any blockages or debris. This should ideally be done by a qualified technician during routine servicing.
7. Кыйынчылыктарды
If you encounter issues with your oven, consult the following troubleshooting guide before contacting service.
- Oven flame does not stay lit:
- Ensure you are holding the gas knob pressed inwards for 10-15 seconds after ignition to allow the thermocouple to heat up. Releasing too soon will cause the flame to extinguish.
- Check if the gas supply valve is fully open.
- If the issue persists, there might be a problem with the thermocouple or ignition system. Contact a qualified technician. - Oven does not heat up:
- Verify that the oven is properly connected to the gas supply and electrical outlet.
- Check if the gas supply valve is open.
- Ensure the temperature knob is set correctly.
- For the electric grill, ensure the function knob is set to the grill symbol. - Бир калыпта эмес бышыруу:
- Ensure food is placed centrally in the oven.
- Avoid overcrowding the oven, which can restrict air circulation.
- Check if the oven door is sealing properly. - Oven light not working:
- The bulb may need replacement. Disconnect power before replacing.
For issues not listed here or if troubleshooting steps do not resolve the problem, contact Teka customer service or a qualified service technician.
8. Техникалык шарттар
| Спецификация | Деталь |
|---|---|
| Бренд | Тека |
| Модель номери | HBB 724 G RX |
| Өнүмдүн Өлчөмдөрү (Ж x Y x D) | 59.49 см х 59.49 см х 56.49 см |
| Таза Салмак | 28 кг |
| Capacity (Net/Gross) | 72 л / 77 л |
| Жылытуу ыкмасы | Gas (LP Gas) |
| Гриль түрү | Электр Grill |
| Тtage | 127 вольт |
| Аяктоо түрү | Brushed Stainless Steel with Anti-fingerprint |
| Эшик түрү | Кош айнек |
9. Кепилдик жана колдоо
Your Teka HBB 724 G RX Gas Oven comes with a manufacturer's warranty. Please refer to the warranty card included with your purchase for specific terms and conditions, including coverage duration and what is covered.
For technical assistance, service requests, or to inquire about spare parts, please contact Teka customer support. Have your model number (HBB 724 G RX) and purchase date ready when contacting support.
Teka Customer Service: Please visit the official Teka webсиздин аймакка тиешелүү байланыш маалыматы үчүн сайт.


