1. Киришүү
This manual provides comprehensive instructions for the proper setup, operation, and maintenance of your U.S. Solid 120g/0.1mg Analytical Balance. Please read this manual thoroughly before using the device to ensure accurate measurements and safe operation.
Негизги өзгөчөлүктөрү:
- Тактык жана тактык: Readable in increments of 0.1 mg with repeatability of 0.2 mg. Linearity of 0.3mg.
- Laboratory Ready: Built-in draft shield with four-sided glass and three sliding doors to minimize environmental interference.
- Колдонуучу интерфейси: Backlit LCD display, 6-button control panel for multiple tares, overload protection, piece counting, percentage weighing, and unit conversions (g, mg, ct, oz).
- Байланыш: RS-232 port for printer and computer compatibility.
- Magnetic Force Restoration: Highly accurate measurement method with easy calibration.
- Underhook Weighing: Capability for weighing hard-to-handle substances or for density calculations.

Figure 1: U.S. Solid 120g/0.1mg Analytical Balance with draft shield and accessories.
2. Орнотуу
2.1 Кутудан чыгаруу жана компоненттер
Carefully open the package and remove all components. Verify that all items are present:
- Analytical Balance unit
- Instruction Manual
- Кубат кабели (AC адаптери)
- Калибрлөө Салмагы
- Тараза
- Долбоор шакек
Video 1: Unboxing and initial component overview of the U.S. Solid 0.1 mg Analytical Balance.
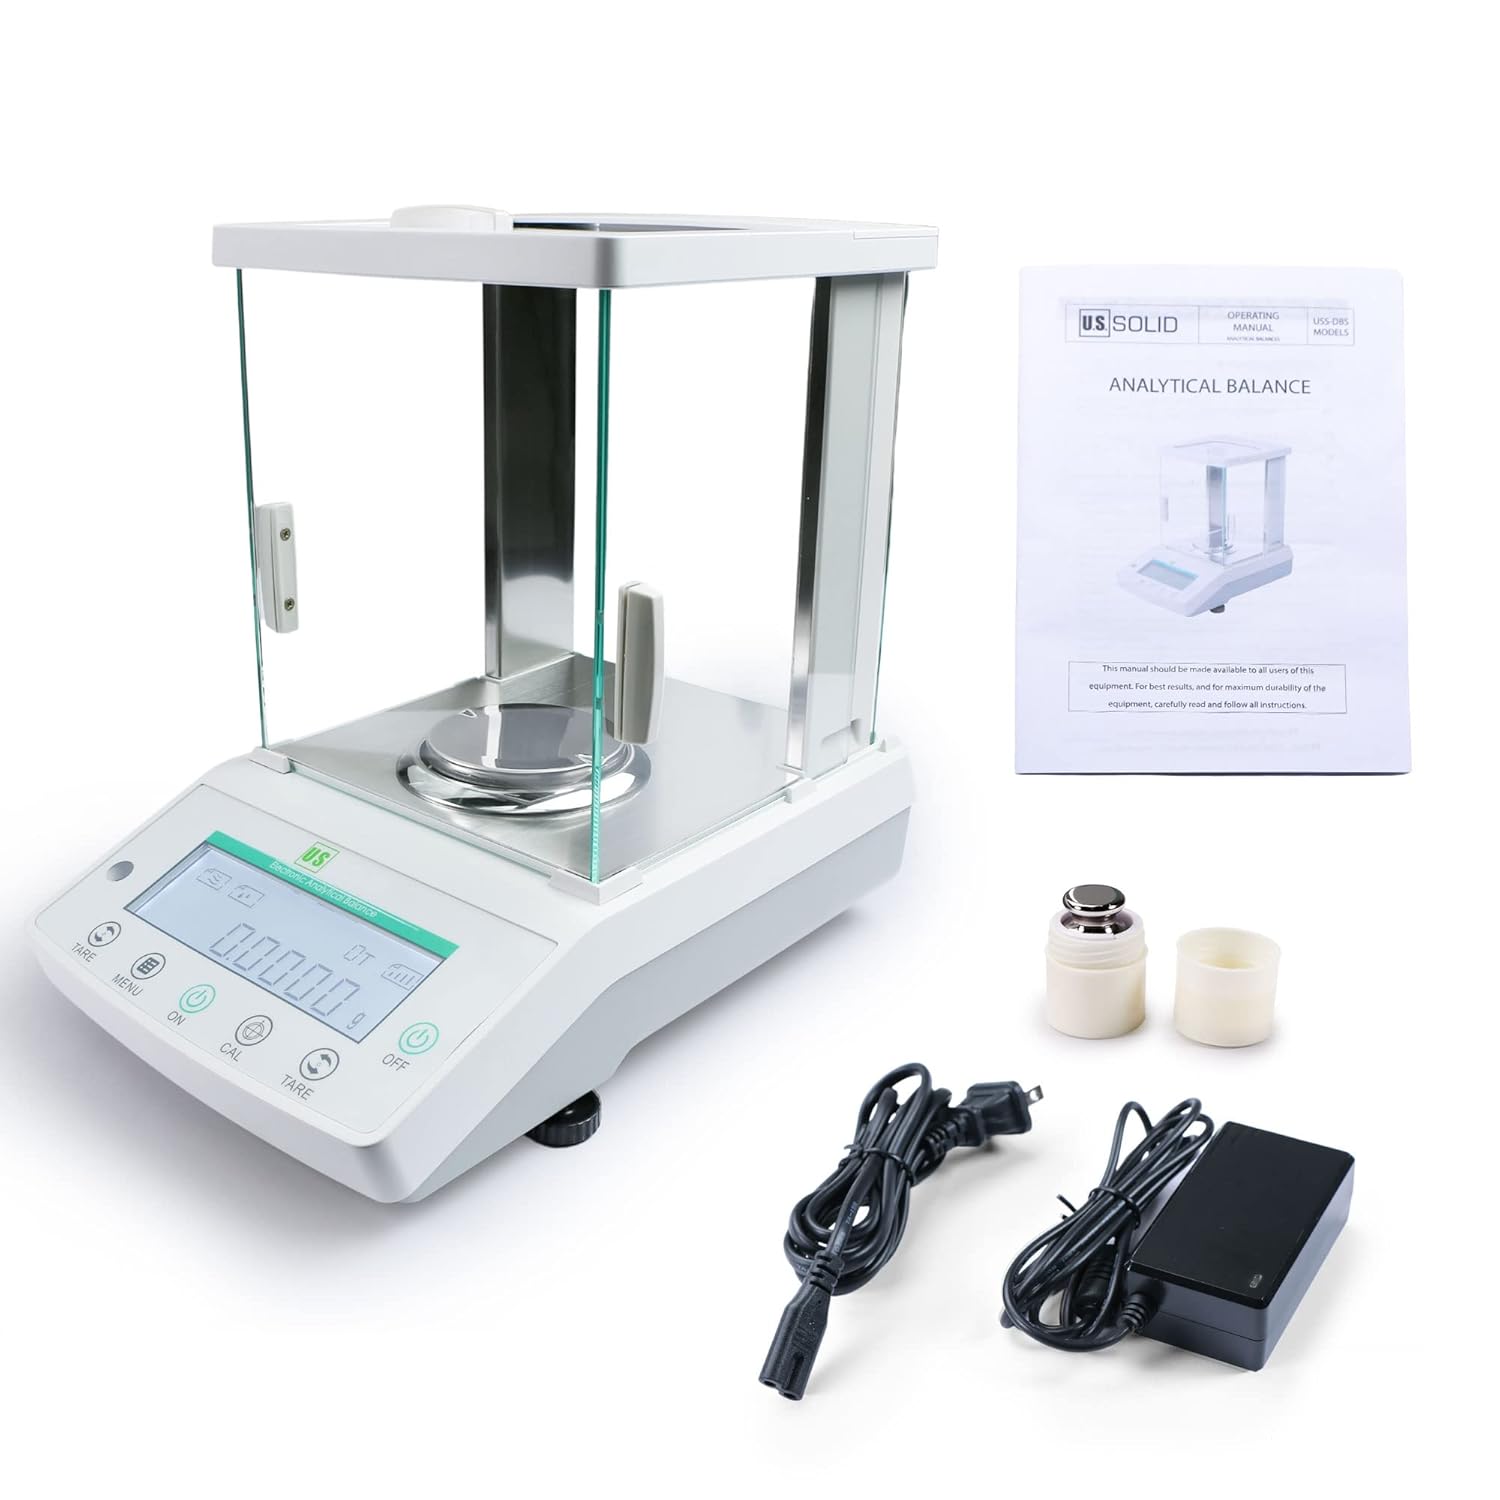
Figure 2: Contents of the U.S. Solid Analytical Balance package, including the balance, manual, power adapter, calibration weight, pan, and draft ring.
2.2 Placement and Assembly
- Place the balance on a stable, vibration-free surface, away from direct sunlight, drafts, and significant temperature changes.
- Connect the balance to the power supply using the provided AC adapter.
- Install the weighing pan. Ensure the draft ring does not touch the weighing pan.

Figure 3: Proper environmental conditions and horizontal adjustment are crucial for accurate balance operation.
2.3 Балансты теңдөө
Use the adjustable feet at the base of the balance to level the unit. Turn the feet until the bubble in the level indicator is perfectly centered. Proper leveling is essential for accurate measurements.
2.4 Warm-up Time
After connecting to power, allow the balance to warm up for at least 30 minutes before use. This ensures optimal performance and stability.
2.5 Калибрлөө
Recalibrate the balance after moving it or before critical measurements. To calibrate:
- Таразалоочу табактын бош экенин жана көтөргүч калкан эшиктери жабык экенин текшериңиз.
- Press and hold the "CAL" button until the display shows "CAL" followed by the required calibration weight.
- Place the specified calibration weight (e.g., 100g or 200g, depending on your model) onto the center of the weighing pan.
- The balance will automatically detect the weight and complete the calibration process. Once complete, the display will return to 0.0000g.
- Калибрлөө салмагын алып салыңыз.
Video 2: Demonstration of the calibration process for the analytical balance.
3. Иштөө нускамалары
3.1 Негизги тараза
- Turn on the balance by pressing the "ON" button.
- Wait for the display to stabilize at 0.0000g.
- Place the item to be weighed onto the center of the weighing pan.
- Коргонуу калкан эшиктерин жабыңыз.
- ЖКда көрсөтүлгөн туруктуу салмакты окуңуз.
- To tare (zero out the weight of a container), place the empty container on the pan and press the "TARE" button. Then add the substance to be weighed.

Figure 4: The backlit LCD display shows the precise weight measurement.
3.2 Бирдикти конверсиялоо
The balance supports multiple weighing units. Press the "UNIT" button to cycle through available units (g, mg, ct, oz).

Figure 5: The balance supports various measuring units including grams, milligrams, carats, and ounces.
3.3 Piece Counting and Percentage Тараза
Refer to the detailed instructions in the full manual for specific procedures on piece counting and percentage weighing functions. These modes allow for efficient counting of multiple small items of uniform weight and calculating the percentage of a sample's weight relative to a reference.

Figure 6: The balance includes features for overload protection, piece counting, and percentage тараза.
3.4 Connecting to a Computer (RS-232)
The balance can be connected to a computer via its RS-232 interface for data transfer. You will need a DB9 serial cable (female to female, 2-3 cross line) and a USB to 9-pin (male) cable if your computer lacks a serial port.
- Connect the balance to the computer using the appropriate cables.
- Download and open a serial port debugging assistant software (e.g., UartAssist) on your computer.
- In the software, select the correct PortNum (usually Default) and set the Baud rate to 1200.
- Click "Open" to establish the connection.
- The computer will synchronize weighing results. The factory default output mode is continuous.
- To change the output mode, press and hold the "ON" button on the balance until "SET-P" appears. Then press and hold the "MENU" button to cycle through output options (PRT-0 to PRT-4). Select the desired mode and press "TARE" to confirm.
- PRT-0: Must press button to output data
- PRT-1: Output every 30 seconds
- PRT-2: Output every 60 seconds
- PRT-3: Output every 120 seconds
- PRT-4: Continuous output
Video 3: Instructions on how to connect the analytical balance to a computer and configure data output settings.
3.5 Принтерге туташуу
The balance can also be connected to a compatible printer via the RS-232 interface to print weighing results.
- Connect the balance to the printer using a suitable serial cable.
- On the balance, press and hold the "ON" button until "SET-F" appears.
- Press the "MENU" button to select the desired print output mode (similar to computer connection settings).
- Press "TARE" to confirm the setting.
Video 4: Guide on connecting the analytical balance to a printer for direct result output.
4. Техникалык тейлөө
To ensure the longevity and accuracy of your analytical balance, follow these maintenance guidelines:
- Тазалоо: Regularly clean the weighing pan and draft shield with a soft, damp cloth. Avoid abrasive cleaners or solvents. Ensure no liquids enter the balance housing.
- Сактагыч: When not in use, keep the balance covered to protect it from dust and debris. Store in a stable environment, away from extreme temperatures and humidity.
- Калибрлөө: Perform regular calibration checks, especially after moving the balance or if environmental conditions change significantly.
- Текшерүү: Periodically inspect the power cable and connections for any signs of damage.
5. Кыйынчылыктарды
If you encounter issues with your analytical balance, consider the following common problems and solutions:
- Туура эмес окуулар:
- Ensure the balance is level.
- Check for drafts or vibrations in the environment.
- Allow sufficient warm-up time.
- Калибрлөө жүргүзүү.
- Ensure the weighing pan and draft shield are clean and properly installed.
- Дисплей күйбөйт:
- Verify the power cable is securely connected to both the balance and a working power outlet.
- Кубат адаптерин бузуп же жок экенин текшериңиз.
- No Data Output (RS-232):
- Confirm correct cable connections between the balance and the computer/printer.
- Verify serial port settings (PortNum, Baud rate) in the software.
- Check the output mode setting on the balance (PRT-0 to PRT-4).
For persistent issues or problems not covered here, please contact U.S. Solid customer support.
6. Техникалык шарттар
| Өзгөчөлүк | Спецификация |
|---|---|
| Бренд | US Solid |
| Модел | 120g/0.1mg Analytical Balance |
| Салмагы Limit | 120 грамм |
| Окуу жөндөмдүүлүгү | 0.1 mg (0.0001g) |
| Кайталануучулук | 0.2 мг |
| болуп сызыктуу | 0.3 мг |
| Дисплей түрү | Арткы жарыктуу LCD |
| Интерфейс | RS232 |
| Продукциянын өлчөмдөрү | 13.39 x 8.46 x 13.78 дюйм |
| Продукт Салмагы | 16 фунт |
7. Кепилдик жана колдоо
For warranty information, technical support, or service inquiries, please refer to the warranty card included with your product or visit the official U.S. Solid webсайт. Сатып алуу квитанциясын кепилдик дооматтары үчүн сатып алуунун далили катары сактаңыз.


