1. Киришүү
This manual provides detailed instructions for the installation, operation, and maintenance of your SilverStone FARA R1 V2 Mid-Tower ATX Case. The FARA R1 V2 is designed for high compatibility and efficient thermal performance, featuring a tempered glass side panel and a perforated mesh front panel for optimal airflow. Please read this manual thoroughly before beginning assembly to ensure proper setup and functionality.

Figure 1: SilverStone FARA R1 V2 Mid-Tower ATX Case (SST-FAR1B-G-V2)
2. Пакеттин мазмуну
Пакетте бардык компоненттер бар экенин текшериңиз:
- SilverStone FARA R1 V2 Mid-Tower ATX Case
- Accessory box (screws, standoffs, cable ties)
- Колдонуучунун Колдонмосу (бул документ)
- Pre-installed 120mm rear fan (quantity may vary by model)
3. Техникалык шарттар
| Модель аты | FARA R1 V2 |
| Модель номери | SST-FAR1B-G-V2 |
| Иштин түрү | Ара Tower |
| Motherboard шайкештиги | ATX, Micro ATX, Mini ITX |
| Материал | Болот, чыңдалган айнек, пластик |
| Өлчөмдөрү (LxWxH) | 15.35 x 8.15 x 17.56 дюйм (390 x 207 x 446 мм) |
| Салмагы | 15.92 фунт (7.22 кг) |
| Кеңейтүү уячалары | 7 |
| Алдыңкы I / O порттору | 2x USB 3.0, 1x USB 2.0, 1x Audio Jack (combined) |
| Муздатуу ыкмасы | Аба |
| Электр менен жабдууну орнотуу | Төмөнкү тоо |
| Максималдуу GPU узундугу | 340mm (with front fan), 365mm (without front fan) |
| CPU муздаткычтын максималдуу бийиктиги | 161мм |

Figure 2: Component Compatibility Overview
4. Орнотуу жана орнотуу
4.1 Ишти даярдоо
- Каптал панелдерин алып салуу: Unscrew the thumbscrews on the rear of the case to remove the tempered glass side panel and the solid steel side panel.
- Аксессуар кутусу: Locate the accessory box inside the case, which contains all necessary screws, standoffs, and cable ties for installation.

3-сүрөт: Интерьер View of the Case
4.2 Motherboard орнотуу
- Standoffs орнотуу: Align the motherboard with the pre-drilled holes in the motherboard tray. Install additional standoffs as required for your specific motherboard form factor (ATX, Micro-ATX, Mini-ITX).
- Коопсуз Motherboard: Place the motherboard onto the standoffs and secure it with the provided screws.
4.3 Электр менен камсыздоону орнотуу
- Mount PSU: Slide the power supply unit (PSU) into the dedicated compartment at the bottom rear of the case.
- Коопсуз PSU: Secure the PSU to the case with screws from the rear.

Figure 4: Rear Panel and PSU Mounting Area
4.4 Сактоочу дискти орнотуу
- 2.5" SSD: Two 2.5" drive mounts are located behind the motherboard tray. Secure SSDs using the provided screws.
- 3.5" HDD: The drive cage at the bottom of the case supports two 3.5" HDDs. Slide drives into the trays and secure them.

Figure 5: 2.5" SSD Mounting Locations

Figure 6: 3.5" HDD Drive Cage
4.5 Видеокартаны жана кеңейтүү картасын орнотуу
- Remove PCI-E Slot Covers: Remove the necessary PCI-E slot covers from the rear of the case. Note that some covers are punch-out type and cannot be reinstalled.
- Картаны орнотуу: Insert your graphics card or other expansion cards into the motherboard's PCI-E slots and secure them with screws.
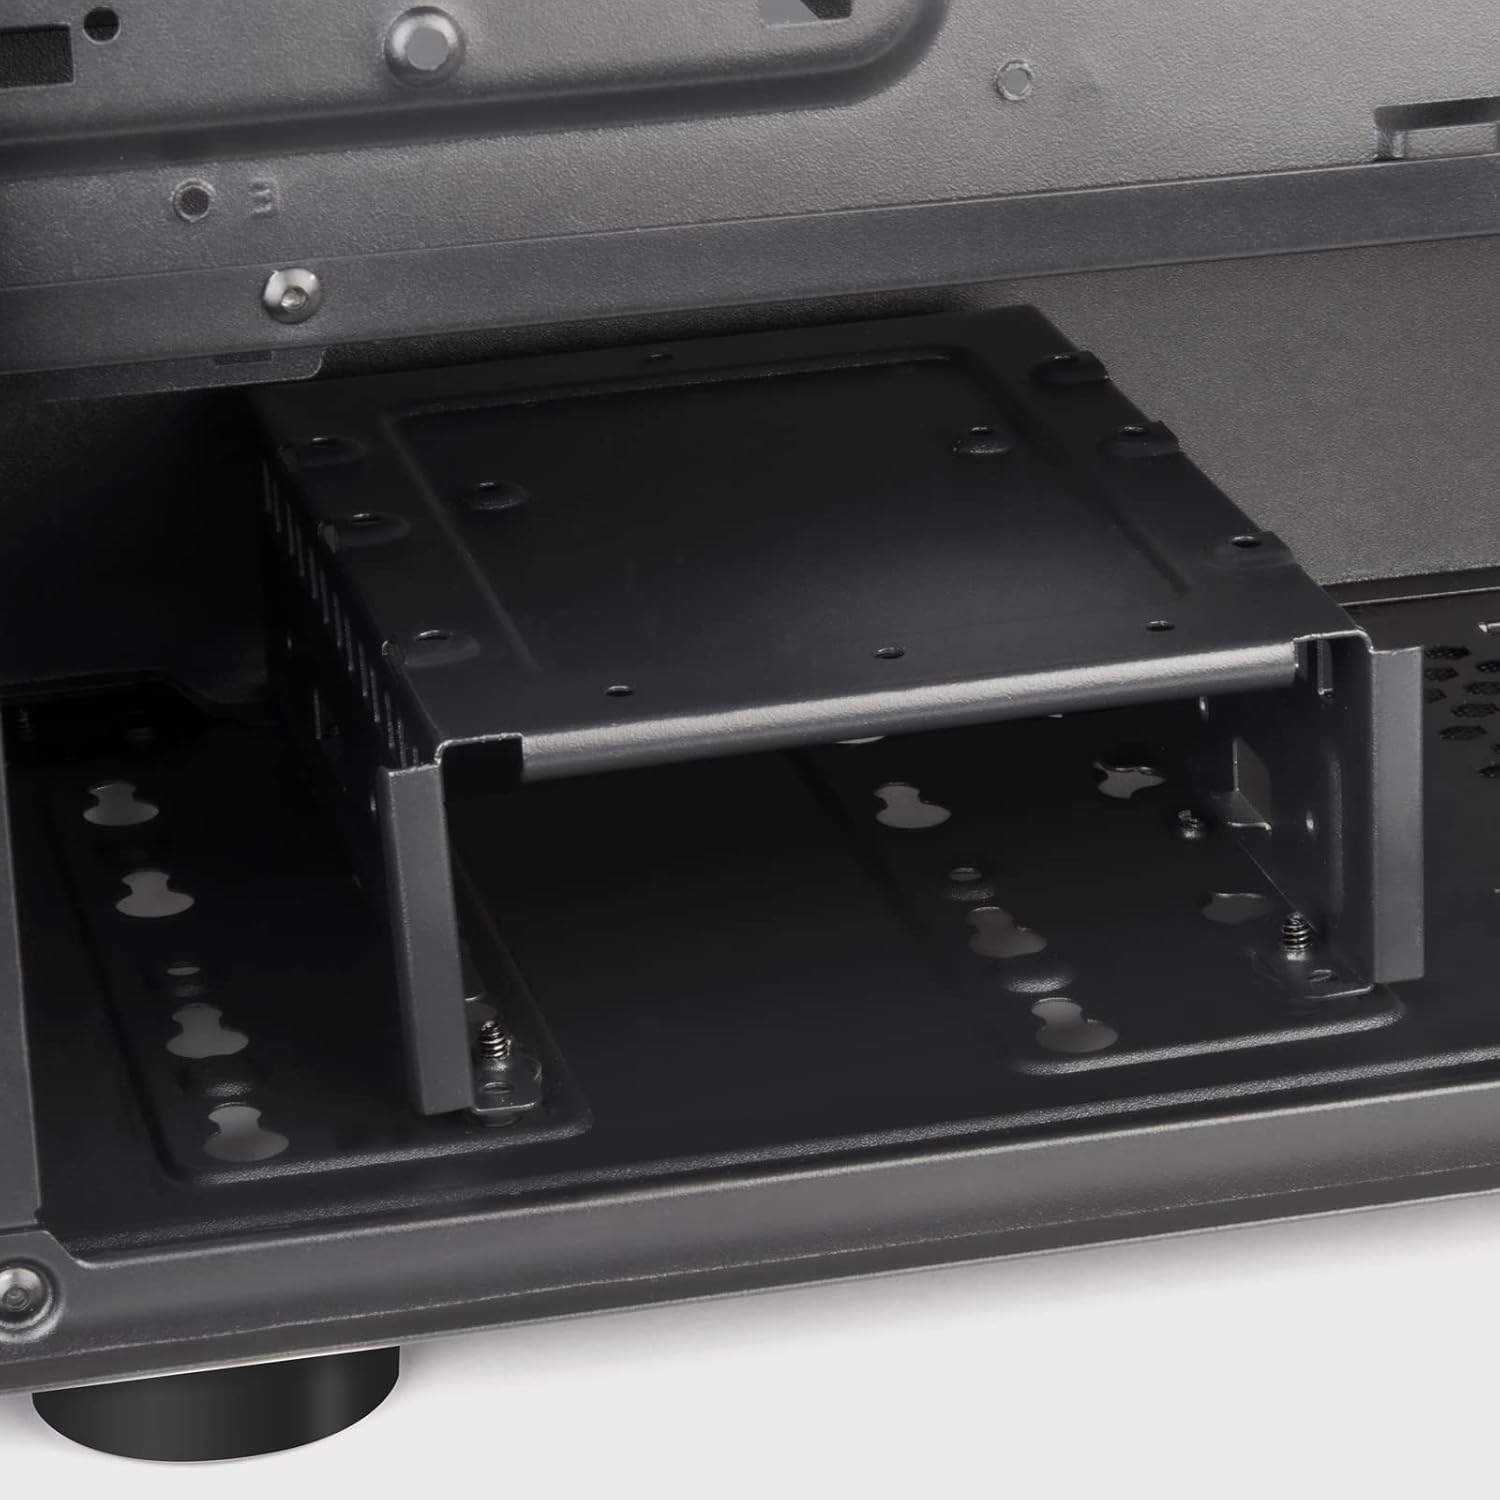
Figure 7: Expansion Slots
4.6 Желдеткичти жана Радиаторду орнотуу
The FARA R1 V2 supports various fan and radiator configurations for optimal cooling.
- Алдыңкы: 3 x 120mm or 2 x 140mm fans / 240mm, 280mm, 360mm radiators
- Жогорку: 2 x 120mm or 2 x 140mm fans / 240mm, 280mm radiators
- Арткы: 1 x 120mm fan (pre-installed)

Figure 8: Fan and Radiator Support

Figure 9: Internal Fan Mount
4.7 Кабелди башкаруу
Кабельдерди уюштуруу үчүн энелик плата лотоктун артындагы кабелдик маршруттук кескичтерди жана байлоо пункттарын колдонуңуз. Бул аба агымын жана эстетиканы жакшыртат.
5. Ишти иштетүү
Once all components are installed and secured, and the side panels are reattached, your system is ready for operation.
5.1 Алдыңкы I/O панели
Алдыңкы I/O панели маанилүү портторго ыңгайлуу мүмкүнчүлүктү камсыз кылат:
- Кубат баскычы: Located at the top right of the front panel.
- Калыбына келтирүү баскычы: Small button below the power button.
- USB 3.0 порттору (x2): жогорку ылдамдыктагы маалыматтарды берүү үчүн.
- USB 2.0 порту (x1): Стандарттык USB түзмөктөр үчүн.
- Audio Jack (x1): Combined headphone/microphone port.

Figure 10: Front I/O Panel
5.2 Аба агымын оптималдаштыруу
The FARA R1 V2 features a fully meshed front panel to maximize air intake. Ensure proper fan configuration (intake at front, exhaust at rear/top) for optimal cooling performance.
6. Техникалык тейлөө
Үзгүлтүксүз тейлөө сиздин PC корпусуңуздун узак иштөөсүн жана иштешин камсыз кылууга жардам берет.
- Чаң чыпкалары: The case includes removable dust filters on the top and bottom (for the PSU intake). Regularly remove and clean these filters with water and mild soap, or by vacuuming, to prevent dust buildup and maintain airflow.
- Тышкы тазалоо: Сырткы беттерин жумшак менен сүртүңүз, гamp кездеме. Абразивдүү тазалагычтардан алыс болуңуз.
- Ички тазалоо: Periodically, with the system powered off and unplugged, use compressed air to remove dust from internal components and fan blades.
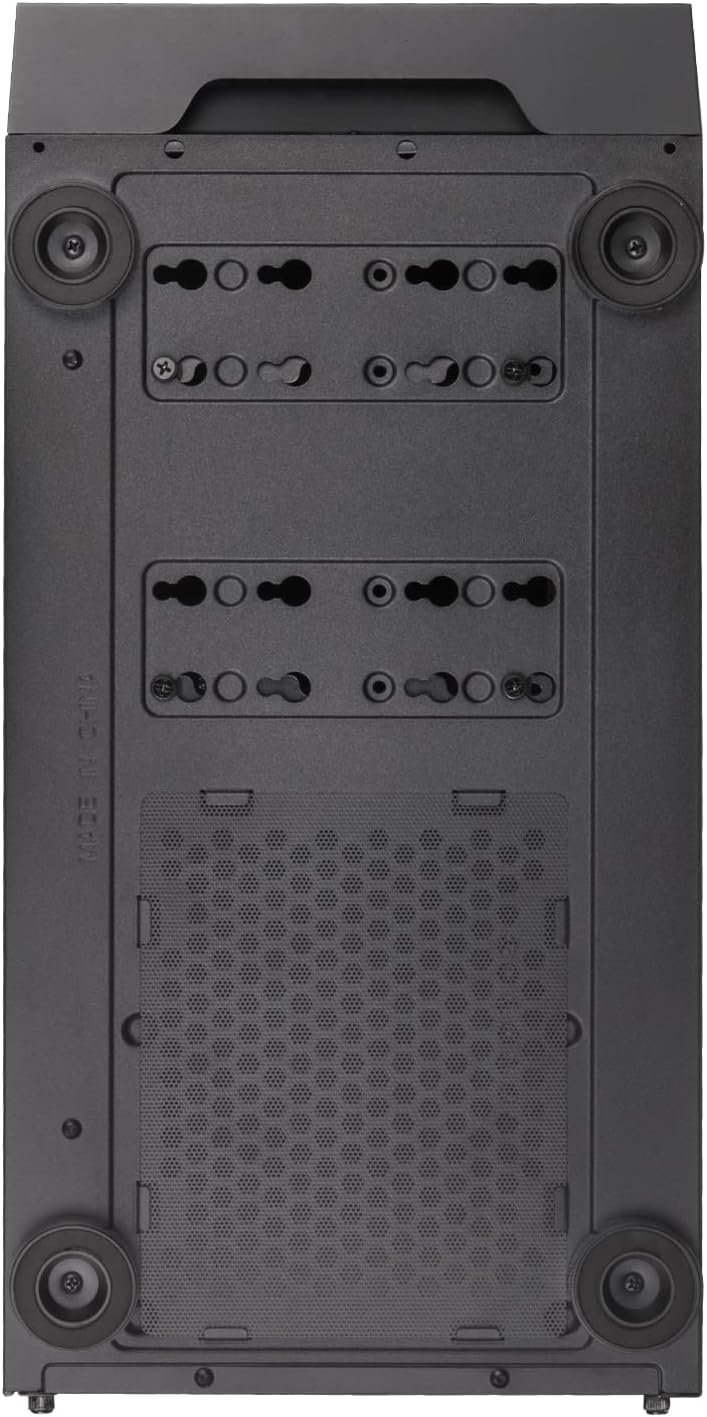
Figure 11: Bottom Dust Filter
7. Кыйынчылыктарды
Бул бөлүм сиз кабылышы мүмкүн болгон жалпы көйгөйлөрдү карайт.
- Система күйбөй жатат:
- Бардык кубат кабелдеринин (24-пиндүү ATX, 8-пиндүү CPU, GPU кубат булагы) бекем туташтырылганын текшериңиз.
- PSU которгучу "ON" абалында экенин текшериңиз.
- Check that the front panel power button cable is correctly connected to the motherboard's F_PANEL header.
- Начар аба агымы/кысып кетүү:
- Бардык чаң чыпкаларын жана ички компоненттерин тазалаңыз.
- Желдеткичтер туура багытта орнотулгандыгын текшериңиз (чыгаруу/чыгаруу).
- Verify fan cables are properly connected to the motherboard or fan controller.
- Front USB/Audio Ports Not Working:
- Check that the USB 3.0, USB 2.0, and HD Audio cables from the front panel are correctly connected to the corresponding headers on the motherboard.
- Tempered Glass Panel Issues:
- Handle the tempered glass panel with care to prevent damage.
- Ensure thumbscrews are tightened sufficiently but not overtightened.
8. Кепилдик жана колдоо
SilverStone Technology provides a limited warranty for its products. For detailed warranty information, technical support, or to inquire about replacement parts, please visit the official SilverStone webсайтка же кардарларды тейлөө бөлүмүнө кайрылыңыз.
Официалдуу Webсайт: www.silverstonetek.com
Кепилдик дооматтары үчүн сатып алганыңыздын далилин сактап коюңуз.


