1. Киришүү
Thank you for choosing the HOMVILLA Alarm Clock Model 8813. This manual provides detailed instructions for setting up, operating, and maintaining your new alarm clock. Please read this manual thoroughly before use to ensure proper functionality and to maximize your user experience. Keep this manual for future reference.
2. Пакеттин мазмуну
Сураныч, пакетте төмөнкү нерселерди текшериңиз:
- HOMVILLA Alarm Clock (Model 8813)
- USB заряддоо кабели
- Кубаттуу адаптер
- Колдонуучунун Колдонмосу (бул документ)

Image 2.1: Alarm clock, USB cable, and power adapter included in the package.
3. Продукт бүтүп калдыview
Ойготкуч саатыңыздын ар кандай бөлүктөрү жана башкаруу элементтери менен таанышыңыз.

Сүрөт 3.1: Алдыңкы жана арткы view of the alarm clock with labeled components.
Алдыңкы дисплей:
- Чоң LED дисплей: Shows time, AM/PM indicator, Alarm 1 (①), Alarm 2 (②), and DST indicator.
Rear Buttons and Ports:
- Көлөм дөңгөлөгү: Ойготкучтун үнүн тууралайт (90-120дБ).
- DST Button: Activates/deactivates Daylight Saving Time.
- Убакытты коюу баскычы: Убакытты орнотуу режимине кирет.
- UP баскычы: Орнотуу учурунда маанилерди жогорулатат.
- ТӨМӨН баскычы: Орнотуу учурунда маанилерди азайтат.
- Ойготкуч орнотуу баскычы: Сигнал орнотуу режимине кирет.
- Күйгүзүү/өчүрүү баскычы: Turns alarm on/off.
- Калыбына келтирүү баскычы: Саатты баштапкы абалга келтирет.
- Дөңгөлөктүн күңүрттүгү: Дисплейдин жарыктыгын тууралайт (0-100%).
- USB порт: Тышкы түзмөктөрдү кубаттоо үчүн.
- DC Порт: Кубат киргизүү үчүн.
Жогорку баскыч:
- Тындырма баскычы: Activates snooze function when an alarm sounds.
4. Орнотуу
4.1 Кубат туташтыруу
The HOMVILLA Alarm Clock is mains powered. Connect the provided USB charging cable to the DC port on the back of the clock and plug the power adapter into a standard wall outlet.
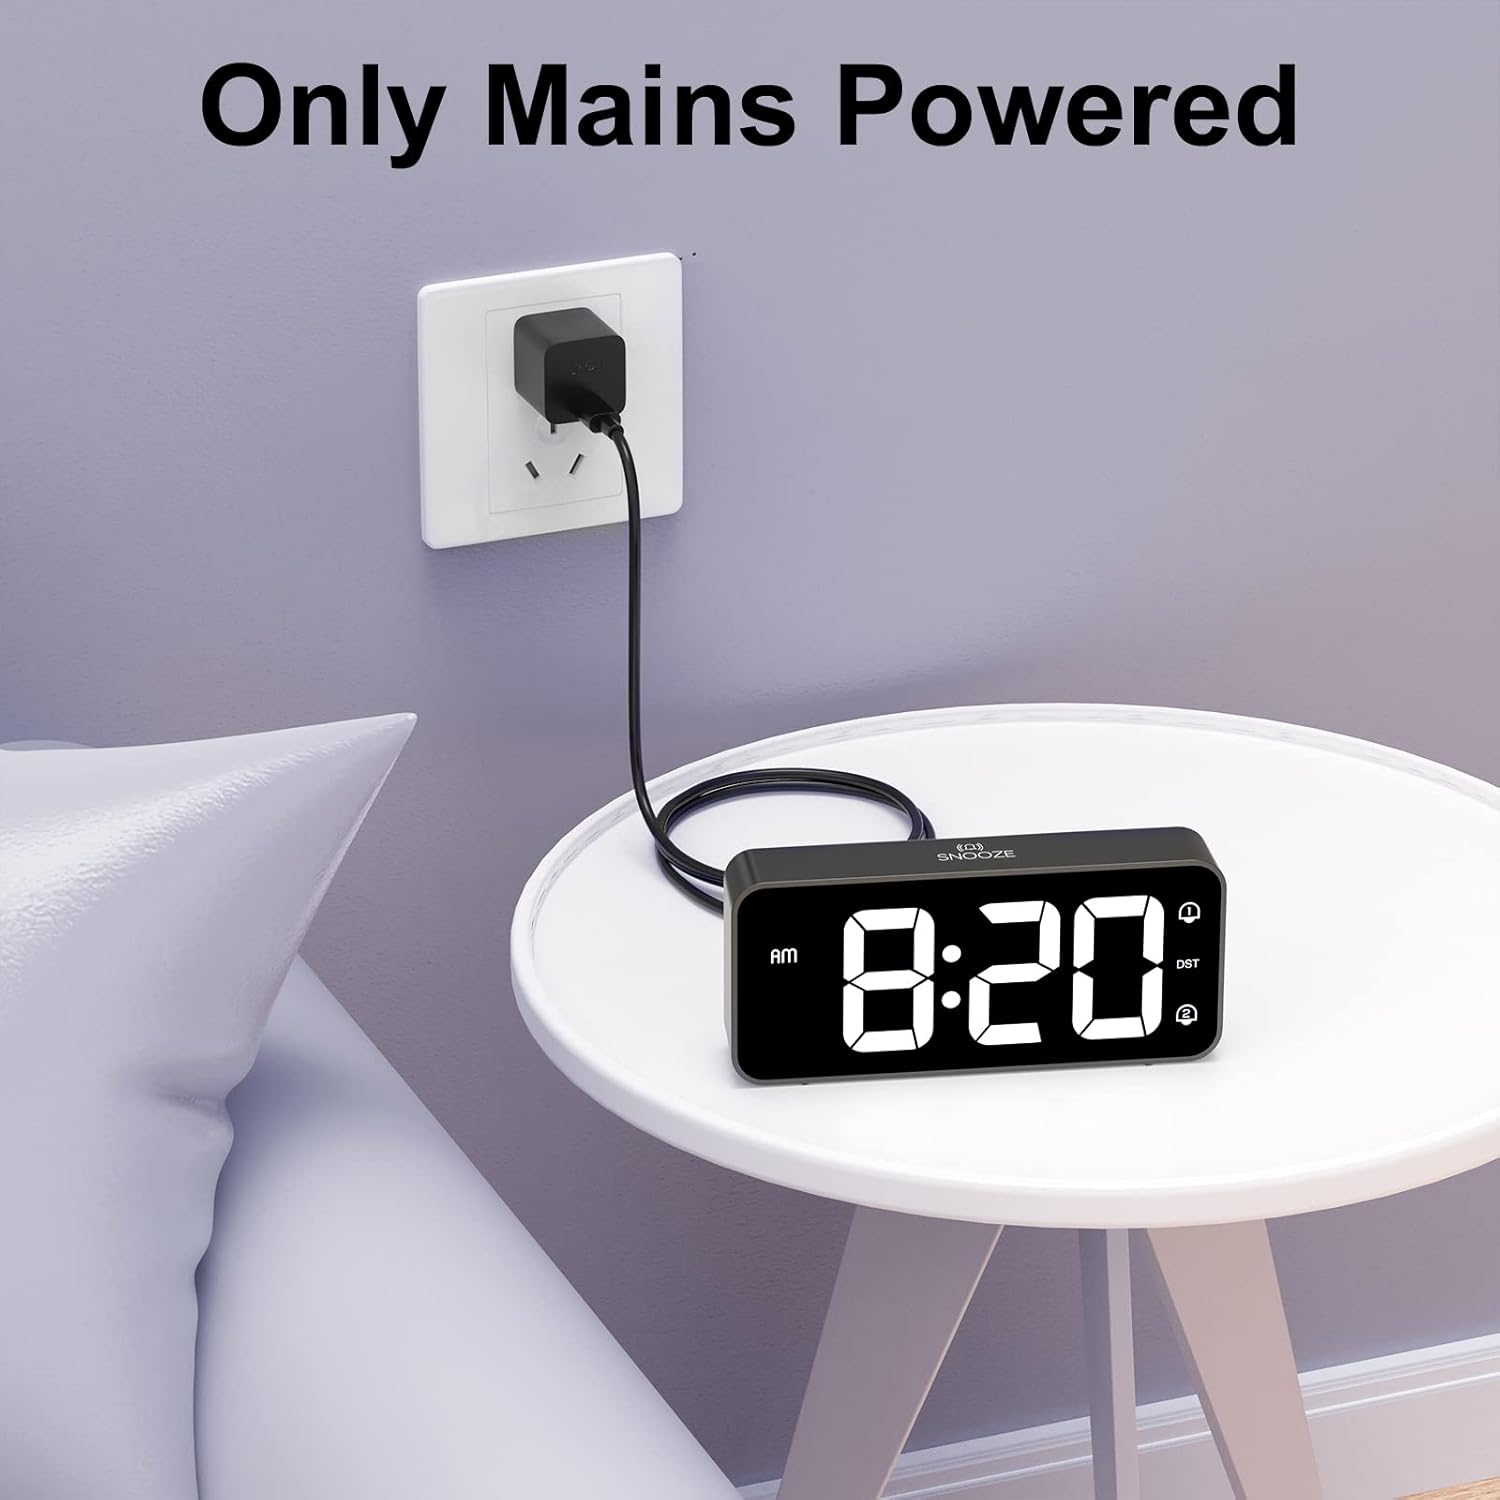
Image 4.1: Connecting the alarm clock to a power outlet.
4.2 Батареянын резервдик көчүрмөсүн орнотуу (кошумча)
To retain time settings during a power outage, install two AAA batteries (not included) into the battery compartment on the bottom of the clock. The batteries only support the memory function and do not power the display or alarm functions.
- Сааттын астыңкы жагындагы батарея бөлүмүнүн капкагын ачыңыз.
- Туура полярдуулукту (+/-) камсыз кылуу менен эки AAA батарейкасын салыңыз.
- Батарея уясынын капкагын жабыңыз.

Image 4.2: Installing AAA batteries for memory function.
5. Иштөө нускамалары
5.1 Убакытты коюу
- басып, кармап туруңуз Убакыт коюу button on the back of the clock. The hour digits will start flashing.
- колдонуу UP or ылдый саатты тууралоо үчүн баскычтар.
- басыңыз Убакыт коюу Саатты ырастоо жана мүнөт жөндөөсүнө өтүү үчүн баскычын кайра басыңыз. Мүнөттөрдүн сандары күйүп-өчүп турат.
- колдонуу UP or ылдый мүнөттөрдү тууралоо үчүн баскычтар.
- басыңыз Убакыт коюу button a third time to confirm the minutes and switch between 12-hour and 24-hour format. Use UP or ылдый тандоо үчүн.
- басыңыз Убакыт коюу button once more to exit time setting mode.
5.2 Ойготкучтарды орнотуу (кош ойготкучтар)
Саат эки көз карандысыз ойготкучту (1-ойготкуч жана 2-ойготкуч) колдойт.
- басып, кармап туруңуз Ойготкуч орнотулган button. The Alarm 1 icon (①) and hour digits will flash.
- колдонуу UP or ылдый ойготкуч саатын тууралоо үчүн баскычтар.
- басыңыз Ойготкуч орнотулган Саатты ырастоо жана мүнөт жөндөөсүнө өтүү үчүн баскычын кайра басыңыз. Мүнөттөрдүн сандары күйүп-өчүп турат.
- колдонуу UP or ылдый ойготкуч мүнөттөрдү тууралоо үчүн баскычтар.
- басыңыз Ойготкуч орнотулган button a third time to select the alarm sound (see section 5.5).
- басыңыз Ойготкуч орнотулган button a fourth time to exit Alarm 1 setting.
- To set Alarm 2, repeat steps 1-6. The Alarm 2 icon (②) will flash during its setting.
5.3 Сигнализацияларды иштетүү/өчүрүү
Ойготкучту койгондон кийин, баскычын басыңыз On/Off button on the back of the clock to toggle Alarm 1 or Alarm 2 on/off. The corresponding alarm icon (① or ②) will appear on the display when active.
5.4 Тындыруу функциясы
Ойготкуч чырылдаганда:
- Чоңду басыңыз Тындыр button on the top of the clock. The alarm will pause for 5 minutes and then sound again.
- To turn off the alarm for the day, briefly press any of the five buttons on the back of the clock. The alarm will sound again the next day at the set time.

Image 5.1: Snooze function and dual alarm capability.
5.5 Дисплейдин жарыктыгын жөндөө
Дисплейдин жарыктыгын 0% дан 100% га чейин тууралоого болот.
- табыңыз Dimmer Wheel on the back right side of the clock.
- Slide the wheel up or down to increase or decrease the display brightness to your preference.

Image 5.2: Adjustable display brightness for day and night.
5.6 Ойготкучтун үнүн тууралоо
The alarm volume can be adjusted between 90dB and 120dB.
- табыңыз Көлөм Колеса on the back left side of the clock.
- Slide the wheel up or down to increase or decrease the alarm volume.

Image 5.3: Volume and brightness adjustment wheels.
5.7 Сигнализация үндөрүн тандоо
The clock offers eight different alarm melodies.
- During alarm setting (refer to section 5.2, step 5), use the UP or ылдый buttons to cycle through the available alarm sounds.
- The available sounds include: Classic ringtone, Bird call, Running water, Crickets, Cock call, White noise, Stringed music, and 'Di di di'.

Image 5.4: Eight available alarm sounds.
5.8 Жайкы убакыт (DST)
- басыңыз DST button on the back of the clock to activate or deactivate Daylight Saving Time.
- When DST is active, the time will adjust by one hour, and a DST indicator will appear on the display.
5.9 USB кубаттоо порту
- The USB port on the back of the clock can be used to charge mobile phones or other small electronic devices.
- Connect your device's charging cable to the USB port.
6. Техникалык тейлөө
- Саатты тазалоо үчүн, анын бетин жумшак, кургак чүпүрөк менен акырын сүртүңүз.
- Абразивдүү тазалагычтарды, эриткичтерди же химиялык спрейлерди колдонбоңуз, анткени алар финишке зыян келтириши мүмкүн.
- Саатты түз күн нурунан, өтө жогорку нымдуулуктан жана өтө жогорку температурадан алыс кармаңыз.
7. Кыйынчылыктарды
| Көйгөй | Мүмкүн себеп | Чечим |
|---|---|---|
| Сааттын дисплейи өчүк. | Электр байланышы жок. | Кубат адаптери саатка жана иштеп жаткан розеткага бекем сайылганын текшериңиз. |
| Ойготкуч угулбайт. | Ойготкуч иштетилген эмес же үн өтө төмөн. | Check if the alarm icon (① or ②) is displayed. Adjust the volume wheel to increase alarm volume. |
| Убакыт бийликтен кийин туура эмесtage. | Батареянын резервдик көчүрмөсү орнотулган эмес же батарейкалар түгөнүп калган. | Install fresh AAA batteries for memory function. Reset the time manually if necessary. |
| Дисплей өтө жарык/күңүрт. | Жарыктык жөндөөсүн тууралоо керек. | Use the Dimmer Wheel on the back of the clock to adjust brightness. |
| USB заряддоо порту иштебей жатат. | Device incompatibility or power issue. | Ensure the clock is powered. Try a different USB cable or device. The port is for charging, not data transfer. |
8. Техникалык шарттар
| Өзгөчөлүк | Деталь |
|---|---|
| Модель номери | 8813 |
| Дисплей түрү | Digital LED |
| Power Source | Mains Powered (USB cable + adapter) |
| Батареянын камдык көчүрмөсү | 2 x AAA batteries (not included, for memory function only) |
| Продукциянын өлчөмдөрү | 14.5 x 3.2 x 6.5 см (5.7 x 1.26 x 2.56 дюйм) |
| Элемент Салмагы | 157 г |
| Өзгөчөлүктөр | Dual Alarm, Snooze Function, Dimmable Display, USB Charging Port, DST Mode |
| Сигнализациянын үн диапазону | 90-120дБ |
| Дисплей жарыктыгы | 0-100% жөнгө салынат |
9. Кепилдик жана колдоо
HOMVILLA offers a lifetime warranty for this product. For any questions, technical support, or warranty claims, please contact our customer service team.
Кызмат электрондук почтасы: support@homvillalife.com

Image 9.1: Service email for customer support.


