1. Киришүү
This manual provides detailed instructions for the installation, operation, maintenance, and troubleshooting of your REOLINK RLK16-1200B8-A 12MP PoE Security Camera System. Please read this manual thoroughly before using the product to ensure proper functionality and safety.
The REOLINK RLK16-1200B8-A system offers advanced surveillance capabilities with 12MP Ultra HD cameras, person, vehicle, and pet detection, color night vision, two-way talk, and a 16-channel NVR with a 4TB HDD, expandable up to 24 channels and 16TB storage.
2. Кутуда эмне бар
Upon unpacking your REOLINK RLK16-1200B8-A system, verify that all components listed below are present and in good condition:
- 1x RLN16-410 NVR (Network Video Recorder)
- 8x B1200 12MP PoE Cameras
- 1x NVR кубат адаптери
- 1x HDMI кабели
- 1x USB чычкан
- 1x 1m Network Cable
- 8x 18m Network Cables

Image: All components included in the REOLINK RLK16-1200B8-A security camera system package.
3. Орнотуу
Setting up your REOLINK security system involves connecting the NVR and cameras, and configuring the system for optimal performance.
3.1. Аппараттык туташуу
- NVRди мониторго туташтыруу: Use the provided HDMI or VGA cable to connect the NVR to a monitor or TV.
- Connect the USB Mouse: Plug the USB mouse into one of the USB ports on the NVR for navigation.
- Connect to Network (Optional for local viewing): Connect an Ethernet cable from the NVR's LAN port to your router's LAN port for remote access and updates.
- Power on the NVR: Connect the NVR power adapter to the NVR and a power outlet. If your NVR has an on/off switch, turn it on.
- Камераны NVRге туташтыруу: Connect each B1200 PoE camera to an available PoE port on the NVR using the provided Ethernet cables. The cameras will receive both power and data through these cables.

Сүрөт: Арткы view of the NVR unit, highlighting various connection ports including PoE, HDMI, VGA, and USB.
3.2. Баштапкы конфигурация
Once the NVR is powered on and connected to a monitor, follow the on-screen instructions to complete the initial setup, including setting a password and configuring network settings.
- Auto Add Cameras: The NVR is designed to automatically detect and add connected PoE cameras. Ensure the "Auto Add" option is enabled in the Channel Management settings.
- Алыстан кирүү: Download the Reolink App (iOS/Android) or Client (Windows/Mac OS) to view live feeds and manage your system remotely.
Video: This video demonstrates the unboxing and setup process for the REOLINK RLK16-1200B8-A system, including connecting components and initial configuration steps.
4. Системаны иштетүү
Your REOLINK system offers various features for monitoring and recording.
4.1. Түз эфир View жана Ойнотуу
- Viewing Live Feeds: Access live camera feeds directly from the NVR connected to a monitor, or via the Reolink App/Client on your smart devices.
- Ойнотуу: Use the NVR interface or the Reolink App/Client to review foo жазылганtage. The 4TB HDD stores continuous 24/7 recordings.

Image: The Reolink app displaying multiple camera views simultaneously, demonstrating remote monitoring capabilities.
4.2. Акылдуу аныктоо жана эскертүүлөр
- Person/Vehicle/Pet Detection: The cameras utilize advanced AI to distinguish between people, vehicles, and pets, reducing false alarms.
- Эскертүүлөр: Configure push notifications, email alerts, and siren activation upon detection of specific events.
- Прожектор жана сирена: The cameras feature motion-activated spotlights for color night vision and deterrence, along with an audible siren.
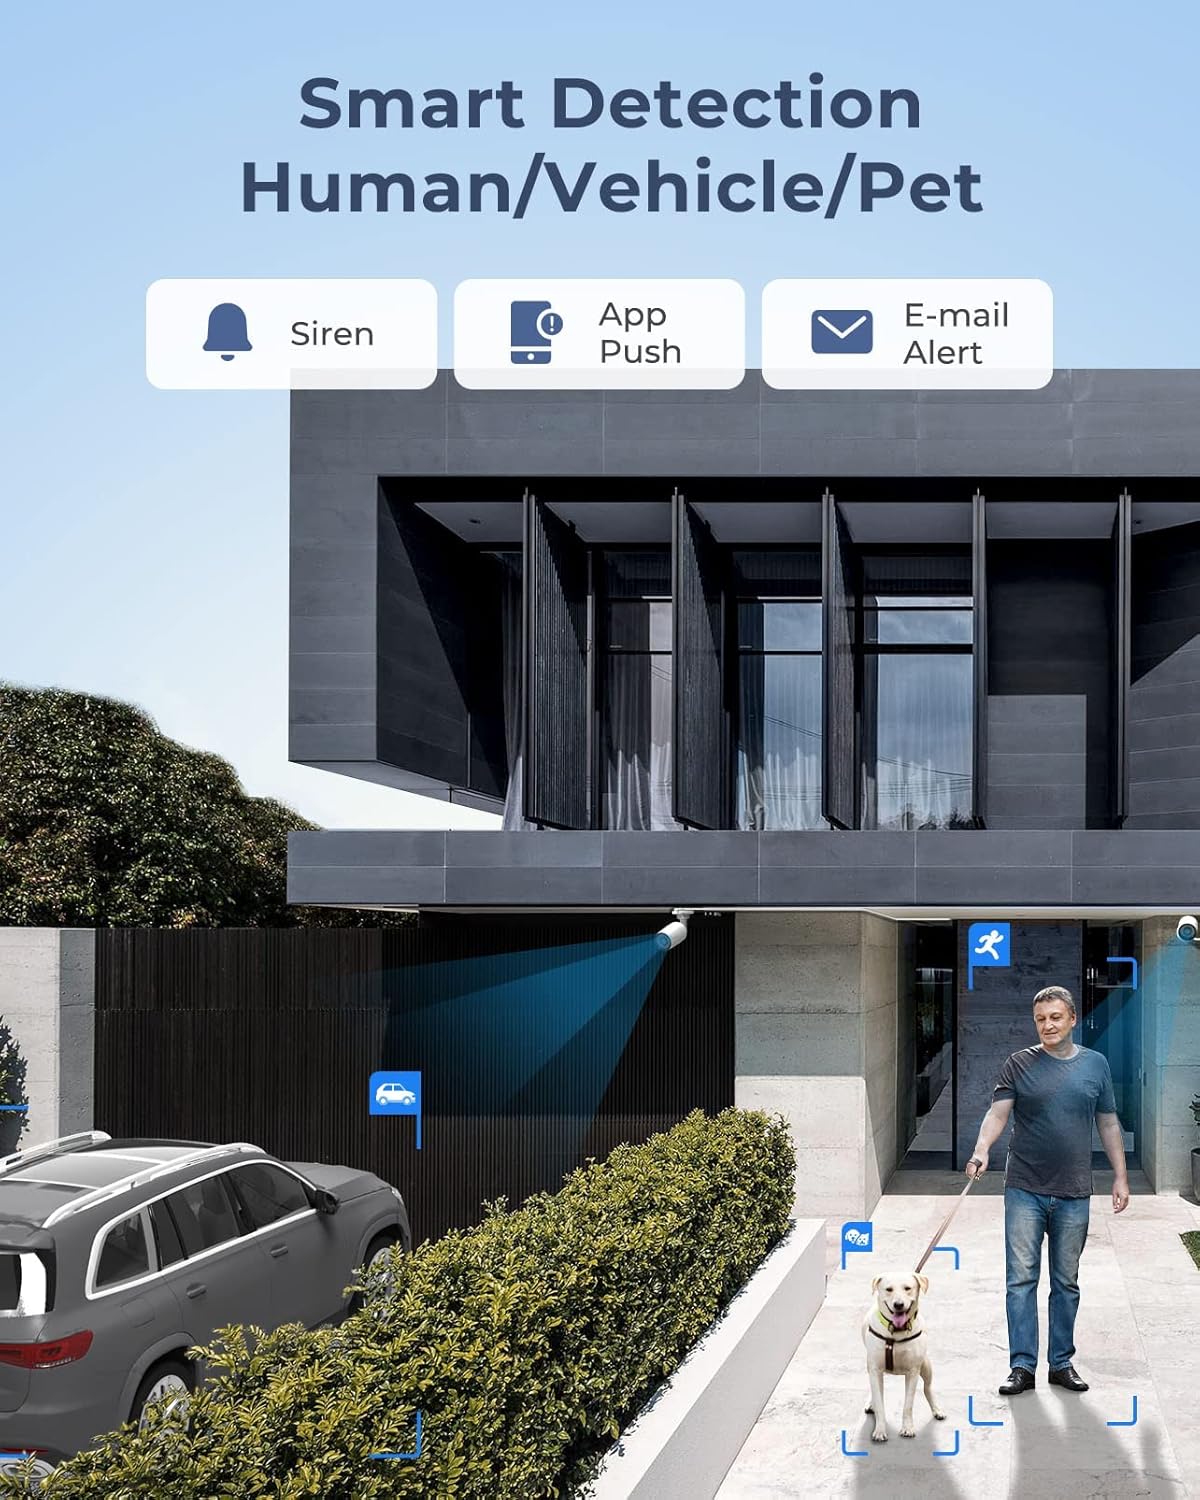
Image: Smart detection in action, identifying a person and a pet within the camera's view.

Image: Demonstrates the effectiveness of color night vision using spotlights compared to traditional black and white infrared.
4.3. Эки тараптуу сүйлөшүү
Each 12MP camera includes a built-in speaker and microphone, enabling two-way communication. This feature allows you to speak with visitors or deter intruders directly through the camera via the Reolink App/Client.

Image: The two-way talk function, showing a user communicating through the camera via a mobile app.
5. Техникалык тейлөө
Үзгүлтүксүз техникалык тейлөө коопсуздук системаңыздын узак мөөнөттүү иштешин жана оптималдуу иштешин камсыз кылат.
- Таза камера линзалары: Камера линзаларын мезгил-мезгили менен жумшак, d чүпүрөк менен тазалап туруңузamp cloth to prevent dust and dirt buildup from affecting image clarity.
- Кабель туташууларын текшерүү: Ensure all Ethernet cables are securely connected to prevent signal loss or power interruptions.
- Программалык камсыздоонун жаңыртуулары: Regularly check for and install firmware updates for both the NVR and cameras via the Reolink App/Client to access new features and improve system stability.
- HDD башкаруу: The NVR's 4TB HDD provides ample storage. Monitor storage usage and configure recording settings as needed. The system supports up to 16TB storage.
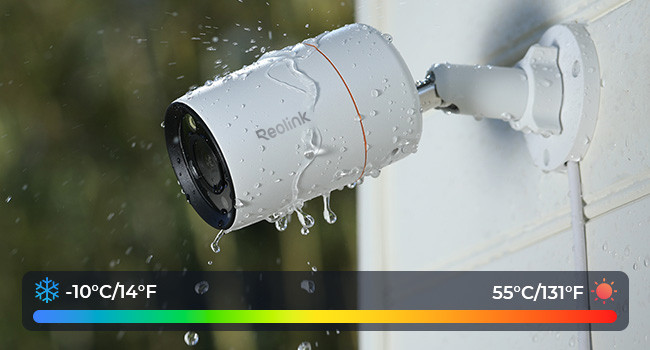
Image: The weatherproof design of the camera, capable of withstanding temperatures from -10°C to 55°C.
6. Кыйынчылыктарды
This section addresses common issues you might encounter with your REOLINK security system.
6.1. Powering On Issues for PoE Camera
- Cause 1: The PoE module of the camera fails to get power.
Чечим: Please use a DC adaptor to power the camera on. (Note: The power adaptor may refer to What is the Output Voltage for Reolink DC Power Adapter)
- Cause 2: The camera is not properly connected to the NVR.
Чечим: Please check the PoE lights of the NVR. If the lights are not on, plug the camera into other ports that work and use another working Ethernet cable.
- Cause 3: Insufficient power supply from PoE NVR.
Чечим: Please make sure that the cameras added to the NVR are no more than the specified quantity. And then please unplug all other cameras and leave one camera connected to the NVR for a test.
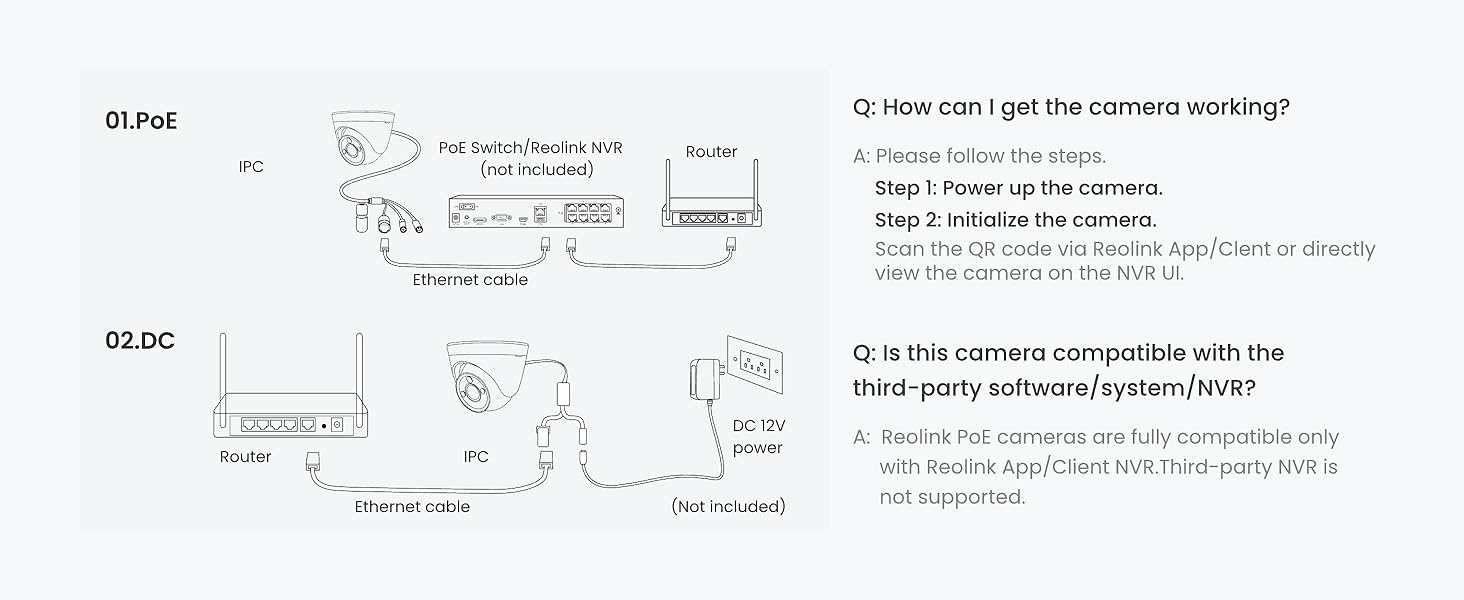
Image: Connection methods for Reolink cameras, showing direct PoE NVR connection and router connection with DC power.
7. Техникалык шарттар
| Өзгөчөлүк | Деталь |
|---|---|
| Бренд | REOLINK |
| Модель номери | RLK16-1200B8-A |
| Байланыш технологиясы | Зымдуу (PoE) |
| Видео тартуунун резолюциясы | 12 мегапикселдүү (4512x2512) |
| Өзгөчөлүктөр | Adjustable, Easy to Install, Motion Sensor, Vehicle Detection, Waterproof, Person Detection, Pet Detection, Spotlight Color Night Vision, Two-Way Talk |
| Каналдардын саны | 16 (Expandable to 24) |
| Эстутум сактоо сыйымдуулугу | 4 TB HDD (Expandable to 16 TB) |
| Power Source | DC |
| Операциялык системанын шайкештиги | iOS, Android, Windows, Mac OS |
| Төмөн жарык технологиясы | Night Vision (Color & IR) |
| Түнкү көрүү диапазону | 100 Фут |
| Frame Rate | 20 кадр/сек |
| Жазуу режими | Motion Recording; Schedule Recording; 24/7 Recording |
| Жалпы USB порттору | 2 |
| Аппараттык интерфейс | Ethernet, HDMI, USB, VGA, eSATA |
| Линзанын түрү | Оңдолду |
| Видео киргизүү | IP |
| Viewбурч | 93 градус |
| Продукциянын өлчөмдөрү | 15.36 x 13.98 x 15.16 дюйм |
| Элемент Салмагы | 35.6 фунт |
8. Кепилдик жана колдоо
REOLINK is committed to providing reliable products and excellent customer service.
- 30 күндүк акчаны кайтарып берүү кепилдиги жана акысыз кайтарып берүү: Эгерде сиз сатып алган товарыңызга канааттанбасаңыз, аны 30 күндүн ичинде кайтарып берип, толук акчаңызды кайтарып алсаңыз болот.
- 2 жылдык Чектелген Кепилдик: The product is covered by a 2-year limited warranty against defects in materials and workmanship.
- 24/7 Онлайн колдоо: For any technical assistance or inquiries, please contact Reolink Support.
Көп берилүүчү суроолор (FAQ)
- Does this PoE system work with other camera brands or models?
The system is designed to work exclusively with Reolink PoE cameras to ensure full functionality and stable performance. Other brands or non-Reolink models are not supported.
- Do I need Internet to use the system?
Internet is only needed for remote access. Local recording will work even without Internet.
- What should I do if a camera or the NVR is not working properly?
Check the cable, switch ports, and confirm power. If the issue remains, contact Reolink Support with your order info for quick troubleshooting or replacement.