Introduction
This manual provides comprehensive instructions for the installation, operation, and maintenance of your JEYI I9-Seal M.2 NVMe SSD Enclosure. This device converts an NVMe M.2 solid-state drive into a portable external storage solution with high-speed USB 3.2 Gen 2 connectivity.
Пакеттин мазмуну
Төмөндө тизмеленген нерселердин баары пакетиңизге камтылганын текшериңиз:
- JEYI M.2 NVMe SSD Enclosure
- Термикалык жаздыкчалар
- Screwdriver
- USB-A to USB-C Cable (10Gbps)
- USB-C to USB-C Cable (10Gbps)
- Lanyard

Орнотуу нускамалары
Follow these steps to install your NVMe M.2 SSD into the JEYI I9-Seal enclosure:
- Тиркемени даярдоо: Gently slide open the enclosure to reveal the internal PCB.
- Термикалык жаздыкчаны колдонуу: Peel off the protective films from both sides of a thermal pad and carefully place it onto the NVMe SSD chip area. This aids in heat dissipation.
- Insert NVMe SSD: Align your NVMe M.2 SSD (2280 form factor only) with the M-Key slot on the PCB. Insert the SSD firmly but gently into the slot at an angle.
- SSDди коопсуздандырыңыз: Once inserted, gently push down the SSD and secure it with the provided screw using the included screwdriver. Ensure the SSD is flat and securely fastened.
- Корпусун жабуу: Carefully slide the enclosure cover back into place until it clicks securely.


Иштөө нускамалары
Once your NVMe SSD is securely installed, connect the enclosure to your device:
- Түзмөккө туташуу: Use either the provided USB-C to USB-C cable or the USB-A to USB-C cable to connect the enclosure to a compatible USB port on your computer, smartphone, tablet, or game console.
- Күч көрсөткүчү: A small LED indicator on the enclosure will illuminate, signifying that the device is powered on and connected.
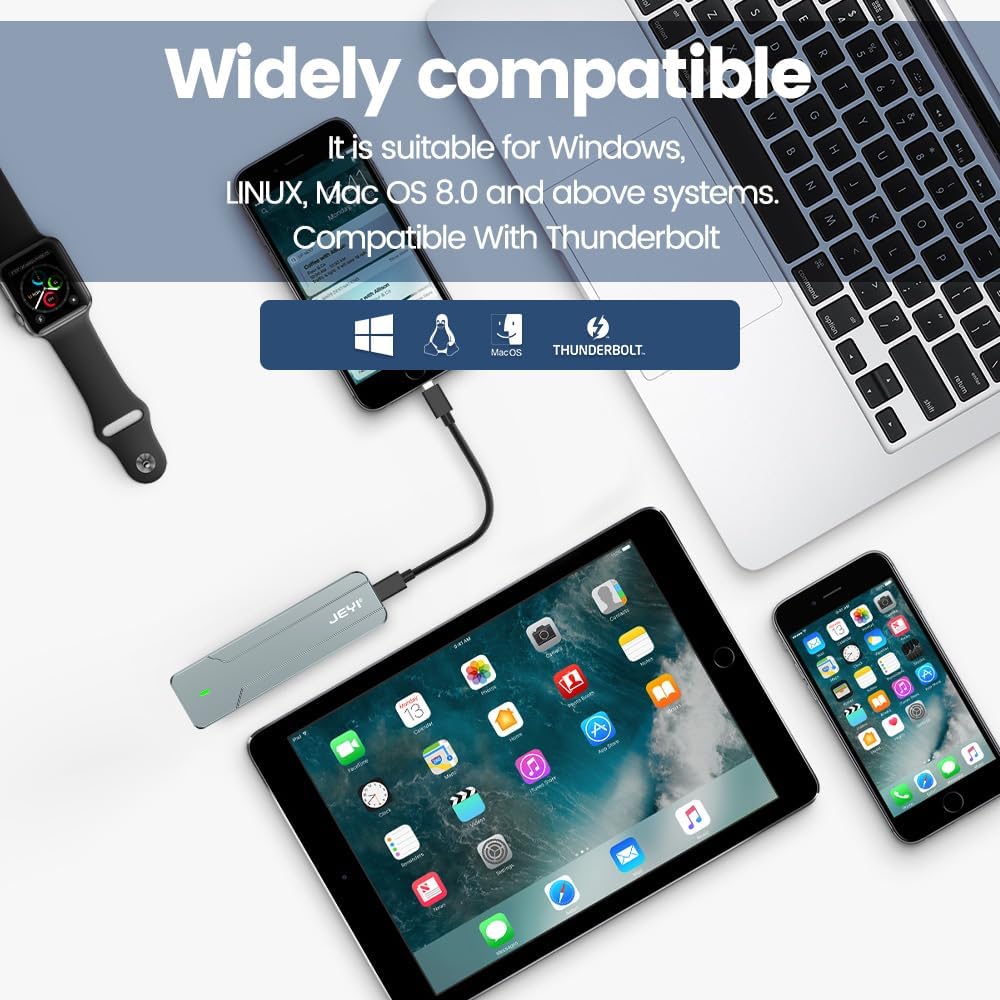
- Disk Recognition: Your operating system (Windows, macOS, Linux, Android, iOS) should automatically detect the new storage device. If it's a new SSD, you may need to initialize and format it through Disk Management (Windows) or Disk Utility (macOS) before use.
- Маалыматтарды өткөрүү: You can now perform data backup, file transfers, disk upgrades, data recovery, or use it for storage expansion. The enclosure supports USB 3.2 Gen 2 speeds up to 10Gbps.

Техникалык тейлөө
To ensure optimal performance and longevity of your JEYI I9-Seal enclosure:
- Жылуулук башкаруу: алюминий сasing and thermal pads are designed for efficient heat dissipation. During prolonged high-speed data transfers, the enclosure may become warm to the touch. This is normal and indicates effective heat transfer from the SSD.
- Тазалоо: Короонун сыртын тазалоо үчүн жумшак, кургак чүпүрөктү колдонуңуз. Суюк тазалагычтарды же эриткичтерди колдонуудан алыс болуңуз.
- Сактагыч: Колдонулбаганда, корпусту күн нурунан жана өтө температурадан алыс салкын, кургак жерде сактаңыз.
- Кабельге кам көрүү: Handle the USB cables carefully. Avoid sharp bends or excessive pulling to prevent damage.
Проблемаларды чечүү
| Көйгөй | Мүмкүн себеп | Чечим |
|---|---|---|
| Компьютер тиркемени аныктаган жок. |
|
|
| Жай маалымат берүү ылдамдыгы. |
|
|
| Enclosure gets very hot. |
|
|
Техникалык шарттар
| Өзгөчөлүк | Деталь |
|---|---|
| Модел | I9-Seal |
| Бренд | JEYI |
| Аппараттык интерфейс | USB 3.2 2-муундагы (USB-C) |
| Маалыматтарды өткөрүү ылдамдыгы | 10 Гбит/сек чейин |
| Шайкеш келген SSD түрү | NVMe M.2 (PCI-E M-Key) |
| Supported SSD Form Factor | 2280 (80mm) only |
| Макс сактоо сыйымдуулугу | 4 ТБ |
| Чипсет | JMS583 A3 |
| Өзгөчөлүктөрү | UASP Support, TRIM Support, Win to Go (WTG) Support |
| Материал | Алюминий эритмеси |
| Түс | Silver |
| Продукциянын өлчөмдөрү | 4.06 x 1.02 x 0.39 дюйм (103 x 26 x 10 мм) |
| Элемент Салмагы | 0.317 унция (9 грамм) |
| Шайкеш операциялык системалар | Windows, macOS, Linux, iOS, Android |

Кепилдик жана колдоо
For warranty information or technical support, please refer to the official JEYI website or contact their customer service directly. Details regarding specific warranty periods and support channels are typically provided with your purchase documentation or on the manufacturer's webсайт.
Өндүрүүчү: JEYI
Webсайт: Visit the JEYI Store on Amazon


