1. Киришүү
This manual provides detailed instructions for the installation, operation, and maintenance of your diymore 30A 12V/24V PWM Solar Charge Controller. This intelligent controller is designed to manage the power flow from your solar panel to your battery, ensuring efficient charging and protecting your battery from overcharge and over-discharge. It features a large LCD screen, dual USB outputs, and comprehensive 3-stage PWM зарядын башкаруу.
Негизги өзгөчөлүктөрү:
- Light control and time control discharge functionality.
- Compatible with lead-acid batteries (OPEN, AGM, GEL).
- 3-сtage PWM charge management: direct charge, boost charge, and float charge.
- Dual MOS reverse current protection, low heat generation.
- Built-in overcurrent, short-circuit, open-circuit, and reverse connection protection.
- Dual USB output (5V/2A Max) for mobile phone charging.
- Automatic 12V/24V voltage идентификация.
2. Коопсуздук маалыматы жана сактык чаралары
Please read all safety instructions carefully before installation and operation to prevent damage to the controller, battery, or other components.
- This solar charge controller is designed exclusively for коргошун-кислота батареялары (OPEN, AGM, GEL). Do not use it with other battery types, including lithium batteries or nickel-metal hydride batteries.
- The controller can only use photovoltaic panels as its power source. Do not use DC or other power sources as a power source.
- Батареяда жетиштүү көлөм бар экенин текшериңизtage for the controller to recognize its type (12V or 24V) during the first installation.
- Install the controller close to the battery to minimize voltage drop due to excessive wire length, which can affect accurate voltage аныктоо.
- The controller will generate heat during operation. Install it on a flat, well-ventilated surface to ensure proper heat dissipation.
- Always connect the components in the specified order to avoid damage.
3. Продукт бүтүп калдыview
Familiarize yourself with the components and display of the solar charge controller.

Сүрөт 1: Алдыңкы view of the diymore 30A 12V/24V PWM Solar Charge Controller, showing the LCD display, control buttons, and USB ports.
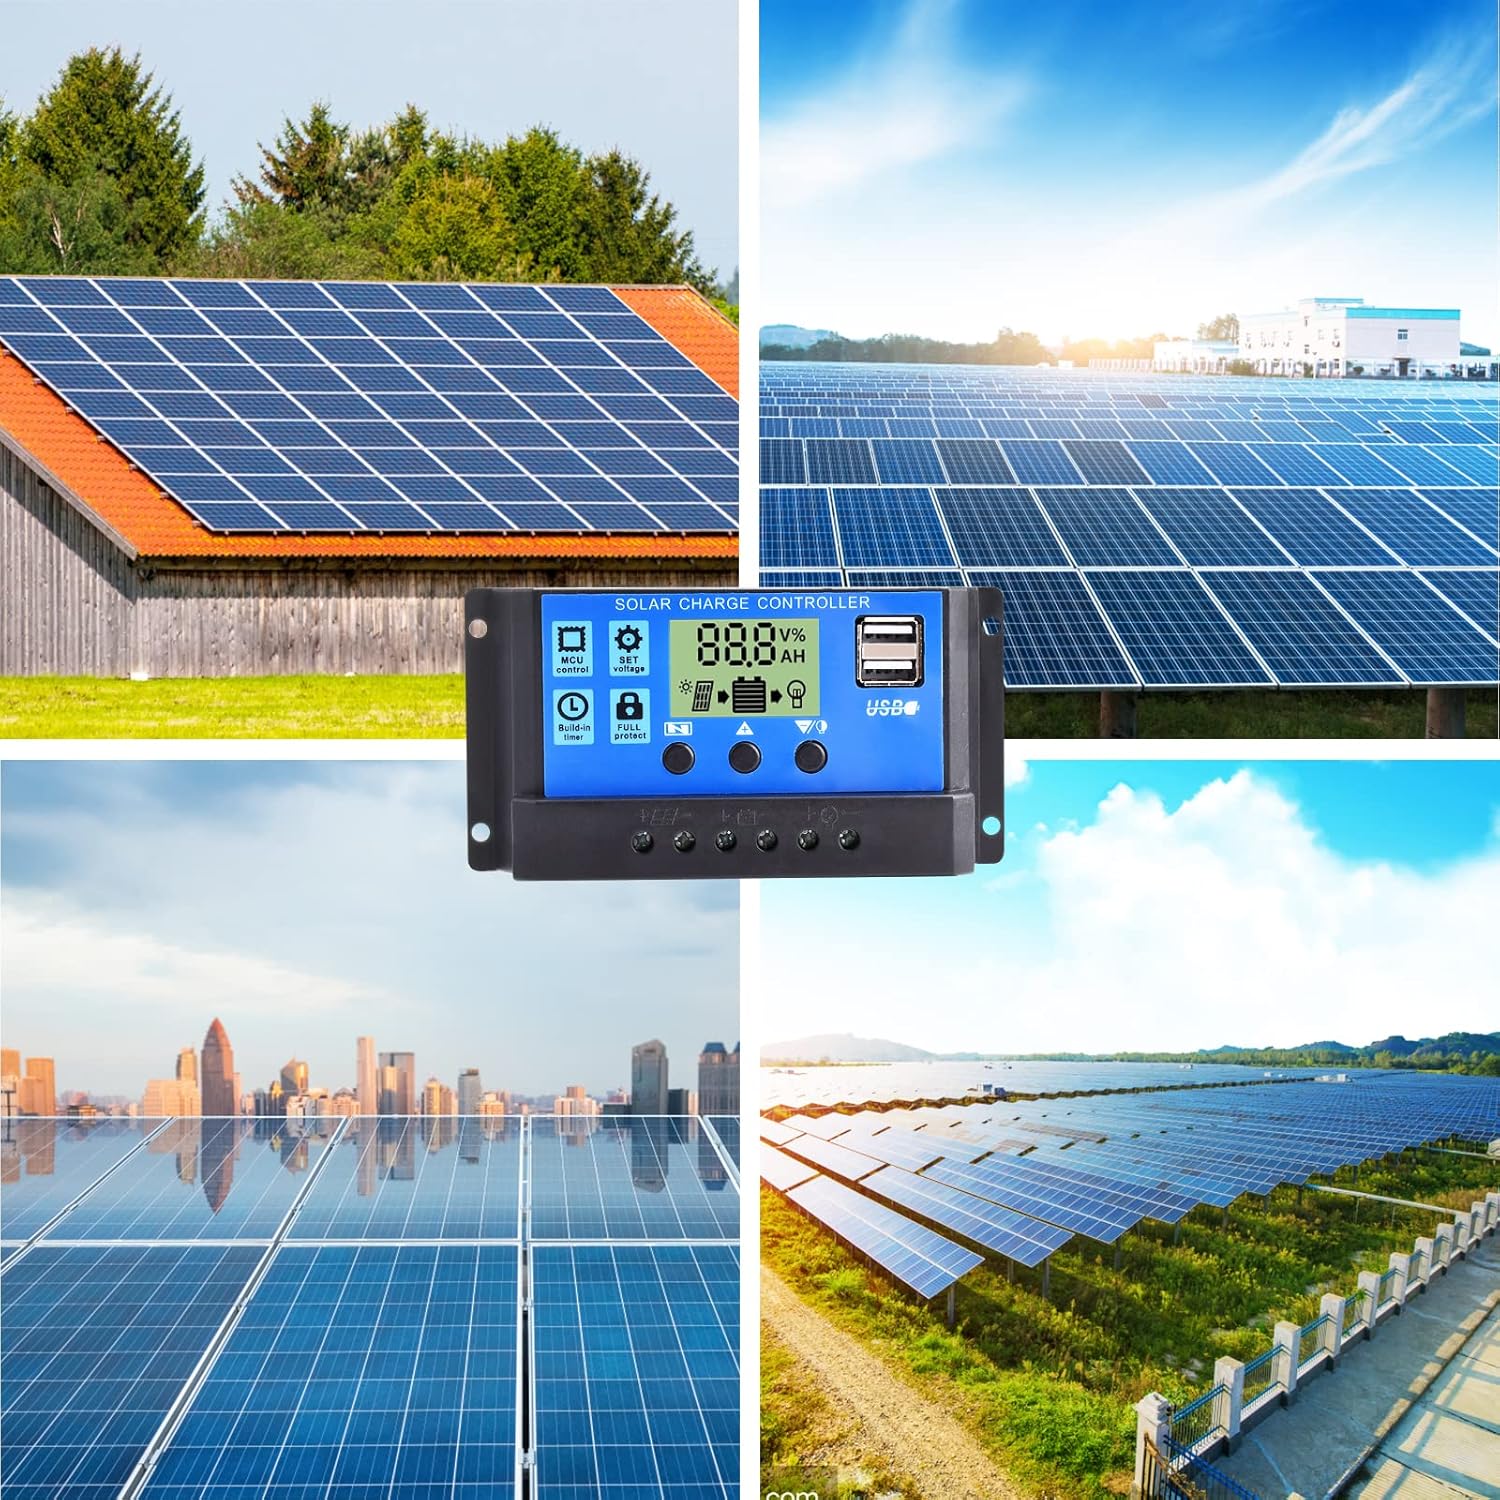
2-сүрөт: Детальдуу view of the LCD display and control buttons. The display shows voltagд, пайызtage, and icons for solar panel, battery, and load. Buttons are labeled for Menu, Up, and Down/Manual.
The LCD screen displays various parameters such as voltage, charging/discharging current, accumulated electricity generation, temperature, and battery status. The three buttons below the screen are used for navigation and setting adjustments.
4. Орнотуу жана орнотуу
Follow these steps for proper installation of the solar charge controller. Ensure all connections are secure and correct to prevent damage.
- Орнотуу ордун даярдаңыз: Choose a flat, well-ventilated surface near the battery. Avoid direct sunlight, high temperatures, and humid environments.
- Батареяны туташтыруу: Connect the positive and negative terminals of the battery to the corresponding battery terminals on the controller. The controller will automatically detect the battery voltage (12V or 24V). Ensure the battery has sufficient charge for detection.
- Күн панелин туташтыруу: Connect the positive and negative terminals of the solar panel to the corresponding solar panel terminals on the controller.
- Жүктү туташтыруу: Connect the positive and negative terminals of your DC load to the corresponding load terminals on the controller. Be careful not to reverse the connections.

Figure 3: Wiring diagram illustrating the connection order: Battery first, then Solar Panel, then Load.
Important: Always connect the battery first, then the solar panel, and finally the load. Disconnect in the reverse order: load, then solar panel, then battery.
5. Иштөө нускамалары
The controller features an intuitive LCD display and three control buttons for easy operation.
5.1 ЖК дисплей маалымат
The LCD screen provides real-time information about your solar system:
- Тtage Белги: Учурдагы томду көрсөтөтtage.
- Санариптик дисплей аянты: Shows numerical values for voltage, current, temperature, etc.
- Сааттары: Displays time-related settings or accumulated hours.
- Panels Icon: Күн панелинин активдүүлүгүн көрсөтөт.
- Charging Logo: Shows charging status (steady on for straight charge/lift charge, slow flash for float charge).
- Five Battery Level Mark: Visual representation of battery charge level.
- Load Identification: Indicates load status.
- Output Identification: Shows output status.
5.2 Баскыч функциялары
- Меню ачкычы: Used to cycle through display modes and enter/exit setting menus.
- Өйдө жебе баскычы: Маанилерди жогорулатуу же менюларда өйдө багыттоо үчүн колдонулат.
- Down Arrow / Manual Key: Used to decrease values, navigate downwards in menus, or manually control the load output (when in manual mode).
5.3 Параметрлерди орнотуу
To adjust parameters like charge voltagд, разрядды токтотуу томtage, or load control mode:
- басыңыз Меню ачкычы орнотуу режимине кирүү үчүн.
- колдонуу Жогору жебе жана Төмөн жебе keys to navigate through the different parameters.
- Once you've selected a parameter, press the Меню ачкычы again to make it blink, indicating it's ready for adjustment.
- колдонуу Жогору жебе жана Төмөн жебе маанисин өзгөртүү үчүн баскычтар.
- басыңыз Меню ачкычы once more to confirm the setting and save it.
- Exit the setting mode by pressing the Меню ачкычы until the display returns to the main interface.
The controller also features light control and time control functions, allowing discharge to be controlled by sunlight and set time periods. Refer to the display icons for current status.
6. Техникалык тейлөө
Regular maintenance ensures optimal performance and longevity of your solar charge controller.
- Байланыштарды текшерүү: Periodically check all wire connections to ensure they are tight and free from corrosion. Loose connections can cause voltagтамчы жана ашыкча ысып кетүү.
- Контроллерди тазалоо: Keep the controller clean and free from dust and debris. Use a dry cloth to wipe the surface. Do not use liquids or solvents.
- Вентиляция: Контроллердин ысып кетишине жол бербөө үчүн, орнотуу аянтынын жакшы желдетилгенин текшериңиз.
- Батареяны текшерүү: Regularly check the battery terminals for corrosion and ensure the battery itself is in good condition.
- Экологиялык шарттар: Avoid exposing the controller to extreme temperatures or excessive moisture.
7. Кыйынчылыктарды
Бул бөлүмдө сиз күн зарядын контролдоочу менен кабылышы мүмкүн болгон жалпы маселелерди карайт.
| Көйгөй | Мүмкүн себеп | Чечим |
|---|---|---|
| Контроллердин дисплейи өчүк. | No power from battery or solar panel; reversed battery connection. | Check battery and solar panel connections. Ensure correct polarity. Verify battery voltage is above minimum operating level. |
| Батарея заряддалбай жатат. | Solar panel not connected; insufficient sunlight; faulty solar panel; battery voltage too high (already full). | Check solar panel connections. Ensure panels are receiving adequate sunlight. Test solar panel output. Verify battery status. |
| Жүктөө иштебей жатат. | Load not connected; battery voltage too low; load overcurrent; load output disabled by settings. | Check load connections. Charge battery. Reduce load or check for short circuit. Adjust load control settings on the controller. |
| USB output not charging devices. | Device incompatible; low battery voltage; faulty USB cable. | Ensure device is compatible with 5V/2A USB charging. Charge battery. Try a different USB cable. |
| Контроллердин ысып кетиши. | Poor ventilation; excessive load or charging current. | Ensure adequate airflow around the controller. Reduce load or check for system imbalances. |
Бул чечимдерди колдонуу аракетинен кийин көйгөй чечилбесе, кардарларды колдоо кызматына кайрылыңыз.
8. Техникалык шарттар
Detailed technical specifications for the diymore 30A 12V/24V PWM Solar Charge Controller.
| Өзгөчөлүк | Спецификация |
|---|---|
| Модел | DMXB0070-01 |
| Номиналдуу заряд ток | 30A |
| Батарея Voltage | 12V/24V Automatic Identification |
| USB чыгышы | 5V/2A Max (Dual USB Ports) |
| Иштөө температурасы | 30°C (as specified) |
| Продукциянын өлчөмдөрү (L x W x Y) | 13.3 x 3.5 x 7 см |
| Продукт Салмагы | 130 грамм |
| Дисплей түрү | LCD |
| Шайкеш батареянын түрлөрү | Lead-acid (OPEN, AGM, GEL) |

Figure 4: Product dimensions in millimeters and inches.
9. Кепилдик жана колдоо
Specific warranty details are not provided in the product information. For warranty claims or technical support, please contact the seller directly through your purchase platform. Ensure you have your purchase details and model number (DMXB0070-01) available when contacting support.


