Продукт бүттүview
The Nilight 2 Gang Rocker Switch Panel is a multi-functional control unit designed for various 12V-24V DC vehicles and marine applications. It integrates two rocker switches, a 4.8A dual USB charger, and a voltmeter, providing convenient power control and monitoring.
Негизги өзгөчөлүктөрү
- Көп функциялуу дизайн: Integrated with 2 rocker switches, a 4.8A dual USB charger, and a voltmeter.
- Натыйжалуу заряддоо: Dual USB charger provides 2.4A per port, totaling 4.8A, for fast charging of USB-powered devices.
- LED Voltage Дисплей: Built-in voltmeter displays current voltage readings for vehicle battery monitoring.
- Туруктуу курулуш: Panel made of strengthened aluminum with well-conductive pins for long-lasting durability.
- Кеңири шайкештик: Suitable for most 12V-24V DC cars, UTVs/ATVs, trucks, trailers, RVs, caravans, buses, marine boats, and yachts.
Пакеттин мазмуну
Пакетте бардык буюмдар бар экенин текшериңиз:
- 1x 2 Gang Switch Panel
- 4x Fixing Screws
- 2 sets of DIY Stickers (132PCS Night Glow Rocker Switch DIY Sticker and 50PCS universal Stickers)

Image: Contents of the Nilight 2 Gang Rocker Switch Panel package, showing the panel, mounting screws, and two sheets of DIY stickers for switch customization.
Продукт спецификациялары
| Спецификация | Нарк |
|---|---|
| Модель номери | 90305G-C |
| Киргизүү көлөмүtage | 12V-24V DC |
| USB чыгышы | 5V 4.8A (ар бир порт үчүн 2.4А) |
| Которуу түрү | Rocker, 5-way (ON-OFF) |
| Учурдагы рейтингди которуштуруу | 20 Amps |
| Материал | Plastic, Metal (Strengthened Aluminum Panel) |
| Продукциянын өлчөмдөрү (L x W x Y) | 10.16 x 10.16 x 7.62 см (4 x 4 x 3 дюйм) |
| Элемент Салмагы | 181 г |
| Монтаж түрү | Панел орнотуу |
| Түс | Жашыл арткы жарык |
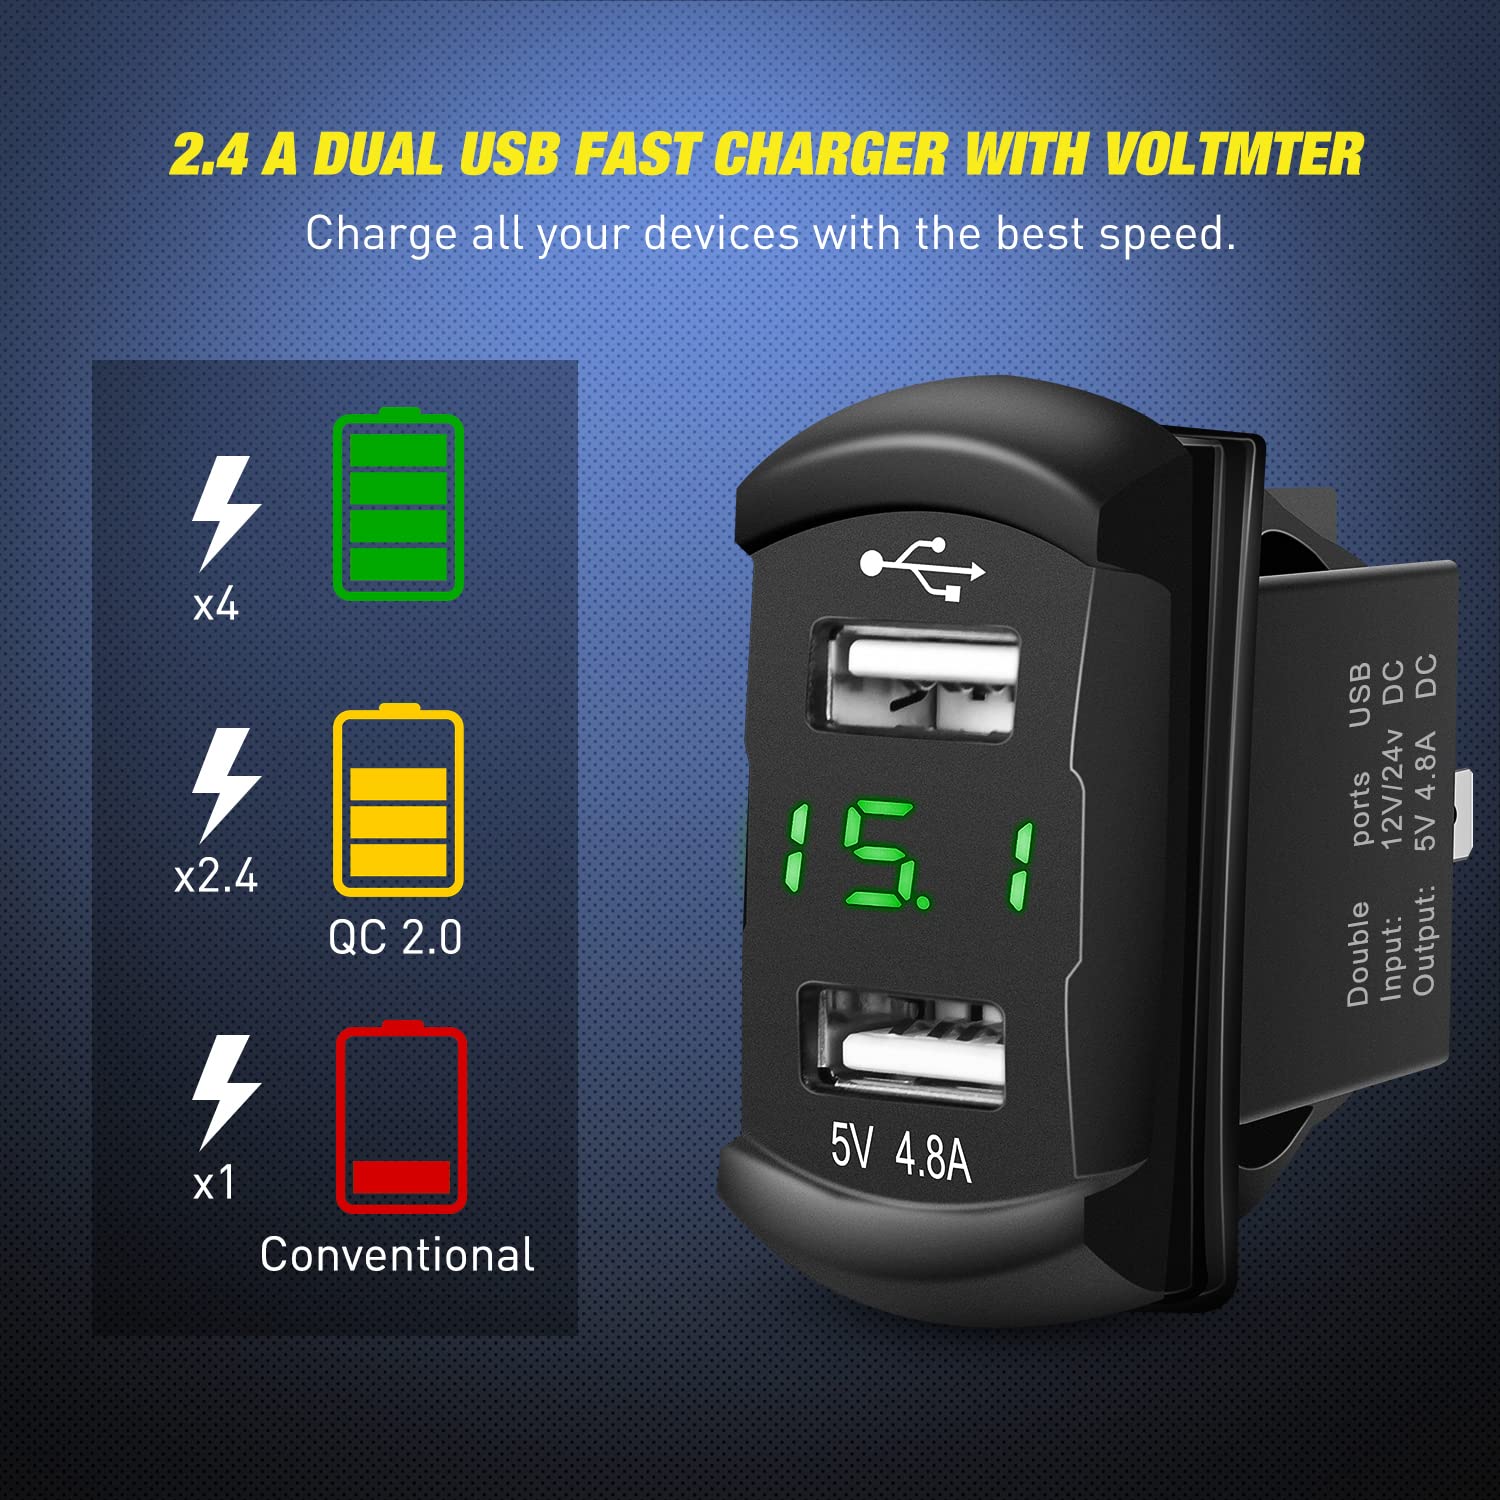
Image: Detailed dimensions of the Nilight 2 Gang Rocker Switch Panel, showing measurements for the panel face and the rear wiring assembly.
Орнотуу нускамалары
This switch panel features a pre-wired harness for simplified installation in both 12V and 24V vehicles. Ensure the vehicle's power is disconnected before beginning installation.
- Панелди орнотуу: Choose a suitable flat surface on your vehicle's dashboard or console. Cut an opening that matches the dimensions of the switch panel. Secure the panel using the provided fixing screws.
- Зымдарды туташтыруу: The panel comes with a pre-wired harness. Connect the positive (+) wires (typically red) to your power source and the negative (-) wires (typically black) to a ground point. Connect the output wires from the switches to your desired accessories.
- Аксессуар туташуу: For each rocker switch, connect the accessory's positive wire to the corresponding output terminal on the switch. Ensure all connections are secure.
- Кубат туташуу: Connect the main positive and negative wires of the panel to your vehicle's 12V or 24V DC power supply. It is recommended to use an inline fuse for protection (not included).
- Terminal Disconnection (if needed): If you need to disconnect a terminal from a switch, press down on the clips to easily separate the terminal.

Image: An illustration demonstrating the easy installation process of the switch panel, highlighting the pre-wired harness and universal compatibility for 12V and 24V vehicles.

Сүрөт: деталдуу view of the improved terminals, showing how to press down on the clips for easy and secure disconnection from the switch.
Орнотуу боюнча видео көрсөтмө
Video: This video demonstrates the wiring and functionality of a similar multi-gang switch panel, including connecting accessories and using the USB charger and voltmeter. While it shows a 4-gang panel, the wiring principles apply to the 2-gang model.
Иштөө нускамалары
- Рокер которгучтары: Each switch controls a connected accessory. Press the switch to the ON position to activate the accessory, and to the OFF position to deactivate it. The green backlight indicates the switch status.
- Кош USB заряддагыч: Plug your USB-powered devices into the USB ports for charging. The dual ports provide up to 2.4A each for efficient charging.
- Вольтметр: The integrated voltmeter displays the current voltage of your vehicle's battery, allowing you to monitor its condition.

Сүрөт: жакын план view of the dual USB fast charger and the integrated voltmeter, showing the digital voltage display and charging capabilities.
Техникалык тейлөө
- Бардык зымдарды туташтыргычтын бекемдигин жана коррозиясын дайыма текшерип туруңуз.
- Keep the panel clean and free from dust and debris. Use a soft, dry cloth for cleaning.
- Ensure the USB port covers are closed when not in use to protect against moisture and dust.
Проблемаларды чечүү
- Панелге кубат жок: Check the main power connection and ensure any inline fuses are intact. Verify the vehicle's battery voltage.
- Switch Not Activating Accessory: Ensure the accessory is properly wired to the switch output. Check the accessory's own power connection and functionality.
- USB Charger Not Working: Verify the panel has power. Try a different USB cable or device to rule out external issues.
- Inaccurate Voltmeter Reading: Ensure proper power connections. If readings are consistently off, contact customer support.
Кепилдик жана колдоо
For warranty information or technical support, please refer to the official Nilight webсайтка же түздөн-түз кардарларды тейлөөгө кайрылыңыз. Кепилдик дооматтар үчүн сатып алуу дүмүрчөгүңүздү сактаңыз.
Официалдуу Webсайт: Nilight Store on Amazon


