Introduction
This manual provides detailed instructions for the setup, operation, and maintenance of your Gioteck SC3 Wireless Pro Controller. Designed for use with Nintendo Switch, PC, and mobile devices, this controller features programmable back buttons, customizable RGB lighting, and changeable magnetic thumb sticks for an enhanced gaming experience.
1. Орнотуу
1.1 Пакеттин мазмуну
- Gioteck SC3 Wireless Pro Controller
- USB заряддоо кабели
- Additional Magnetic Thumb Sticks (if included)
- Колдонуучунун Колдонмосу (бул документ)
1.2 Контроллерди заряддоо
Before initial use, fully charge the controller. Connect the supplied USB charging cable to the controller's charging port and the other end to a USB power source (e.g., Nintendo Switch dock, PC USB port, or USB wall adapter).
- LED индикатору кубаттоо абалын көрсөтөт.
- Толук кубаттоо адатта болжол менен 2-3 саатты талап кылат.
Сүрөт: Төмөнкү view of the Gioteck SC3 controller, highlighting the USB-C charging port located between the two textured grips.
1.3 Nintendo Switch менен жупташтыруу
- Nintendo Switch HOME менюсунан тандаңыз Контроллер, анда Катуу/Тартипти өзгөртүү.
- On the SC3 controller, press and hold the Жупташтыруу баскычы (usually a small button on the top or back) for a few seconds until the LED indicators begin to flash rapidly.
- Once the controller is recognized by the Switch, the player LED(s) on the controller will illuminate solid, indicating successful pairing.
- басыңыз А баскычы ырастоо үчүн.
Note: For subsequent uses, the controller should automatically reconnect to the last paired Switch console when powered on.
1.4 Connecting to PC/Mobile (Bluetooth)
- Ensure Bluetooth is enabled on your PC or mobile device.
- On the SC3 controller, press and hold the Жупташтыруу баскычы for a few seconds until the LED indicators flash rapidly.
- On your PC/mobile device, navigate to Bluetooth settings and search for new devices.
- Select "Gioteck SC3" or similar from the list of available devices to pair.
- The controller's LED will become solid upon successful connection.
1.5 Installing Magnetic Thumb Sticks
The SC3 controller features changeable magnetic thumb sticks. To replace them:
- Gently pull the existing thumb stick straight up to remove it.
- Align the desired magnetic thumb stick with the base and gently push it down until it snaps into place.

Сүрөт: алдыңкы view of the Gioteck SC3 controller, showcasing the magnetic thumb sticks and button layout.
2. Иштөө нускамалары
2.1 Баскычтын жайгашуусу
The SC3 controller features a traditional button layout. Refer to the image below for button identification.

Сүрөт: бурчтуу алдыңкы view of the Gioteck SC3 controller, displaying the full button layout including face buttons, D-pad, analog sticks, and shoulder buttons.
- Сол/оң аналогдук таякчалар: Кыймылды жана камераны башкаруу үчүн.
- D-Pad: Багыттуу киргизүү.
- A/B/X/Y баскычтары: Аракет баскычтары.
- Сол/Оң/Жалгыз/Жалгыз баскычтар: Ийин жана триггер баскычтары.
- +/- баскычтары: Start/Select equivalents.
- Үй баскычы: Returns to the console's home menu.
- Тартуу баскычы: Скриншотторду тартат.
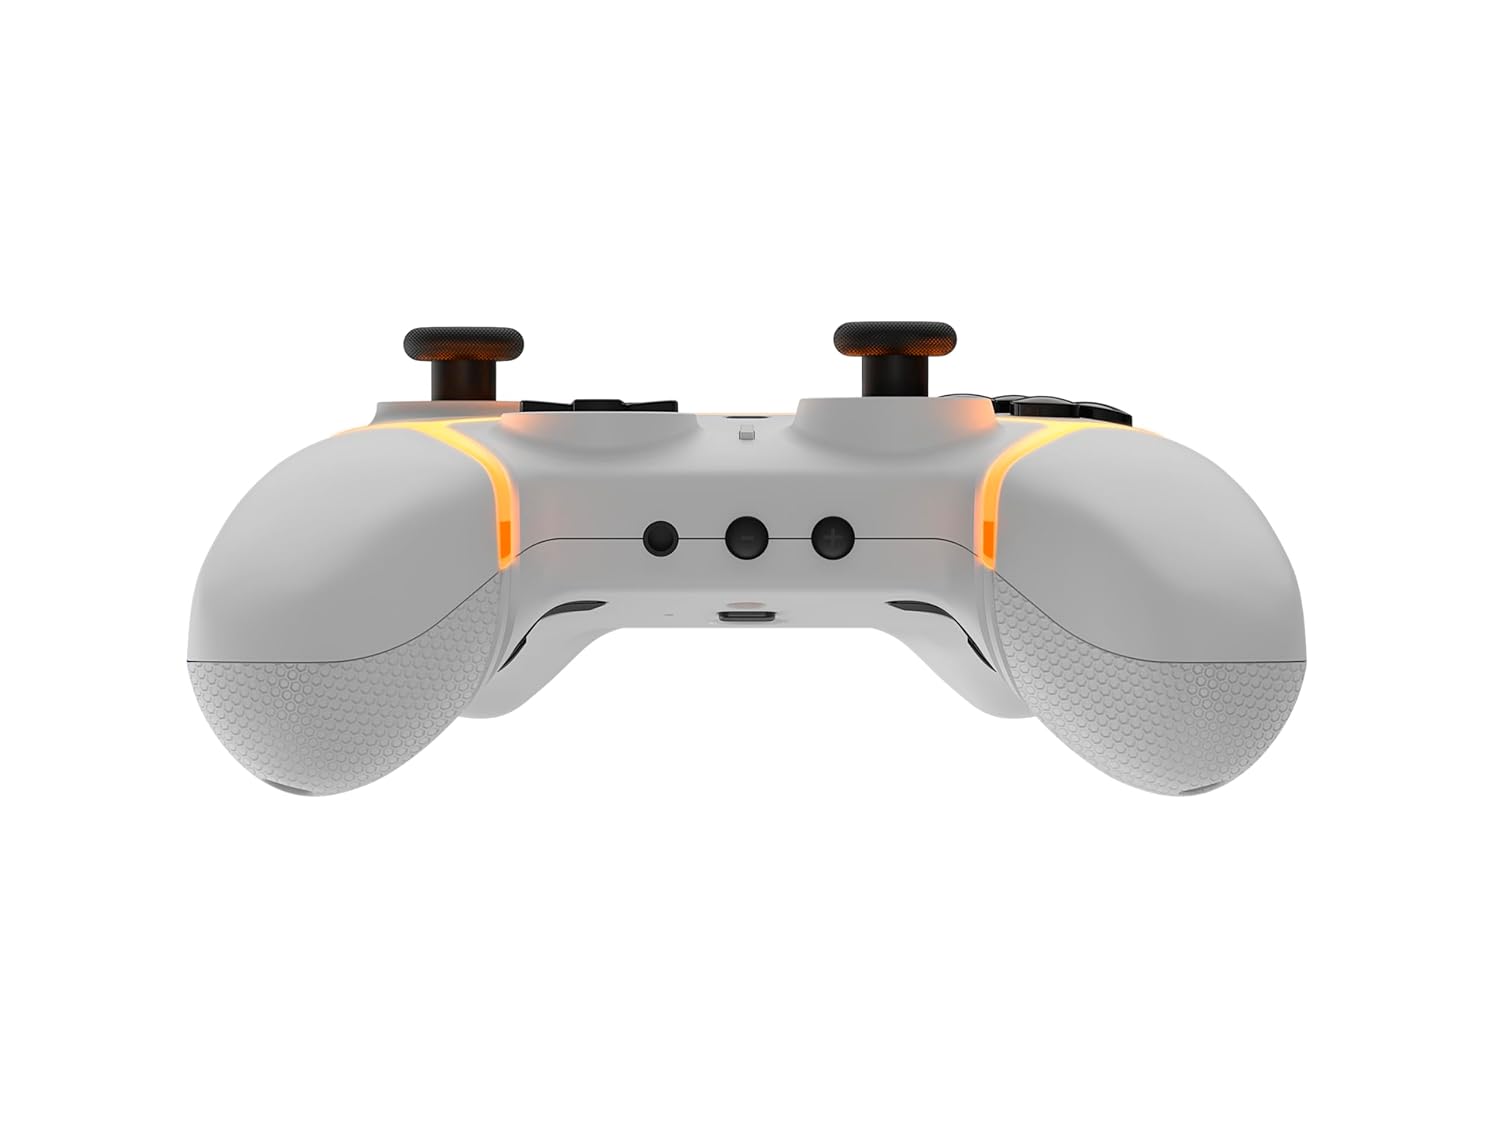
2.2 Программалануучу артка баскычтары
The SC3 controller includes programmable back buttons (M1, M2, M3, M4) for custom assignments.

Сүрөт: Арткы view of the Gioteck SC3 controller, clearly showing the four programmable back buttons (M1, M2, M3, M4) and textured grips.
Программалоо кадамдары:
- басып, кармап туруңуз Программа баскычы (refer to diagram if available, usually a small button on the back) until the LED indicator flashes.
- басыңыз Артка баскычы (M1, M2, M3, or M4) you wish to program. The LED will flash slowly.
- басыңыз Киргизүү баскычы (e.g., A, B, X, Y, L, R, ZL, ZR, D-pad direction) you want to assign to the back button.
- басыңыз Программа баскычы again to save the assignment. The LED will stop flashing.
- Repeat for other back buttons as desired.
To clear a programmed button, follow steps 1-2, then press the Program Button again without pressing an input button.
2.3 RGB Lighting Настройка
The controller features customizable RGB lighting. Specific instructions for changing colors or effects are typically found in the product's quick start guide or by pressing a dedicated button combination (e.g., Function + R3).
Consult the quick start guide included with your controller for precise button combinations to adjust RGB lighting.
2.4 Кыймылды башкаруу
The SC3 controller supports motion controls, allowing for immersive gameplay in compatible Nintendo Switch titles. No special setup is usually required; motion controls activate automatically when supported by the game.
2.5 Audio Headset Jack
A 3.5mm audio headset jack is located on the controller for connecting compatible headsets. It includes dedicated mute and volume control buttons.
- Үнүн жогорулатуу/төмөндөтүү: Аудио чыгарууну тууралоо.
- Үнсүз баскычы: Mute/unmute microphone input.

Сүрөт: Жогорку view of the Gioteck SC3 controller, highlighting the 3.5mm audio jack, volume controls, and mute button.
3. Техникалык тейлөө
3.1 Тазалоо
Контроллериңизди тазалоо үчүн жумшак, кургак чүпүрөктү колдонуңуз. Өжөр кир үчүн бир азampкездемени суу менен жууп салыңыз. Катуу химиялык заттарды, абразивдүү тазалоочу каражаттарды же эриткичтерди колдонуудан алыс болуңуз, анткени алар контроллердин сырткы көрүнүшүнө жана ички компоненттерине зыян келтириши мүмкүн.
- Do not immerse the controller in water or any other liquid.
- Ensure all ports are dry before charging or connecting devices.
3.2 Сактоо
Башкаргычты салкын, кургак жерде, күндүн түз нурунан жана өтө жогорку температурадан алыс сактаңыз. Бузулуп калбашы үчүн, башкаруучуга оор нерселерди койбоңуз.
3.3 Батареяга кам көрүү
The controller contains a rechargeable battery. To prolong battery life:
- Батареяны бат-баттан толук кубаттап калуудан алыс болуңуз.
- Charge the controller regularly, even if not in use for extended periods (e.g., once every 3-6 months).
- Do not expose the controller to temperatures above 60°C (140°F).
4. Кыйынчылыктарды
4.1 Контроллер туташуу эмес/жупташуу
- Батареяны текшерүү: Контроллер жетиштүү заряддалганын текшериңиз.
- Кайра жупташтыруу: Follow the pairing instructions in Section 1.3 or 1.4.
- Интерференция: Move closer to the console/device and away from potential sources of wireless interference (e.g., Wi-Fi routers, other Bluetooth devices).
- Контроллерди баштапкы абалга келтирүү: Locate a small reset button (often a pinhole) on the back of the controller. Use a paperclip to press and hold it for a few seconds. Then attempt to re-pair.
- Update Console/Device Software: Ensure your Nintendo Switch, PC, or mobile device's operating system is up to date.
4.2 Buttons/Sticks Not Responding
- Кайра синхрондоштуруу: Контроллерди ажыратып, кайра туташтырыңыз.
- Таза: Топчулардын же таякчалардын айланасында эч кандай таштандылар топтолуп калбаганын текшериңиз.
- Test in another game/menu: Determine if the issue is specific to a game or system-wide.
- Контроллерди баштапкы абалга келтирүү: Perform a hard reset as described above.
4.3 Кыймылды башкаруу каражаттары иштебейт
- Оюндун шайкештиги: Ойноп жаткан оюнуңуз кыймылды башкарууну колдой турганын текшериңиз.
- Кайра калибрлөө: On Nintendo Switch, you can recalibrate motion controls in the system settings.
- Контроллерди баштапкы абалга келтирүү: Катуу баштапкы абалга келтирүүнү аткарыңыз.
5. Техникалык шарттар
| Модел: | Gioteck SC3 Wireless Pro Controller |
| Шайкештик: | Nintendo Switch (Original, Lite, OLED), PC, Mobile Devices |
| Байланыш: | Bluetooth зымсыз |
| Өлчөмдөрү (болжол менен): | 2.87 x 5.35 x 6.34 дюйм (7.29 x 13.59 x 16.1 см) |
| Салмагы (болжол менен): | 10.6 унция (300 грамм) |
| Аудио Jack: | 3.5mm with mute and volume controls |
| Өзгөчөлүктөр: | Programmable back buttons, Magnetic thumb sticks, RGB lighting, Motion controls |
6. Кепилдик маалыматы
The Gioteck SC3 Wireless Pro Controller comes with a manufacturer's warranty. For specific details regarding warranty coverage, duration, and claims process, please refer to the warranty card included with your product or visit the official Gioteck webсайт.
Сураныч, кепилдик максаттары үчүн сатып алганыңыздын далилин сактап коюңуз.
7. Кардарларды колдоо кызматы
If you encounter any issues or have questions not covered in this manual, please contact Gioteck customer support. Contact information can typically be found on the product packaging or the official Gioteck webсайт.
Gioteck Official Webсайт: www.gioteck.com


