1. Киришүү
This manual provides essential information for the proper installation, operation, and maintenance of the NOVUS N1030-RR Temperature Controller. Please read this manual carefully before using the device to ensure safe and efficient operation. The N1030-RR is designed for precise temperature control in various industrial and commercial applications.
2. Коопсуздук маалыматы
Жеке жаракаттарды жана жабдууларга зыян келтирбөө үчүн ар дайым төмөнкү коопсуздук чараларын сактаңыз:
- Disconnect power before performing any installation, maintenance, or wiring procedures.
- Бардык электр туташуулары жергиликтүү жана улуттук электр эрежелерине ылайык келээрин текшериңиз.
- The device must be installed by qualified personnel only.
- Do not operate the device in environments with explosive gases or vapors.
- Түзмөктү нымдуулуктан, чаңдан жана өтө жогорку температурадан коргоңуз.
- Use only specified power supply and sensor types.
3. Продукт бүтүп калдыview
The NOVUS N1030-RR is a compact and reliable temperature controller featuring a clear digital display and intuitive control buttons.
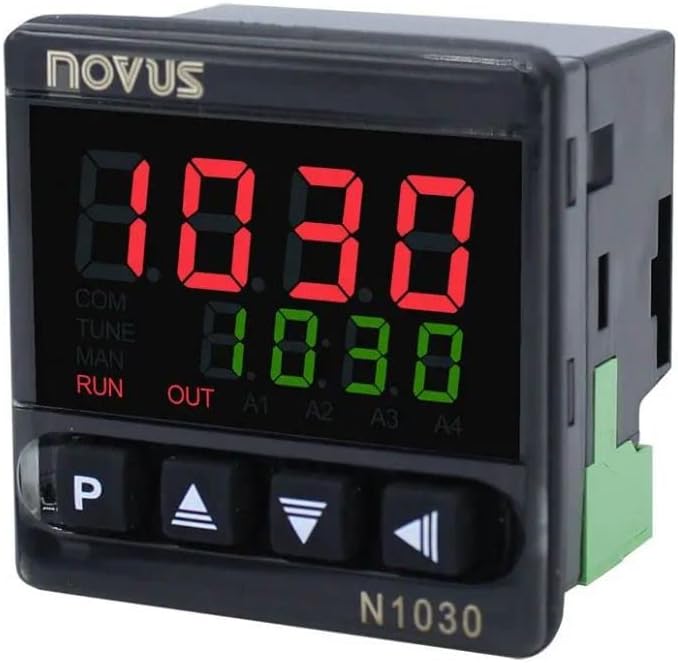
Figure 1: NOVUS N1030-RR Front Panel
The image displays the front panel of the NOVUS N1030-RR Temperature Controller. It features a black casing with a prominent digital display showing red and green numerical values. Below the display are four control buttons: 'P', an 'Up' arrow, a 'Down' arrow, and a 'Left/Enter' arrow. The 'NOVUS' logo is visible at the top left, and 'N1030' is printed at the bottom right.
3.1. Алдыңкы панелдин компоненттери
- Санариптик дисплей: Two LED displays, typically red for process value (PV) and green for setpoint value (SV).
- 'P' Button: Used to access and navigate parameter menus.
- Өйдө жебе баскычы: Маанилерди көбөйтөт же параметрлерди жылдырат.
- Төмөн жебе баскычы: Маанилерди азайтат же параметрлерди жылдырат.
- Left/Enter Arrow Button: Moves cursor, confirms selections, or enters values.
- Статус көрсөткүчтөрү: LEDs for COM, TUNE, MAN, RUN, OUT, A1, A2, A3, A4 (specific indicators may vary based on configuration).
4. Орнотуу
4.1. Орнотуу
- Mount the controller in a panel cutout of appropriate dimensions. Ensure sufficient space for wiring and ventilation.
- Secure the controller using the provided mounting clips.
- Ensure the operating environment is within the specified temperature and humidity ranges.
4.2. Электр зымдары
Refer to the wiring diagram provided with the product packaging for specific connection details. General wiring guidelines include:
- Электр камсыздоо: Connect the controller to the specified voltage камсыздоо.
- Сенсор киргизүү: Connect the temperature sensor (e.g., thermocouple, RTD) to the designated input terminals. Ensure correct polarity for thermocouples.
- Control Output: Connect the control output (e.g., relay, SSR) to the heating or cooling element.
- Сигнал чыгаруулары: If applicable, connect alarm outputs to external alarm devices.
- Кыска туташуунун алдын алуу үчүн бардык туташуулардын коопсуз жана изоляцияланганын текшериңиз.
4.3. Баштапкы кубаттуулук
After completing all wiring, apply power to the controller. The device will perform a self-test, and the display will show the current process value (PV) and setpoint value (SV).
5. Иштөө нускамалары
5.1. Setting the Setpoint (SV)
- Press the 'P' button briefly to enter the setpoint adjustment mode. The SV display will flash.
- Use the Up and Down arrow buttons to adjust the setpoint to the desired temperature.
- Press the 'P' button again or the Left/Enter arrow button to confirm the new setpoint and exit the adjustment mode.
5.2. Accessing Parameters
To access advanced configuration parameters:
- Press and hold the 'P' button for several seconds until the first parameter menu appears.
- Use the Up and Down arrow buttons to navigate through the different parameter groups.
- Use the Left/Enter arrow button to enter a parameter group or confirm a value.
- Use the Up and Down arrow buttons to change parameter values.
- Press the 'P' button to save changes and move to the next parameter, or hold 'P' to exit the menu.
5.3. Auto-Tuning Function
The auto-tuning function helps optimize the PID control parameters for stable and accurate temperature control.
- Ensure the process is stable and near the desired setpoint.
- Access the auto-tuning parameter in the menu (refer to the full manual for specific parameter codes).
- Activate auto-tuning. The 'TUNE' indicator may flash.
- Allow the controller to complete the tuning cycle, which may involve several heating and cooling cycles.
- Once complete, the 'TUNE' indicator will turn off, and the new PID parameters will be saved.
6. Техникалык тейлөө
6.1. Тазалоо
- Тазалоодон мурун электрди өчүрүңүз.
- Алдыңкы панелди жумшак менен сүртүңүз, гamp кездеме. Абразивдүү тазалагычтарды же эриткичтерди колдонбоңуз.
- Аппараттын ичине суюктук кирбегенин текшериңиз.
6.2. Текшерүү
- Зымдардын туташууларынын бекемдигин жана дат басуу белгилерин мезгил-мезгили менен текшерип туруңуз.
- Check the sensor for damage or degradation.
- Контроллердин айланасында туура желдетүүнү камсыз кылыңыз.
7. Кыйынчылыктарды
Бул бөлүмдө кеңири таралган көйгөйлөр каралат. Татаалыраак көйгөйлөр үчүн техникалык колдоо кызматына кайрылыңыз.
| Көйгөй | Мүмкүн себеп | Чечим |
|---|---|---|
| Дисплей жок/Өчүрүү | No power supply; Incorrect wiring; Blown fuse | Check power connections; Verify wiring; Replace fuse if necessary. |
| Температураны туура эмес көрсөткүч | Sensor faulty; Incorrect sensor type configured; Sensor not properly installed | Check sensor for damage; Verify sensor type in parameters; Ensure sensor is correctly placed. |
| Output not activating | Setpoint not reached; Output wiring incorrect; Control mode incorrect | Check PV vs SV; Verify output wiring; Confirm control mode (e.g., PID, ON/OFF). |
| Temperature overshoots/undershoots | PID parameters not optimized | Perform auto-tuning or manually adjust PID parameters. |
8. Техникалык шарттар
- Модел: N1030-RR
- Өндүрүүчү: NOVUS
- Дисплей түрү: LED (Red for PV, Green for SV)
- Түсү: Кара
- Киргизүү: Universal (e.g., Thermocouple, RTD - specific types depend on configuration)
- Control Output: Relay or SSR (specific type depends on configuration)
- Электр камсыздоо: (Refer to product label for specific voltagе жана жыштыгы)
- Өлчөмдөрү: (Так өлчөмдөрү үчүн продукттун техникалык маалымат баракчасын караңыз)
- Иштөө температурасы: (Продукциянын техникалык маалымат баракчасын караңыз)
- Сактоо температурасы: (Продукциянын техникалык маалымат баракчасын караңыз)
9. Кепилдик жана колдоо
The NOVUS N1030-RR Temperature Controller is covered by a manufacturer's warranty against defects in materials and workmanship. The duration and terms of the warranty are specified in the warranty card included with the product or available on the official NOVUS webсайт.
For technical assistance, troubleshooting beyond this manual, or warranty claims, please contact your authorized NOVUS distributor or visit the official NOVUS support website. When contacting support, please have your product model number (N1030-RR) and any relevant purchase information ready.


