Introduction
This manual provides comprehensive instructions for the setup, operation, and maintenance of your Prechen 27 Inch FHD 1080P Computer Monitor. Designed for both business and gaming, this monitor features a 3-sided frameless IPS panel, Full HD 1920x1080P resolution, 75Hz refresh rate, and eye care technology. Please read this manual thoroughly before using the product to ensure proper functionality and longevity.

Сүрөт: алдыңкы view of the Prechen 27 Inch FHD 1080P Computer Monitor, showcasinанын алкаксыз дизайны жана жандуу дисплейи.
Жайгашуу
1. Пакеттен чыгаруу жана чогултуу
Carefully remove all components from the packaging. Ensure all parts are present: monitor panel, stand base, stand neck, power adapter, HDMI cable, and user manual. Assemble the stand by attaching the neck to the base, then secure the assembled stand to the back of the monitor panel.
2. Туташтыруучу кабельдер
The monitor supports both HDMI and VGA inputs. Connect the appropriate video cable from your computer or device to the corresponding port on the monitor. Then, connect the power adapter to the monitor's DC input and plug it into a power outlet.
Сүрөт: Арткы view of the monitor showing the HDMI, VGA, and DC power input ports, highlighting the rich connectivity options.
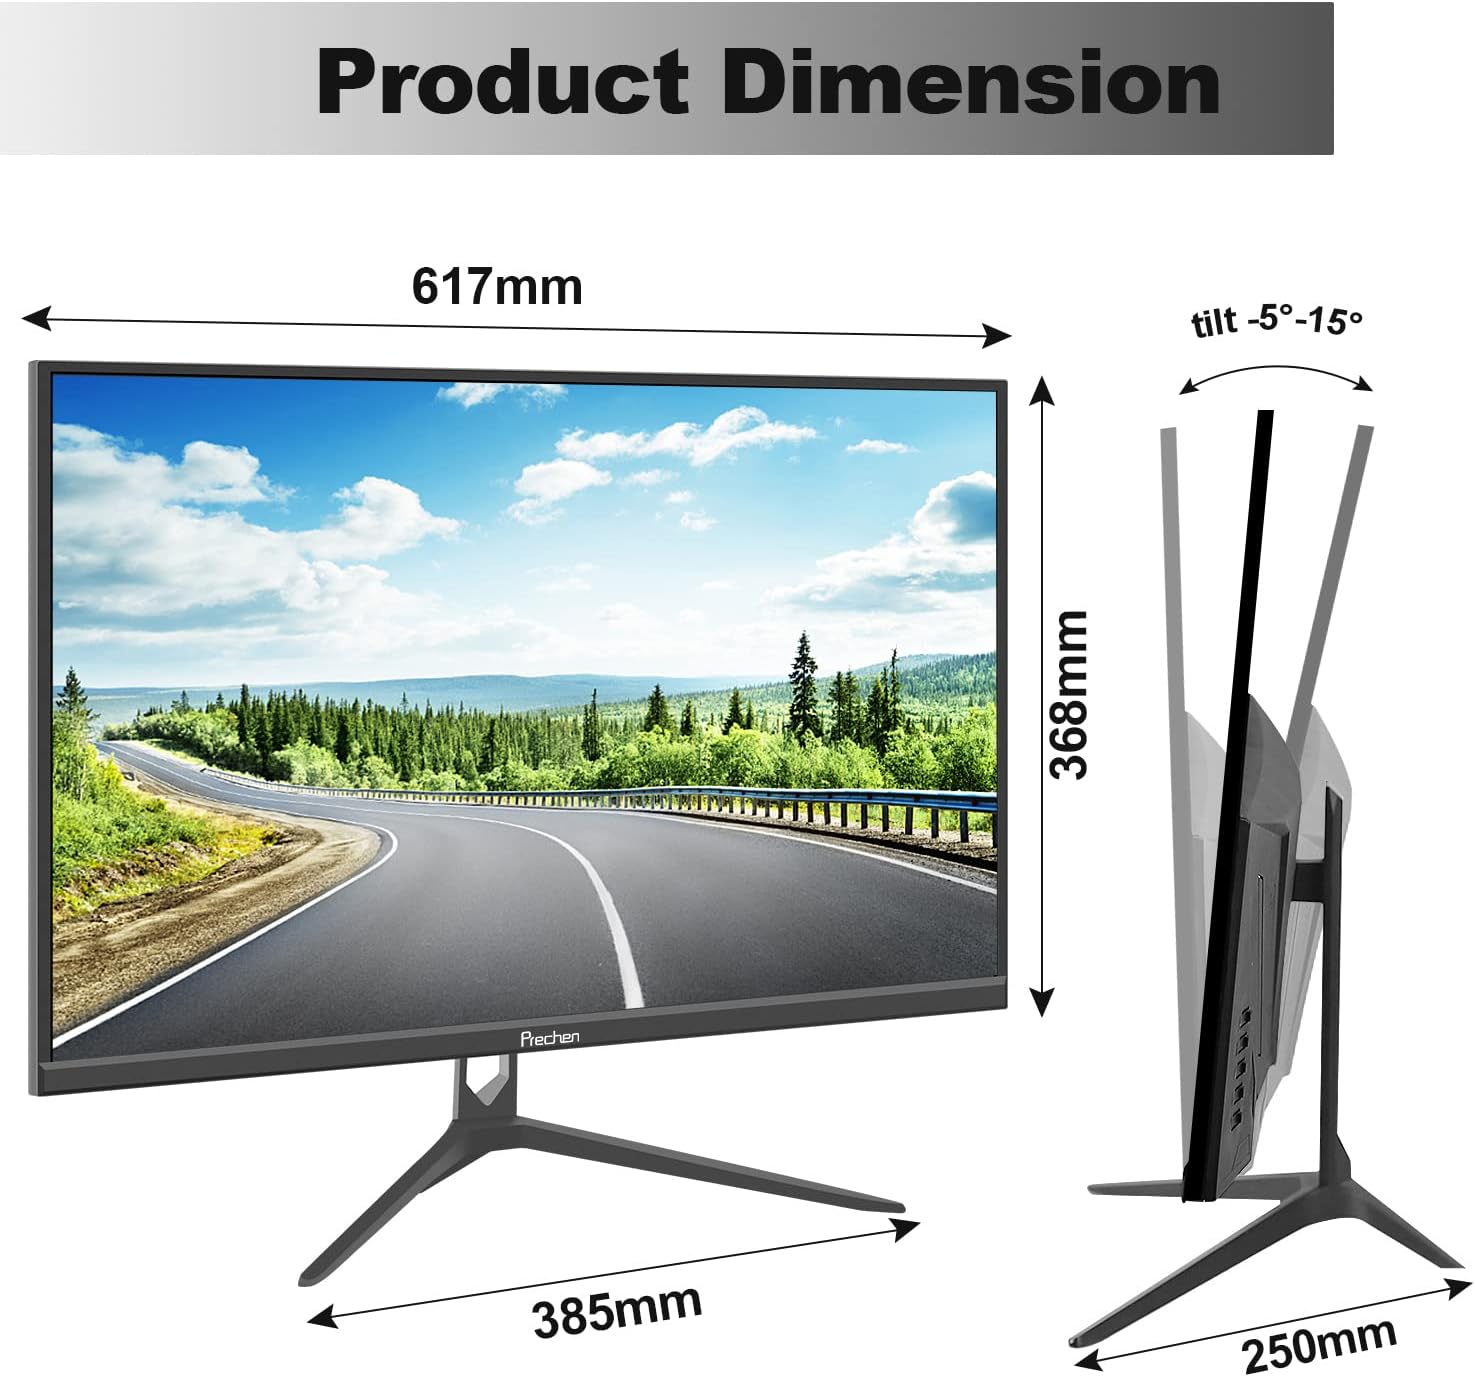
Image: Diagram illustrating multiple connection possibilities for the monitor, including PC, notebook, Xbox, and TV box, demonstrating its versatility.
3. VESA Mounting (Optional)
This monitor is VESA compatible (100mm x 100mm). If you wish to wall-mount or use a different monitor arm, remove the stand and attach the monitor to your VESA-compatible mount using appropriate screws (not included).

Image: Infographic summarizing key features of the monitor, such as FHD 1080p resolution, IPS panel, Eye Care technology, 178° viewing angle, 99% sRGB, 75Hz refresh rate, VESA 100x100mm compatibility, and 5ms response time.
Иштөө нускамалары
1. Күйгүзүү / Өчүрүү
Press the power button, usually located on the back or bottom right of the monitor, to turn the monitor on or off. The power indicator light will illuminate when the monitor is active.
2. Киргизүүнү тандоо
If you have multiple devices connected, use the input/source button on the monitor to cycle through available inputs (HDMI, VGA) until your desired source is displayed.
3. Экрандагы дисплей (OSD) менюсу
Access the OSD menu by pressing the Menu button. Use the navigation buttons (up/down/left/right or joystick) to browse through options such as Brightness, Contrast, Color Settings, Input Source, and other display adjustments. Press the Menu button again or an 'Exit' option to close the OSD.

Image: The monitor displaying a vibrant business dashboard with various charts and graphs, illustrating its brilliant visual performance for professional use.
4. Көзгө кам көрүүнүн өзгөчөлүктөрү
The monitor incorporates low blue light and flicker-free technology to reduce eye strain during prolonged use. These features are designed to protect your eyes and enhance viewсооронуч.

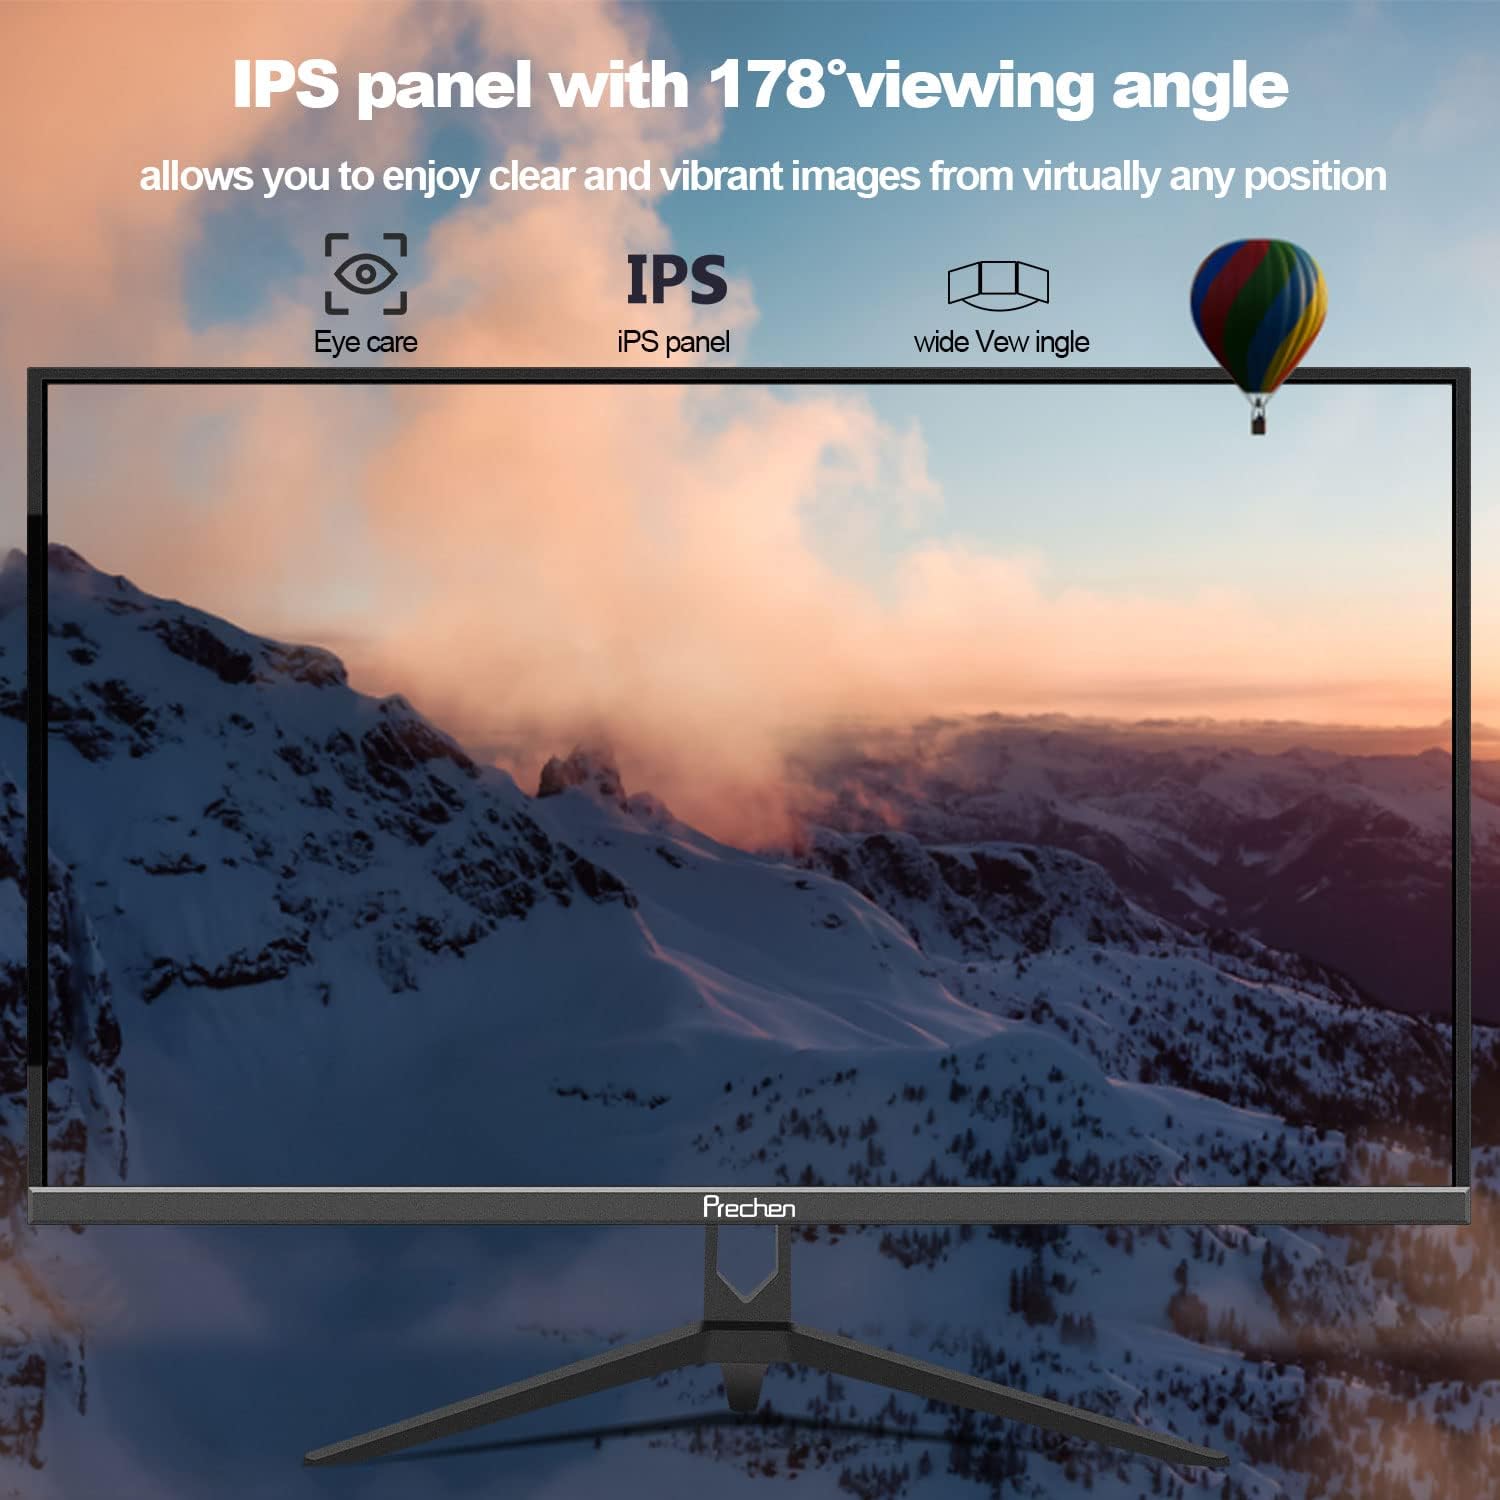
Image: The monitor displaying a wide mountain landscape, emphasizing its IPS panel with a 178° viewing angle and integrated eye care features for comfortable viewар кандай кызматтардан.
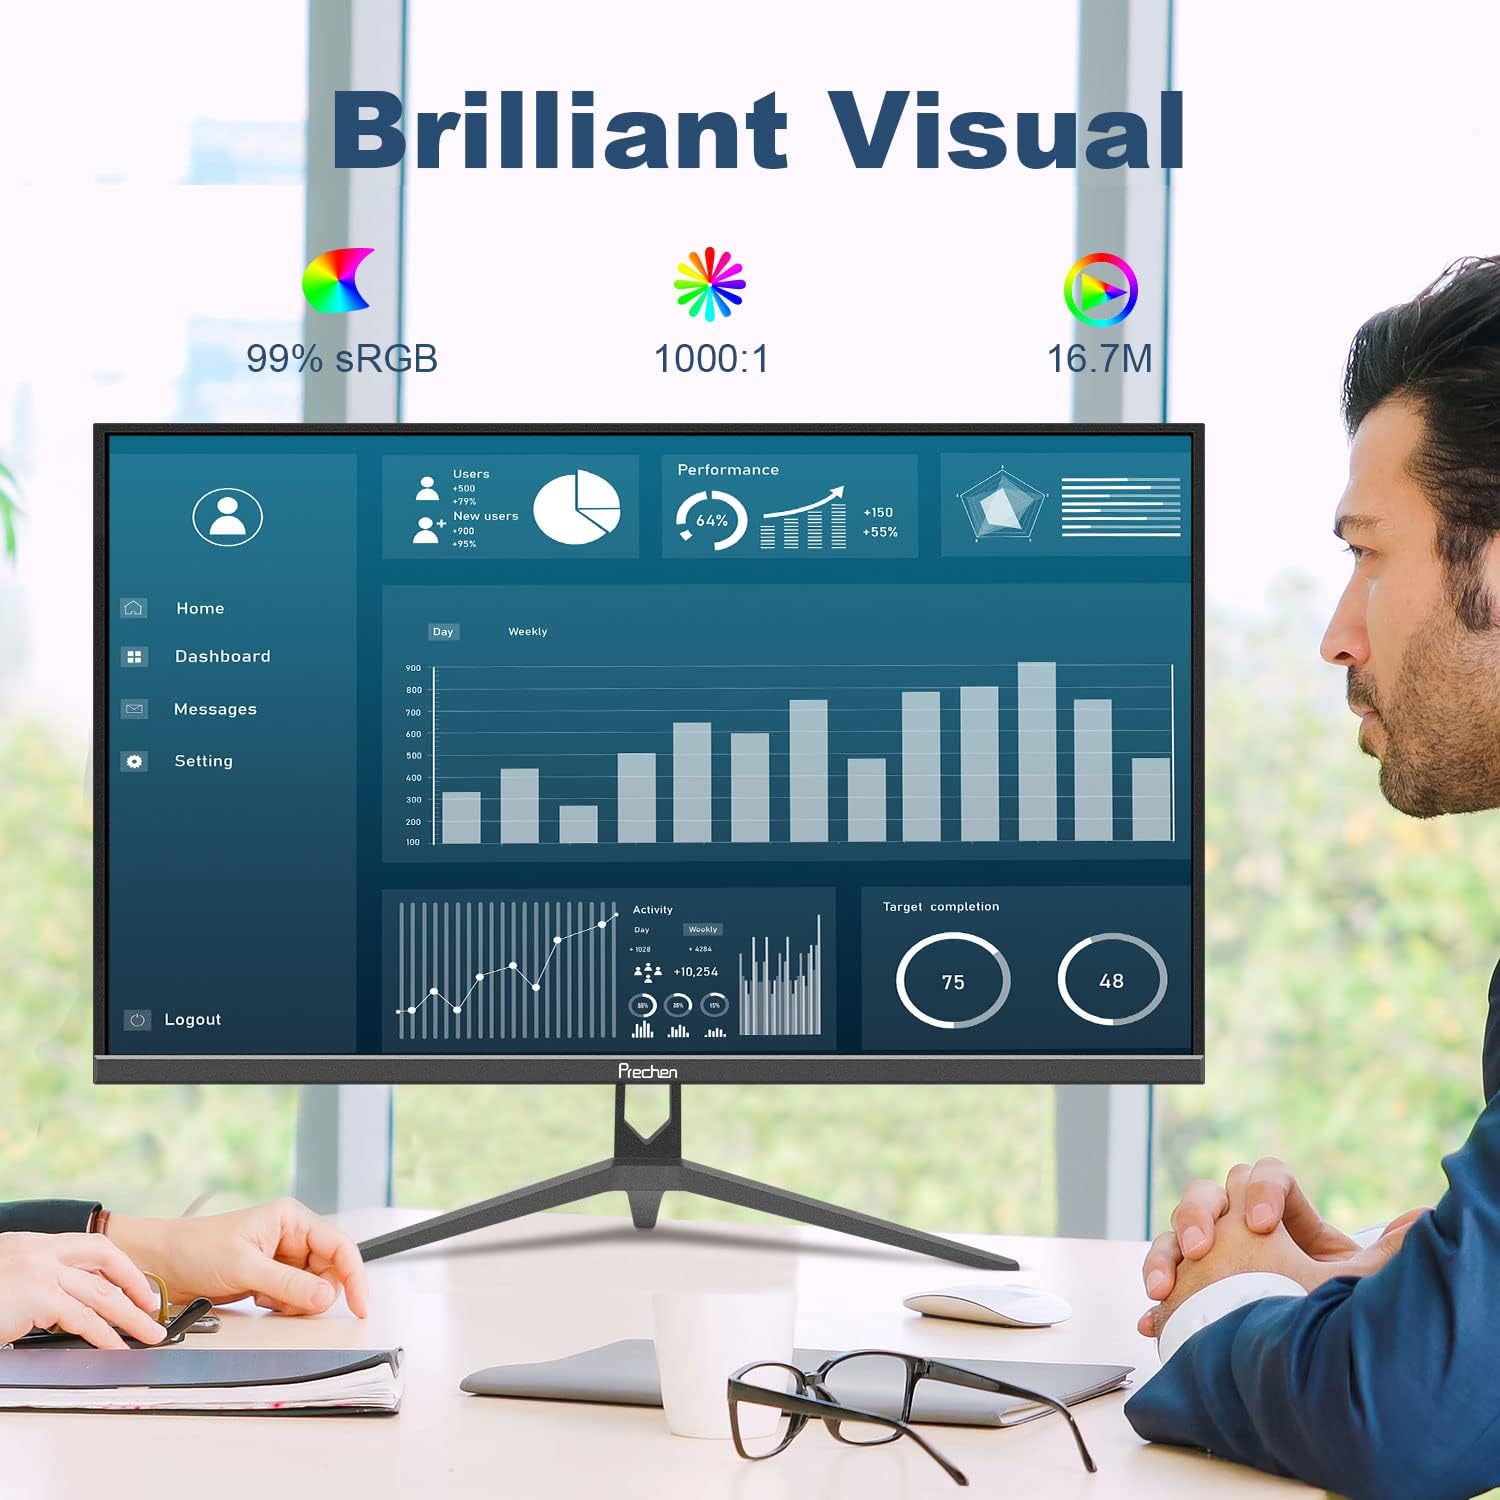
Image: A side-by-side comparison demonstrating the difference between 60Hz and 75Hz refresh rates in a racing game, illustrating the smoother motion provided by the 75Hz refresh rate.
Техникалык тейлөө
1. Экранды тазалоо
Экранды тазалоо үчүн аны жумшак, түксүз чүпүрөк менен акырын сүртүңүз. Кежир белгилер үчүн, гampкездемени суу же абразивдүү эмес экран тазалагыч менен бир аз сүртүңүз. Спирт, аммиак же абразивдүү тазалоочу каражаттарды колдонуудан алыс болуңуз, анткени алар экрандын бетине зыян келтириши мүмкүн.
2. Жалпы кам көрүү
Keep the monitor away from direct sunlight, excessive heat, and moisture. Ensure proper ventilation around the monitor to prevent overheating. Do not place heavy objects on the monitor or its cables.
Проблемаларды чечүү
| Көйгөй | Мүмкүн себеп | Чечим |
|---|---|---|
| Экранда сүрөт жок | Электр кабели ажыратылган; Видео кабели ажыратылган; Туура эмес киргизүү булагы тандалды. | Check power and video cable connections. Ensure the monitor is powered on. Select the correct input source using the monitor's OSD menu. |
| Сүрөт бүлбүлдөгөн же туруксуз | Loose video cable; Incorrect refresh rate setting; Interference from other devices. | Securely connect the video cable. Adjust the refresh rate to 75Hz in your computer's display settings. Move interfering electronic devices away from the monitor. |
| Түстөр туура эмес көрүнөт | Color settings in OSD are misconfigured; Faulty video cable. | Reset color settings to default in the OSD menu. Try a different video cable. |
Эгер бул жерде көрсөтүлбөгөн маселелерге туш болсоңуз же сунушталган чечимдер көйгөйдү чечпесе, кардарларды колдоо кызматына кайрылыңыз.
Техникалык шарттар
| Өзгөчөлүк | Деталь |
|---|---|
| Screen Size | 27 дюйм |
| Дисплей түрү | IPS диоддору |
| Резолюция | 1920x1080 (FHD 1080p) |
| Жаңыртуу ылдамдыгы | 75 Гц |
| Жооп убактысы | 5 Миллисекунд |
| Контраст катышы | 1000:1 |
| Viewбурч | 178 градус (горизонталдуу/вертикалдуу) |
| Түс гаммасы | 99% sRGB, 16.7 Million Colors |
| Байланыш | Сапаттуу, VGA |
| VESA шайкештиги | 100мм x 100мм |
| Тилтти тууралоо | -5 degrees forward, 15 degrees backward |
| Өлчөмдөрү (W x Y x D) | Approx. 617mm x 368mm x 250mm (with stand) |
| Салмагы | Болжол менен 4.54 кг |

Image: Diagram illustrating the physical dimensions of the Prechen 27 inch monitor, including its width (617mm), height (368mm), and stand depth (385mm), as well as the tilt adjustment range (-5° to 15°).
Кепилдик жана колдоо
1. Кепилдик маалыматы
Prechen products are covered by a limited warranty. Please refer to the warranty card included in your product packaging for specific terms and conditions, including warranty period and coverage details. Keep your purchase receipt as proof of purchase for warranty claims.
2. Кардарларды колдоо кызматы
For technical assistance, troubleshooting, or warranty inquiries, please contact Prechen customer support. Contact information can typically be found on the official Prechen website or on the warranty card provided with your product. When contacting support, please have your product model and purchase details ready.


