1. Киришүү
This manual provides detailed instructions for the HAOVM M8 PLUS 8-inch Android Tablet. Please read this manual thoroughly before using your device to ensure proper operation and to maximize its features. Keep this manual for future reference.
2. Кутуда эмне бар
Upon opening your HAOVM M8 PLUS tablet package, you should find the following items:
- 1x HAOVM Android Tablet
- 1x Кубат адаптери (5V2A)
- 1x USB 2.0 Cable (Type-C)
- 1x Ыкчам Баштоо Көрсөтмөсү
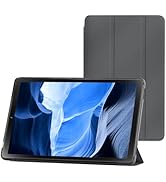
Image: Included accessories with the HAOVM M8 PLUS tablet.
3. Продукт бүтүп калдыview
The HAOVM M8 PLUS is an 8-inch Android tablet designed for versatile use. It features a sleek design and intuitive controls.

Сүрөт: алдыңкы view of the HAOVM M8 PLUS tablet.
3.1. Физикалык өзгөчөлүктөрү
- Дисплей: 8-inch IPS HD (1280x800)
- Камералар: Front camera, 8MP Rear camera
- Порттор: Кубаттоо жана маалыматтарды өткөрүү үчүн USB Type-C, 3.5 мм кулакчын уячасы
- Баскычтар: Power On/Off, Volume Up/Down
- Баяндамачылар: Кош баяндамачылар
- Карта уячалары: MicroSD card slot (expandable up to 1TB), SIM card slot (for cellular data/calls)
Видео: Кыскачаview of the tablet's physical design, including the case and SIM card tray.
4. Орнотуу
4.1. Баштапкы күйгүзүү
- Press and hold the Power On/Off button located on the side of the tablet until the screen lights up.
- Тилиңизди тандоо, Wi-Fi тармагына туташуу жана Google аккаунтуңузду орнотуу үчүн экрандагы көрсөтмөлөрдү аткарыңыз.
4.2. Планшетти заряддоо
Before first use, it is recommended to fully charge the tablet. Use the provided USB Type-C cable and power adapter.
- USB Type-C кабелин планшеттин кубаттоо портуна туташтырыңыз.
- Кубат адаптерин розеткага сайыңыз.
- The charging indicator will appear on the screen. A full charge typically takes less than 3 hours.

Image: Battery and charging features of the tablet.
Video: Demonstrating the tablet's charging process and included accessories.
4.3. MicroSD картасын салуу (кошумча)
To expand storage, you can insert a MicroSD card (up to 1TB, sold separately).
- Планшеттин капталынан MicroSD карта уячасын табыңыз.
- Use the provided SIM ejector tool (or a small paperclip) to gently press into the small hole next to the slot to eject the tray.
- Place the MicroSD card onto the tray with the gold contacts facing down.
- Тапканды кылдаттык менен уячага кайра кыстарыңыз.
4.4. Inserting a SIM Card (Optional)
For cellular data and calls, you can insert a SIM card (sold separately).
- Follow the same steps as for inserting a MicroSD card to open the tray.
- Place your SIM card onto the designated slot on the tray.
- Кылдаттык менен лотокту оюкка кайра салыңыз.
5. Иштөө нускамалары
5.1. Navigating the Android OS
The tablet runs on a native Android OS, providing full access to the Google Play Store and a familiar user interface.
- Башкы экран: Swipe left or right to access different app pages.
- Эскертмелер: Экрандын өйдө жагынан төмөн карай сүрүңүз view эскертмелер жана тез орнотуулар.
- Колдонмо тартмасы: Бардык орнотулган колдонмолорго жетүү үчүн экранды ылдый жагынан өйдө сүрүңүз.

Image: Full access to the Google Play Store for various applications.
5.2. Дисплей режимдери
The IPS HD display offers various modes for enhanced viewсооронуч:
- Кадимки режим: Provides crisp, clear details and vivid colors.
- Окуу режими: Optimizes the display for comfortable reading, similar to paper.
- Eye Comfort Function: Filters blue light to reduce eye fatigue, especially useful at night.

Image: Different display modes for optimal viewing.
5.3. Байланыш
- Wi-Fi: Supports ultra-fast 2.4Ghz and 5Ghz Wi-Fi for internet access.
- Bluetooth: Connect wireless accessories like headphones or speakers.
- FM радиосу: Сүйүктүү радиостанцияларыңызды угуңуз.
- GPS: Built-in GPS for offline navigation. Download maps before traveling.
- Cellular (with SIM card): Make calls, send texts, and use mobile data.

Image: Tablet demonstrating GPS navigation capabilities.
5.4. Камеранын функциялары
The tablet is equipped with a front camera and an 8MP rear camera.
- Сүрөткө тартуу: Камера колдонмосун ачып, жапкычты басыңыз.
- Видеолорду жаздыруу: Камера колдонмосунда видео режимине которулуп, жаздыруу баскычын басыңыз.
- Видео чалуулар: Use the front camera for video calls through compatible applications.

Image: Tablet features including camera, speakers, and connectivity.
5.5. Ата-энелик көзөмөл
The tablet includes parental control features to manage content and usage for children.
- Access parental controls through the device settings to set limits, filter content, and monitor activity.
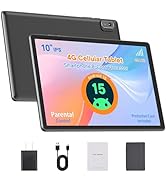
Image: Tablet designed with parental controls for kid-friendly content.
6. Техникалык шарттар
| Өзгөчөлүк | Деталь |
|---|---|
| Модель аты | M8PLUS |
| Screen Size | 8 дюйм |
| Screen Resolution | 1280x800 (IPS HD) |
| Процессор | MediaTek 2 GHz Octa-core (MT8183) |
| RAM | 4 GB SDRAM DDR4 |
| Ички сактагыч | 64 ГБ |
| Кеңейтүүчү сактагыч | Up to 1 TB via TF card (MicroSD) |
| Батарея сыйымдуулугу | 5100 мАч |
| Батареянын орточо иштөө мөөнөтү | Up to 12 Hours (mixed-use) |
| Операция системасы | Android |
| Зымсыз түрү | 802.11ac (2.4Ghz & 5Ghz WiFi) |
| Bluetooth | Ооба |
| GPS | Built-in GPS, GLONASS, Galileo |
| Арткы Webcam Resolution | 8 депутат |
| Элемент Салмагы | 13 унция |
| Продукциянын өлчөмдөрү | 8.3 x 4.96 x 0.35 дюйм |

Image: Tablet's processor and connectivity details.

Image: Tablet's memory and storage capabilities.
7. Техникалык тейлөө
- Тазалоо: Use a soft, lint-free cloth to clean the screen and body. Avoid abrasive cleaners.
- Сактагыч: Планшетти күн нурунан жана экстремалдык температурадан алыс салкын, кургак жерде сактаңыз.
- Батареяга кам көрүү: To prolong battery life, avoid fully discharging the tablet frequently. Charge it regularly.
- Программалык камсыздоо жаңыртуулары: Оптималдуу аткарууну жана коопсуздукту камсыз кылуу үчүн системанын жаңыртууларын дайыма текшерип, орнотуңуз.
8. Кыйынчылыктарды
- Планшет күйбөй жатат: Ensure the tablet is charged. Connect it to the charger and wait a few minutes before attempting to power it on again.
- Экран жооп бербейт: Try restarting the tablet by holding down the power button for about 10-15 seconds.
- Wi-Fi туташуу көйгөйлөрү: Check if Wi-Fi is enabled in settings. Restart your router and the tablet.
- Колдонмолор бузулуп жатат: Ensure apps are updated to their latest versions. Clear the app's cache or reinstall it if issues persist.
- Жай аткаруу: Close unused applications, clear cache, or consider a factory reset if performance significantly degrades. Back up your data before a factory reset.
9. Кепилдик жана колдоо
HAOVM provides comprehensive service and a 1-year manufacturer warranty for this product.
- Кепилдик мөөнөтү: Сатып алган күндөн тартып 1 жыл.
- Колдоо кызматы менен байланышуу: For technical assistance, warranty claims, or any product-related inquiries, please refer to the contact information provided in your Quick Start Guide or visit the official HAOVM webсайт.

Image: HAOVM customer support and warranty details.


