1. Киришүү
This manual provides instructions for the JLab GO Charge Wireless Mouse. Please read this manual thoroughly before using the product to ensure proper operation and to maximize its features.

Figure 1: JLab GO Charge Wireless Mouse, top view with USB dongle.
2. Пакеттин мазмуну
Пакетте бардык буюмдар бар экенин текшериңиз:
- GO Charge Wireless Mouse
- Charging cord (USB-C to USB-A)
- 2.4 ГГц USB зымсыз Dongle
- Quick Start Guide
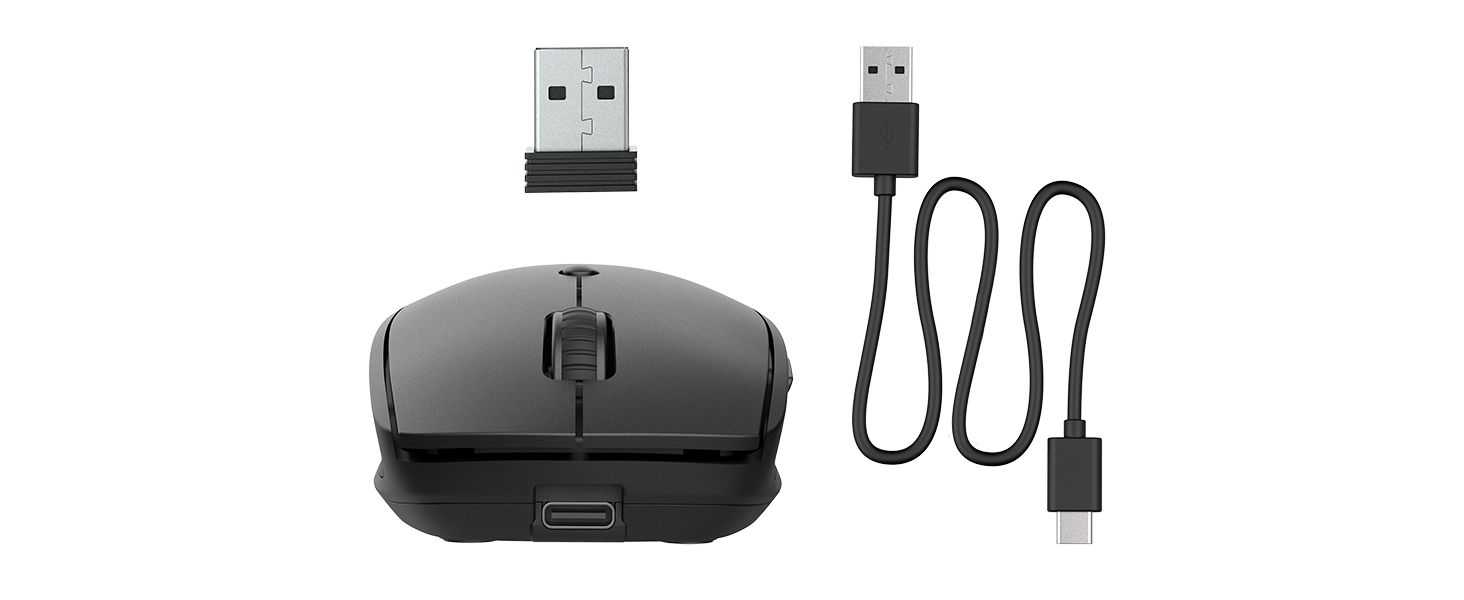
Figure 2: Included components: JLab GO Charge Wireless Mouse, USB-C to USB-A charging cable, and 2.4GHz USB wireless dongle.
3. Орнотуу
3.1 Чычканды заряддоо
The JLab GO Charge Wireless Mouse features a rechargeable battery, eliminating the need for disposable batteries. Use the provided USB-C to USB-A charging cable to charge the mouse. The charging port is located at the front of the mouse.
- Connect the USB-C end of the cable to the mouse.
- Connect the USB-A end to a compatible USB power adapter (not included) or a computer USB port.
- A red indicator light on the underside of the mouse will illuminate during charging and turn off when fully charged.
3.2 Байланыш параметрлери
The mouse offers two primary connection methods: 2.4GHz USB wireless dongle and Bluetooth.
3.2.1 2.4GHz USB Wireless Dongle Connection
- Locate the USB wireless dongle stored in the compartment on the underside of the mouse.
- Insert the USB dongle into an available USB-A port on your computer.
- Turn on the mouse using the power switch on its underside. The red optical sensor light will activate.
- Чычкан компьютериңизге автоматтык түрдө туташуу керек.

Figure 3: Underside of the mouse, highlighting the USB dongle storage compartment and the power switch.
3.2.2 Bluetooth байланышы
The mouse supports connecting wirelessly to up to two Bluetooth devices.
- Төмөн жагындагы кубат которгучу менен чычканды күйгүзүңүз.
- Press the Bluetooth pairing button (often labeled 'BT1' or 'BT2') on the underside of the mouse. The corresponding LED indicator will blink, indicating pairing mode.
- Түзмөгүңүздө (компьютер, планшет ж.б.) Bluetooth жөндөөлөрүнө өтүп, жаңы түзмөктөрдү издеңиз.
- Select "JLab GO Charge Mouse" from the list of available devices to pair.
- Repeat for a second Bluetooth device using the 'BT2' button if available.
3.3 Multi-Device Toggle
The JLab GO Charge Mouse allows seamless switching between up to three connected devices (one via USB dongle, two via Bluetooth). Use the dedicated toggle button on the underside of the mouse to switch between the paired devices.
4. Чычканды иштетүү
4.1 Негизги функциялар
- Сол чыкылдатуу: Негизги тандоо жана активдештирүү.
- Оң чыкылдатуу: Контексттик менюларга жетет.
- Жылдыруу дөңгөлөгү: Scrolls content vertically. Can also be clicked for middle-click functionality.

Figure 4: Proper hand placement for operating the JLab GO Charge Wireless Mouse.
4.2 Adjustable Tracking (DPI)
The mouse features an adjustable DPI (Dots Per Inch) button, typically located below the scroll wheel. Press this button to cycle through different sensitivity settings, allowing you to adjust the cursor speed to your preference.
4.3 Каптал баскычтары
The mouse is equipped with side buttons, usually for 'Forward' and 'Back' navigation in web браузерлер же file explorers. These can often be customized through your operating system's mouse settings.
5. Техникалык тейлөө
5.1 Тазалоо
To maintain optimal performance, regularly clean your mouse. Use a soft, dry cloth to wipe the surface. For the optical sensor, use a cotton swab lightly dampизопропил спирти менен эритип, чычкандын ичине суюктуктун кирбешин камсыздайт.
5.2 Батареяга кам көрүү
To prolong the life of the internal rechargeable battery:
- Батареяны бат-баттан толук кубаттап калуудан алыс болуңуз.
- Чычканды узак убакытка колдонбогондо салкын, кургак жерде сактаңыз.
- Charge the mouse regularly, even if not completely depleted.
6. Кыйынчылыктарды
6.1 Чычкан жооп бербейт
- Чычкан күйгүзүлгөнүн текшериңиз.
- Батареянын деңгээлин текшерип, керек болсо заряддаңыз.
- For 2.4GHz connection: Ensure the USB dongle is securely inserted into a working USB port. Try a different USB port.
- For Bluetooth connection: Verify Bluetooth is enabled on your device and the mouse is paired. Try re-pairing the mouse.
- Компьютериңизди же түзмөгүңүздү өчүрүп күйгүзүңүз.
6.2 Курсордун туруксуз кыймылы
- Чычкандын астындагы оптикалык сенсорду тазалаңыз.
- Чычканды ылайыктуу жерде (мисалы, чычкан аянтчасында) колдонуп жатканыңызды текшериңиз. Өтө чагылдыруучу же тунук беттерден качыңыз.
- Adjust the DPI setting to a lower sensitivity.
6.3 Заряддоо маселелери
- Verify the charging cable is correctly connected to both the mouse and the power source.
- Башка USB портун же кубат адаптерин колдонуп көрүңүз.
- Заряддоочу кабелдин бузулбагандыгын текшериңиз.
7. Техникалык шарттар
| Бренд | Jlab |
| Модел | GO Charge Wireless Mouse |
| Түс | Кара |
| Байланыш технологиясы | Bluetooth, USB, Wireless (2.4GHz) |
| Кыймылды аныктоо технологиясы | Оптикалык |
| Өзгөчө өзгөчөлүк | Зымсыз, кайра заряддалуучу |
| Шайкештик | Mac, Windows, Chrome OS |
8. Кепилдик жана колдоо
8.1 Кепилдик маалыматы
JLab products are designed with quality and durability in mind. For detailed warranty information, please refer to the official JLab webсайтка же продуктуңузга кошулган кепилдик картасы. Кепилдик дооматтар үчүн сатып алганыңыздын далилин сактаңыз.
8.2 Кардарларды колдоо
If you encounter any issues or have questions regarding your JLab GO Charge Wireless Mouse, please visit the official JLab support page or contact their customer service. Contact information can typically be found on the JLab webсайтында же Ыкчам баштоо колдонмосунда.


