1. Продукт бүтүп калдыview
The Geevon Wireless Indoor Outdoor Thermometer (Model GN-8688-DE-T) is designed to provide accurate temperature and humidity readings for both indoor and outdoor environments. It features a large LCD display with backlight, an integrated alarm clock, snooze function, and calendar. The system includes a main display unit and one wireless outdoor sensor, with support for up to three remote sensors (additional sensors sold separately).

Image: Main display unit showing indoor and outdoor readings, time, and date.
Негизги өзгөчөлүктөр төмөнкүлөрдү камтыйт:
- Max & Min Data Records: Tracks and displays the highest and lowest indoor/outdoor temperature and humidity over a 24-hour period or since the last reset.
- Тренд көрсөткүчтөрү: Arrows on the display indicate whether temperature and humidity are rising, falling, or remaining stable.
- Зымсыз диапазон: The outdoor sensor can transmit data up to 60 meters (200 feet) in an open area to the main display unit.
- Арткы жарык: A soft white backlight illuminates the display for 10 seconds for easy reading in low-light conditions.
- Ар тараптуу жайгаштыруу: The main unit can be placed on a tabletop using its integrated stand or mounted on a wall. The outdoor sensor can also be wall-mounted.
2. Орнотуу жана орнотуу
2.1 Батареяны орнотуу
Both the main display unit and the outdoor sensor require batteries (not included).
- Тышкы сенсор: Open the battery compartment on the back of the outdoor sensor. Insert 2 x AAA batteries, ensuring correct polarity (+/-). Before closing, select a channel (1, 2, or 3) using the small switch inside the compartment. This allows for multiple sensors if purchased separately. Close the battery compartment.
- Негизги дисплей блогу: Open the battery compartment on the back of the main display unit. Insert 3 x AAA batteries, ensuring correct polarity (+/-). Close the battery compartment.
2.2 Сенсорду жупташтыруу
After installing batteries, the main unit will automatically search for the outdoor sensor signal. Place the main unit and the sensor close to each other (within a few feet) for approximately 2-3 minutes to ensure successful pairing. The outdoor temperature and humidity should appear on the main display.

Image: Main display unit and outdoor sensor.
2.3 Жайгаштыруу боюнча көрсөтмөлөр
For optimal performance and accurate readings:
- Негизги блок: Place the main unit indoors, away from direct sunlight, heat sources, or drafts that could affect its internal temperature sensor. It can be placed on a flat surface or mounted on a wall.
- Тышкы сенсор: Position the outdoor sensor vertically in a shaded area, protected from direct sunlight and precipitation. Ensure it is within the 60-meter (200-foot) wireless range of the main unit. Avoid placing it directly on the ground or horizontally, as this can affect accuracy and signal transmission.

Image: Recommended placement for the outdoor sensor.

Image: Main unit placement options: wall mount and tabletop stand.
3. Иштөө нускамалары
3.1 Маалыматты көрсөтүү
Чоң LCD дисплей төмөнкү маалыматтарды көрсөтөт:
- Current Time (12/24 hour format)
- Date and Day of the Week
- Үйдүн ичиндеги температура жана нымдуулук
- Outdoor Temperature and Humidity (from connected sensor)
- Temperature and Humidity Trend Arrows
- Max/Min Records for Indoor/Outdoor Temperature and Humidity
- Ойготкуч сүрөтчөсү

Image: Display features and dimensions.
3.2 Убакытты жана датаны орнотуу
Refer to the buttons on the back or side of the main unit. Typically, a 'SET' or 'MODE' button is used to enter setting mode, and 'UP'/'DOWN' or '+'/'–' buttons are used to adjust values. Press 'SET'/'MODE' repeatedly to cycle through time, date, and 12/24 hour format settings. Confirm each setting by pressing 'SET'/'MODE' again.

Image: Main unit display with control buttons.
3.3 Celsius/Fahrenheit Selection
To switch between Celsius (°C) and Fahrenheit (°F), press the 'UP' button (often labeled 'C/F') on the main display unit.
3.4 Арткы жарыкты иштетүү
Press the 'SNOOZE/LIGHT' button to activate the soft white backlight. The backlight will remain on for approximately 10 seconds before automatically turning off.
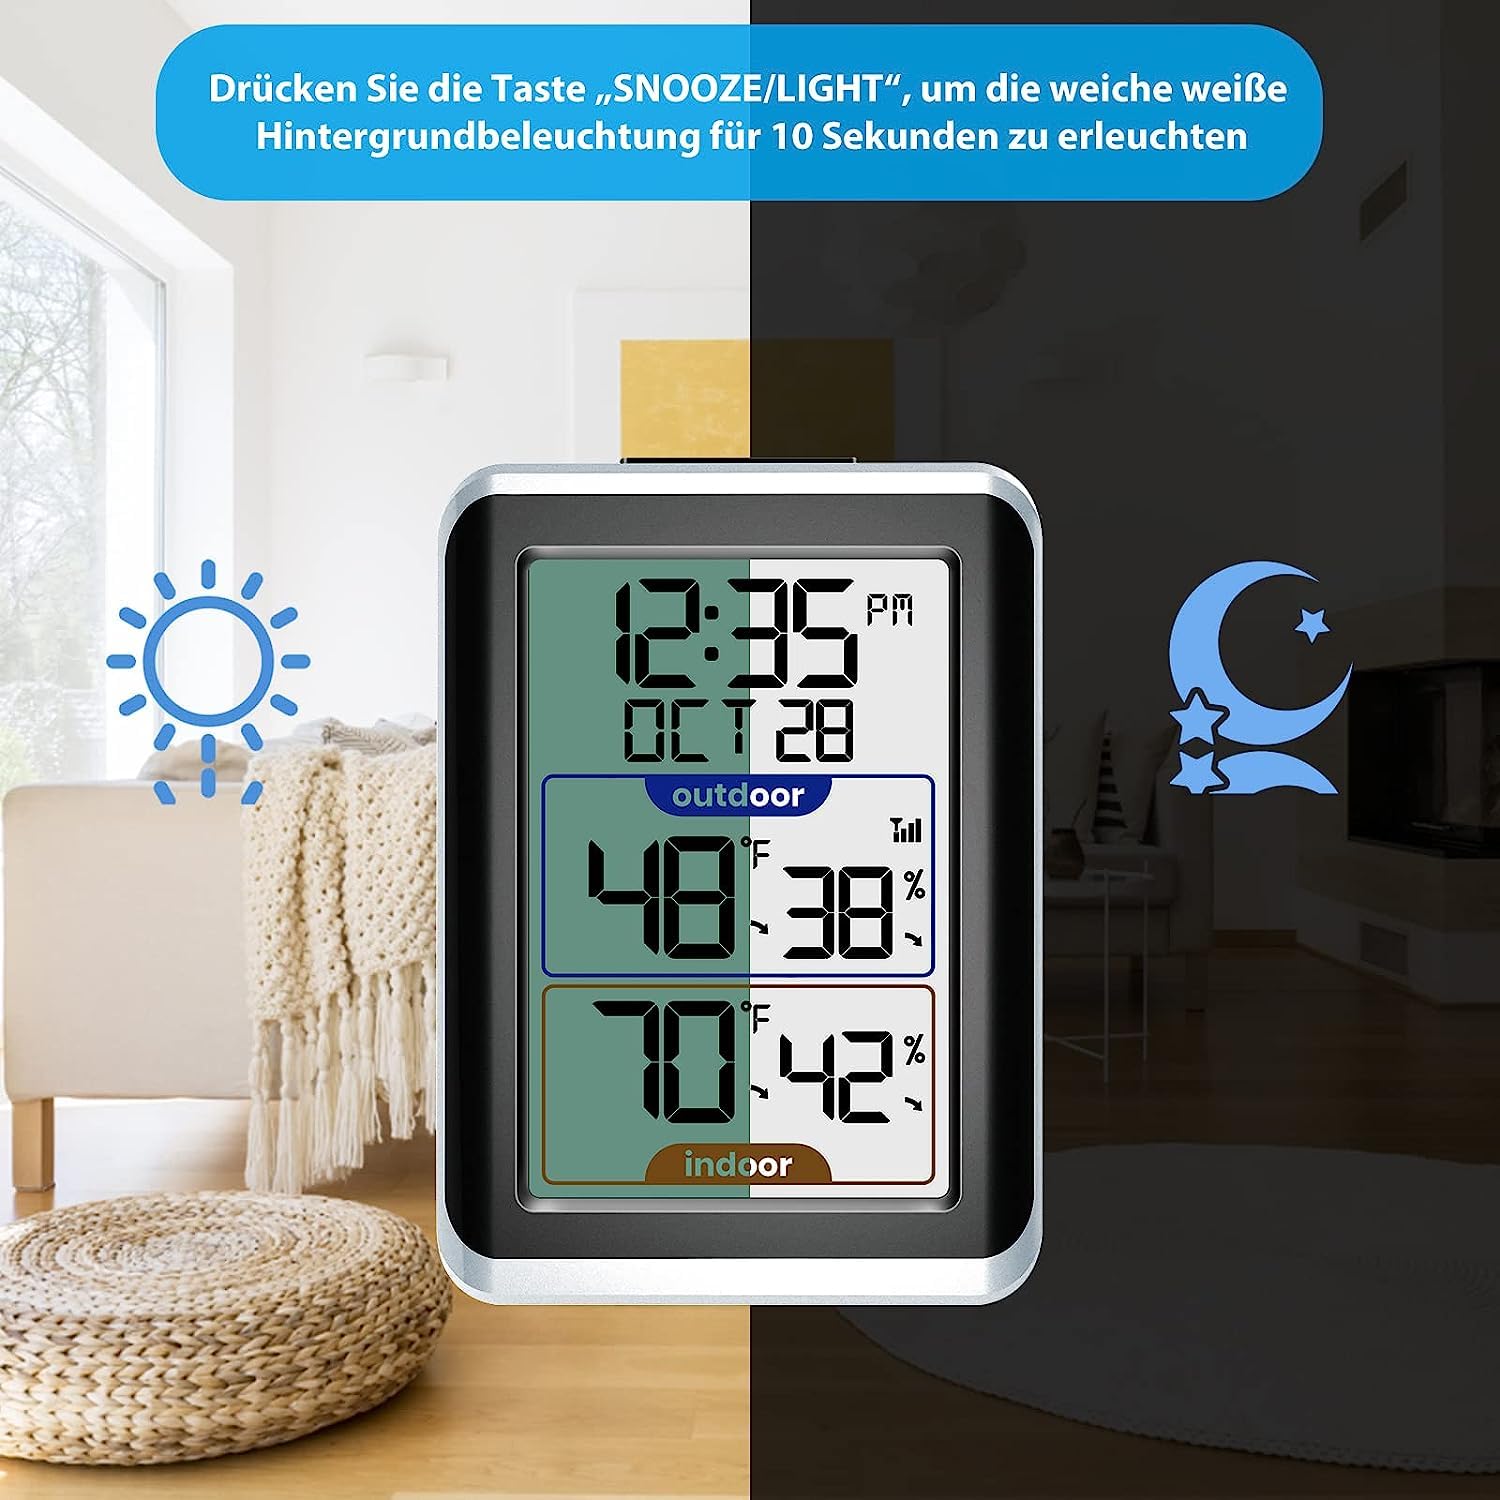
Image: Backlight function in use.
3.5 Alarm Clock and Snooze Function
To set the alarm, use the 'ALARM' or 'MODE' button to enter alarm setting mode. Use the 'UP'/'DOWN' buttons to adjust the alarm time. Press 'ALARM' or 'MODE' again to confirm. When the alarm sounds, press the 'SNOOZE/LIGHT' button to activate the snooze function, which will temporarily silence the alarm for a few minutes.
3.6 Макс/Мин. Жазуулар
The device automatically records the maximum and minimum temperature and humidity values. Press the 'MAX/MIN' button to view these records. Pressing it again will cycle through the maximum, minimum, and current readings. To reset the Max/Min records, press and hold the 'MAX/MIN' button while viewжазууларды алуу.

Image: Trend arrows and Max/Min records.
3.7 Multiple Sensor Channels
If you have multiple outdoor sensors (up to 3), the main unit can display readings from each. Press the 'CHANNEL' button to cycle through the connected sensors (CH1, CH2, CH3). The display will show the readings for the selected channel. If you wish to view all channels in rotation, press the 'CHANNEL' button until the cycle icon appears.

Image: Support for up to 3 remote sensors.
4. Техникалык тейлөө
4.1 Батареяны алмаштыруу
When the battery indicator appears on the display, it is time to replace the batteries. Replace all batteries in the respective unit (main display or sensor) with new ones of the same type (AAA). Ensure correct polarity. After replacing batteries in the sensor, you may need to re-pair it with the main unit by following the steps in Section 2.2.
4.2 Тазалоо
Дисплейди жана c блогун сүртүңүзasinжумшак, d менен gsamp cloth. Do not use abrasive cleaners or solvents, as these can damage the plastic and electronic components. Avoid submerging the units in water.
4.3 Айлана-чөйрөнү коргоо
To prolong the life of your outdoor sensor, ensure it is placed in a location protected from extreme weather conditions, such as heavy rain, snow, or direct, intense sunlight. While designed for outdoor use, excessive exposure to harsh elements can reduce its lifespan.
5. Кыйынчылыктарды
| Көйгөй | Мүмкүн себеп | Чечим |
|---|---|---|
| Негизги блокто же сенсордо дисплей жок. | Өлүк же туура эмес орнотулган батарейкалар. | Туура полярдуулукту камсыз кылуу менен батарейкаларды алмаштырыңыз. |
| Outdoor reading not displayed or flashing. | Sensor not paired, out of range, or interference. | 1. Ensure sensor channel is selected correctly. 2. Re-pair the sensor (remove/reinsert batteries in both units, place close together). 3. Move sensor closer to the main unit. 4. Avoid sources of electromagnetic interference (e.g., TVs, microwaves). |
| Температура/нымдуулуктун көрсөткүчтөрү так эмес. | Improper placement, direct sunlight/heat, or ventilation issues. | 1. Ensure both units are away from direct sunlight, heat sources, or drafts. 2. Place outdoor sensor in a shaded, well-ventilated area. |
| Alarm settings are incorrect or difficult to set. | User error or specific button sequence required. | Carefully follow the alarm setting instructions in Section 3.5. If issues persist, try resetting the unit by removing and reinserting batteries. |
6. Техникалык шарттар
- Модель номери: GN-8688-DE-T
- Бренд: Geevon
- Кубат булагы: Main Unit: 3 x AAA batteries (not included); Outdoor Sensor: 2 x AAA batteries (not included)
- Зымсыз диапазон: Ачык абада 60 метрге (200 фут) чейин
- Sensor Channels: Supports up to 3 outdoor sensors
- Өзгөчөлүктөр: Alarm, Wireless, Clock, Backlight, Max/Min Records, Trend Indicators
- Дисплей: 3.7-inch LCD with white backlight
- Өлчөмдөрү (пакет): Approximately 12.4 x 8.9 x 5.8 cm; 190 g
7. Кепилдик жана колдоо
For warranty information and customer support, please refer to the documentation included with your purchase or contact Geevon customer service directly. Details are typically available on the manufacturer's official webсайт же продукт сатылып алынган сатуучу аркылуу.


