1. Киришүү
Сатып алганыңыз үчүн рахматasing the RUBOT P15 Handheld Vacuum Cleaner. This manual provides essential information for the safe and efficient operation, maintenance, and troubleshooting of your device. Please read this manual thoroughly before use and retain it for future reference.
2. Коопсуздук нускамалары
- Шайманды колдонуудан мурун бардык нускамаларды окуп чыгыңыз.
- Чаң соргучту суунун жанында же нымдуу шарттарда колдонбоңуз.
- Чачты, кенен кийимдерди, манжаларды жана дененин бардык бөлүктөрүн тешиктерден жана кыймылдуу бөлүктөрдөн алыс кармаңыз.
- Бензин сыяктуу күйүүчү же күйүүчү суюктуктарды сордурбаңыз же алар болушу мүмкүн болгон жерлерде колдонбоңуз.
- Do not vacuum burning or smoking materials, such as cigarettes, matches, or hot ashes.
- Өндүрүүчү тарабынан берилген кубаттоочу кабелди гана колдонуңуз.
- Эгерде чаң соргуч түшүп кетсе, бузулуп калса, сыртта калтырылган болсо же сууга түшүп кетсе, аны иштетпеңиз.
- Ensure the dust cup and filters are properly installed before operation.
- Бул шайман физикалык, сенсордук же акыл-эс жөндөмү начар же тажрыйбасы жана билими жок адамдар (анын ичинде балдар) тарабынан колдонууга арналбайт, эгерде алардын коопсуздугуна жооптуу адам тарабынан шайманды колдонуу боюнча көрсөтмө болбосо .
3. Пакеттин мазмуну
Пакетиңизде бардык буюмдар бар экенин текшериңиз:
- RUBOT P15 Handheld Vacuum Cleaner
- Brush Nozzles (various types)
- Жарык сопло
- Pumping & Suction Accessories (Small, Medium, Large, Silicone)
- Ийкемдүү шланг
- USB заряддоо кабели
- Колдонуучунун Колдонмосу (бул документ)

Image 1: The RUBOT P15 handheld vacuum cleaner shown with its complete set of accessories, including various nozzles, a flexible hose, and inflation attachments. The vacuum itself is white with a clear dust collection chamber.
4. Продукт бүтүп калдыview
The RUBOT P15 is a versatile 6-in-1 handheld vacuum cleaner designed for various cleaning tasks. It features a lightweight, cordless design with multiple functions including vacuuming, inflating, and integrated lighting.
Негизги компоненттер:
- Негизги блок: Мотор, батарея жана башкаруу баскычтарын камтыйт.
- Чаң кесе: Transparent chamber for collecting debris.
- Фильтр системасы: Includes a stainless steel pre-filter and a HEPA filter for efficient dust separation.
- Кубат / режим баскычы: Controls power on/off and suction modes.
- Жарык баскычы: Activates the integrated flashlight and warning light.
- Заряддоо порту: USB-C port for recharging the device.
- Nozzle Attachment Point: For connecting various cleaning and inflation accessories.
5. Орнотуу
5.1 Аппаратты заряддоо
- Биринчи жолу колдонуудан мурун, чаң соргучту толугу менен заряддаңыз.
- Connect the provided USB charging cable to the charging port on the vacuum cleaner.
- USB кабелинин экинчи учун туура келген USB кубат адаптерине (кошумча эмес) же USB портуна сайыңыз.
- The indicator light will show charging status. A full charge typically takes 3-4 hours.
5.2 Аксессуарларды тиркөө
Select the appropriate nozzle or accessory for your cleaning task and firmly attach it to the vacuum's suction opening. For inflation, attach the desired inflation accessory to the exhaust port.
6. Иштөө нускамалары
6.1 Күйгүзүү/өчүрүү жана соргуч режимдери
- Press the Power/Mode button once to turn on the vacuum in Eco Mode (10kPa suction).
- Press the Power/Mode button a second time to switch to High-Speed Mode (13kPa suction).
- Press the Power/Mode button a third time to turn off the vacuum.
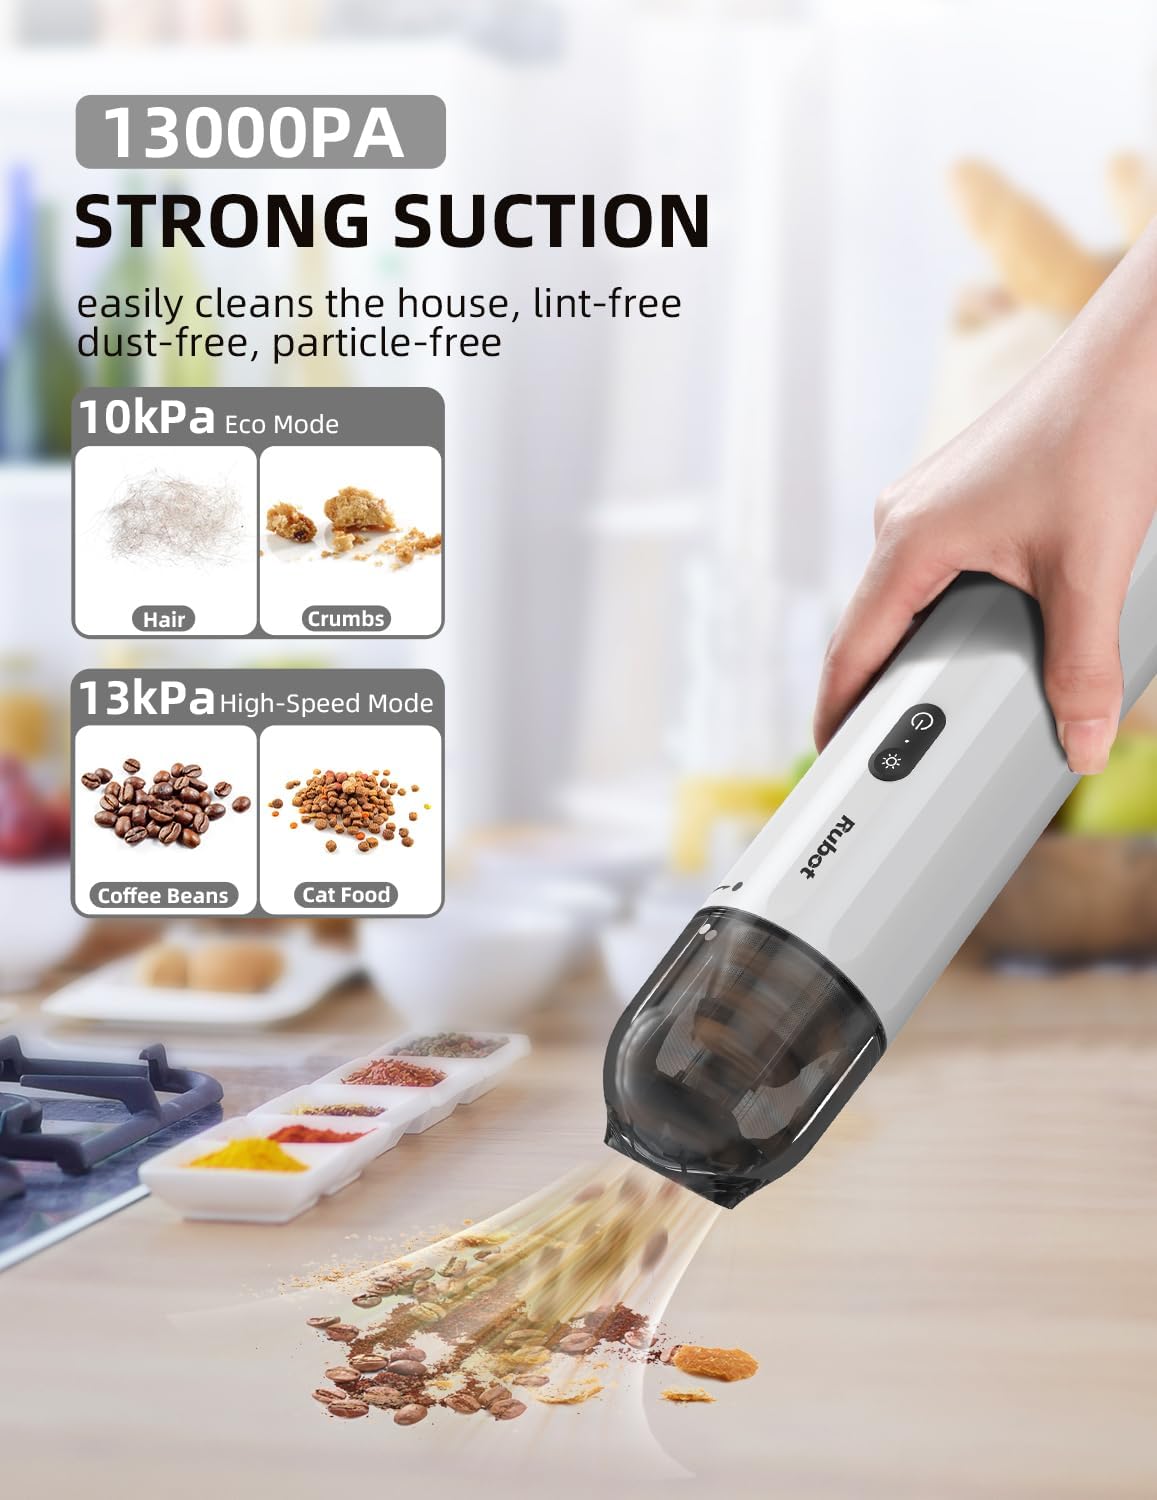
Image 2: Illustrates the two suction power modes of the RUBOT P15: 10kPa Eco Mode suitable for hair and crumbs, and 13kPa High-Speed Mode for heavier debris like coffee beans and cat food. The image shows the vacuum in action on a countertop.
6.2 Using Cleaning Nozzles
- Щетка учтары: Ideal for cleaning upholstery, car mats, and surfaces that require gentle agitation to dislodge dirt.
- Жарык насосу: Designed for reaching tight spaces, corners, and gaps in car interiors or furniture.
- Ийкемдүү шланг: Extends reach for awkward angles and deep crevices, often used with other nozzles attached to its end.

Image 3: Displays the versatility of the RUBOT P15 with various attachments. It shows the brush nozzles, crevice nozzle, pumping and suction attachments, and the flexible hose being used for different cleaning scenarios, including car interiors and sofa gaps.
6.3 Inflation and Pumping Function
The RUBOT P15 can also be used to inflate items or pump air out of storage bags.
- Attach the appropriate pumping/suction accessory to the exhaust port of the vacuum cleaner.
- For inflation, connect the accessory to the item you wish to inflate (e.g., air mattress, swimming buoy).
- Turn on the vacuum cleaner to activate the air pump function.

Image 4: Demonstrates the inflation and vacuuming capabilities of the RUBOT P15, particularly useful for camping. It shows the vacuum inflating an air mattress and a ground sheet, highlighting the small, medium, large, and silicone nozzle options for various inflation needs.
6.4 Интегралдык жарыктандыруу
The vacuum cleaner includes a built-in flashlight and a warning light for enhanced utility.
- Press the Light button once to activate the white flashlight, useful for illuminating dark areas during cleaning, such as under car seats or engine bays.
- Press the Light button a second time to activate the red warning light, which can be used as an emergency signal, for example, when parked on the roadside.

Image 5: Showcases the dual lighting features of the RUBOT P15. One panel illustrates the white flashlight illuminating a car engine bay for inspection, while the other panel shows the red warning light active at the rear of a car, indicating an emergency or roadside stop.
7. Техникалык тейлөө
7.1 Чаң чөйчөгүн бошотуу
Empty the dust cup regularly to maintain optimal suction power.
- Чаң соргучтун өчүрүлгөнүн текшериңиз.
- Twist or unlatch the dust cup from the main unit according to the product design.
- Чогултулган таштандыларды таштанды челекке төгүңүз.
7.2 Фильтрлерди тазалоо
The filters should be cleaned periodically to prevent clogging and maintain performance.
- Remove the filters from the dust cup. The RUBOT P15 typically uses a stainless steel pre-filter and a HEPA filter.
- Бош чаңды кетирүү үчүн чыпкаларды таштанды челектин үстүнө акырын басыңыз.
- If heavily soiled, rinse the filters under running water. Ensure they are completely dry before reinserting them into the vacuum cleaner. Do not use the vacuum with wet filters.
Сүрөт 6: деталдуу view of the RUBOT P15's filter system, showing the stainless steel pre-filter and the HEPA filter separated from the dust cup, illustrating how they can be removed for cleaning.
7.3 Сактоо
Store the vacuum cleaner and its accessories in a cool, dry place, away from direct sunlight and extreme temperatures. The compact design allows for easy storage, such as in a car's cup holder.

Image 7: Demonstrates the ultra-slim and light design of the RUBOT P15, showing it conveniently stored in a car's cup holder, highlighting its portability and ease of storage.
8. Кыйынчылыктарды
| Көйгөй | Мүмкүн себеп | Чечим |
|---|---|---|
| Вакуум күйбөйт | Батарея түгөндү Кубат баскычы туура басылган жок | Батареяны толук заряддаңыз Press the Power/Mode button firmly |
| Соруу күчү начар | Чаң чөйчөгү толтура Фильтрлер тыгылып калган Сопло же шланг бөгөттөлгөн | Чаң чөйчөгүн бошотуңуз Чыпкаларды тазалаңыз же алмаштырыңыз Check and clear any blockages in the nozzle or hose |
| Заряддоо иштебей жатат | Charging cable is faulty USB адаптери иштебей жатат Charging port is dirty | Башка USB кубаттоо кабелин колдонуп көрүңүз Use a different USB power adapter Заряддоо портун акырын тазалаңыз |
| Иш учурунда адаттан тыш ызы-чуу | Object stuck in the fan or nozzle Filters are improperly installed | Turn off and inspect for obstructions Ensure filters are correctly seated |
9. Техникалык шарттар
- Модел: P15 (CA15)
- Бренд: RUBOT
- Күч: 100 Ватт
- Тtage: 12 вольт
- Соруу күчү: 10kPa (Eco Mode), 13kPa (High-Speed Mode)
- Ызы-чуу деңгээли: <65 дБ
- Өлчөмдөрү (L x W x Y): 28 x 6.5 x 6.5 см (11 x 2.56 x 2.56 дюйм)
- Салмагы: Болжол менен 544 г (1.2 фунт)
- Батарея: 1 x 9V (кошулган)
- Өзгөчөлүктөр: Lightweight, Portable, Cordless, LED Flashlight, Red Warning Light, Inflation/Pumping Function
10. Кепилдик жана колдоо
For warranty information and customer support, please refer to the documentation included with your purchase or visit the official RUBOT webсайт. Ар кандай кепилдик дооматтары үчүн сатып алганыңыздын далилин сактаңыз.


