1. Киришүү
This manual provides detailed instructions for the safe and effective operation of the GVDA GD166B True RMS Digital Clamp Meter. This high-performance smart digital clamp meter is designed to simplify and enhance your electrical measurement tasks. It integrates a wide range of functions, making it an essential tool for professionals and enthusiasts alike.
The GD166B is capable of measuring AC/DC voltage, AC/DC current, frequency, duty cycle, resistance, capacitance, temperature, diode, continuity, NCV (Non-Contact Voltage) detection, live wire detection, and more.
2. Коопсуздук маалыматы
WARNING: To avoid electric shock or personal injury, read and understand all safety information before using this product.
- Ар дайым жергиликтүү жана улуттук коопсуздук эрежелерин сактаңыз.
- Эгерде өлчөгүч бузулгандай көрүнсө же изоляциясы бузулган болсо, аны колдонбоңуз.
- Баалангандан ашык колдонбоңузtagд, эсептегичте белгиленгендей, терминалдардын ортосунда же кандайдыр бир терминал менен жердин ортосунда.
- Том менен иштөөдө этият болуңузtag30V AC RMS, 42V пик же 60V DC жогору. Мындай томtagшок коркунучун жаратат.
- Remove the test leads from the circuit before changing functions.
- Ensure the battery cover is closed and secured before operation.
- Do not operate the meter with the battery compartment open.
- Батарея аз индикатор пайда болоору менен батарейкаларды алмаштырыңыз.
- Эсептегичти жарылуучу газ, буу же чаңдуу чөйрөдө колдонбоңуз.
- Өлчөөлөрүңүз үчүн тийиштүү терминалдарды, функцияны жана диапазонду колдонуңуз.
3. Продукт бүтүп калдыview
The GVDA GD166B is a versatile digital clamp meter designed for accurate and reliable electrical measurements. Below are its key features and components.
3.1 Негизги өзгөчөлүктөрү
- Синусоидалуу эмес толкундар боюнча так окуу үчүн чыныгы RMS өлчөө.
- Чаралар AC/DC Voltage, AC/DC Current, Resistance, Capacitance, Frequency, and Temperature.
- Diode Test and Continuity Test functions.
- Байланышсыз томtage (NCV) detection and Live Wire detection for enhanced safety.
- AC Inrush Current measurement.
- Smart Measurement (Auto) mode for simplified operation.
- Data Hold, Backlight, and Flashlight functions.
- Large LCD display with 6000 counts.
- Compact and ergonomic design with a 36mm clamp ачылышы.
3.2 Компоненттер

Сүрөт 3.2.1: Алдыңкы View of the GD166B Clamp Метр. This image shows the main unit of the GVDA GD166B digital clamp meter along with its red and black test leads. The large display, function buttons, and the clamp jaw are clearly visible.

Figure 3.2.2: GVDA GD166B with Brand Logo. Жакыныраак view of the GD166B clamp meter, highlighting the GVDA brand logo and model number on the device's body.
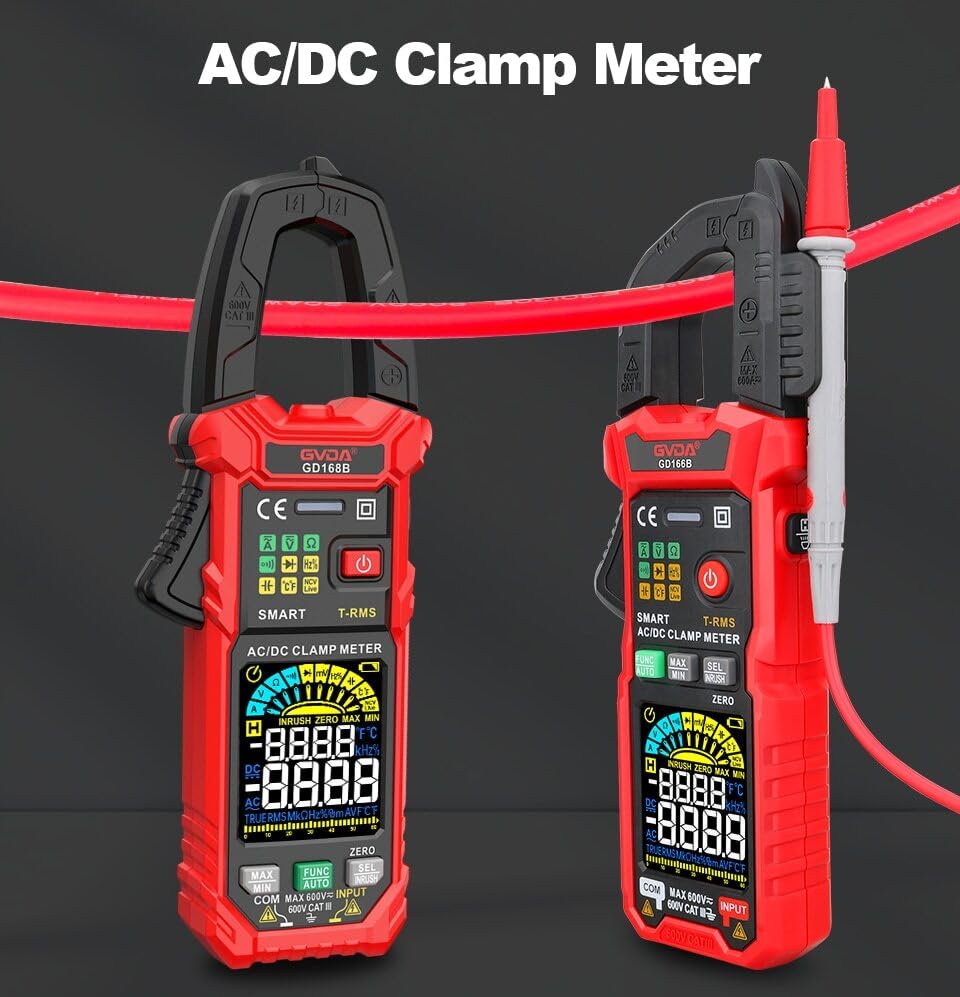
Figure 3.2.3: AC/DC Clamp Meter Comparison. This image displays two GVDA clamp meters, GD168B and GD166B, side-by-side, showcasing their similar design and functionality as AC/DC clamp метр.

3.2.4-сүрөт: Пакеттин мазмуну. This image shows the complete package contents, including the GD166B clamp meter, test leads, a thermocouple probe, a carrying case, and the user manual.
4. Орнотуу
4.1 Батареяны орнотуу
The GD166B requires 3 x 1.5V AAA batteries (not included) for operation.
- Эсептегичтин артындагы батарея отсегин табыңыз.
- Батарея бөлүкчөсүнүн капкагын ачуу үчүн бурагычты колдонуңуз.
- Insert three AAA batteries, ensuring correct polarity (+ and -).
- Батарея уясынын капкагын ордуна коюңуз жана аны бурама менен бекитиңиз.
4.2 Сыноо өткөргүчтөрүн туташтыруу
Сыноо өткөргүчтөрүн талап кылган өлчөөлөр үчүн (мисалы, томtage, resistance, continuity, diode, capacitance, temperature), connect them as follows:
- Кара сыноо өткөргүчтү "COM" (жалпы) киргизүү уячасына салыңыз.
- Insert the red test lead into the "INPUT" (positive) input jack.

Figure 4.2.1: Test Lead Connection. This image illustrates the correct way to connect the test leads to the meter's input jacks for various measurements.
5. Иштөө нускамалары
5.1 Күйгүзүү/өчүрүү
басыңыз Кубат баскычы (⑂) to turn the meter on or off.
5.2 Функцияны тандоо
The GD166B features a "Smart Measurement (Auto)" mode, which automatically identifies the measurement type (voltage, resistance, continuity) when test leads are connected. For other specific functions, use the FUNC button to cycle through modes or the rotary dial if present (though this model appears button-driven).
5.3 Common Measurements
5.3.1 AC/DC Voltage Өлчөө
- Кызыл сыноо зымын "INPUT" уячасына, ал эми кара сыноо зымын "COM" уячасына туташтырыңыз.
- Тийиштүү томду тандаңызtage range (or use Smart Auto mode).
- Сыноо өткөргүчтөрүн өлчөнө турган схемага же компонентке параллель туташтырыңыз.
- Томду окуңузtage мааниси дисплейде.
5.3.2 AC/DC Ток өлчөө (Clamp)
Учурдагы өлчөөлөр үчүн cl колдонуңузamp jaw. Ensure the circuit is de-energized before clamping.
- Select the AC or DC current function.
- cl ачыңызamp jaw and enclose only one conductor of the circuit.
- cl жабууamp jaw completely.
- Дисплейдеги учурдагы маанини окуңуз.
5.3.3 Каршылыкты өлчөө
- Каршылыкты өлчөөдөн мурун чынжырдын токтун өчүрүлгөнүн текшериңиз.
- Connect the test leads to the "INPUT" and "COM" jacks.
- Select the resistance function.
- Сыноо өткөргүчтөрүн өлчөнө турган компонентке туташтырыңыз.
- Дисплейдеги каршылык маанисин окуп чыгыңыз.
5.3.4 Үзгүлтүксүздүк тести
- Схема кубаты өчүрүлгөнүн текшериңиз.
- Connect the test leads to the "INPUT" and "COM" jacks.
- Select the continuity function.
- Connect the test leads across the circuit or component. A continuous beep indicates continuity (low resistance).
5.3.5 Контактсыз томtage (NCV) аныктоо
NCV функциясы AC көлөмүн аныктоого мүмкүндүк беретtagд түз байланышсыз.
- Select the NCV function.
- Place the top end of the meter near the conductor or outlet.
- The meter will beep and the NCV indicator will light up if AC voltagе аныкталат.

Figure 5.3.5.1: NCV Measurement in Progress. This image demonstrates the GD166B clamp meter being used to perform a Non-Contact Voltage (NCV) measurement on an electrical outlet, indicating its ability to detect live voltagд физикалык байланышсыз.
5.3.6 AC Inrush Current Measurement
This function measures the initial surge of current when a device is turned on.
- Select the Inrush Current function.
- cl ачыңызamp jaw and enclose only one conductor of the circuit.
- Turn on the device to be measured. The meter will capture the peak inrush current.

Figure 5.3.6.1: Inrush Current Measurement. This image shows the GD166B clamp meter actively measuring inrush current on a set of electrical wires, demonstrating its capability to capture transient current peaks.
5.3.7 Башка функциялар
- Дайындарды кармоо: басыңыз БЕРҮҮ Учурдагы көрсөткүчтү дисплейде тоңдуруу үчүн баскычты басыңыз. Бошотуу үчүн кайра басыңыз.
- МАКС/МИН: басыңыз МАКС/МИН button to record the maximum and minimum readings.
- Арткы жарык/чырак: басыңыз Жарык баскычы to turn on/off the display backlight or the integrated flashlight.
- DCA Zero: Used to zero out the DC current reading before measurement to ensure accuracy.
6. Техникалык тейлөө
6.1 Тазалоо
Ишти жарнама менен сүртүңүзamp кездеме жана жумшак жуугуч каражат. Абразивдүү заттарды же эриткичтерди колдонбоңуз. Киргизүү терминалдарын кирден же нымдан таза кармаңыз.
6.2 Батареяны алмаштыруу
When the low battery indicator (батарея сөлөкөтү) appears on the display, replace the batteries immediately to ensure accurate readings. Refer to Section 4.1 for battery installation instructions.
6.3 Сактоо
If the meter is not to be used for an extended period, remove the batteries to prevent leakage and damage to the meter. Store the meter in a cool, dry place, away from direct sunlight and extreme temperatures.
7. Кыйынчылыктарды
| Көйгөй | Мүмкүн себеп | Чечим |
|---|---|---|
| Эсептегич күйбөйт. | Өлүк же туура эмес орнотулган батарейкалар. | Батареянын полярдуулугун текшерүү; батареяларды алмаштыруу. |
| "OL" көрсөтүлөт. | Ашыкча жүктөө же диапазондон тышкары. | Select a higher range (if applicable) or ensure the measured value is within the meter's limits. |
| Туура эмес окуулар. | Low battery; incorrect function/range; poor test lead connection. | Replace batteries; select correct function/range; ensure secure test lead connection. |
| Үзгүлтүксүздүк сигналы жок. | Circuit not continuous; high resistance; meter not in continuity mode. | Check circuit; ensure resistance is low; select continuity mode. |
8. Техникалык шарттар
| Параметр | Диапазон/маани |
|---|---|
| DC Voltage | 600mV, 6V, 60V, 600V |
| AC Voltage | 600mV, 6V, 60V, 600V |
| AC тогу | 60A, 600A |
| Туруктуу ток | 60A, 600A |
| Каршылык | 600Ω, 6kΩ, 60kΩ, 600kΩ, 6MΩ, 60MΩ |
| AC кирүү тогу | 60A, 600A |
| Сыйымдуулук | 6nF, 60nF, 600nF, 6µF, 60µF, 600µF, 6mF, 60mF |
| Жыштык | 100Hz, 1000Hz, 10kHz, 100kHz, 1000kHz, 10MHz |
| Милдеттик цикл | 1-99% |
| Температура | -40℃ ~ 1000℃, -40℉ ~ 1832℉ |
| Max. Томtage терминалдар менен Жердин ортосунда | 600V |
| Дисплей | 6000 эсеп |
| Аралыктагы көрсөткүч | "ОЛ" |
| Батареянын төмөн көрсөткүчү | Ооба |
| Input Polarity Indication | Display "-" |
| Clamp Ачылышынын өлчөмү | 36 мм |
| Power талап | 3x 1.5V ААА батареялары |
| Продукт өлчөмү | 199*81*32 мм |
| Салмагы (пакет) | 440г |
9. Кепилдик жана колдоо
This product is manufactured to high-quality standards. For information regarding warranty coverage, technical support, or service, please refer to the documentation provided with your purchase or contact your retailer.
Кепилдик дооматтары үчүн сатып алганыңыздын далилин сактап коюңуз.


