1. Introduction and Overview
The ID-COOLING FROSTFLOW X 240 is an all-in-one (AIO) liquid CPU cooler designed to provide efficient heat dissipation for your processor. Featuring a 240mm radiator and two 120mm PWM fans, it ensures optimal cooling performance while maintaining a sleek aesthetic with its classic white LED lighting on the pump. This manual provides detailed instructions for installation, operation, maintenance, and troubleshooting to ensure the best performance and longevity of your cooler.
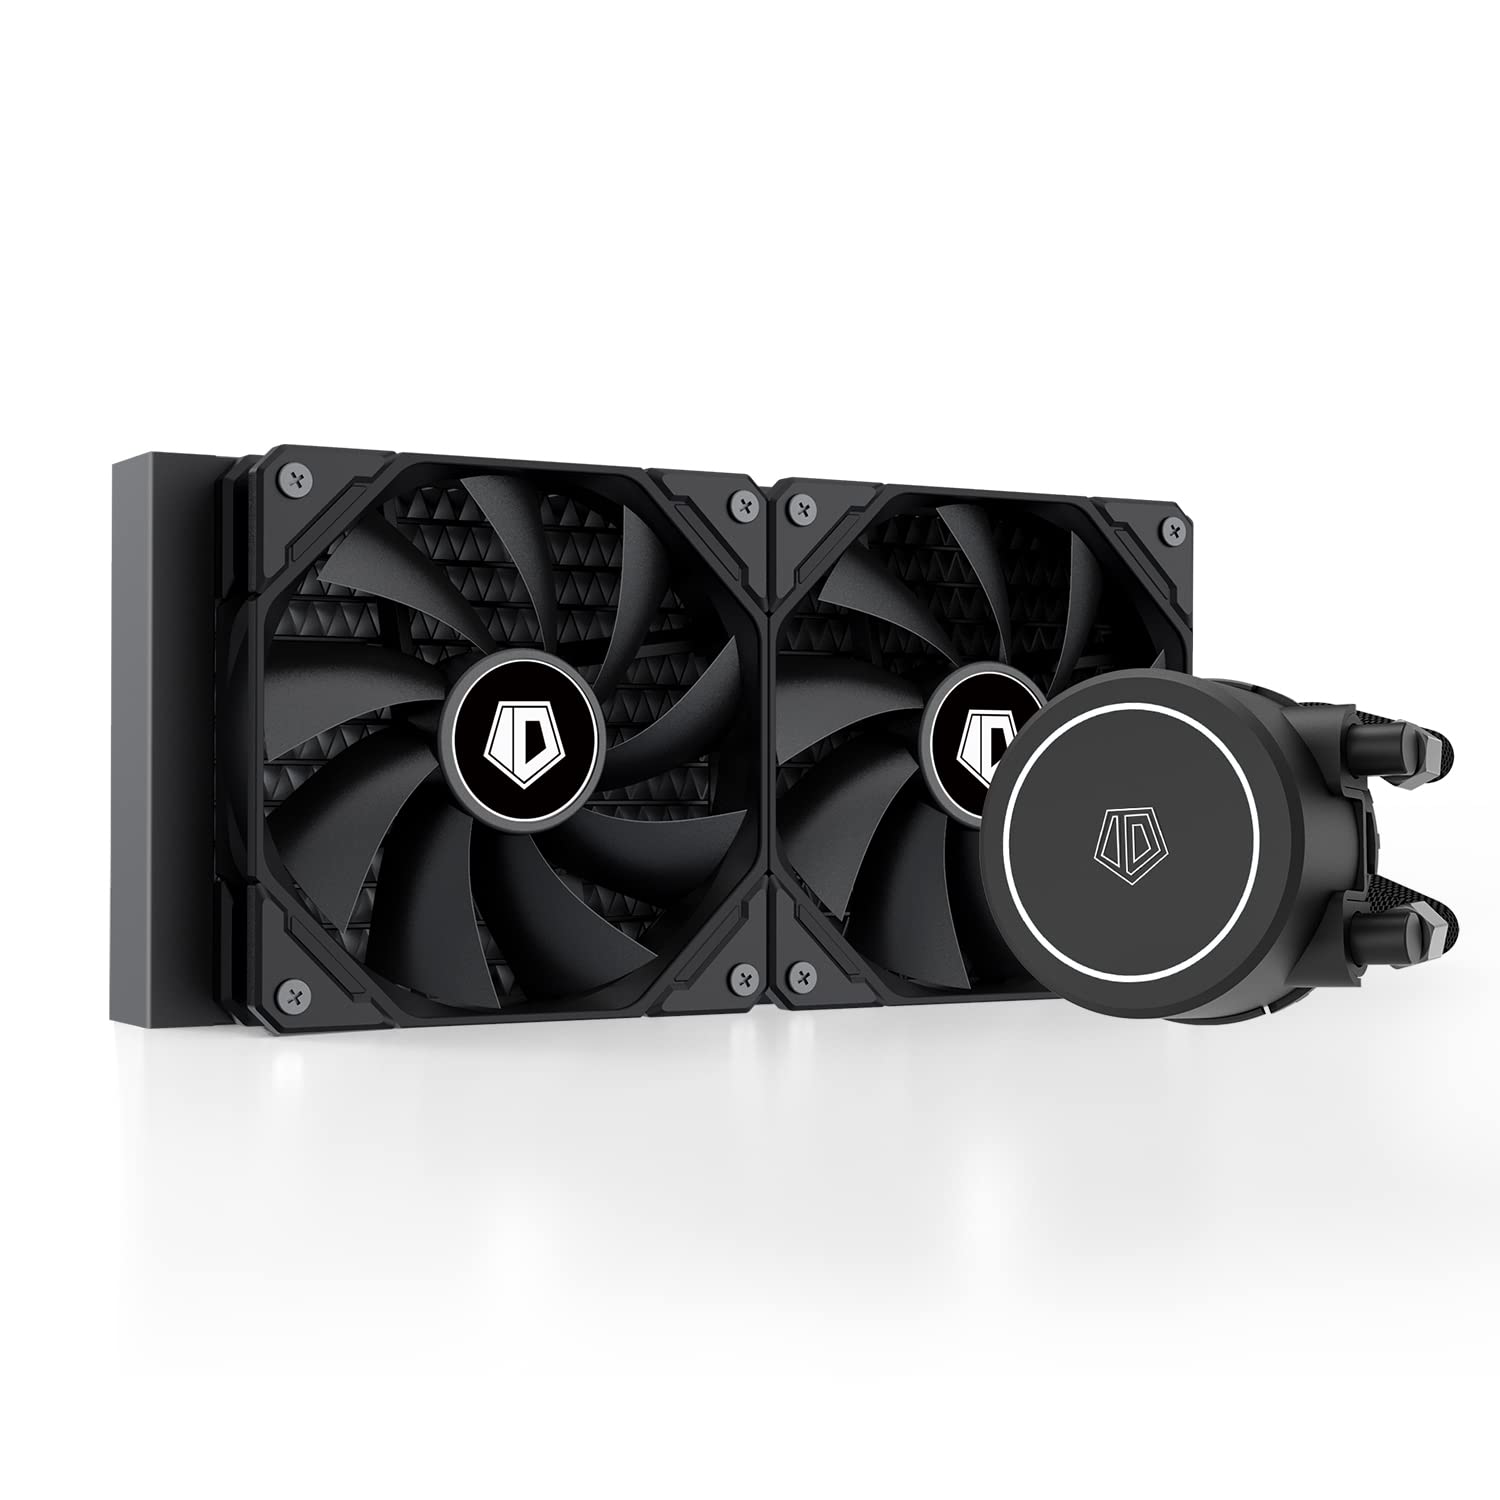
Figure 1: The ID-COOLING FROSTFLOW X 240 CPU Water Cooler, showcasing its radiator, fans, and pump unit.
Видео 1: Аткаминер бүттүview of the Frostflow X 240, highlighting its design and features.
2. Продукциянын өзгөчөлүктөрү
- Better Heat Dissipation: Equipped with a 240mm radiator and two 120mm PWM fans, ensuring excellent heat transfer from the CPU.
- Ак LED жарыктандыруу: Classic white LED lighting on the pump to complement your PC build's aesthetic.
- PWM күйөрмандары: The 120mm PWM fans deliver improved airflow for extreme CPU cooling performance, adjusting speed based on temperature.
- Кеңири шайкештик: Compatible with multiple sockets including Intel LGA1700/1200/1151/1150/1155/1156 and AMD AM5/AM4.

Figure 2: Close-up of the pump head featuring its integrated white LED lighting.

Figure 3: Diagram illustrating the efficient heat dissipation process within the 240mm radiator.
3. Пакеттин мазмуну
Орнотууну баштоодон мурун пакетте бардык компоненттер бар экенин текшериңиз:
- 240мм радиатор
- 2x 120 мм муздатуучу желдеткичтер
- CPU Water Block/Pump Unit
- Mounting Hardware for Intel (LGA1700/1200/115X)
- Mounting Hardware for AMD (AM5/AM4)
- Термикалык паста
- Колдонуучунун Колдонмосу (бул документ)

Figure 4: All components included in the FROSTFLOW X 240 package.
4. Орнотуу жана орнотуу
Proper installation is crucial for optimal performance. Please follow the steps carefully. Refer to Video 2 for a visual guide.
Video 2: Detailed installation guide for ID-COOLING AIO Coolers, applicable to the FROSTFLOW X 240.
4.1. Орнотууга чейинки кадамдар
- Ensure your motherboard is removed from the PC case for easier access.
- Эски термикалык паста же калдыктарды кетирүү үчүн процессордун бетин изопропил спирти менен кылдат тазалаңыз.
4.2. Intel Socket Installation (LGA1700/1200/115X)
- Install the included Intel backplate onto the rear of the motherboard, aligning the holes with the CPU socket.
- Secure the Intel backplate using the provided Intel standoffs. For LGA1700, use the specific LGA1700 socket columns. For LGA1200/115X, use the LGA1200/115X socket columns. Tighten the thumbscrews until secure.
- Apply a pea-sized amount of the included thermal paste to the center of your CPU's integrated heat spreader (IHS).
- Install the Intel bracket onto the pump head. Ensure it clicks securely into place.
- Remove the protective sticker from the pump head's copper base.
- Carefully place the pump head onto the CPU, aligning the mounting holes with the standoffs. Secure it by tightening the screws in a diagonal pattern until snug.

Figure 5: Intel mounting hardware components, including backplate, standoffs, and brackets.
4.3. AMD Socket Installation (AM5/AM4)
- Remove the plastic retention clips from the motherboard, but keep the stock AMD backplate.
- Install the AMD standoffs onto the stock backplate's mounting holes.
- Apply a pea-sized amount of the included thermal paste to the center of your CPU's integrated heat spreader (IHS).
- Install the AMD bracket onto the pump head. Ensure it clicks securely into place.
- Remove the protective sticker from the pump head's copper base.
- Carefully place the pump head onto the CPU, aligning the mounting holes with the standoffs. Secure it by tightening the screws in a diagonal pattern until snug.
4.4. Радиатор жана желдеткич орнотуу
- Mount the two 120mm PWM fans to the radiator using the provided fan screws. Ensure the fan airflow direction is as desired (typically intake or exhaust depending on case mounting).
- Радиатор топтомун компьютериңиздин корпусуна орнотуңуз. Орнотуунун кеңири таралган жерлерине корпустун үстүнкү же алдыңкы бөлүгү кирет. Аны тиешелүү бурамалар менен бекитиңиз.
- Насостун 3-пиндүү кубат кабелин энелик платадагы CPU_FAN же AIO_PUMP колонкасына туташтырыңыз.
- Connect the 4-pin PWM fan cables to the CPU_FAN or SYS_FAN headers on your motherboard. If using a fan splitter (not included), connect both fans to the splitter and then to a single motherboard header.
- Ensure all cables are neatly routed and secured to prevent interference with other components or airflow.

Figure 6: The 240mm radiator with its two 120mm PWM fans installed.

Figure 7: The FROSTFLOW X 240 cooler fully installed within a PC case, showing the pump and radiator placement.
5. Иштөө нускамалары
Once installed, the FROSTFLOW X 240 operates automatically. The PWM fans adjust their speed based on CPU temperature, ensuring efficient cooling when needed and quiet operation during lighter loads.
- Баштапкы жүктөө: Upon first power-on, the pump and fans will start. It is normal to hear some gurgling sounds initially as air bubbles are purged from the loop. This should subside within a few minutes of operation.
- Температура мониторинги: Use motherboard monitoring software (e.g., ASUS AI Suite, MSI Dragon Center, Gigabyte SIV) to monitor CPU temperatures and fan/pump speeds. Ensure temperatures remain within safe operating limits, especially under load.
- LED башкаруу: The white LED on the pump head is static and does not require software control.

Figure 8: The pump head illuminated with its white LED, installed on the CPU.
6. Техникалык тейлөө
Regular maintenance helps ensure the longevity and performance of your AIO cooler.
- Чаңды тазалоо: Periodically (every 3-6 months, or more often in dusty environments) use compressed air to clean dust from the radiator fins and fan blades. Ensure fans are not spinning during cleaning to prevent damage.
- Түтүктөрдү текшерүү: Visually inspect the tubing for any kinks, tears, or signs of leakage. While AIOs are sealed, regular checks are good practice.
- Термикалык паста: Re-applying thermal paste is generally not required unless the cooler is removed from the CPU. If re-installation occurs, clean off old paste and apply new paste.
7. Кыйынчылыктарды
If you encounter issues with your FROSTFLOW X 240, refer to the common problems and solutions below:
| Көйгөй | Мүмкүн себеп | Чечим |
|---|---|---|
| Жогорку CPU Температуралары | Термикалык пастанын туура эмес колдонулушу, насостун бош орнотулушу, аба агымынын жетишсиздиги, насостун иштебей калышы. | Re-apply thermal paste, re-seat pump, check fan orientation/speed, ensure pump is powered. |
| Fans Not Spinning / Noisy Fans | Incorrect fan connection, dust buildup, fan failure. | Check fan headers, clean fans, replace faulty fan. |
| Pump LED Not Lighting Up | Power cable not connected, faulty LED. | Ensure pump power cable is securely connected to motherboard header. |
| Gurgling Noise Persists | Air trapped in the loop. | Gently tilt the PC case in different directions to help dislodge air bubbles. Ensure radiator is mounted higher than the pump. |
8. Техникалык шарттар
| Өзгөчөлүк | Деталь |
|---|---|
| Продукциянын өлчөмдөрү | 4.72 x 0.98 x 4.72 дюйм; 4.06 фунт |
| Радиатор өлчөмдөрү | 276 x 120 x 27 мм |
| Fan Size | 120мм (x2) |
| Fan Speed | 500-1800 RPM (PWM) |
| Ызы-чуу деңгээли | 30 дБ (Макс) |
| Муздатуу ыкмасы | Суу |
| Шайкеш түзмөктөр | Иш столунун процессорлору |
| CPU розеткасынын шайкештиги | Intel LGA1700/1200/115X, AMD AM5/AM4 |
| Кубат туташтыргычынын түрү | 2-пин (насос), 4-пин PWM (күйөрмандары) |
| Тtage | 12 вольт |
| Ватtage | 4.8 ватт |
9. Кепилдик жана колдоо
ID-COOLING products are manufactured to high quality standards. For warranty information, technical support, or service inquiries, please refer to the warranty card included in your product packaging or visit the official ID-COOLING webсайт. Кепилдик дооматтар үчүн сатып алганыңыздын далилин сактаңыз.
For further assistance, you may contact ID-COOLING customer support directly through their official channels.


