1. Киришүү
This user manual provides detailed instructions for the installation, operation, and maintenance of your Xprinter XP-D200N Thermal Receipt Printer. The XP-D200N is a high-speed thermal printer designed for reliable and efficient receipt printing in various business environments. Please read this manual thoroughly before using the printer to ensure proper functionality and to prevent damage.
2. Коопсуздук маалыматы
To ensure safe operation and prevent damage to the printer or injury to yourself, please observe the following safety precautions:
- Always use the provided power adapter. Using an incorrect adapter may damage the printer and void the warranty.
- Принтерди сууга, нымдуулукка же экстремалдык температурага дуушар кылбаңыз.
- Принтерди күн тийген жерге же жылуулук булактарынын жанына коюудан алыс болуңуз.
- Do not attempt to disassemble or repair the printer yourself. Refer all servicing to qualified personnel.
- Принтер туруктуу, түз бетке коюлганын текшериңиз.
- Keep the printer away from dust and debris to maintain optimal performance.
3. Пакеттин мазмуну
Сураныч, таңгагыңыздын ичиндегисин текшериңиз. Эгерде кандайдыр бир буюмдар жок болсо же бузулуп калса, дароо сатуучуга кайрылыңыз.
- Xprinter XP-D200N Thermal Receipt Printer
- Кубаттуу адаптер
- Электр кабели
- USB кабели
- Термалдык кагаз түрмөк (стартер)
- Колдонуучунун Колдонмосу (бул документ)
4. Продукт бүтүп калдыview
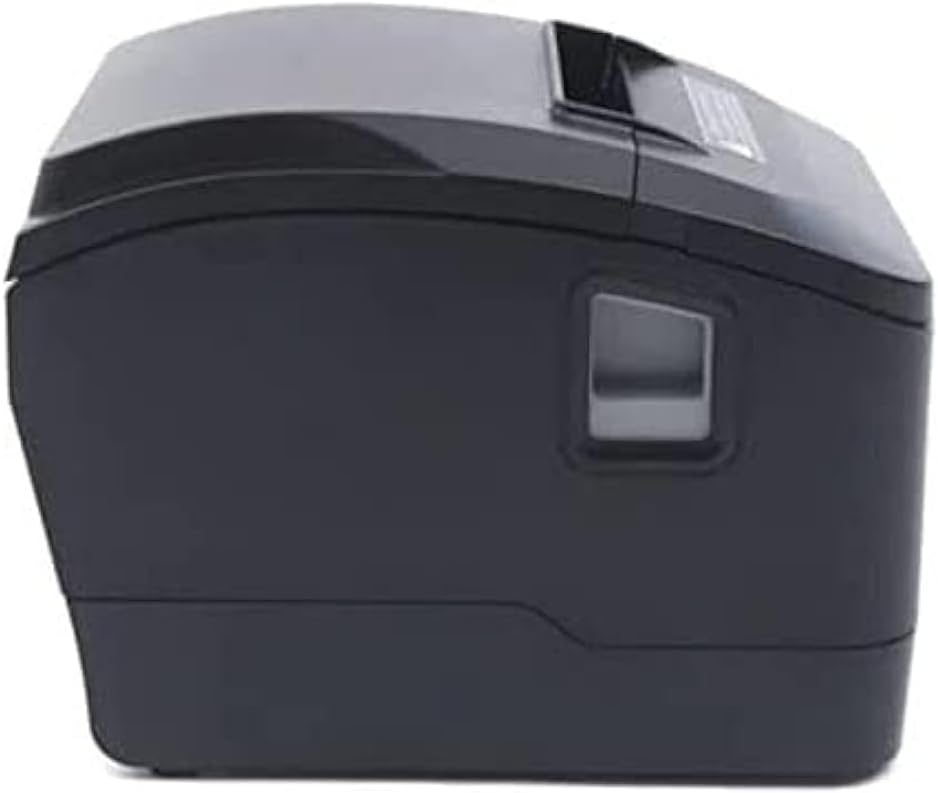
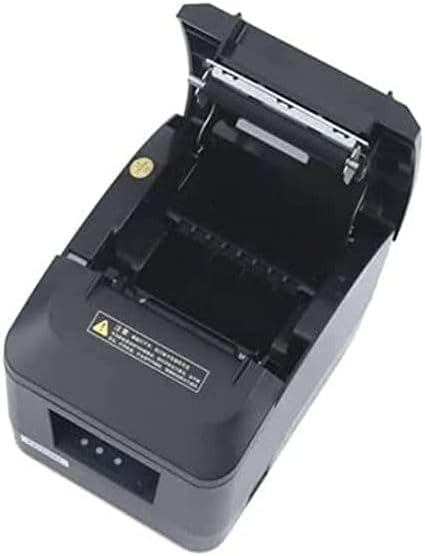
The Xprinter XP-D200N is a compact and efficient thermal receipt printer. Below are images illustrating its key components and design.
4.1-сүрөт: Алдыңкы жагы view of the Xprinter XP-D200N Thermal Receipt Printer. This image shows the sleek, black casing and the paper output slot.
4.2-сүрөт: Side view of the Xprinter XP-D200N Thermal Receipt Printer. This perspective highlights the compact design and the power switch on the right side.

4.3-сүрөт: Жогорку view of the Xprinter XP-D200N Thermal Receipt Printer with the cover open, revealing the thermal paper roll compartment and the print head mechanism. This view is essential for paper loading and maintenance.
5. Орнотуу
5.1 Электр кубатын туташтыруу
- Принтердин кубат которгучу ӨЧҮРҮҮ абалында экенин текшериңиз.
- Connect the power adapter to the power input port on the back of the printer.
- Plug the power cord into the power adapter, then into a standard electrical outlet.
5.2 Компьютерге туташуу
The XP-D200N supports both USB and LAN connectivity.
USB туташуу:
- Connect one end of the USB cable to the USB port on the printer.
- USB кабелинин экинчи учун компьютериңиздеги жеткиликтүү USB портуна туташтырыңыз.
LAN (Ethernet) Connection:
- Connect an Ethernet cable to the LAN port on the printer.
- Ethernet кабелинин экинчи учун тармак роутериңизге же коммутаторуңузга туташтырыңыз.
- Refer to the printer's advanced settings or driver utility for network configuration (e.g., IP address settings).
5.3 Термикалык кагазды жүктөө
- Open the printer cover by pressing the release button or lifting the cover latch. (Refer to Figure 4.3).
- Insert the thermal paper roll into the compartment with the paper feeding from the bottom and the leading edge extending towards the front of the printer. Ensure the paper is aligned correctly.
- Кескичтин жанынан бир аз кагазды тартыңыз.
- Принтердин капкагын ордуна чыкылдаган үн чыкканча бекем жабыңыз.
5.4 Драйверди орнотуу
After connecting the printer, you will need to install the appropriate drivers on your computer. Drivers are typically provided on a CD included with the printer or can be downloaded from the official Xprinter webсайт. Орнотуу учурунда экрандагы көрсөтмөлөрдү аткарыңыз.
6. Иштөө нускамалары
6.1 Күйгүзүү/өчүрүү
- To power on: Ensure the power cord is connected, then flip the power switch to the ON position. The indicator light will illuminate.
- To power off: Flip the power switch to the OFF position.
6.2 Негизги басып чыгаруу
Once the printer is connected and drivers are installed, you can print receipts from your point-of-sale (POS) software or other applications. Select the Xprinter XP-D200N as your default printer in your application's print settings.
6.3 Статус индикаторлору
The printer features indicator lights (usually on the front panel) that provide information about its status:
- Күч көрсөткүчү: Solid light indicates the printer is powered on.
- Ката көрсөткүчү: Flashing or solid light indicates an error (e.g., paper out, cover open, print head overheat). Refer to the troubleshooting section.
- Paper Out Indicator: Illuminates when the paper roll is empty or nearly empty.
7. Техникалык тейлөө
7.1 Басып чыгаруу башын тазалоо
Басып чыгаруу башын үзгүлтүксүз тазалоо оптималдуу басып чыгаруу сапатын камсыз кылат жана принтердин иштөө мөөнөтүн узартат.
- Принтерди өчүрүп, кубат сымын сууруп алыңыз.
- Принтердин капкагын ачыңыз.
- Кебезди жеңил колдонуңуз dampened with isopropyl alcohol (70% or higher) to gently wipe the thermal print head surface. Avoid touching the print head with bare hands.
- Allow the print head to dry completely before closing the cover and reconnecting power (approximately 2-3 minutes).
7.2 Жалпы тазалоо
Принтердин сыртын жумшак менен сүртүңүз, damp кездеме. Абразивдүү тазалагычтарды же эриткичтерди колдонбоңуз.
7.3 Кагаз түрмөгүн алмаштыруу
When the paper out indicator illuminates or print quality degrades, it's time to replace the paper roll. Follow the steps in Section 5.3 "Loading Thermal Paper".
8. Кыйынчылыктарды
| Көйгөй | Мүмкүн себеп | Чечим |
|---|---|---|
| Принтер күйбөй жатат. | No power, faulty power adapter/cord. | Check power connections. Ensure power switch is ON. Test outlet. |
| Басып чыгаруу жок. | Paper out, cover open, incorrect driver, incorrect printer selected, cable disconnected. | Load paper, close cover, check USB/LAN connection, verify driver installation, select correct printer in software. |
| Poor print quality (faint, blank lines). | Dirty print head, low quality thermal paper, print head damage. | Clean print head (Section 7.1). Replace thermal paper. If problem persists, contact support. |
| Кагаз тыгылышы. | Improper paper loading, foreign object. | Turn off printer, open cover, carefully remove jammed paper. Reload paper correctly. |
| Error indicator light is on/flashing. | General error, paper out, cover open. | Check for paper out, ensure cover is closed. Power cycle the printer. If error persists, consult manufacturer's support. |
9. Техникалык шарттар
| Бренд: | Xprinter |
| Модел: | XP-D200N |
| Принтердин түрү: | Термикалык дүмүрчөктүн принтери |
| Басып чыгаруу ыкмасы: | Түз жылуулук |
| Басып чыгаруу ылдамдыгы: | 220 mm/sec (as per product description) |
| Максималдуу медиа өлчөмү: | 8 cm (80mm) |
| Байланыш: | USB, LAN (Ethernet) |
| Кубат киргизүү: | 24V – 2.5A |
| Принтердин чыгышы: | Монохромдуу |
| Өзгөчөлүктөр: | Sleek, Compact, Lightweight Design, High Print Quality, Durability, Low Noise, Automatic Paper Cutting |
| Продукциянын өлчөмдөрү: | 18.4 x 14 x 13.5 см |
| Элемент Салмагы: | 1.63 кг |
10. Кепилдик жана колдоо
The Xprinter XP-D200N Thermal Receipt Printer comes with a standard manufacturer's warranty. For specific warranty terms and conditions, please refer to the warranty card included with your product or visit the official Xprinter website. For technical support, driver downloads, or service inquiries, please contact your local dealer or the Xprinter customer support team through their official channels.
Акыркы маалымат жана колдоо булактары үчүн төмөнкү дарекке кириңиз: www.xprinter.net


