1. Киришүү
Thank you for choosing the Fakir WD 7 Pure Clean Wet & Dry Cordless Vertical Vacuum Cleaner. This manual provides important information on the safe operation, maintenance, and troubleshooting of your appliance. Please read this manual thoroughly before using the product and keep it for future reference.
2. Коопсуздук нускамалары
Өрт, электр шок же жаракат алуу коркунучун азайтуу үчүн электр шаймандарын колдонууда ар дайым негизги коопсуздук чараларын сактаңыз.
- Шайманды колдонуудан мурун бардык нускамаларды окуп чыгыңыз.
- Түзмөктү, кубаттоочу негизди же адаптерди сууга же башка суюктуктарга салбаңыз.
- This appliance is for household use only. Do not use outdoors or on wet surfaces other than those intended for wet cleaning.
- Балдарга чаң соргучту иштетүүгө уруксат бербеңиз. Балдардын жанында колдонулганда тыкыр көзөмөл керек.
- Өндүрүүчү сунуштаган тиркемелерди жана аксессуарларды гана колдонуңуз.
- Бензин сыяктуу күйүүчү же күйүүчү суюктуктарды албаңыз же алар болушу мүмкүн болгон жерлерде колдонбоңуз.
- Тамеки, ширеңке, ысык күл сыяктуу күйүп жаткан же чылым чеккен нерселерди албаңыз.
- Тейлөө же тазалоо иштерин жүргүзүүдөн мурун шайманды өчүрүңүз.
- If the power cord or adapter is damaged, it must be replaced by the manufacturer, its service agent, or similarly qualified persons to avoid a hazard.
3. Пакеттин мазмуну
Пакетиңиздин мазмунун текшериңиз. Эгерде кандайдыр бир буюмдар жок же бузулуп калса, сатуучуга кайрылыңыз.
- Fakir WD 7 Pure Clean Main Unit
- Ассамблея туткасы
- Заряддоо базасы
- Кубаттуу адаптер
- Тазалоочу щетка
- User Manual
4. Продукт бүтүп калдыview
Familiarize yourself with the components of your Fakir WD 7 Pure Clean vacuum cleaner.
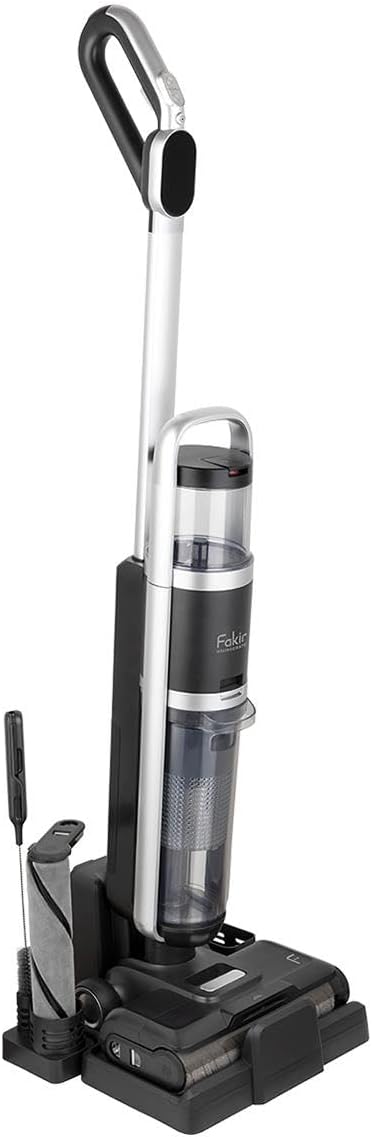
4.1-сүрөт: Жалпысынан view of the Fakir WD 7 Pure Clean vacuum cleaner, showing the main unit, handle, and the charging/storage base with the cleaning brush accessory.
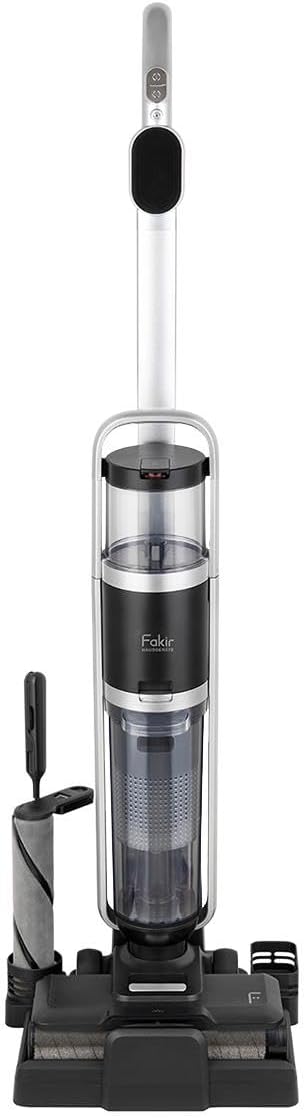
4.2-сүрөт: Фронт view of the vacuum cleaner, highlighting the clean water tank (top), dirty water tank (bottom), and the main brush head.

4.3-сүрөт: Бурчтуу view demonstrating the vacuum cleaner's maneuverability and upright design during use.

4.4-сүрөт: Side profile of the vacuum cleaner, showing the slim design and the placement of the water tanks.

4.5-сүрөт: Жакынкы план view, highlighting the digital display on the handle, which shows battery status and operating modes.
5. Орнотуу
5.1 Ассамблея
- Бардык компоненттерди кутудан кылдаттык менен чыгарыңыз.
- Тутка топтомун негизги блокко бекем орнотулганга чейин киргизиңиз.
- Заряддоо негизин электр розеткасынын жанындагы тегиз, туруктуу бетке коюңуз.
- Кубат адаптерин кубаттоочу базага туташтырып, аны розеткага сайыңыз.
5.2 Батареяны заряддоо
Before first use, fully charge the vacuum cleaner for approximately 4-5 hours. The battery indicator on the display will show charging progress.
- Place the vacuum cleaner onto the charging base, ensuring the charging contacts align.
- The display will illuminate, indicating that charging has begun.
- Once fully charged, the indicator will change, and the unit is ready for use.
6. Иштөө нускамалары
6.1 Filling the Clean Water Tank (Wet Cleaning)
- Негизги блоктон таза суу сактагычты алып салыңыз.
- Open the tank cap and fill with clean tap water. For enhanced cleaning, a small amount of non-foaming, compatible cleaning solution can be added (refer to solution instructions). Do not overfill.
- Close the cap securely and reinsert the tank into the vacuum cleaner until it clicks.
6.2 Starting and Selecting Modes
- Press the Power button on the handle to turn on the vacuum cleaner.
- Use the Mode button to switch between cleaning modes (e.g., Wet, Dry, Auto). The selected mode will be displayed on the screen.
- For wet cleaning, ensure the clean water tank is filled. The vacuum will automatically dispense water and suction dirty water.
- For dry cleaning, ensure the dirty water tank is empty and the filter is clean.
6.3 Тазалоо
Move the vacuum cleaner slowly and steadily over the surface to be cleaned. For wet cleaning, overlap passes slightly to ensure thorough coverage. The automatic suction power feature adjusts to different surfaces.
7. Техникалык тейлөө
Үзгүлтүксүз тейлөө оптималдуу иштешин камсыз кылат жана шайманыңыздын иштөө мөөнөтүн узартат.
7.1 Кир суу куюлган бактын ичин бошотуу жана тазалоо
- After each wet cleaning session, or when the dirty water tank is full, remove it from the unit.
- Резервуарды ачып, кир сууну төгүңүз.
- Rinse the tank thoroughly with clean water and allow it to air dry completely before reattaching.
7.2 HEPA чыпкасын тазалоо
- The HEPA filter is located within the dirty water tank assembly. Remove it.
- Tap the filter gently to remove loose debris. If necessary, rinse under cool running water.
- Маанилүү: Allow the HEPA filter to air dry completely for at least 24 hours before reinserting. Do not use the vacuum with a wet filter.
7.3 Щетка түрмөгүн тазалоо
- Чаң соргучту өчүрүп, розеткадан ажыратыңыз.
- Access the brush roll compartment (refer to diagram in Product Overview керек болсо).
- Remove any hair, threads, or debris wrapped around the brush roll using the provided cleaning brush or scissors.
- Щетканын рулонун жана анын корпусун жарнама менен сүртүңүзamp кездеме.
- Ensure the brush roll is dry before reassembling.
8. Кыйынчылыктарды
Чаң соргучуңузда көйгөйлөргө туш болсоңуз, жалпы көйгөйлөр жана чечүү жолдору үчүн төмөнкү таблицага кайрылыңыз.
| Көйгөй | Мүмкүн себеп | Чечим |
|---|---|---|
| Вакуум күйбөйт. | Батарея түгөнүп калды. | Батарейканы толугу менен кубаттаңыз. |
| Соруу күчү төмөн. | Кир суу сактагыч толтура. Фильтр бүтүп калган. Щетка түрмөгүнө тоскоол болгон. | Кир суу резервуарын бошотуп, тазалаңыз. HEPA чыпкасын тазалаңыз же алмаштырыңыз. Remove obstructions from the brush roll. |
| Water not dispensing (wet mode). | Таза суу сактагыч бош. Nozzle/water path is clogged. | Таза суу резервуарын кайра толтуруңуз. Check for and clear any blockages in the water dispensing path. |
| Аккан суу. | Танктар туура эмес орнотулган. Tank caps not closed securely. | Ensure both clean and dirty water tanks are correctly inserted and locked into place. Check that all tank caps are tightly closed. |
9. Техникалык шарттар
| Өзгөчөлүк | Деталь |
|---|---|
| Бренд | Факир |
| Күч | 300 Вт |
| Өзгөчө өзгөчөлүк | Wet/Dry, Automatic Suction Power |
| Чыпка түрү | HEPA чыпкасы |
| Surface Recommendation | Hard Floor |
| Power Source | Батарея менен иштейт |
10. Кепилдик жана колдоо
Fakir products are manufactured to the highest quality standards. For information regarding warranty coverage, technical support, or service, please refer to the warranty card included with your purchase or visit the official Fakir webсайт. Кепилдик дооматтар үчүн сатып алганыңыздын далилин сактаңыз.
For further assistance, please contact Fakir customer service.


