Introduction
This manual provides comprehensive instructions for the installation, operation, and maintenance of your Beetronics 19VG7M 19-Inch Full HD IPS Monitor. Designed for professional and continuous use, this industrial-grade display offers exceptional visual clarity, versatile connectivity, and robust construction. Please read this manual thoroughly before using the monitor to ensure proper setup and optimal performance.

Сүрөт 1: Алдыңкы view of the Beetronics 19VG7M Monitor.
Пакеттин мазмуну
Орнотууну улантуудан мурун, бардык компоненттердин пакетте бар экендигин текшериңиз:
- Beetronics 19VG7M Monitor
- Кубат менен камсыздоо жана шнур
- Алыстан башкаруу
- Flush Mounting Brackets (if applicable)
- Desktop & Surface Mounting Stand
- Колдонуучунун Колдонмосу (бул документ)
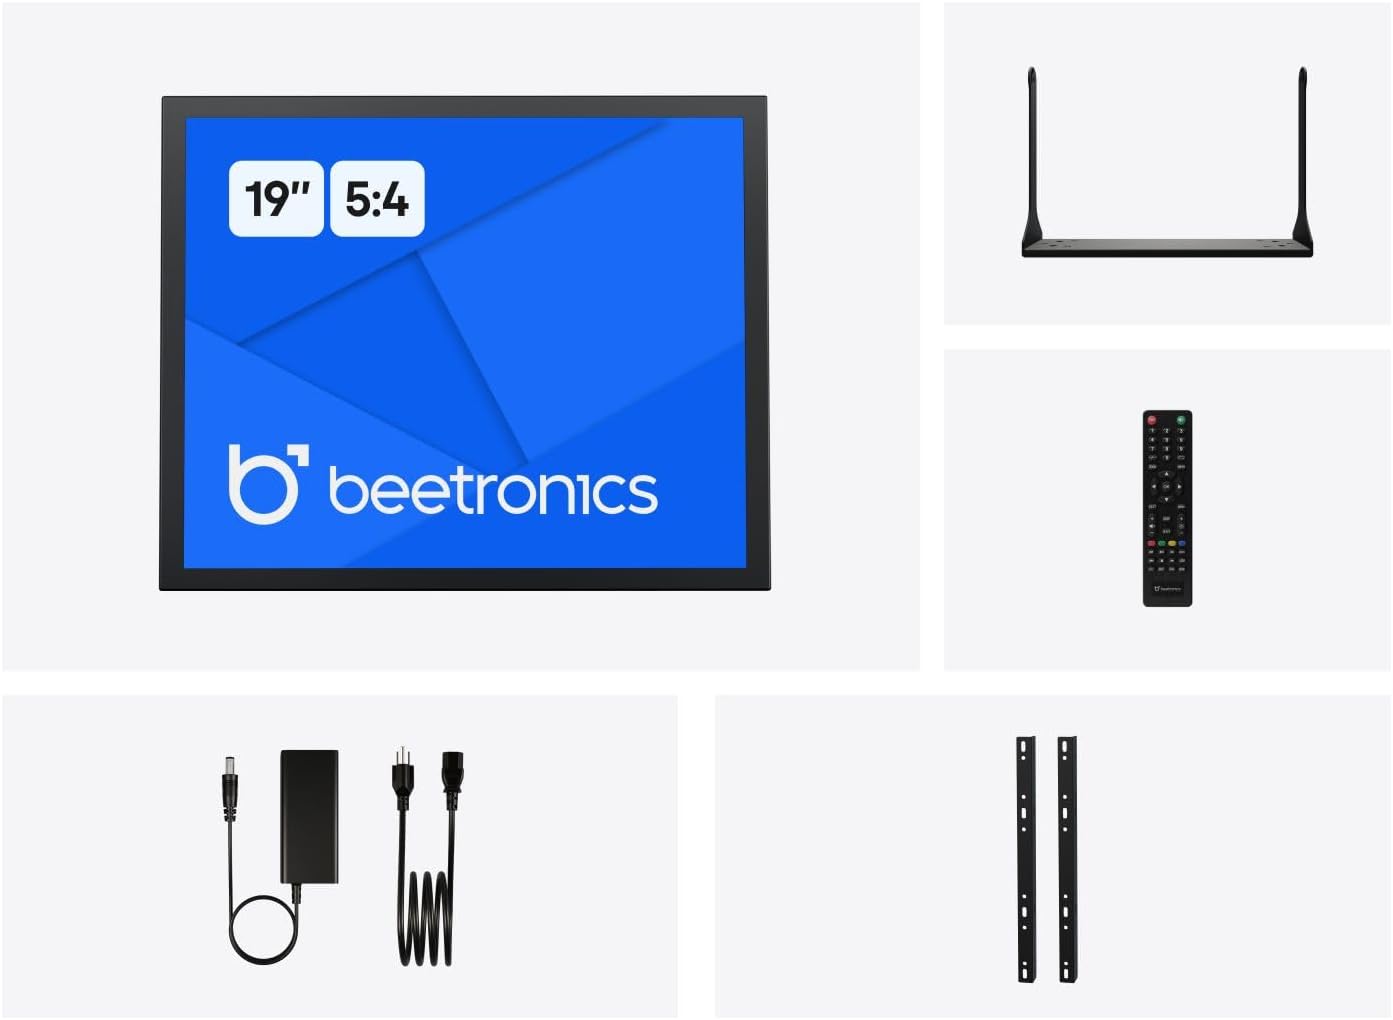
Figure 2: Included accessories with the Beetronics 19VG7M Monitor.
Жайгашуу
1. Монтаждоо параметрлери
The 19VG7M monitor offers flexible mounting solutions, including a collapsible desktop stand and VESA 100mm compatibility for wall or arm mounting.
Desktop Stand Installation:
- Чийилбеш үчүн мониторду кылдаттык менен жумшак, таза бетке ылдый каратып коюңуз.
- Attach the desktop stand to the designated mounting points on the rear of the monitor using the provided screws. Ensure it is securely fastened.
- Мониторду туруктуу, тегиз бетке коюңуз.
VESA Wall/Arm Mounting:
- If the desktop stand is attached, remove it.
- Align the VESA 100mm mounting holes on the back of the monitor with your VESA-compatible wall mount or arm.
- Secure the monitor to the mount using appropriate VESA screws (M4 x 10mm recommended, not always included with monitor).

Figure 3: Monitor dimensions with desktop stand.
2. Туташтыруучу кабельдер
The 19VG7M monitor features a variety of input ports located on the rear, facing downwards for neat cable management. Ensure the monitor and all connected devices are powered off before making connections.

Figure 4: Downward-facing input ports.
- HDMI: Connect an HDMI cable from your source device (e.g., computer, media player) to the HDMI port on the monitor.
- VGA: Connect a VGA cable from your source device to the VGA port on the monitor.
- BNC: For professional video applications, connect a BNC cable to the BNC input.
- RCA (AV): Use RCA cables for composite video and stereo audio input. Connect the yellow plug for video, and red/white for audio.
- USB: (If applicable for touch functionality or specific peripherals, consult product specifications for exact USB function).
- Күч: Connect the provided power supply to the DC input port on the monitor, then plug the power cord into a wall outlet. The monitor supports a wide input voltage range of 9-36 Volts.

Сүрөт 5: Арткы панелдин үстүндөview with control buttons and ports.
Иштөө нускамалары
1. Күйгүзүү / Өчүрүү
басыңыз КҮЙГҮЗҮҮ/ӨЧҮРҮҮ button located on the rear panel or on the remote control to power the monitor on or off. The power indicator light will illuminate when the monitor is on.
2. Киргизүүнү тандоо
To switch between different video inputs (HDMI, VGA, BNC, RCA):
- басыңыз АВТО button on the rear panel or the INPUT алыстан башкаруудагы баскыч.
- колдонуу + or - buttons to navigate through the available inputs.
- басыңыз МЕНЮ button or wait a few seconds to confirm your selection.
3. Экрандагы дисплей (OSD) менюсу
The OSD menu allows you to adjust various display settings. To access and navigate the OSD menu:
- басыңыз МЕНЮ button on the rear panel or remote control to open the OSD menu.
- колдонуу + or - баскычтар меню параметрлери боюнча чабыттоо.
- басыңыз МЕНЮ button again to enter a sub-menu or confirm a setting.
- To exit the OSD menu, navigate to the "Exit" option or press the МЕНЮ button repeatedly until the menu disappears.
Жалпы OSD жөндөөлөрү:
- Сүрөт: Adjust brightness, contrast, color temperature, and aspect ratio (e.g., 5:4).
- Аудио: Control volume and mute settings.
- OSD Орнотуулары: OSD тилин, тунуктугун жана тайм-аутту тууралаңыз.
- Кайтаруу: Демейки жөндөөлөрдү калыбына келтирүү.
The monitor also supports a fully dimmable backlight, which can be adjusted via the OSD menu or dedicated dimmer controls if available.
Техникалык тейлөө
Proper maintenance ensures the longevity and optimal performance of your Beetronics monitor.
Мониторду тазалоо:
- Тазалоодон мурун ар дайым мониторду өчүрүп, розеткадан сууруп коюңуз.
- Экран: Бир аз жумшак, түксүз кездемени колдонуңуз dampсуу же абразивдүү эмес, мониторго арналган тазалоочу эритме менен эритип алыңыз. Суюктукту түз эле экранга чачпаңыз.
- Casing: Wipe the metal housing with a soft, dry cloth. Avoid using harsh chemicals, abrasives, or solvents, as they may damage the finish.
Жалпы кам көрүү:
- Монитор же анын кабелдерине оор нерселерди коюудан алыс болуңуз.
- Монитордогу желдетүү тешиктерин жаппаңыз.
- Keep the monitor away from direct sunlight, excessive heat, and high humidity.
- If the monitor will not be used for an extended period, it is recommended to unplug it from the power source.
Проблемаларды чечүү
Мониторуңузда көйгөйлөргө туш болсоңуз, төмөнкү жалпы көйгөйлөрдү жана чечимдерди караңыз:
| Көйгөй | Мүмкүн себеп | Чечим |
|---|---|---|
| Экранда сүрөт жок |
|
|
| Image too dark/bright or colors incorrect |
|
|
| Аудио жок |
|
|
| Monitor flickering or unstable image |
|
|
If the problem persists after trying these solutions, please contact Beetronics customer support.
Техникалык шарттар
Key technical specifications for the Beetronics 19VG7M 19-Inch Full HD IPS Monitor:
| Модель номери | 19VG7M |
| Screen Size | 19 дюйм |
| Аспект катышы | 5:4 |
| Резолюция | 1280 x 1024 (Full HD) |
| Панел түрү | IPS |
| Viewбурч | 178° (горизонталдуу/вертикалдуу) |
| Жарыктык | 470 Кандела |
| Киргизүү көлөмүtage | 9-36 Вольт (ТК) |
| Киргизүү порттору | HDMI, VGA, BNC, RCA (AV), USB |
| Продукциянын өлчөмдөрү (L x W x Y) | 1.6 x 16.1 x 15.2 дюйм (тактагычсыз) |
| Элемент Салмагы | 3.3 фунт |
| Өндүрүүчү | Beetronics |
| Screen Surface | Мт |

Figure 6: Internal components and key features.
Кепилдик жана колдоо
Кепилдик маалымат
The Beetronics 19VG7M monitor comes with a solid 2 жылдык кепилдик, ensuring reliability and peace of mind. This warranty covers defects in materials and workmanship under normal use. Please retain your proof of purchase for warranty claims.
For detailed warranty terms and conditions, please refer to the official Beetronics webсайтка же кардарларды колдоо менен байланышыңыз.
Кардарларды колдоо
If you require technical assistance, have questions about your product, or need to initiate a warranty claim, please contact Beetronics customer support:
- Webсайт: Visit the official Beetronics webКөп берилүүчү суроолор, колдоо булактары жана байланыш формалары үчүн сайт. www.beetronics.com
- Электрондук почта: Refer to the Beetronics webэң акыркы колдоо электрондук почта дареги үчүн сайт.
- Телефон: Refer to the Beetronics webаймактык колдоо телефон номерлери үчүн сайт.
When contacting support, please have your monitor's model number (19VG7M) and purchase information readily available.


