Продукт бүттүview
The Artillery Sidewinder X3 Plus is a high-performance 3D printer designed for both hobbyists and professionals, offering a large build volume and advanced features for efficient and precise 3D printing.

1-сүрөт: Фронт view of the Artillery Sidewinder X3 Plus 3D Printer, showcasing its robust frame and integrated control panel.
Негизги өзгөчөлүктөрү
- Large Build Size: 300mm × 300mm × 400mm (11.8in × 11.8in × 15.7in) for greater creative freedom.
- Өтө тынч жогорку ылдамдыктагы басып чыгаруу: Achieves speeds up to 300 mm/s with 0.1 mm precision.
- Upgraded 300°C High-Temperature Nozzle: Supports various filaments including PLA, TPU, PETG, ABS, and Nylon, with automatic nozzle cleaning.
- 49-пункттуу автоматтык түрдө төшөктү тегиздөө: Ensures quick and accurate leveling of the build platform.
- Dual-Gear Direct Extruder: Provides powerful extrusion and smoother filament feeding for improved print quality.
- Резюме басып чыгаруу функциясы: Detects filament runout/breakage or power loss and resumes printing after recovery.
- Кош Z-октору жана кош моторлор: Ensures stability and higher printing accuracy through coordinated movement.

2-сүрөт: Illustration demonstrating the large print volume of the Sidewinder X3 Plus, capable of accommodating substantial models.
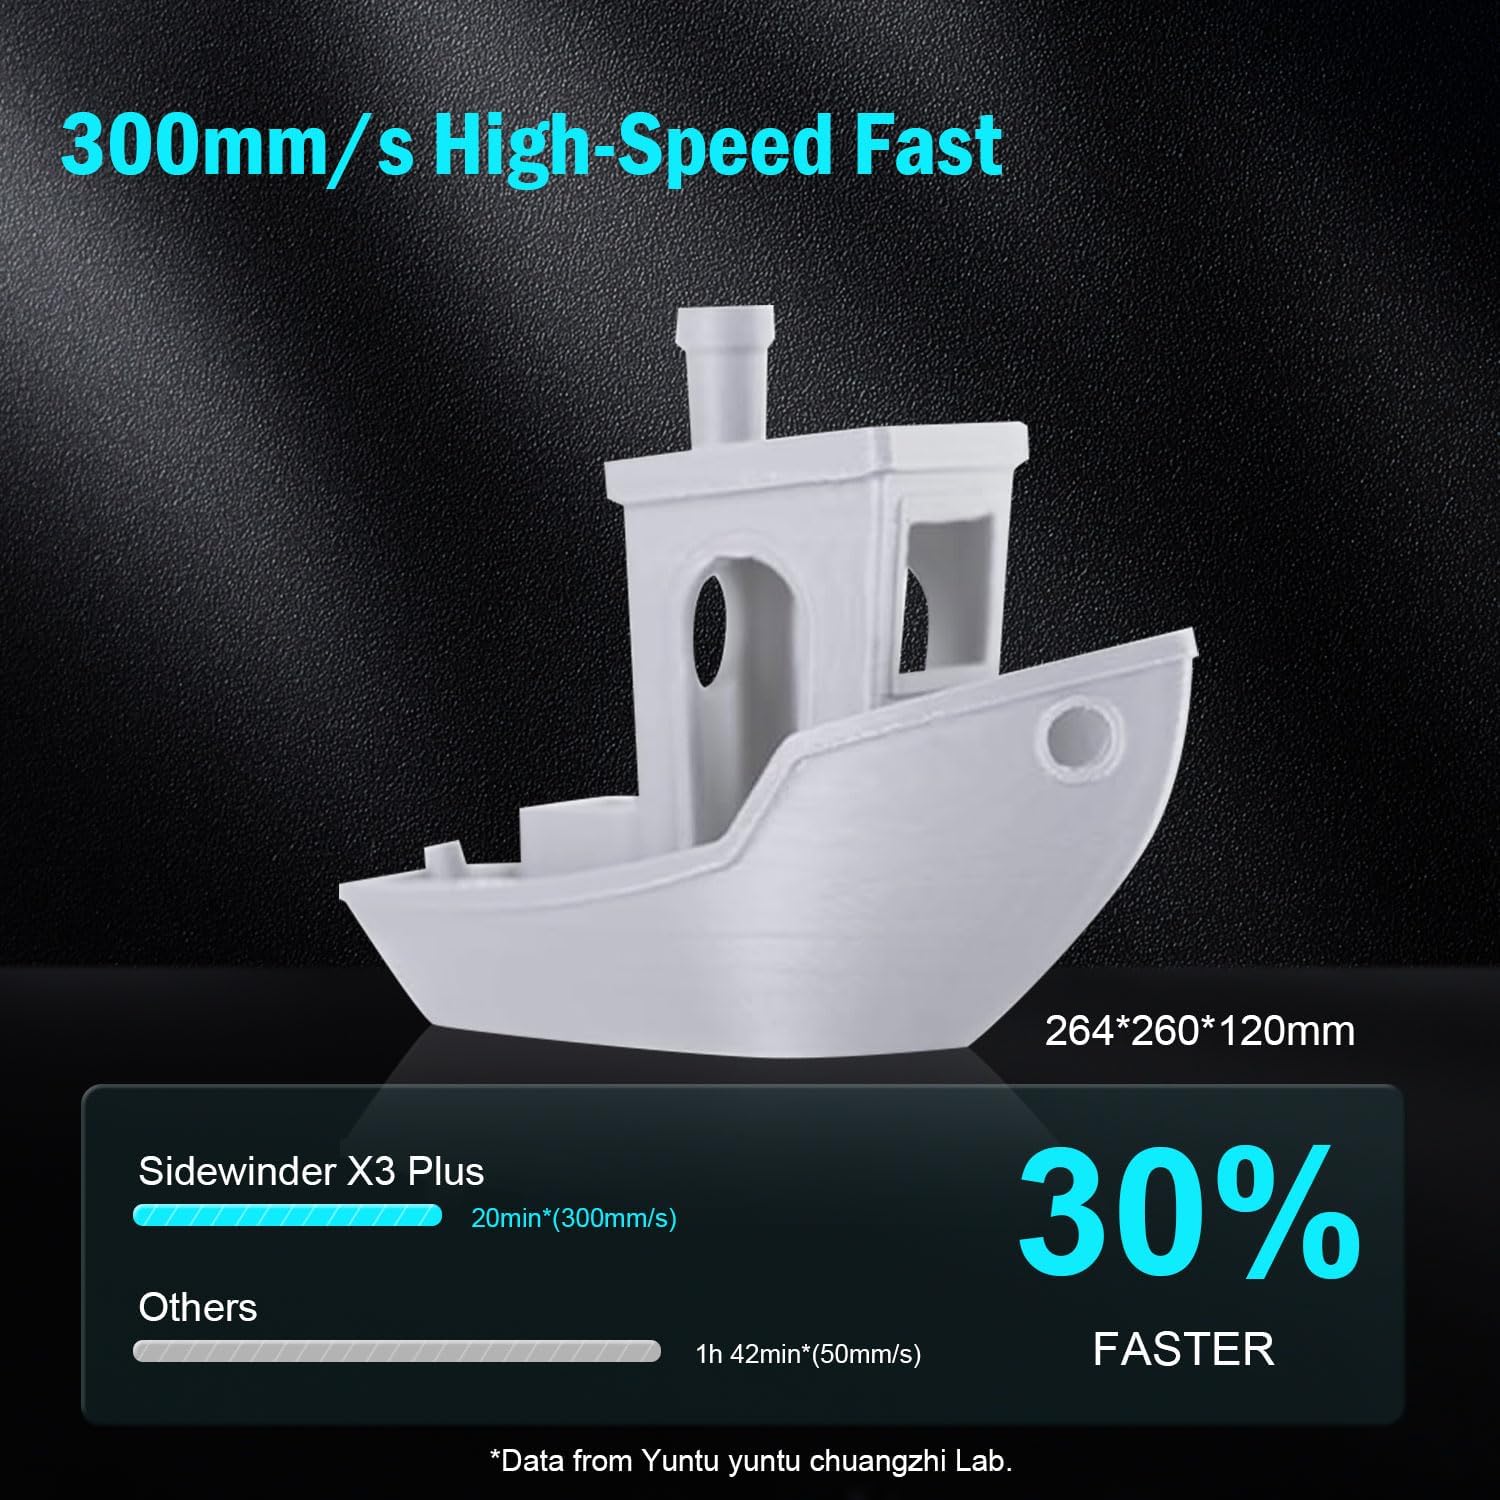
3-сүрөт: Visual representation of the Sidewinder X3 Plus's high-speed printing capability, showing a printed boat model.

4-сүрөт: Жакын план view of the all-metal hotend and automatic cleaning nozzle, highlighting its high-temperature capabilities.

5-сүрөт: Diagram illustrating the 49-point smart auto-leveling system on the print bed, simplifying the leveling process.
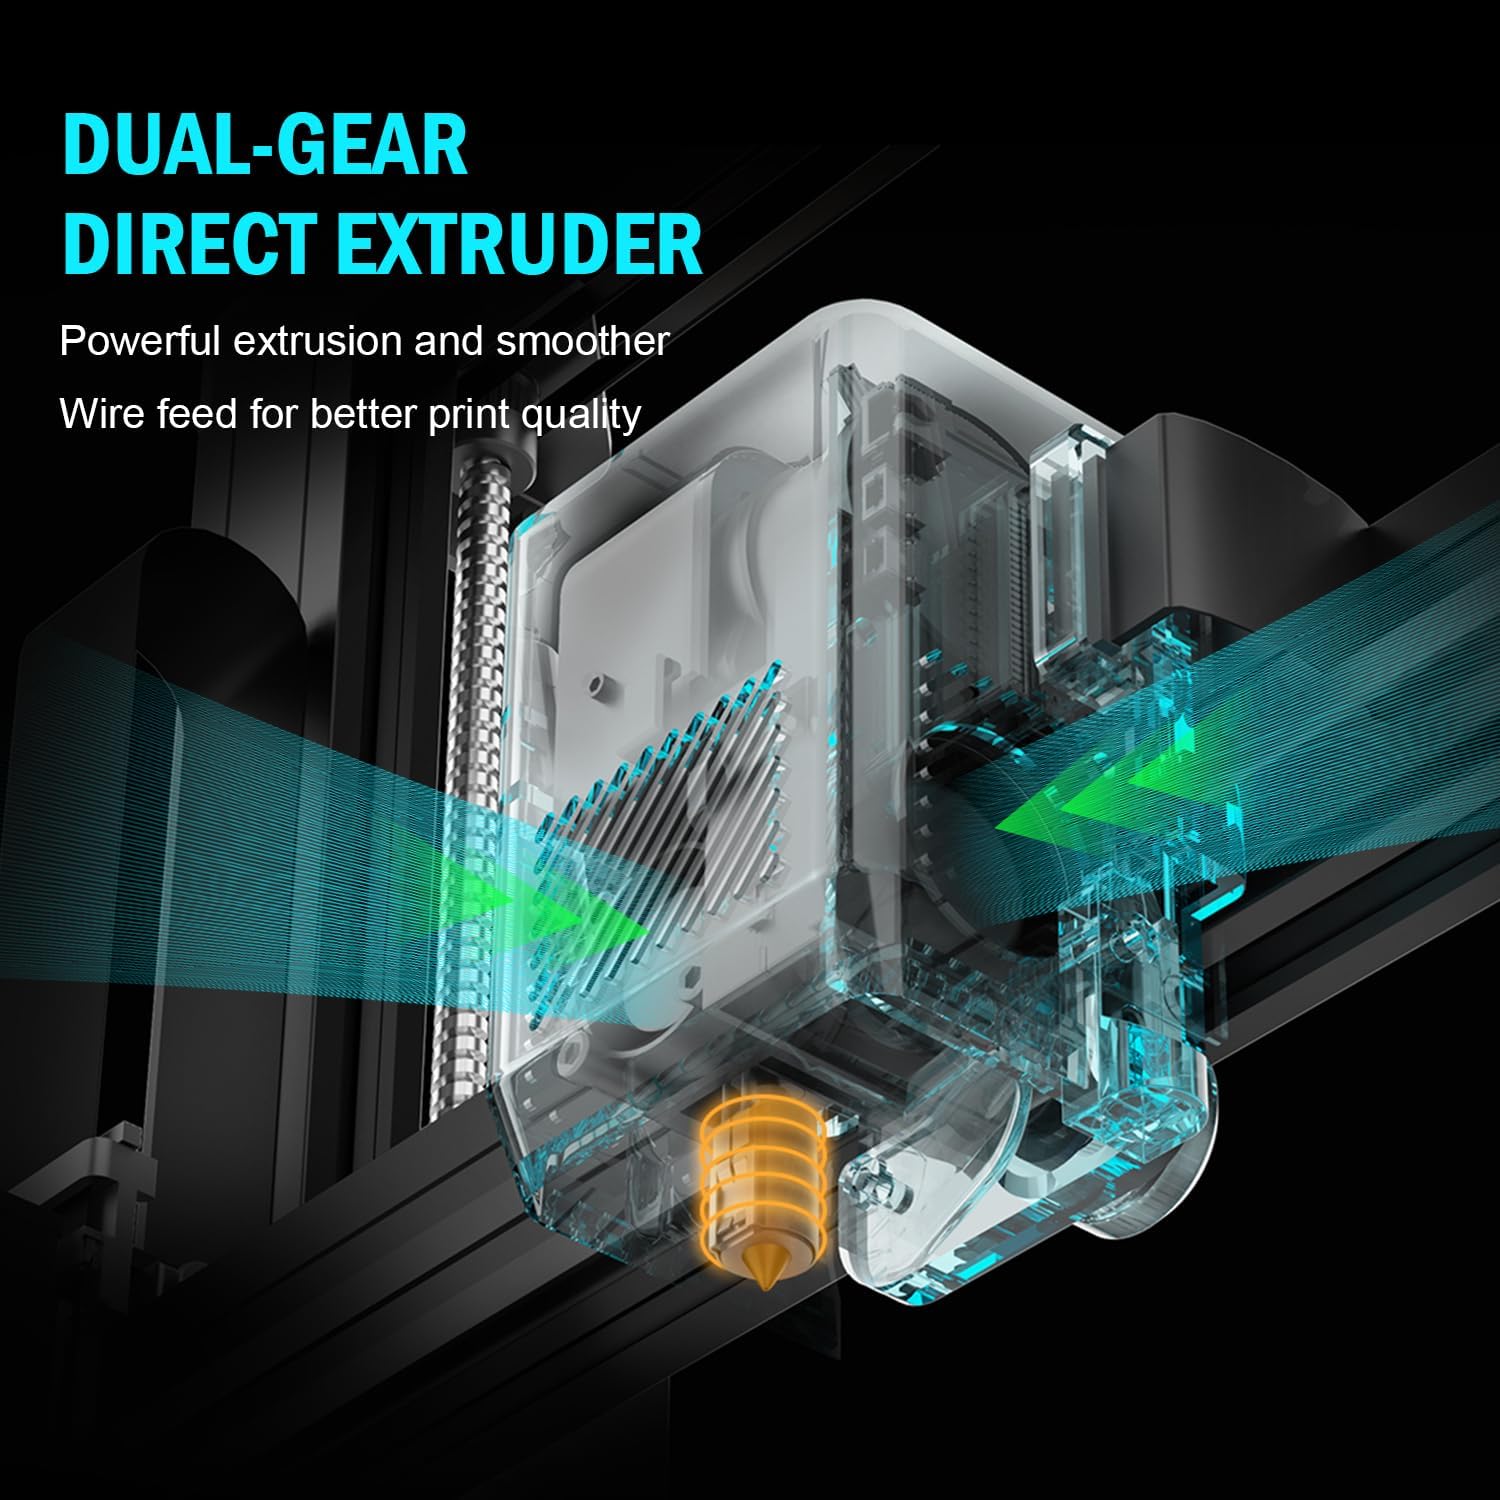
6-сүрөт: Ички view of the dual-gear direct extruder, showing the gears that ensure consistent filament flow.

7-сүрөт: Depiction of the dual Z-axes and dual motors system, highlighting their role in enhancing print stability and precision.
Орнотуу колдонмосу
The Artillery Sidewinder X3 Plus is designed for quick assembly. Follow these general steps for initial setup:
- Пакеттен чыгаруу: Бардык компоненттерди таңгактан кылдаттык менен алып салыңыз. Таңгактоо тизмесинде көрсөтүлгөн бардык бөлүктөрдүн бар экенин текшериңиз.
- Негизги Ассамблея: Place the printer base on a stable, level surface.
- Gantry Installation: Attach the gantry (Z-axis frame) to the base. Ensure all screws are securely fastened.
- Зымдарды туташтыруу: Connect all necessary cables, including power, motor, and sensor cables, according to the labels.
- Filament Holder: Mount the filament holder.
- Баштапкы күйгүзүү: Электр зымдарын туташтырыңыз жана принтерди күйгүзүңүз.
- Автоматтык тегиздөө: Perform the 49-point auto bed leveling procedure as prompted by the printer's interface. This is crucial for successful first prints.

8-сүрөт: Visual guide showing the four main steps for assembling the Artillery Sidewinder X3 Plus, indicating a straightforward setup process.
Иштөө нускамалары
Filament жүктөлүүдө
- Ensure the hotend is preheated to the appropriate temperature for your filament type (e.g., 200°C for PLA).
- Insert the filament into the extruder's input hole.
- Push the filament until it is gripped by the extruder gears and begins to feed through the hotend.
- Confirm filament is extruding smoothly from the nozzle.
Басып чыгарууну баштоо
- Prepare your 3D model using slicing software (e.g., Cura, PrusaSlicer) and save it as a G-code file to a USB drive or SD card.
- Insert the USB drive/SD card into the printer's designated slot.
- Navigate the printer's touchscreen interface to select the desired G-code file.
- Confirm print settings and initiate the print. The printer will automatically preheat and begin printing.

9-сүрөт: Image showing the 4.3-inch touchscreen interface of the Sidewinder X3 Plus, demonstrating user interaction for print control.
Removing a Print
- Allow the print bed to cool down completely after the print finishes.
- Gently flex the PEI magnetic print platform to detach the printed object. Avoid using excessive force or sharp tools to prevent damage to the print surface.
Техникалык тейлөө
Regular maintenance ensures optimal performance and longevity of your Artillery Sidewinder X3 Plus.
- Басма керебетти тазалоо: After each print, clean the print surface with isopropyl alcohol to remove any residue and ensure good adhesion for future prints.
- Соплолорду тазалоо: The printer features an automatic cleaning nozzle. However, inspect the nozzle periodically for clogs or wear. If necessary, perform a cold pull or replace the nozzle.
- Lubricate Z-axis Lead Screws: Apply a small amount of lithium grease or similar lubricant to the Z-axis lead screws every few weeks, depending on usage, to ensure smooth vertical movement.
- Курларды жана шкивтерди текшерүү: Periodically inspect the X and Y axis belts for proper tension and wear. Ensure pulleys are clean and move freely.
- Программалык камсыздоонун жаңыртуулары: Расмий артиллерияны текшериңиз webПринтериңизде эң акыркы функциялар жана каталарды оңдоо бар экенине ынануу үчүн жеткиликтүү болгон микропрограммалык камсыздоонун жаңыртуулары үчүн сайт.
Жалпы көйгөйлөрдү чечүү
| Көйгөй | Мүмкүн себеп | Чечим |
|---|---|---|
| Жипче экструзияланбайт | Бүтөлүп калган форсунка, чаташып калган жипче, туура эмес температура. | Clean the nozzle, check filament path, verify hotend temperature. |
| Төшөктүн начар жабышуусу | Unleveled bed, dirty print surface, incorrect bed temperature. | Perform auto-leveling, clean print bed with isopropyl alcohol, adjust bed temperature. |
| Катмардын жылышы | Loose belts, motor issues, print speed too high. | Check and tighten X/Y axis belts, inspect motor connections, reduce print speed. |
| Printer is excessively loud | Loose components, fan noise, worn bearings. | Inspect for loose screws, check fan operation, lubricate moving parts. |
| "Thermal runaway detected" error | Faulty thermistor, loose wiring to hotend/bed, heater cartridge issue. | Immediately power off the printer. Check all wiring connections to the hotend and heated bed. Contact support if issue persists. |
| "Error: home Y failed" or similar homing errors | Obstructed endstop switch, loose motor cable, faulty sensor. | Check for obstructions, ensure all motor and endstop cables are securely connected. Restart printer. |
Техникалык мүнөздөмөлөр
| Өзгөчөлүк | Деталь |
|---|---|
| Продукциянын өлчөмдөрү | 20 x 19.4 x 25.6 дюйм (508 x 493 x 650 мм) |
| Элемент Салмагы | 36.6 фунт (16.6 кг) |
| Build Volume | 300 x 300 x 400 мм (11.8 x 11.8 x 15.7 дюйм) |
| Басып чыгаруу ылдамдыгы | 300 мм/сек чейин |
| Сопло температурасы | Макс 300°C |
| Төшөктү тегиздөө | 49-пункттуу Auto керебет тегиздөө |
| Экструдер түрү | Dual-Gear Direct Extruder |
| Колдоого алынган жипчелер | PLA, TPU, PETG, ABS, Nylon |
| Байланыш | USB, SD карта |
| Материал | Металл |
| Түс | Кара |
Кепилдик жана колдоо
For warranty information and technical support, please refer to the official Artillery webсайтка же түздөн-түз кардарларды тейлөөгө кайрылыңыз. Сатып алуу квитанциясын кепилдик дооматтары үчүн сатып алуунун далили катары сактаңыз.
Өндүрүүчү: Артиллерия
Официалдуу Webсайт: www.artillery3d.com (Эскертүү: Бул толтургуч URL, please refer to the actual manufacturer's webколдоо үчүн сайт.)


