1. Киришүү
This manual provides comprehensive instructions for the installation, operation, and maintenance of your Vivotek ND9426P Network Video Recorder (NVR). The ND9426P is a 16-channel, 2-bay embedded NVR with Power over Ethernet (PoE) capabilities and integrated Artificial Intelligence (AI) features, designed for robust surveillance applications. Please read this manual thoroughly before using the device to ensure proper setup and functionality.
2. Коопсуздук маалыматы
- Ашыкча ысып кетүүнүн алдын алуу үчүн NVR жакшы желдетилген жерге орнотулганын текшериңиз.
- Аппарат менен кошо берилген кубат адаптерин гана колдонуңуз.
- Do not expose the NVR to water, moisture, or extreme temperatures.
- Avoid placing heavy objects on top of the NVR.
- Тейлөө же орнотуу процедураларын аткаруудан мурун электр кубатын өчүрүңүз.
- Бардык тейлөөлөрдү квалификациялуу кызматкерлерге тапшырыңыз.
3. Пакеттин мазмуну
Төмөндө көрсөтүлгөн бардык буюмдар таңгагыңызда бар экенин текшериңиз. Эгерде кандайдыр бир буюмдар жок болсо же бузулуп калса, дароо сатуучуга кайрылыңыз.
- Vivotek ND9426P NVR Unit
- Кубаттуу адаптер
- USB чычкан
- Ыкчам орнотуу колдонмосу
- HDD орнотуучу бурамалар
4. Физикалык бүтүрүүview
Familiarize yourself with the front and rear panels of the Vivotek ND9426P NVR.
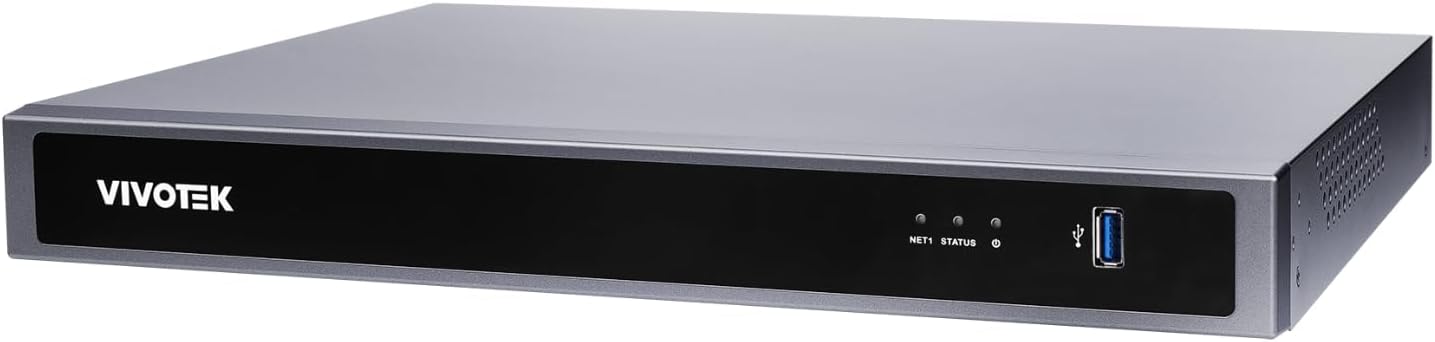
Figure 1: Front Panel of Vivotek ND9426P NVR. This image displays the front of the NVR unit, featuring the VIVOTEK brand logo on the left, two small indicator LEDs labeled "NET1" and "STATUS" in the center, and a blue USB 3.0 port on the right. The overall casing is a dark gray metallic finish.
4.1 алдыңкы панели
- VIVOTEK Logo: Брендди көрсөтөт.
- NET1 LED: Network activity indicator for LAN port 1.
- STATUS LED: Системанын абалынын көрсөткүчү.
- USB 3.0 порт: For connecting a USB mouse, keyboard, or external storage devices.
4.2 Арткы панель (Типтүү конфигурация)
While not pictured, the rear panel typically includes the following ports:
- PoE Ports (x16): RJ-45 ports for connecting IP cameras and providing power.
- LAN порту: RJ-45 port for connecting the NVR to your local network.
- HDMI чыгышы: Мониторго же дисплейге туташуу үчүн.
- VGA чыгаруу: Мониторго же дисплейге туташуу үчүн.
- Аудио кириш/чыгыш: Тышкы аудио түзүлүштөрдү туташтыруу үчүн.
- USB 2.0 порттору: Перифериялык түзүлүштөр үчүн кошумча USB порттору.
- Кубат киргизүү: Кубат адаптерин туташтыруу үчүн.
- Жерге туташтыруу терминалы: For safety grounding.
5. Орнотуу
5.1 Аппараттык камсыздоону орнотуу
- Катуу диск орнотуу:
NVR c бурап чыгарыңызasing to access the internal bays. Mount up to two 3.5-inch SATA hard drives using the provided screws. Reattach the casing коопсуз.
- IP камераларын туташтыруу:
Connect your PoE-enabled IP cameras to the NVR's PoE ports using Ethernet cables. The NVR will provide power and data connectivity.
- Connect Display and Mouse:
Connect a monitor to the NVR's HDMI or VGA output port. Connect the USB mouse to one of the NVR's USB ports.
- Тармак туташуусу:
NVRдин LAN портун тармактык роутериңизге же коммутаторуңузга Ethernet кабели аркылуу туташтырыңыз.
- Күйгүзүү:
Кубат адаптерин NVRдин кубат киргизүү булагына туташтырып, андан кийин аны розеткага сайыңыз. NVR автоматтык түрдө күйөт.
5.2 Баштапкы конфигурация
- Upon first boot, the NVR will guide you through a setup wizard. Follow the on-screen instructions.
- Set a strong password for the administrator account. This is crucial for security.
- Configure network settings (DHCP or static IP).
- Scan for and add connected IP cameras.
- Датаны, убакытты жана убакыт алкагын коюу.
6. NVRди иштетүү
6.1 Колдонуучу интерфейсинин навигациясы
- Live View: Access real-time video feeds from all connected cameras. Use the mouse to select camera views and layouts.
- Ойнотуу: Review foo жазылганtage. Navigate through timelines, search by date/time, and export video clips.
- Жаздыруу орнотуулары: Configure recording schedules (continuous, motion-triggered, event-based) and video quality for each camera.
- Иш-чараларды башкаруу: Set up alerts for motion detection, tampering, or AI-triggered events. Configure notification methods (e.g., email, push notifications).
- Системанын жөндөөлөрү: Manage user accounts, network configurations, storage, and system logs.
6.2 AI өзгөчөлүктөрү
The Vivotek ND9426P integrates advanced AI capabilities to enhance surveillance efficiency. These features may include:
- Акылдуу кыймылды аныктоо: Differentiates between human/vehicle movement and environmental factors to reduce false alarms.
- Кирүүнү аныктоо: Defines specific areas for monitoring and triggers alerts upon unauthorized entry.
- Сызыктардын кесилишин аныктоо: Detects when an object crosses a predefined virtual line.
- Refer to the NVR's on-screen interface or the detailed software manual for specific AI feature configuration.
7. Техникалык тейлөө
- Программалык камсыздоонун жаңыртуулары: Regularly check the VIVOTEK webоптималдуу иштөөнү жана коопсуздукту камсыз кылуу үчүн микропрограммалык камсыздоону жаңыртуу сайты. Жаңыртуу үчүн берилген көрсөтмөлөрдү кылдаттык менен аткарыңыз.
- Маалыматтын камдык көчүрмөсү: Маанилүү жаздырылган азыктардын камдык көчүрмөсүн мезгил-мезгили менен сактап туруңузtage to external storage devices (e.g., USB drive, network storage) to prevent data loss.
- Системалык журналдар: Review system logs regularly for any error messages or unusual activity that may indicate a problem.
- Тазалоо: Keep the NVR unit clean and free from dust. Use a soft, dry cloth. Do not use liquid cleaners or aerosols. Ensure ventilation openings are not obstructed.
8. Кыйынчылыктарды
| Көйгөй | Мүмкүн себеп | Чечим |
|---|---|---|
| Монитордо видео чыгыш жок | Кабелдин туташуусу бошоп калган, монитордо туура эмес киргизүү булагы бар, NVR күйгөн эмес. | Check HDMI/VGA cable connections. Ensure monitor is set to correct input. Verify NVR power. |
| Cameras not displaying | Camera not powered, network issue, incorrect camera settings. | Check camera power and Ethernet cables. Verify network connectivity. Ensure cameras are added and configured correctly in NVR settings. |
| NVRге тармак аркылуу кирүү мүмкүн эмес | Network cable disconnected, incorrect IP address, firewall blocking access. | Check LAN cable. Verify NVR's IP address and network settings. Adjust firewall rules if necessary. |
| Жаздыруу иштебей жатат | Hard drive not installed/initialized, recording schedule not set, insufficient storage. | Ensure HDD is installed and formatted. Check recording schedules. Verify available storage space. |
9. Техникалык шарттар
| Модел | ND9426P |
| Бренд | VIVOTEK |
| Каналдардын саны | 16 |
| HDD булуңдары | 2 (3.5" SATA) |
| PoE порттору | 16 |
| Байланыш технологиясы | Ethernet, USB |
| Элемент Салмагы | 1 килограмм (2.2 фунт) |
| Пакеттин өлчөмдөрү | 0.39 x 0.39 x 0.39 дюйм (L x W x H) |
Note: Specifications are subject to change without notice. For the most current information, please refer to the official VIVOTEK product page.
10. Кепилдик жана колдоо
VIVOTEK products are covered by a limited warranty. For detailed warranty terms and conditions, please refer to the warranty card included with your product or visit the official VIVOTEK webсайт.
For technical support, product inquiries, or service requests, please contact your local VIVOTEK dealer or visit the VIVOTEK support portal online. Have your product model and serial number ready when contacting support.
- VIVOTEK расмий Webсайт: www.vivotek.com
- Колдоо порталы: караңыз webаймактык колдоо байланыштары үчүн сайт.


